This guide will demonstrate how to install Nvidia Drivers on Ubuntu 24.04, 22.04, or 20.04 LTS Linux releases utilizing the command-line terminal with Ubuntu’s default repository, Graphics Drivers LaunchPAD PPA, or Nvidia CUDA APT Repository builds for Ubuntu.
Nvidia Drivers are pivotal in leveraging the full potential of Nvidia GPUs, catering to a wide array of computational needs, from gaming to professional graphics work and artificial intelligence research. These drivers ensure seamless integration with the operating system, providing an optimized computing experience through enhanced performance, stability, and compatibility. Key highlights of Nvidia Drivers include:
- Enhanced Performance: Unlock superior graphics and computational capabilities, ensuring smooth and efficient processing.
- Advanced Features: Access to cutting-edge technologies like ray tracing, deep learning super sampling (DLSS), and AI-driven applications.
- Energy Efficiency: Improved power management for longer battery life and lower energy consumption.
- Robust Stability: Regular updates and patches ensure compatibility with the latest games and applications.
- Broad Compatibility: Support for a wide range of Nvidia GPUs, from older models to the latest releases.
- Optimized Graphics: Crisp, clear visuals for gaming, professional graphics work, and video streaming.
- Customizable Settings: Users can tailor their experience according to their performance or quality preferences.
- Developer Support: Extensive resources and tools for developers to harness the power of Nvidia GPUs in their projects.
Equipped with these capabilities, Nvidia Drivers are integral to maximizing the performance and efficiency of Nvidia GPUs on Ubuntu systems.
Now, let’s move on to how you can install these drivers, ensuring your system is fully equipped to meet your graphics and computational demands.
Remove Previous NVIDIA Installations on Ubuntu
If you’ve previously installed NVIDIA drivers using a specific method and wish to reinstall using a different approach mentioned here, be cautious. Mixing multiple NVIDIA repositories can disrupt your drivers. It’s recommended to revert to Mesa drivers first and then freshly install the NVIDIA drivers.
Note: You can bypass this section if you haven’t installed any NVIDIA drivers yet.
Method 1: APT Method Removal of NVIDIA Drivers
First, use a blanket command to remove any traces of NVIDIA installation on your system. This command searches for any NVIDIA-related packages and purges them from your system:
sudo apt autoremove nvidia* --purgeMethod 2: Removing Runfile NVIDIA Driver Installations
Suppose you have installed the NVIDIA drivers using the “.run” file method (which is not recommended due to better alternatives like the NVIDIA CUDA repository). In that case, you need to remove them using a different approach.
To remove the runfile type of installation, use the following command:
sudo /usr/bin/nvidia-uninstallMethod 3: Removing NVIDIA CUDA Toolkit Runfile Installations
If you have installed the CUDA toolkit using the runfile method, you must also remove it. To do so, execute the following command:
sudo /usr/local/cuda-X.Y/bin/cuda-uninstallReplace X.Y with the version number of your installed CUDA toolkit.
These methods should remove any existing NVIDIA drivers from your Ubuntu system, allowing you to proceed with a fresh installation.
Pre-installation Steps For NVIDIA Drivers Installation on Ubuntu
Before installing the NVIDIA drivers, it is essential to perform some pre-installation checks to ensure a smooth installation process. This section will guide you through the necessary steps.
Update Ubuntu Before Nvidia Drivers Installation
Updating your system ensures that all packages are up-to-date, reducing the likelihood of conflicts during the installation. This is particularly important when installing packages such as new kernels and graphics card drivers.
First, update the package list:
sudo apt updateNext, upgrade any outdated packages:
sudo apt upgradeDetermine Your Graphics Card
For users with older NVIDIA graphics cards, it is essential to determine if your card is supported. Users with brand-new cards can skip this step, as they will undoubtedly be supported.
First, find your graphics card module using the following command:
lspci | grep -e VGAThis command will display information about your graphics card. An example output is shown below:
03:00.0 VGA compatible controller: NVIDIA Corporation TU117 [GeForce GTX 1650] (rev a1)If you use an older card, research it on the NVIDIA website to check if the latest drivers support it. In some cases, you may need to install legacy drivers instead.
Install NVIDIA Drivers with Ubuntu Repository via CLI Terminal
The command line is the first option for installing NVIDIA drivers on your Ubuntu system. While advanced users may prefer command-based methods, even beginners can easily follow this approach.
Identify Your Graphics Card and Recommended Driver
Open your terminal by pressing CTRL+ALT+T and find information about your graphics card using the following command:
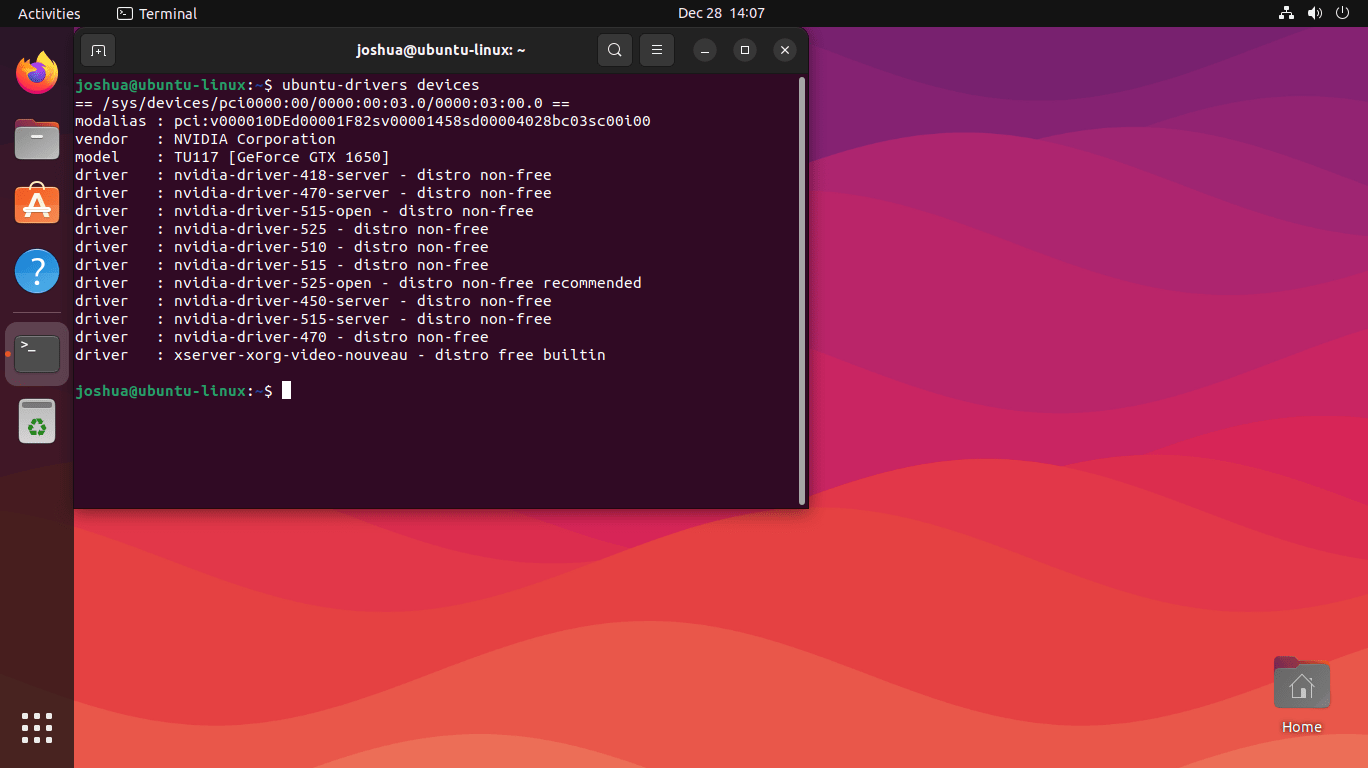
ubuntu-drivers devicesIn the example output, the graphics card model is “TU117 [GeForce GTX 1650]”, and the recommended NVIDIA driver is “nvidia-driver-545-open”. Remember that your NVIDIA graphics card model may differ, so look for the recommended driver option in your output.
Install the Recommended Driver or Choose Another Version
You can install the recommended driver package using one of the two methods below.
If you are satisfied with the recommended version, use this command to install it automatically:
sudo ubuntu-drivers autoinstallIf you prefer to install a specific driver version, use the appropriate command from the list below. Remember that these version numbers are examples and will change over time.
The below commands are just common examples. Remember, Nvidia releases newer versions all the time. This guide may not be updated for the command, but it will still exist.
sudo apt install nvidia-driver-545sudo apt install nvidia-driver-535sudo apt install nvidia-driver-530sudo apt install nvidia-driver-525sudo apt install nvidia-driver-520sudo apt install nvidia-driver-515sudo apt install nvidia-driver-510Reboot Your System
Once the driver installation is complete, reboot your Ubuntu system by entering the following command:
rebootAfter the system restarts, your NVIDIA drivers should be successfully installed and ready for use.
Install NVIDIA Drivers with Ubuntu Repository via Desktop GUI
The second solution for installing NVIDIA drivers on your Ubuntu system is using the graphical user interface (GUI) method. This approach is especially recommended for beginners in Linux.
Open “Additional Drivers” Application
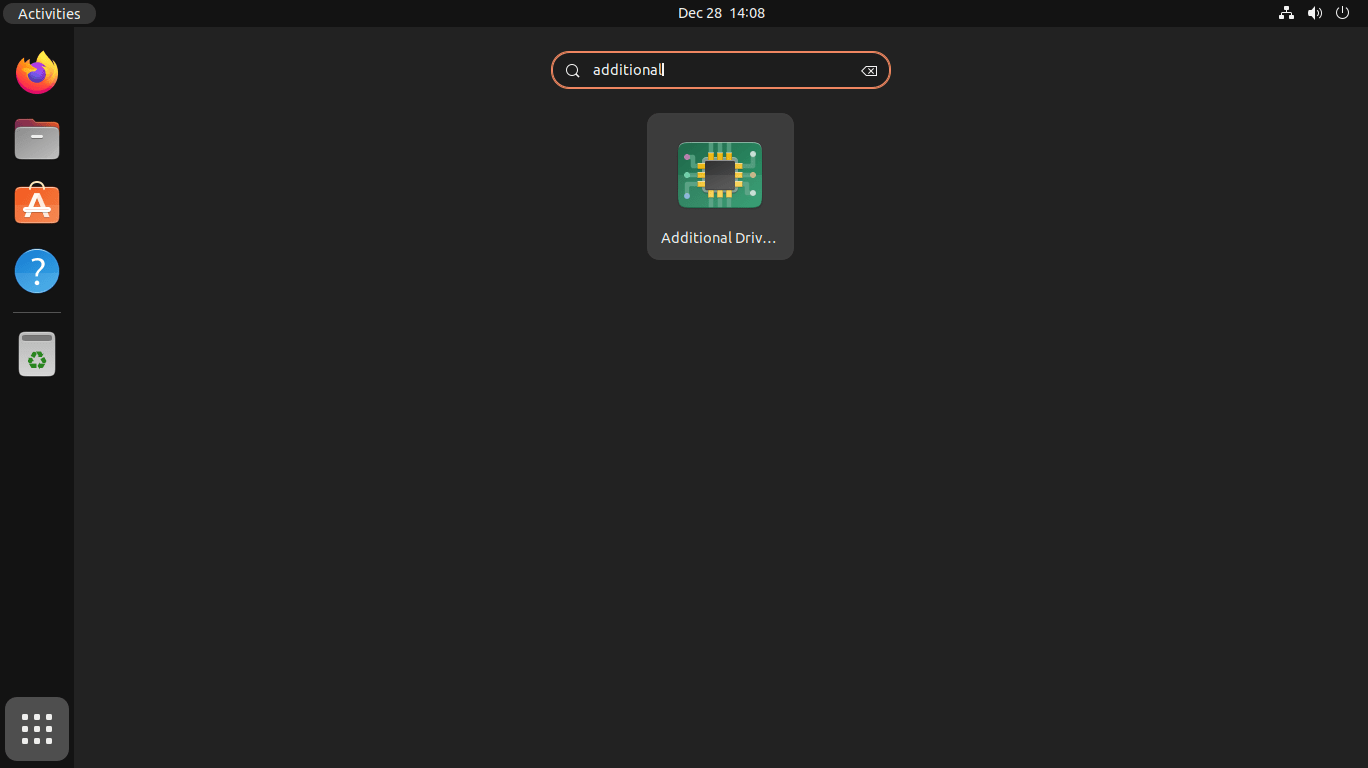
First, go to your application menu and open the “Additional Drivers” application. For users new to Ubuntu, you can find it by following these steps:
- Click “Activities” in the top-left corner of the screen.
- Type “Additional Drivers” in the search bar.
- Select the “Additional Drivers” application from the search results.
Choose the NVIDIA Driver to Install on Ubuntu
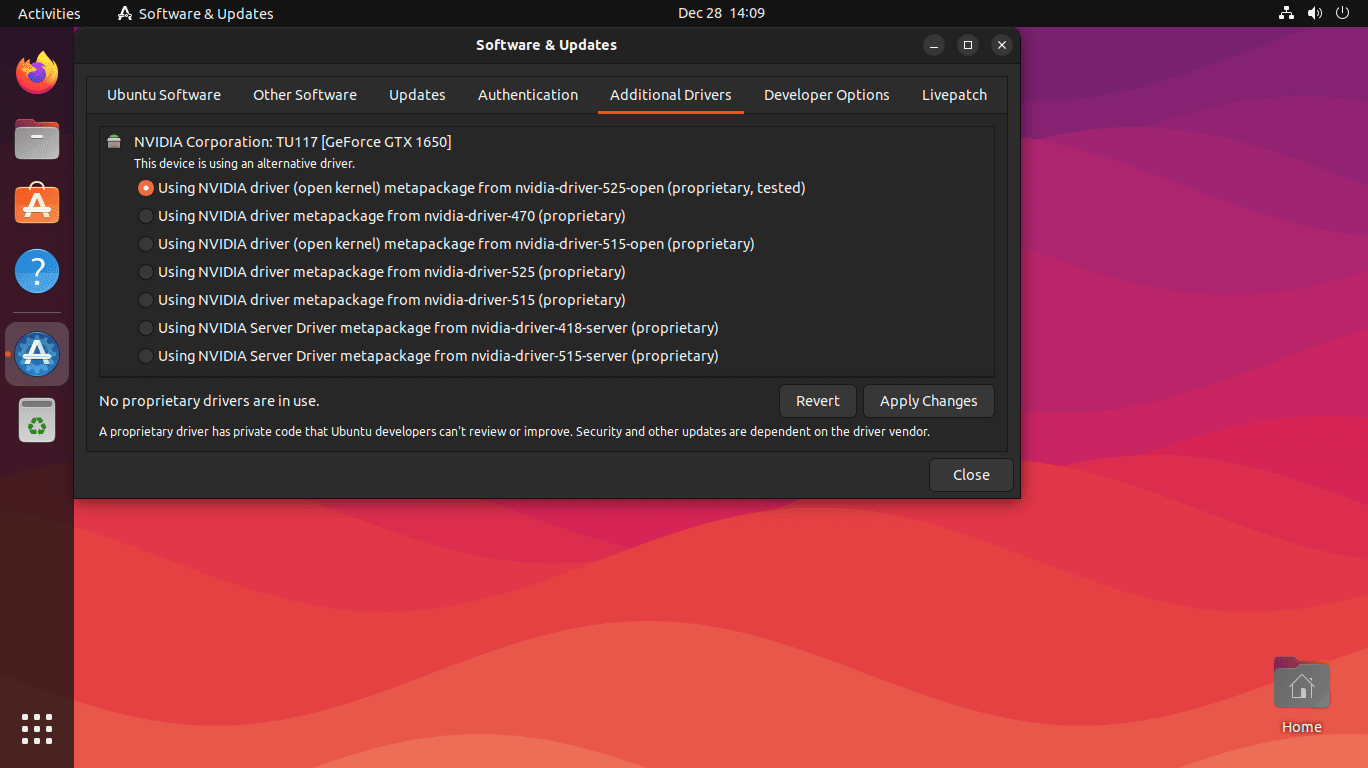
The “Software & Updates” window will appear, displaying a list of available drivers for your NVIDIA graphics card. Note that the number of drivers listed may vary depending on the age and popularity of your graphics card.
Select the NVIDIA driver you wish to install and click the “Apply Changes” button. The installation process will take around 2 to 3 minutes, depending on your system and its resources.
Reboot Your System
Once the driver installation is complete, reboot your system. You can do this immediately by typing the following command in your terminal:
rebootInstall NVIDIA Drivers using “graphics-drivers/ppa” on Ubuntu
The following method involves installing NVIDIA drivers from the graphics-drivers/ppa repository, which is known for providing the most up-to-date proprietary NVIDIA drivers. This approach is recommended for users who want to update their graphics drivers regularly.
Install Required Dependencies
First, you need to install the required dependencies by executing the following command:
sudo apt install software-properties-common -yAdd the graphics-drivers PPA
Next, add the graphics-drivers/ppa repository to your system using the following command:
sudo add-apt-repository ppa:graphics-drivers/ppa -yRefresh Package Cache
With the PPA now added to your system, update the package list by running:
sudo apt updateCheck Recommended Nvidia Drivers
Now, enter the following command to display the recommended drivers for your graphics card:
ubuntu-drivers devicesThe output will differ from the one you received using the standard Ubuntu APT repository. You will see a third-party recommended driver in the list.
Install NVIDIA Drivers on Ubuntu via APT Command from the PPA
To install the driver, choose one of the following options:
If you are satisfied with the recommended version, use this command:
sudo ubuntu-drivers autoinstallAlternatively, if you want to install a specific driver version, use one of the commands below:
sudo apt install nvidia-driver-545sudo apt install nvidia-driver-535sudo apt install nvidia-driver-530sudo apt install nvidia-driver-525sudo apt install nvidia-driver-520sudo apt install nvidia-driver-515sudo apt install nvidia-driver-510sudo apt install nvidia-driver-470sudo apt install nvidia-driver-450sudo apt install nvidia-driver-390Reboot Your System
Once the installation is complete, reboot your system using the following command:
rebootAfter the restart, the newly installed NVIDIA drivers from the graphics-drivers/ppa repository will be active on your system.
Install NVIDIA Drivers on Ubuntu via CUDA PPA
This section only applies to Ubuntu 22.04 and 20.04 LTS releases. Short-term releases cannot use this method. If you try, it will fail, or if by some chance you do install this version, you will face serious instabilities.
Note: Ubuntu 24.04 Nvidia Build is not out, once it is I will update this section.
Install the Required Packages To Install Nvidia Drivers from CUDA PPA
The last method of installing NVIDIA drivers involves using the NVIDIA CUDA repository, which is frequently updated and supports Debian, Ubuntu, RHEL, and other popular Linux distributions.
First, make sure to install the following packages, which might already be installed on your system:
sudo apt install dirmngr ca-certificates software-properties-common apt-transport-https dkms curl -yImport NVIDIA Repository GPG Key on Ubuntu
Next, import the GPG key for your distribution version:
Jammy Jellyfish release:
curl -fSsL https://developer.download.nvidia.com/compute/cuda/repos/ubuntu2204/x86_64/3bf863cc.pub | sudo gpg --dearmor | sudo tee /usr/share/keyrings/nvidia-drivers.gpg > /dev/null 2>&1Focal Fossa release:
curl -fSsL https://developer.download.nvidia.com/compute/cuda/repos/ubuntu2004/x86_64/3bf863cc.pub | sudo gpg --dearmor | sudo tee /usr/share/keyrings/nvidia-drivers.gpg > /dev/null 2>&1Add NVIDIA CUDA Repository
Now, add the NVIDIA repository for your system, ensuring you import the correct one to match your Ubuntu distribution version:
Jammy Jellyfish release:
echo 'deb [signed-by=/usr/share/keyrings/nvidia-drivers.gpg] https://developer.download.nvidia.com/compute/cuda/repos/ubuntu2204/x86_64/ /' | sudo tee /etc/apt/sources.list.d/nvidia-drivers.listFocal Fossa release:
echo 'deb [signed-by=/usr/share/keyrings/nvidia-drivers.gpg] https://developer.download.nvidia.com/compute/cuda/repos/ubuntu2004/x86_64/ /' | sudo tee /etc/apt/sources.list.d/nvidia-drivers.listRefresh APT Package Index
Update your sources list to reflect the newly added repository:
sudo apt updateSearch and Install Nvidia Drivers on Ubuntu VIA Nvidia PPA
Next, install the latest Nvidia drivers. You can use the APT search command to view the complete list of available drivers:
apt search nvidia-driver-*This tutorial demonstrates how to install the latest version currently available. Replace 545 with 530, 525, 520, 515, etc., depending on your preference.
For the best compatibility, install the proprietary version, especially if you are new to Ubuntu. Open-source drivers may cause issues with certain graphics cards.
Advanced users can easily switch between open-source and proprietary drivers as needed.
- Install NVIDIA Drivers 545.xx without CUDA support (proprietary):
sudo apt install nvidia-driver-545- Install NVIDIA Drivers 545.xx with CUDA support (proprietary):
sudo apt install nvidia-driver cuda- Install NVIDIA Drivers 545.xx without CUDA support (open-source):
sudo apt install nvidia-driver-545-open- Install NVIDIA Drivers 545.xx with CUDA support (open-source):
sudo apt install nvidia-driver-545-open cudaIf the above drivers do not work, you can try using version 530, 520, 515, etc., or use the search command mentioned earlier to find other versions.
Install Nvidia Headless Drivers on Ubuntu
Installing NVIDIA drivers directly from the CUDA repository for non-desktop users and those running servers with specialized software is often best. The instructions are the same as for desktop users, but you need to add “headless” to the command.
Proprietary NVIDIA 545 headless drivers
sudo apt install nvidia-headless-545Open-source NVIDIA 545 headless drivers
sudo apt install nvidia-headless-545-openFor more options, use the APT search command in your terminal to locate specific packages:
apt search nvidia-headless*Additionally, you can add CUDA and any other required packages. Desktop users should not install headless drivers.
Confirming Nvidia Drivers Installation on Ubuntu
Once you have successfully installed the Nvidia drivers and rebooted your system, verifying that the installation was successful is essential. This section will guide you in confirming the installation using the command line and the graphical user interface (GUI).
Check Nvidia Drivers via Terminal
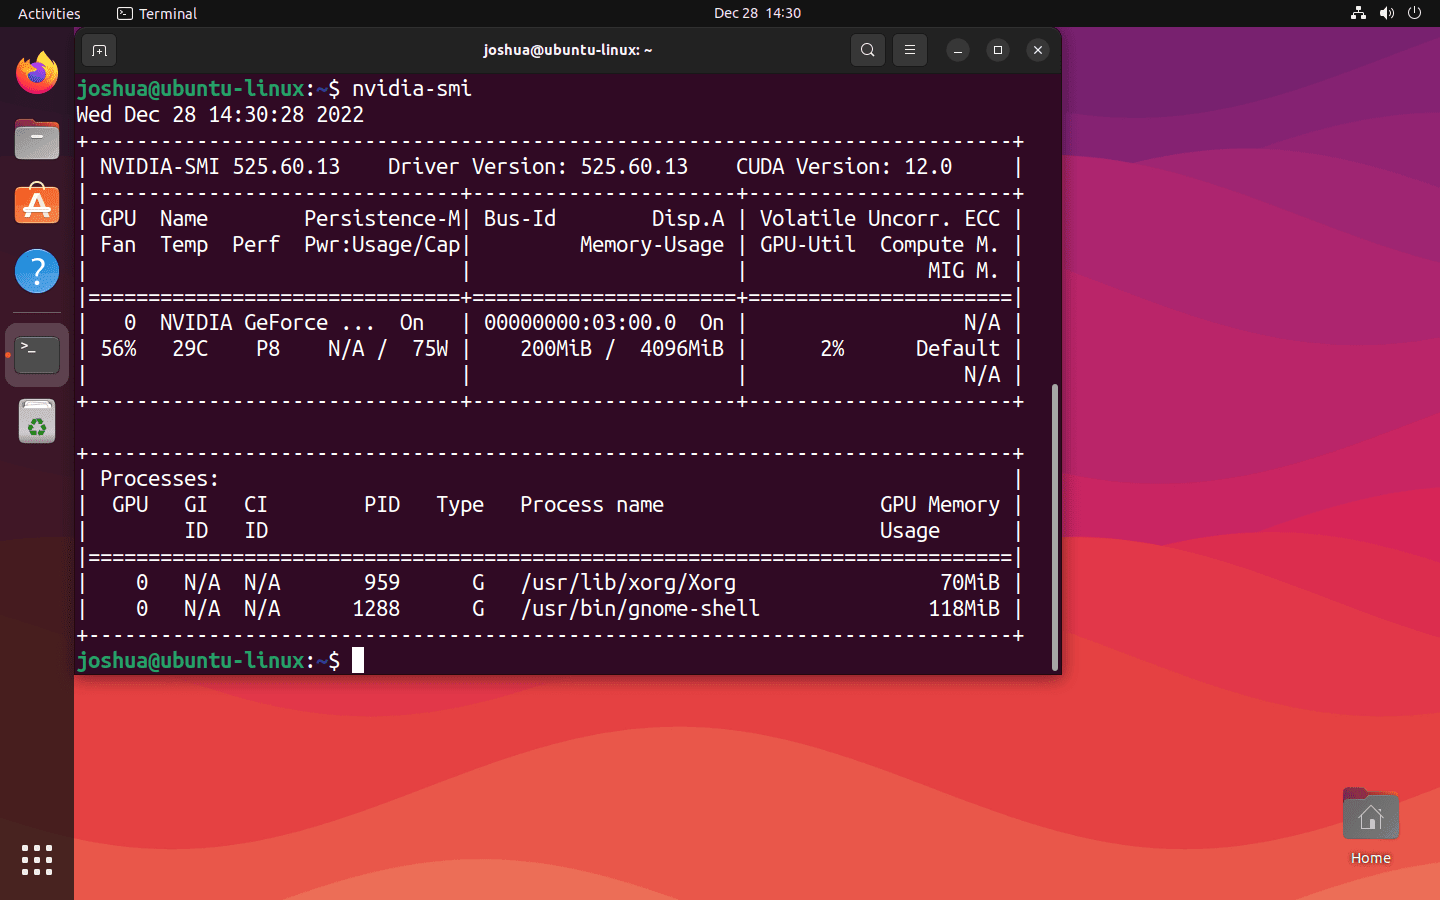
You can use the command to verify the installation through the command line. This command will display information about your Nvidia GPU, such as the driver version, GPU usage, temperature, and more.
nvidia-smiAccess Nvidia Settings GUI
You can launch the Nvidia settings GUI if you prefer a graphical interface. To do this, follow the steps below:
Open the terminal and enter the following command:
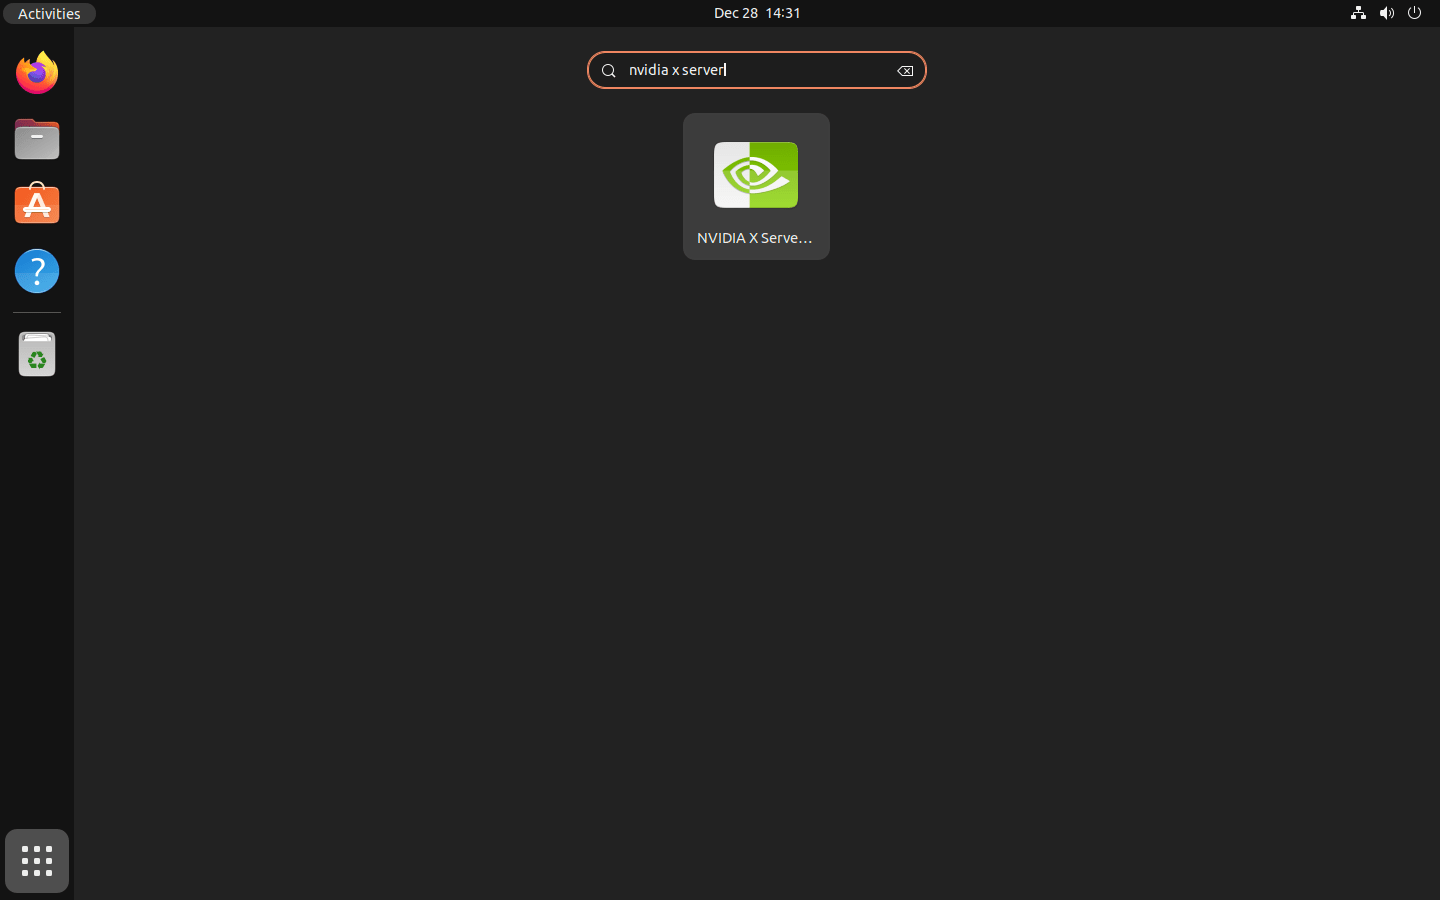
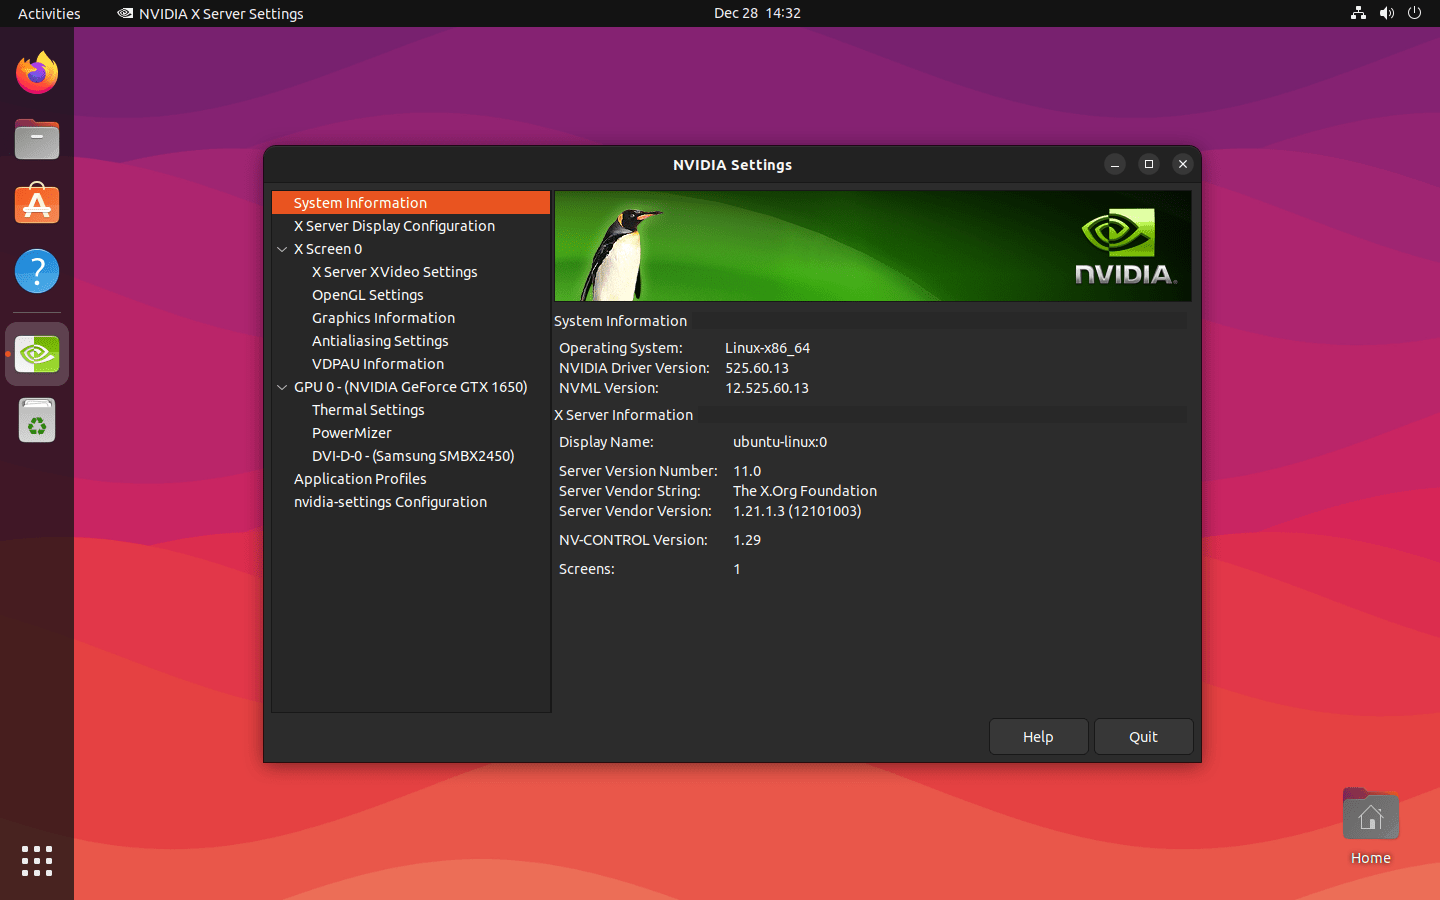
nvidia-settingsAlternatively, you can access the Nvidia settings through the application menu:
Go to Activities > Show Applications > NVIDIA X Server Settings.
After opening the Nvidia settings GUI, you can see your GPU’s configuration, information, and other settings that can be customized.
Conclusion
In wrapping up, this guide walked you through installing Nvidia Drivers on Ubuntu 24.04, 22.04, or 20.04 LTS, showing you the ropes with a few straightforward methods. Remember, keeping your drivers updated ensures your Nvidia GPU runs smoothly, giving you the best performance for whatever you’re tackling, be it work, gaming, or creative projects. Don’t hesitate to revisit these steps or check for updates to keep things running optimally. And hey, feel free to explore more about what your Nvidia GPU can do; there’s a lot under the hood. Safe travels in your Ubuntu journey!


Great job!!! It worked perfectly with my Asus Tuf 15 gaming laptop (rtx 3050 inside)
Great tutorial, tysm!
Just as a heads-up after rebooting I could not get to nvidia-smi so I did (DO NOT ENTER THIS COMMAND YET) sudo prime-select nvidia. And after rebooting again I couldn’t use my mouse or keyboard, found a solution here:
https://forums.developer.nvidia.com/t/ubuntu-22-04-2-lts-nvidia-525-105-17-hangs-on-login-screen/249679
Which basically is doing: sudo apt-get install xserver-xorg-input-all
Then do “sudo prime-select nvidia” and reboot
NOTE: If after reboot your mouse and keyboard are not responding enter in recovery mode (select to open a shell) and switch back to intel “sudo prime-select nvidia” then do the steps above.