Wine, or WineHQ, is a crucial compatibility layer that allows users to efficiently run Windows applications on Unix-like operating systems, including Linux. Understanding its core functionalities and benefits is essential for those aiming to install Wine on Ubuntu 22.04 Jammy Jellyfish or its older stable release of Ubuntu 20.04 Focal Fossa.
Key Features and Benefits of Wine:
- Not an Emulator: Unlike traditional emulators, Wine translates Windows API calls into POSIX calls without emulating a complete Windows environment, resulting in a lightweight and efficient solution.
- Cross-Platform Compatibility: With support for Linux, macOS, and FreeBSD, Wine ensures Windows applications are accessible on various operating systems.
- Extensive Application Database: Wine supports over 26,000 Windows applications, each categorized by compatibility levels ranging from “Garbage” to “Platinum.”
- Eliminates Virtual Machines: Users can run Windows software without relying on virtual machines or dual-boot setups, simplifying the user experience and reducing system overhead.
- Open Source and Free: Available under the GNU Lesser General Public License (LGPL), Wine is free and open source, promoting user modification and distribution.
- Actively Developed: With ongoing development, Wine consistently receives updates and enhancements to improve compatibility and performance.
With these features, Wine stands out as a valuable tool for those needing to run Windows applications on Ubuntu without the hassle of operating dual systems or virtual machines. The upcoming guide will walk you through the straightforward process of installing Wine on Ubuntu 22.04 Jammy Jellyfish or Ubuntu 20.04 Focal Fossa, using the official WineHQ repository to access the latest stable, pre-release, or development versions.
Update Ubuntu Before Wine Installation
Before installing Wine, update your system to prevent potential conflicts during installation:
sudo apt update && sudo apt upgradeWine Pre-installation Steps on Ubuntu 22.04 or 20.04
To facilitate the installation process of the software, it is necessary to install the following packages:
sudo apt install software-properties-common apt-transport-https curlOptional Step: Enable 32-bit Support on Ubuntu for Wine
For compatibility with many games and Windows applications, enable 32-bit architecture support. Lack of this support may limit Wine’s usability.
To activate 32-bit architecture support, execute the command below:
sudo dpkg --add-architecture i386Especially for lower-end systems, users should enable this feature since many 32-bit games require it. High-powered systems won’t experience any negative impact from installing these packages, ensuring complete compatibility with Wine and smooth running of various applications.
Import WineHQ APT Repository on Ubuntu 22.04 or 20.04
Before installing any versions of Wine from WineHQ, it is crucial to import the GPG key and WineHQ repository for your Ubuntu Linux system to ensure the authenticity of the Wine packages.
To import the required GPG key, run the following command:
curl -s https://dl.winehq.org/wine-builds/winehq.key | sudo gpg --dearmor | sudo tee /usr/share/keyrings/winehq.gpg > /dev/null
Next, import the WineHQ repository using the following command:
echo deb [signed-by=/usr/share/keyrings/winehq.gpg] http://dl.winehq.org/wine-builds/ubuntu/ $(lsb_release -cs) main | sudo tee /etc/apt/sources.list.d/winehq.listAfter importing the GPG key and repository, execute an APT update to acknowledge the newly imported packages:
sudo apt updateInstall Wine on Ubuntu 22.04 or 20.04 via APT
Option 1: Install Wine on Ubuntu with stable release
The first method for installing Wine is to install the latest stable version from the WineHQ repository, which is often a better solution than using the Ubuntu repository version. This option provides a more updated version of Wine without being as cutting-edge as the development release from WineHQ.
To install the stable Wine release, run the following command:
sudo apt install --install-recommends winehq-stableUtilize the –install-recommends option to install WineHQ’s recommended dependencies, optimizing its performance on your system.
Once the installation is complete, you can verify the version of Wine that you have installed by typing the following command:
wine --versionThis will display the Wine version currently installed on your system.
Alternative – Install Wine from Ubuntu Repository
Consider installing the version available in Ubuntu’s repositories for a stable Wine release. Although possibly outdated, this version is a dependable alternative.
To install the 64-bit Wine version from the Ubuntu repository, enter the command below:
sudo apt install wine64If you’ve enabled 32-bit support, install both 64-bit and 32-bit architectures as outlined:
sudo apt install wine64 wine32This command will install both the 64-bit and 32-bit versions of Wine.
Option 2: Install Wine on Ubuntu with staging release
The second method for installing Wine is to install the latest version from the staging branch. This option provides a beta or testing version just before the official release. It is ideal for users who prefer a newer version of Wine over the stable release but do not want to risk the instability of using the bleeding-edge development version.
To install the Wine staging release, run the following command:
sudo apt install --install-recommends winehq-stagingThis will install the latest version of Wine from the staging branch, including any necessary dependencies.
Once the installation is complete, you can verify the version of Wine that you have installed by typing the following command:
wine --versionThis will display the Wine version currently installed on your system.
Option 3: Install Wine devel on Ubuntu (nightly dev version)
Consider installing Wine from the development branch to access the most recent features. This version, while cutting-edge, might be unstable. Hence, only experienced users or developers should use it.
To install the Wine development release, input the command below:
sudo apt install --install-recommends winehq-develThis will install the latest version of Wine from the development branch and any necessary dependencies.
Once the installation is complete, you can verify the version of Wine that you have installed by typing the following command:
wine --versionThis will display the Wine version currently installed on your system. Following these steps, you can install the latest development version of Wine and experience its newest features.
Finalize Wine Installation on Ubuntu 22.04 or 20.04
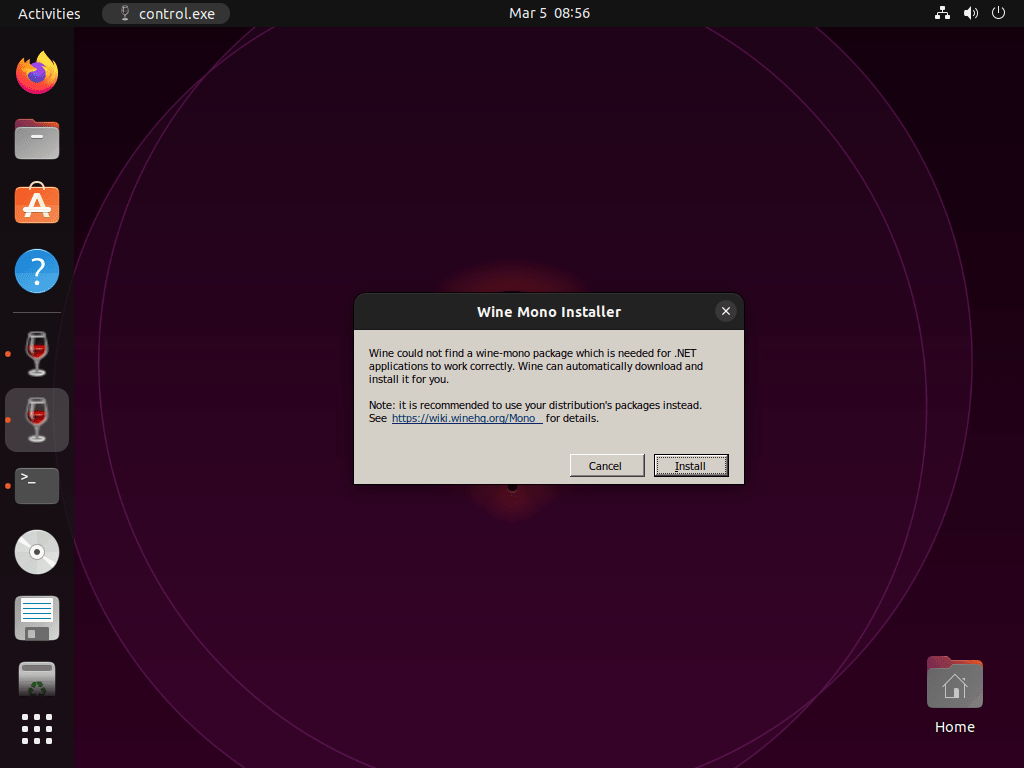
After successfully installing WineHQ on your Ubuntu system, finalize the installation by running the “winecfg” command. This command sets up the necessary environments for Wine, including Mono, for running .NET applications on Linux.
To initiate the Wine configuration dialogue, enter the command below:
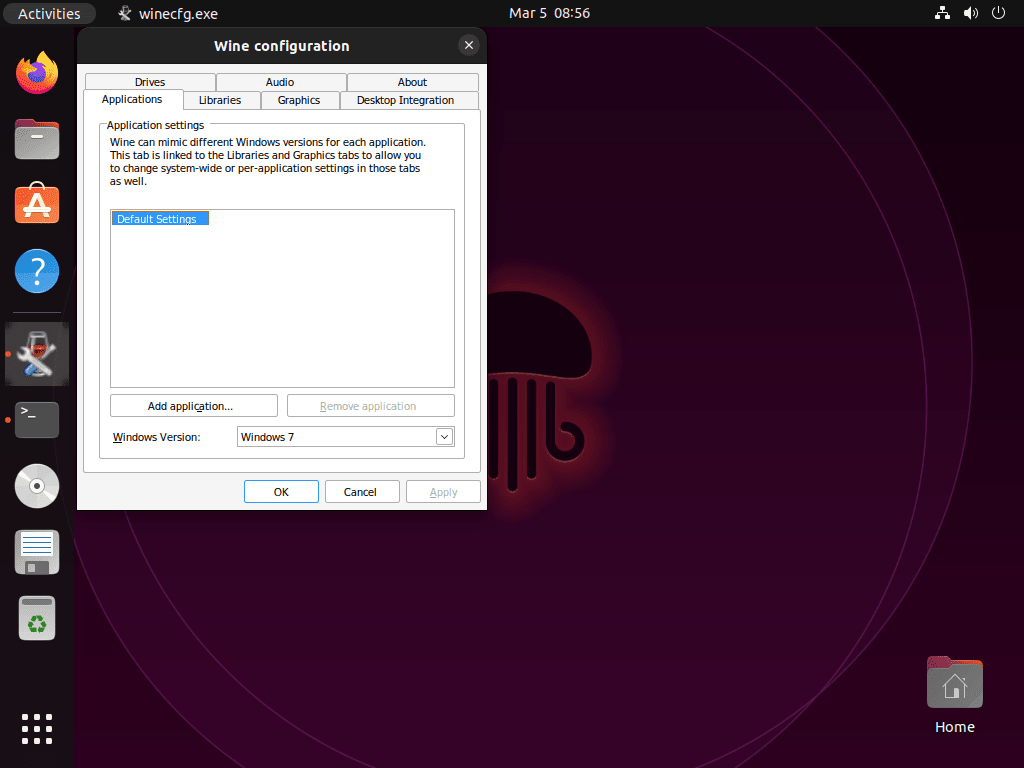
winecfgClick “Install” to initiate the necessary installations. Upon completion, the Wine configuration dialogue box appears, where you can adjust Wine settings if necessary. The default setting is Windows 7, but you may want to switch to a more recent version, like Windows 10, since Windows 11 is not supported yet.
Once you have finished making any desired changes, close the dialogue box.
There are also optional extras that you can install to make your Wine experience even better. For example, you can install winetricks, which provides extra libraries and applications to help Wine run Windows software more smoothly. You can install winetricks by running the following command in your terminal:
sudo apt install winetricksWith winetricks installed, use it to introduce additional Windows components not included with Wine. For instance, to install the 32-bit Microsoft fonts, use the command below:
winetricks allfonts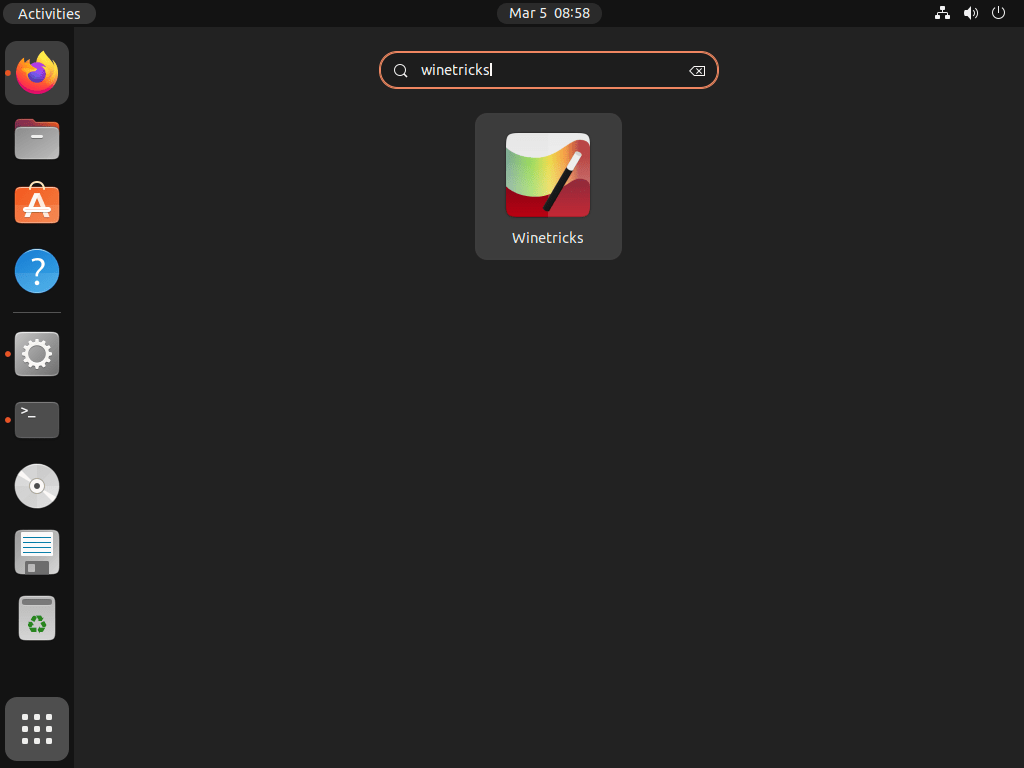
Additional Wine Commands with Ubuntu 22.04 or 20.04
Wine Package Installation Example on Ubuntu: Install NotePad ++ on Ubuntu
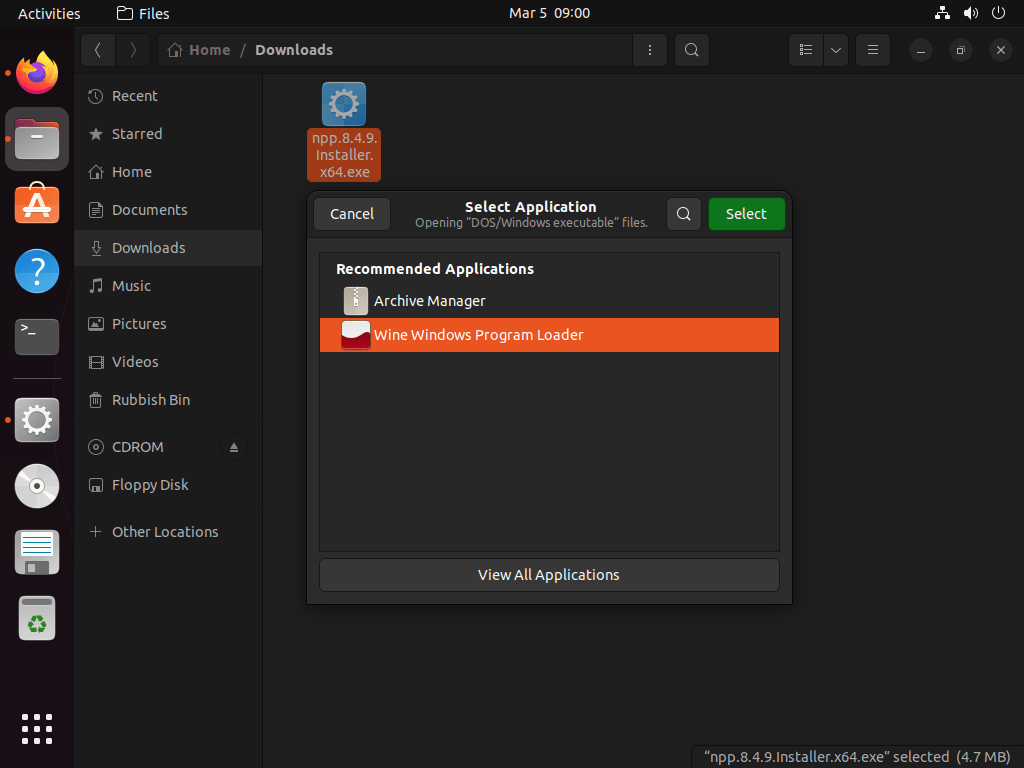
To run a Windows binary file using Wine, you can right-click on the file, select “Open With Other Application,” and select Wine from the list of applications.
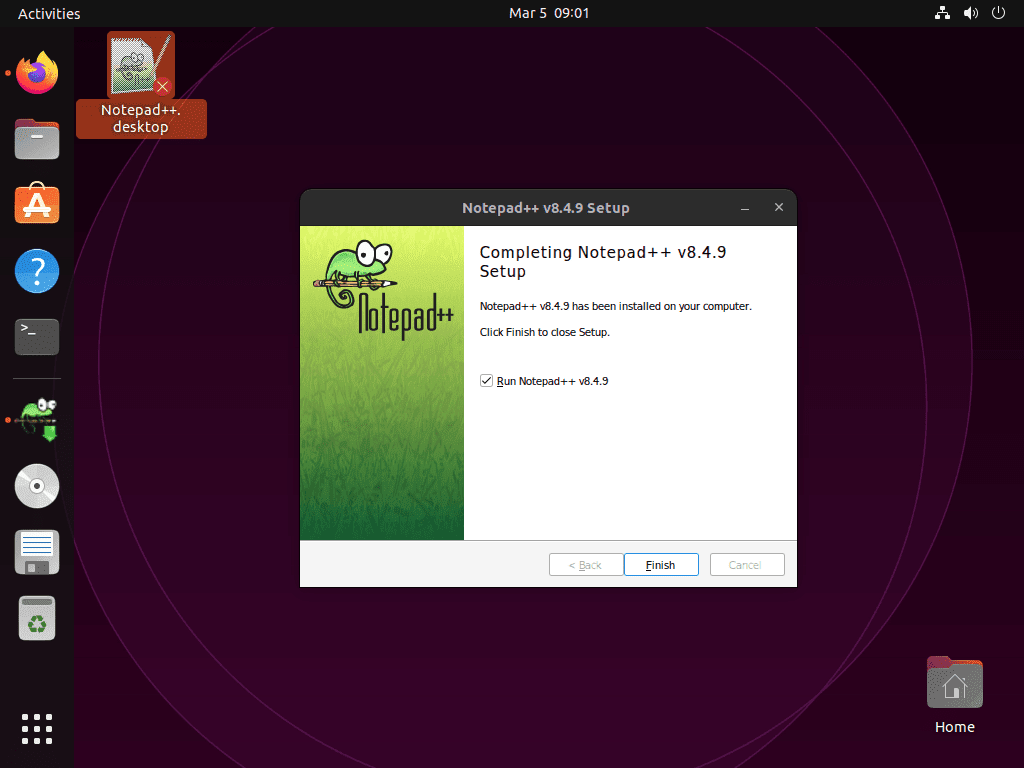
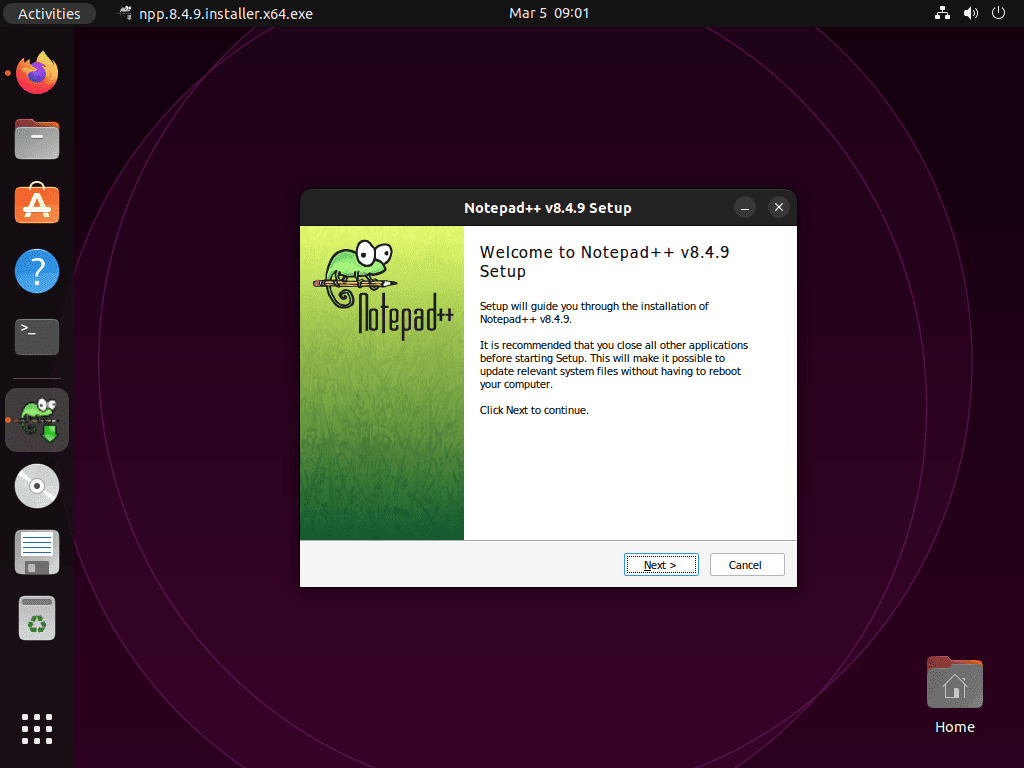
For example, you want to download and install Notepad++ on your Ubuntu system using Wine. First, download the Notepad++ installation .exe file from the official website. Once the download is complete, navigate to the file’s directory.
To run the installation file using Wine, right-click on the .exe file, select “Open With Other Application,” and then select Wine from the list of applications.
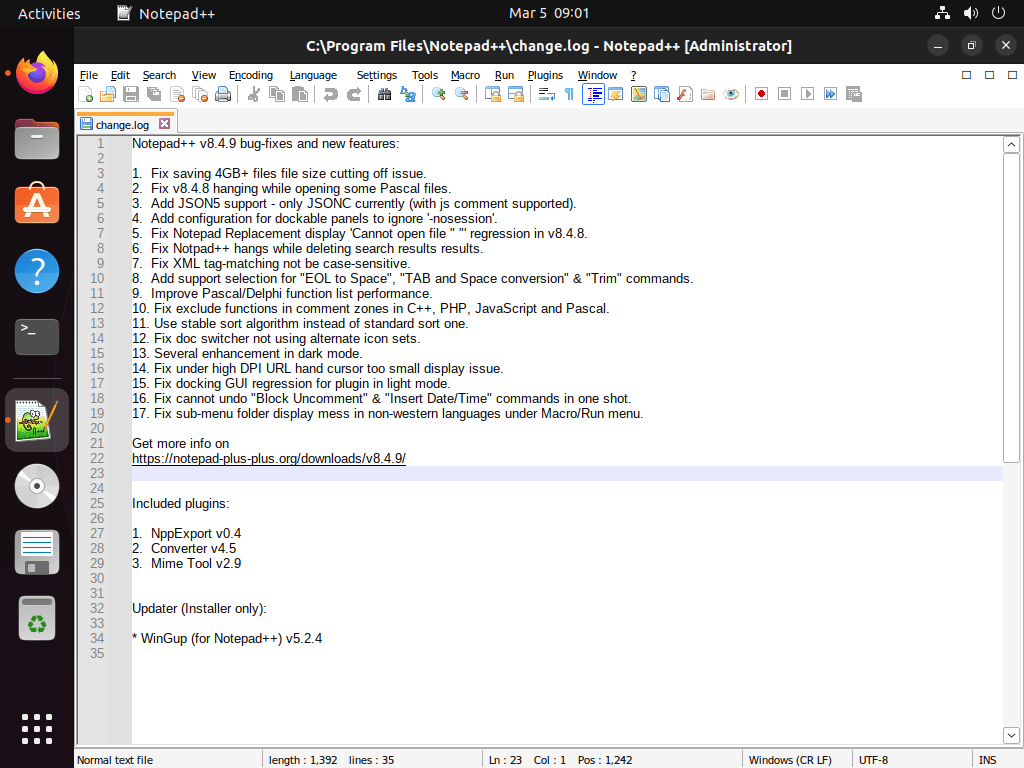
To run Notepad++, click on the application icon, and the software will launch using Wine. With Wine, you can use this same process to run any other Windows applications on your Ubuntu system.
Configure Wine as 32-bit on Ubuntu
Wine on Ubuntu can be configured to run both 32-bit and 64-bit Windows applications. While the default configuration supports 64-bit applications, adjusting settings to support 32-bit applications is possible.
For the 32-bit application setup, adjust the WINEARCH environment variable to “win32” and set the WINEPREFIX environment variable to a directory other than the default “~/.wine” directory.
To set WINEARCH to “win32”, enter the following command:
export WINEARCH=win32Next, set the WINEPREFIX environment variable to a different directory than the default “~/.wine” directory. You can do this by typing the following command:
export WINEPREFIX=~/.wine32This command creates a new Wine prefix directory called “.wine32” in your home directory.
winecfgFinally, run the Wine configuration dialog box using the “winecfg” command to apply the changes you have made:
winecfgThis will open the Wine configuration window, where you can make any necessary changes to the settings for your 32-bit applications.
Commands to Run Wine From Terminal on Ubuntu
Execute Wine commands from the Ubuntu terminal for greater control over the running software. This section introduces and explains some commonly used Wine commands.
wine command
The most basic command for Wine is “wine.” This command allows you to run Windows applications from the terminal. To use this command, type “wine” followed by the path to the .exe file you wish to run.
Example:
wine /path/to/program.exewinecfg command
The “winecfg” command allows you to configure various settings for Wine, such as the Windows version, audio settings, and graphics settings. This command opens the Wine configuration dialogue box, where you can change the settings.
Example:
winecfgregedit command
The “regedit” command allows you to access the Wine registry editor. The registry editor is a database that stores configuration settings for Wine and Windows applications.
Example:
wine regeditwinetricks command
Use the “winetricks” command to install additional components and libraries not bundled with Wine, selecting from a list of available components.
Example:
winetricks allfontswinepath command
The “winepath” command converts Windows-style paths to Unix-style paths and vice versa. This command is useful for scripts that work with Windows and Unix paths.
Example:
winepath -w /unix/pathThis command will convert the Unix-style path to a Windows-style path.
wineserver command
The “wineserver” command oversees the Wine server, facilitating communication between Windows applications and Linux. Though rarely used, it can assist with debugging and troubleshooting.
Example:
wineserver -kThis command will kill the Wine server, which can help resolve some issues with Wine.
By utilizing these Wine commands, you can have more control over your Windows applications and improve your experience running them on Ubuntu.
Update Wine on Ubuntu 22.04 or 20.04
To update Wine to the latest version from WineHQ, you need to run the following command in the terminal:
sudo apt upgrade && sudo apt updateRemove Wine From Ubuntu 22.04 or 20.04
Depending on which version of Wine you have installed, you can use one of the following commands to remove it.
sudo apt remove winehq-stablesudo apt remove winehq-stagingsudo apt remove winehq-develAfter removing the version of Wine that you no longer need, you can delete the repository file using the following command:
sudo rm /etc/apt/sources.list.d/winehq.listIf you’ve deleted the WineHQ repository, consider removing the GPG key with the command below:
sudo rm /usr/share/keyrings/winehq.gpgRemove Wine (Ubuntu Repository Versions)
If you installed Wine from the default Ubuntu repository, you could use the following command to remove it:
sudo apt remove wine32 wine64Conclusion
In conclusion, installing Wine (WineHQ) on Ubuntu is vital for running Windows applications on Linux systems. With continuous updates and improvements, Wine maintains compatibility with a wide range of Windows applications, proving invaluable to Ubuntu users. Follow guidelines and documentation from WineHQ and Ubuntu communities for seamless installation and peak performance. Keeping Wine updated ensures access to the latest enhancements and compatibility updates.


