
Brave blocks ads, trackers, and several fingerprinting techniques before you add a single extension, while still keeping Chromium site compatibility and Chrome Web Store support. To install Brave Browser on Ubuntu 26.04, 24.04, or 22.04, use Brave’s official APT repository for the native package, or choose Snap or Flatpak when sandboxing or an existing store workflow matters more than native integration.
Brave’s Linux download page points Ubuntu users to a signed APT repository, not a Launchpad PPA or a standalone .deb download. The same repository format also provides stable, beta, and nightly packages, so you can keep daily browsing on stable while testing preview builds separately when needed.
Install Brave Browser on Ubuntu
Choose a Brave Browser Install Method
Most Ubuntu desktops should use the APT repository because it installs Brave as a native desktop application under /opt/brave.com/, adds normal menu launchers, and updates through APT. Snap and Flatpak are still valid alternatives, but Brave’s own Linux page recommends the native package repositories when they are available.
| Method | Package Source | Channels | Architecture | Best Fit |
|---|---|---|---|---|
| APT repository | Brave Software | Stable, beta, nightly | amd64, arm64 | Recommended native install with full desktop integration |
| Snap | Snapcraft, Brave Software | Stable by default | amd64, arm64 | Automatic background updates through Snap |
| Flatpak | Flathub, verified Brave Software listing | Stable | x86_64, aarch64 | Systems that already use Flathub and Flatpak permissions |
Use only the package format you want to maintain. APT, Snap, and Flatpak can coexist, but mixing them gives you multiple Brave installs with separate update paths and separate user-data locations.
Prepare Ubuntu for Brave APT Repository
Refresh APT first so Ubuntu has current package metadata before you add Brave’s external source:
sudo apt updateThese commands use
sudofor tasks that need root privileges. If your user account is not in the sudoers file yet, follow the guide on how to add and manage sudo users on Ubuntu.
Install the small tools used to download Brave’s keyring and repository file over HTTPS:
sudo apt install curl ca-certificates -yThe curl command downloads the repository files, and ca-certificates lets APT and curl verify HTTPS certificates. Both are common on Ubuntu desktops, but minimal installs may need them.
Add Official Brave APT Repository
Brave publishes a binary GPG keyring and a ready-made DEB822 .sources file, so there is no need for apt-key, a Launchpad PPA, or manual codename substitution. Install the stable source for normal browsing.
Add Brave Stable Repository
Download the stable channel keyring to the path referenced by Brave’s source file:
sudo curl -fsSLo /usr/share/keyrings/brave-browser-archive-keyring.gpg https://brave-browser-apt-release.s3.brave.com/brave-browser-archive-keyring.gpgThen download Brave’s stable APT source definition:
sudo curl -fsSLo /etc/apt/sources.list.d/brave-browser-release.sources https://brave-browser-apt-release.s3.brave.com/brave-browser.sourcesConfirm the file points at Brave’s codename-neutral stable suite and the expected keyring:
cat /etc/apt/sources.list.d/brave-browser-release.sourcesTypes: deb URIs: https://brave-browser-apt-release.s3.brave.com Suites: stable Components: main Architectures: amd64 arm64 Signed-By: /usr/share/keyrings/brave-browser-archive-keyring.gpg
Optional Brave Beta or Nightly Repositories
Beta and nightly builds install as separate packages, so they can run beside stable Brave. Add these sources only when you actually plan to install those preview channels.
For the beta channel, download the beta keyring and source file:
sudo curl -fsSLo /usr/share/keyrings/brave-browser-beta-archive-keyring.gpg https://brave-browser-apt-beta.s3.brave.com/brave-browser-beta-archive-keyring.gpg
sudo curl -fsSLo /etc/apt/sources.list.d/brave-browser-beta.sources https://brave-browser-apt-beta.s3.brave.com/brave-browser.sources
For the nightly channel, download the nightly keyring and source file:
sudo curl -fsSLo /usr/share/keyrings/brave-browser-nightly-archive-keyring.gpg https://brave-browser-apt-nightly.s3.brave.com/brave-browser-nightly-archive-keyring.gpg
sudo curl -fsSLo /etc/apt/sources.list.d/brave-browser-nightly.sources https://brave-browser-apt-nightly.s3.brave.com/brave-browser.sources
Update APT and Confirm Brave Package
Refresh APT after adding the Brave source. This is the step that makes apt install brave-browser resolve from Brave’s repository.
sudo apt updateCheck the package candidate before installing:
apt-cache policy brave-browserRelevant output should show Brave’s S3 repository as the package source:
brave-browser:
  Installed: (none)
  Candidate: 1.x.x
  Version table:
     1.x.x 500
        500 https://brave-browser-apt-release.s3.brave.com stable/main amd64 Packages
Install Brave from APT Repository
Install the stable Brave Browser package for normal desktop use:
sudo apt install brave-browser -yVerify the installed browser from the terminal:
brave-browser --versionBrave Browser 1xx.1.x.x
If you added the beta source, install the beta package with its own package name:
sudo apt install brave-browser-beta -yIf you added the nightly source, install the nightly package instead:
sudo apt install brave-browser-nightly -yPreview builds expose their own launch commands and profile directories, so stable browsing data stays separate from testing data. Verify only the preview package you installed:
brave-browser-beta --versionbrave-browser-nightly --versionInstall Brave Browser on Ubuntu via Snap
Snap installs Brave from Snapcraft with automatic background updates. Use this method if your Ubuntu system already uses Snap packages and you are comfortable with Snap confinement; otherwise, the APT repository remains the better default for Brave.
Confirm Snap is available:
snap versionIf snap is missing on a minimal or customized system, install snapd first:
sudo apt install snapd -yInstall the stable Brave Snap package:
sudo snap install braveVerify the installed Snap package:
snap list braveName Version Rev Tracking Publisher Notes brave 1.x.x xxx latest/stable brave** -
Install Brave Browser on Ubuntu via Flatpak and Flathub
Flatpak installs Brave from Flathub as a system Flatpak app. This path is useful when you already manage desktop applications through Flathub, but Brave’s native APT package is still the preferred Ubuntu method when you do not need Flatpak isolation.
Install Flatpak if it is not already present:
sudo apt install flatpak -yAdd Flathub at system scope so the install and update commands use the same scope:
sudo flatpak remote-add --if-not-exists flathub https://flathub.org/repo/flathub.flatpakrepoInstall Brave from Flathub:
sudo flatpak install flathub com.brave.Browser -yVerify the Flatpak app ID and origin:
flatpak info com.brave.Browser ID: com.brave.Browser
Ref: app/com.brave.Browser/x86_64/stable
Branch: stable
Version: 1.x.x
Origin: flathub
Installation: system
Launch Brave Browser on Ubuntu
Brave is a desktop browser, so package installation can complete over SSH or on a minimal system, but normal browsing still needs a graphical desktop session. Use the command that matches the package format you installed.
APT stable package:
brave-browserSnap package:
snap run braveFlatpak package:
flatpak run com.brave.BrowserAPT beta or nightly packages:
Beta package:
brave-browser-betaNightly package:
brave-browser-nightlyLaunch from Application Menu
On Ubuntu’s desktop, open the application launcher and search for Brave Web Browser. Beta and nightly packages appear as separate Brave entries so you can keep stable and preview channels apart.
Use Brave Privacy Features on Ubuntu
Brave is built on Chromium, but it adds Brave Shields for ad blocking, tracker blocking, fingerprinting protections, and cross-site cookie controls. That makes it different from a plain Chromium Browser on Ubuntu install, while still keeping Chrome extension compatibility for users who need Web Store extensions.
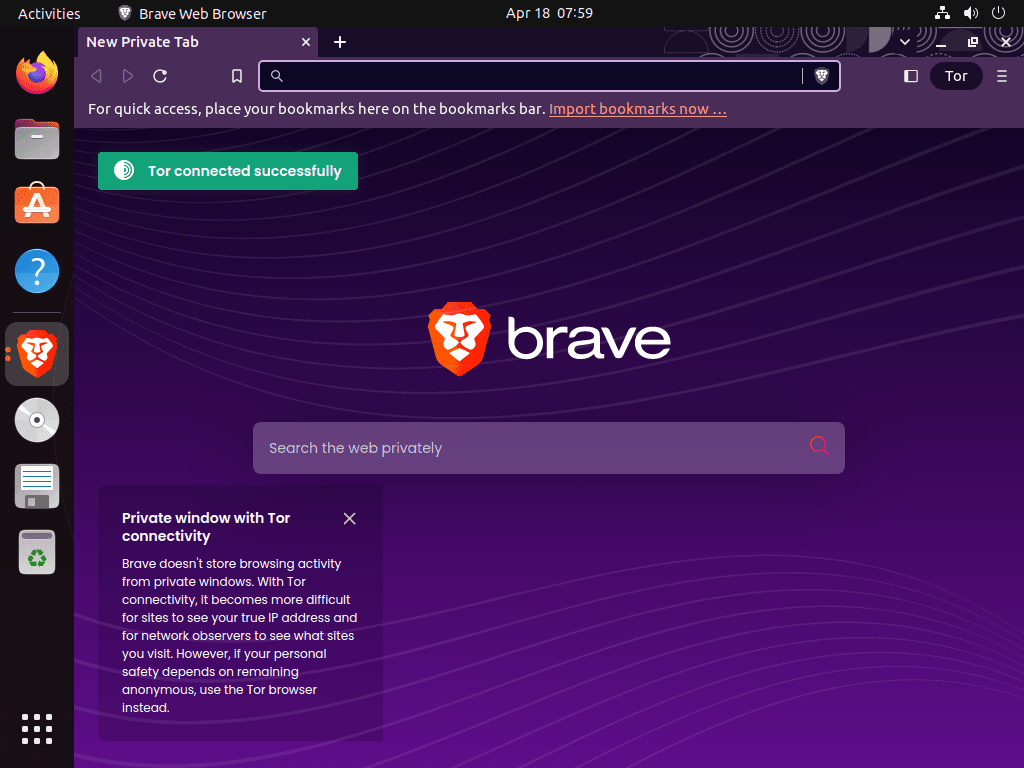
Private windows with Tor are included for routing a browsing session through the Tor network, but they are separate from Brave VPN. Brave VPN is an optional paid service inside the browser, while Tor private windows are available without a VPN subscription.
Manage Brave Browser on Ubuntu
Update Brave Browser
APT installations update through Ubuntu’s package manager. Refresh package metadata, then upgrade Brave only:
sudo apt update
sudo apt install --only-upgrade brave-browser
For APT beta or nightly packages, replace the package name with brave-browser-beta or brave-browser-nightly.
Snap packages refresh automatically, but you can trigger a manual refresh:
sudo snap refresh braveFlatpak installations update through Flatpak:
sudo flatpak update com.brave.BrowserRemove Brave Browser
Remove only the package format and channel you installed. For APT, remove the browser package first and keep brave-keyring until all Brave APT channels are gone.
Stable APT package:
sudo apt remove brave-browserBeta APT package:
sudo apt remove brave-browser-betaNightly APT package:
sudo apt remove brave-browser-nightlyConfirm no Brave APT packages remain installed:
dpkg -l brave-browser brave-browser-beta brave-browser-nightly 2>/dev/null | grep '^ii' || echo "No Brave APT packages installed"When all Brave APT packages are gone and you do not plan to reinstall them, remove the shared keyring package, downloaded source files, and any channel keyrings you added manually:
sudo apt remove brave-keyring
sudo rm -f /etc/apt/sources.list.d/brave-browser-release.sources
sudo rm -f /etc/apt/sources.list.d/brave-browser-beta.sources
sudo rm -f /etc/apt/sources.list.d/brave-browser-nightly.sources
sudo rm -f /usr/share/keyrings/brave-browser-archive-keyring.gpg
sudo rm -f /usr/share/keyrings/brave-browser-beta-archive-keyring.gpg
sudo rm -f /usr/share/keyrings/brave-browser-nightly-archive-keyring.gpg
sudo apt update
Preview orphaned packages before allowing APT to remove anything else. Reused systems can have unrelated packages waiting for autoremove, so review the list before you continue.
sudo apt autoremove --dry-runIf the preview only lists packages you want to remove, run the real cleanup interactively:
sudo apt autoremoveRemove the Snap package with:
sudo snap remove braveRemove the Flatpak package and then review unused runtimes:
sudo flatpak uninstall com.brave.Browser
sudo flatpak uninstall --unused
Remove Brave User Data
The next commands delete browsing data, bookmarks, saved passwords, extensions, and profile settings. Export anything you need before deleting these directories.
APT stable, beta, and nightly profiles live under Brave’s configuration directory:
rm -rf ~/.config/BraveSoftwareSnap profiles live under your Snap directory:
rm -rf ~/snap/braveFlatpak profiles live under the Flatpak app directory:
rm -rf ~/.var/app/com.brave.BrowserTroubleshoot Brave Browser on Ubuntu
Fix Brave Repository or GPG Errors
If sudo apt update reports a Brave signature or missing-key error, re-download the keyring for the channel you use, then refresh APT again. The stable channel uses this path:
sudo curl -fsSLo /usr/share/keyrings/brave-browser-archive-keyring.gpg https://brave-browser-apt-release.s3.brave.com/brave-browser-archive-keyring.gpg
sudo apt update
For beta or nightly, use the matching keyring URL from the optional repository section. If APT reports duplicate source or Signed-By conflicts, remove older Brave .list or .sources files that point at the same repository before running sudo apt update again.
Check AppArmor Sandbox Support on Ubuntu 26.04 and 24.04
Ubuntu 26.04 and 24.04 restrict unprivileged user namespaces through AppArmor. Current Ubuntu AppArmor packages provide a brave profile for the stable Brave APT path, so check the distro profile before adding any custom sandbox workaround. Preview-channel profile coverage can differ by release, so inspect the file if beta or nightly fails with a sandbox error.
sysctl -n kernel.apparmor_restrict_unprivileged_userns
dpkg -S /etc/apparmor.d/brave
sudo aa-status | grep brave
1 apparmor: /etc/apparmor.d/brave brave
To inspect which Brave APT paths the profile covers, print the Brave path rules from the file:
grep '/opt/brave.com/' /etc/apparmor.d/braveIf the profile file exists but is not loaded, reload it:
sudo apparmor_parser -r /etc/apparmor.d/braveIf the file is missing on Ubuntu 26.04 or 24.04, reinstall the distro AppArmor package rather than the Brave package:
sudo apt install --reinstall apparmorAvoid using
--no-sandboxas a permanent browser workaround. That flag disables Chromium’s security sandbox instead of fixing the profile or user-namespace setting that caused the launch failure.
Check User Namespace Settings on Ubuntu 22.04
Ubuntu 22.04 normally does not use the newer AppArmor user-namespace restriction. If Brave fails with sandbox errors on a hardened 22.04 system, confirm user namespaces are enabled before changing browser flags.
cat /proc/sys/kernel/unprivileged_userns_clone1
A value of 0 means local hardening has disabled unprivileged user namespaces. Re-enable it only if that matches your system security policy:
sudo sysctl -w kernel.unprivileged_userns_clone=1Fix Snap or Flatpak Desktop Integration Issues
Sandboxed Brave builds can behave differently with file pickers, notifications, password storage, and theme integration. If those details matter, switch to the APT package. If you stay with Flatpak, make sure portal helpers are installed:
sudo apt install xdg-desktop-portal xdg-desktop-portal-gtk -yLog out and back in after installing portal packages so your desktop session picks them up.
Related Brave and Ubuntu Browser Guides
These resources help with Brave-specific documentation and nearby Ubuntu browser choices:
- Brave Linux installation page for the current upstream repository commands and Snap or Flatpak notes.
- Brave release notes for current stable, beta, and nightly desktop releases.
- Brave privacy features for Brave Shields, Tor private windows, sync privacy, and VPN details.
- Install Google Chrome on Ubuntu if you need Google’s official Chromium-based browser and Google account integration.
- Install Tor Browser on Ubuntu if Tor isolation is the main reason you are comparing browsers.
- Install Vivaldi Browser on Ubuntu for another Chromium-based browser with a native vendor repository.
- Install Firefox Beta or Nightly on Ubuntu if you want preview browser channels outside Chromium.
Conclusion
Brave Browser is installed on Ubuntu with the package path that matches your update model: native APT for most desktops, Snap for automatic store updates, or Flatpak for Flathub-managed isolation. From here, sign in or import bookmarks, review Shields settings per site, and keep the browser current through the same package manager you used to install it.

Brave Browsr has “saved” a password I did NOT want saved, …. How do I remove that “saved” password.
Thanks for reaching out, Fred. Removing unwanted saved passwords in Brave is straightforward through the browser’s password manager.
Open Brave and click the three-line menu icon (top-right), then navigate to Settings → Additional Settings → Auto-fill → Password Manager. Locate the saved password you want to remove in the list, click on it, and select Delete. The password will be removed immediately from Brave’s storage.
Alternatively, you can access the password manager directly by typing
brave://settings/passwordsin the address bar. For enhanced security going forward, consider disabling the “Offer to save passwords” toggle in Password Settings to prevent Brave from auto-saving credentials without your explicit confirmation.