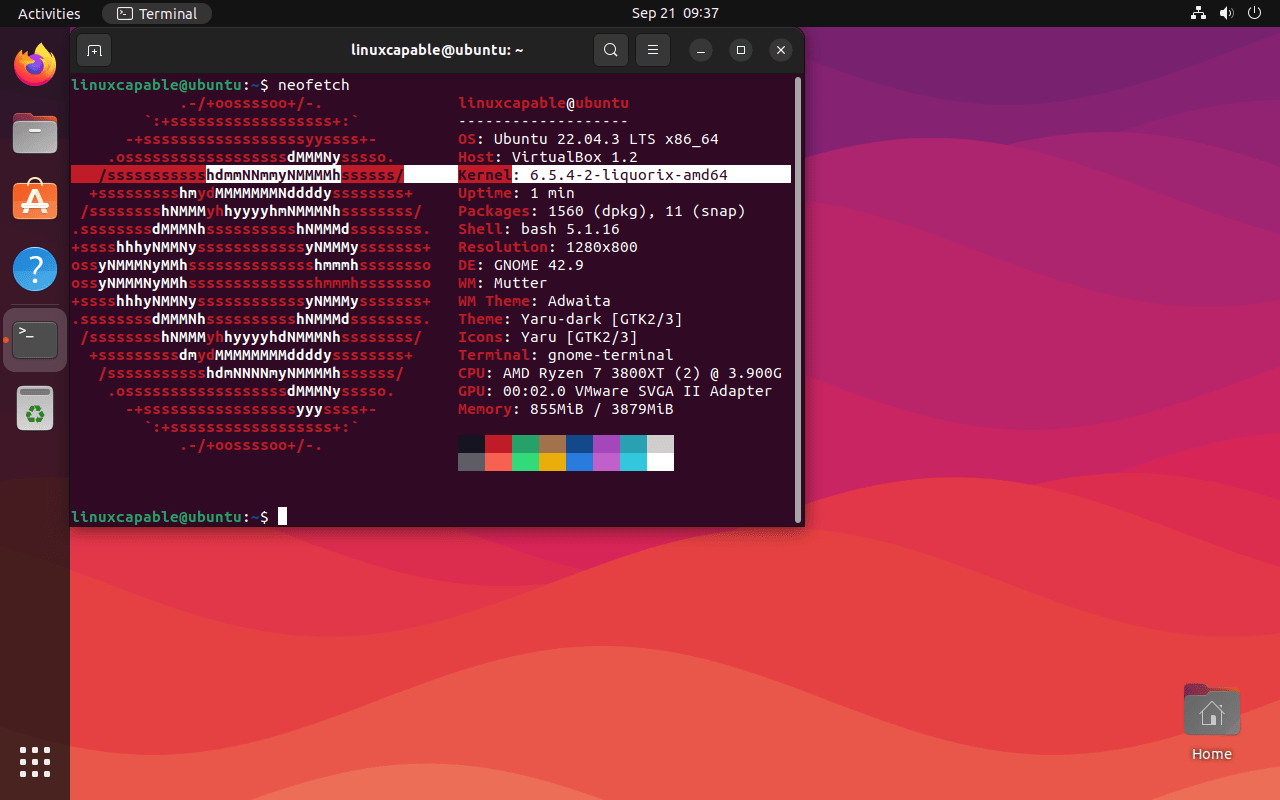
This guide will demonstrate how to install Liquorix Kernel on Ubuntu 24.04, 22.04, or 20.04 LTS Linux releases utilizing the command-line terminal with the Liquorix LaunchPAD PPA for the latest version and for quick updates in the future.
Liquorix Kernel stands out in the Linux community for its performance optimizations and cutting-edge features, making it a top choice for enthusiasts and professionals seeking enhanced system responsiveness and hardware support. Unlike the standard kernel that comes with Ubuntu distributions, Liquorix Kernel is tailored for a superior computing experience, ensuring smoother operations and improved system efficiency. It integrates advanced scheduler and memory management techniques to optimize desktop, gaming, and multimedia applications. The kernel is also configured to favor interactive tasks, reducing latency and boosting the overall performance of your system.
Key highlights include:
- Enhanced Performance: Optimized for speed and responsiveness, making your system faster and more responsive.
- Cutting-edge Hardware Support: Regular updates provide support for the latest hardware.
- Optimized Scheduling: Improves the performance of interactive applications, providing a smoother user experience.
- Improved Gaming Experience: Tailored configurations that benefit gaming and multimedia tasks.
- Advanced Memory Management: Ensures efficient system resource use, enhancing stability and performance.
- Low Latency: Perfect for audio and video applications requiring real-time performance.
- Easy Updates: Keeping the kernel updated through the Liquorix LaunchPAD PPA is hassle-free.
It’s important to note that the Liquorix Kernel is tailored specifically for systems with x86_64 processor architecture. This means devices like the Raspberry PI, which operate on ARMHF or ARM64 architectures, are not compatible. Moreover, for those planning to install Liquorix Kernel, be aware that it does not support secure boot. To proceed with the installation, secure boot must be disabled in your system’s BIOS settings.
Now, let’s get started with the installation process.
Install Liquorix Kernel on Ubuntu via APT PPA
Update Ubuntu Before Liquorix Kernel Installation
Before we begin the installation process, ensuring that your system is up to date with the latest packages is essential. To do this, execute the following commands in your terminal:
sudo apt update
sudo apt upgrade
The first command updates the package list, while the second upgrades outdated packages to their latest versions.
Import the Liquorix Kernel PPA on Ubuntu
The Liquorix Kernel team offers support through a Liquorix Launchpad PPA (Personal Package Archive), making installing and maintaining the kernel easy. Run the following command to import the Liquorix Kernel PPA:
sudo add-apt-repository ppa:damentz/liquorix -yThis command adds the Liquorix repository to your system’s sources.list file.
Next, run a quick update to refresh the APT repository cache, which must be done before the installation:
sudo apt updateInstall the Liquorix Kernel on Ubuntu via APT Command
Now that the Liquorix Kernel PPA is available on your system, you can start the installation process. Use the following command to install the Liquorix kernel:
sudo apt install linux-image-liquorix-amd64After the installation is complete, reboot your system to activate the newly installed Liquorix kernel:
rebootVerify the Liquorix Kernel Installation on Ubuntu
Once your system has restarted, you can verify that the Liquorix kernel is active by checking the output of the /proc/version file. Use the following command to display its contents:
cat /proc/versionExample output:
Linux version x.x.x-x-liquorix-amd64The output should display the Liquorix kernel version, which may vary depending on the current version available in the PPA.
Additional Liquorix Kernel Commands on Ubuntu
Update Liqourix Kernel
To ensure that the Liquorix kernel remains up-to-date, you should periodically run the apt update and upgrade commands, as you used the APT package manager to install the kernel.
Run the command “apt update” to check for updates on packages managed by APT.
sudo apt updateIf updates are available, use the following command to upgrade all packages, including the Liquorix kernel.
sudo apt upgradeRemove Liqourix Kernel From Ubuntu
Remove Liquorix Kernel PPA
If you have decided not to continue using the Liquorix kernel and wish to remove the PPA, use the following command.
sudo add-apt-repository --remove ppa:damentz/liquorix -yCheck Liquoirx Installed Packages
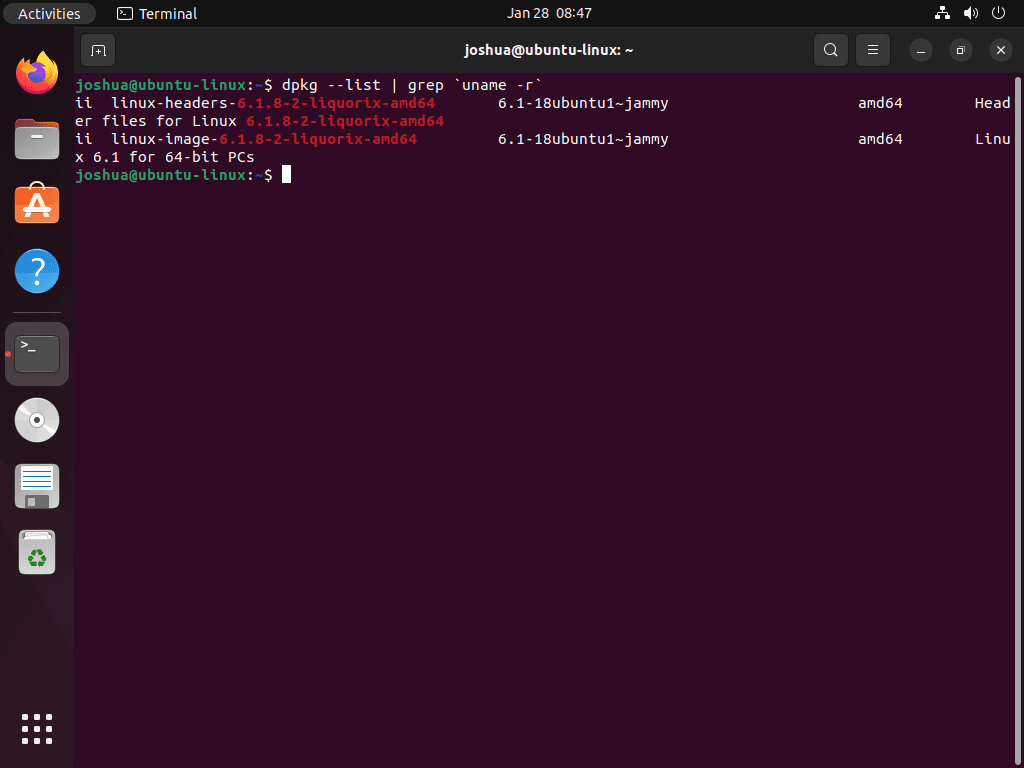
Note that you must specify the exact name of the Linux image and header package to remove them. You can find the names by running the following command.
dpkg --list | grep `uname -r`Remove Liquorix Kernel
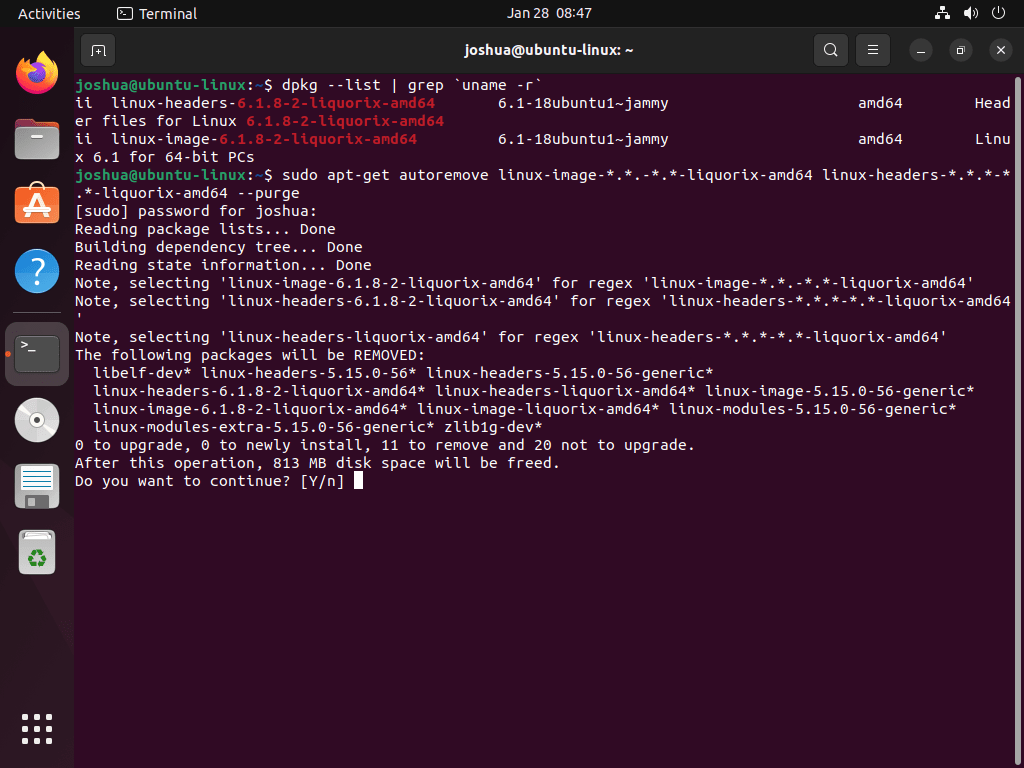
To remove the kernel packages, use the provided command, which should cover all versions of Liquorix. However, modify the command to match the kernel version in your output if necessary.
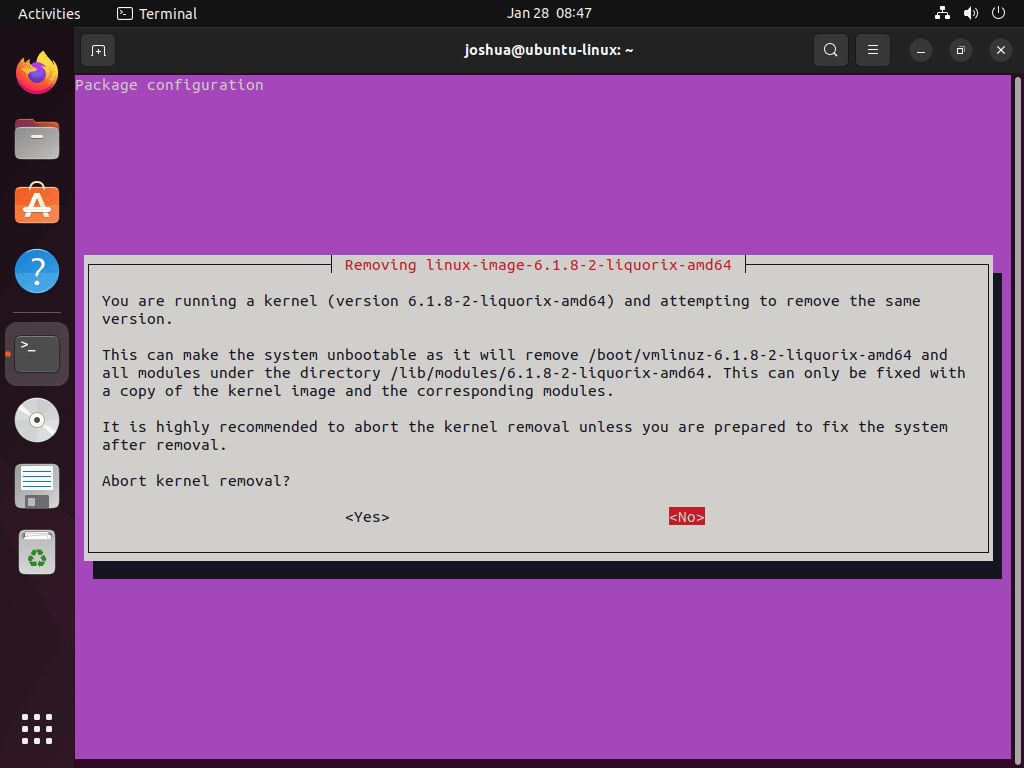
sudo apt-get autoremove linux-image-*.*.-*.*-liquorix-amd64 linux-headers-*.*.*-*.*-liquorix-amd64 --purgeWhile removing the Liquorix Kernel, you may encounter a prompt asking for confirmation to proceed with the removal.
During the removal process for the Liquorix Kernel, a warning message may appear about not having a fallback Linux Kernel to rely on during a reboot. Selecting “No” to proceed with the removal process is essential.
Re-Install Generic Ubuntu Kernel
Once you have removed the Liquorix kernel, run the following command to ensure the generic Linux Kernel is installed. You can change this later on for users wanting something else.
sudo apt install linux-image-genericNote: Alternatively, you could install the HWE Kernel to suit your Ubuntu system better for Ubuntu LTS release variants.
Reboot and Verify Restored Ubuntu Default Kernel
Now restart your PC to finalize the removal of Liquorix:
rebootTo confirm that the Liquorix kernel has been successfully removed, you can check the installed kernel version using a command like “cat /proc/version” and compare the output to the version of the Liquorix kernel you had previously installed.
cat /proc/versionExample output if the default kernel is restored:
Linux version x.x.xConclusion
We’ve walked through the steps to install the Liquorix Kernel on Ubuntu 24.04, 22.04, and 20.04 LTS, leveraging the Liquorix LaunchPAD PPA for a smooth setup and future updates. This guide aims to equip you with a kernel that boosts your system’s performance, especially if you’re into gaming or require efficient handling of intensive applications. Remember, Liquorix shines on x86_64 architectures and won’t play nice with secure boot-enabled or ARM-based devices. As a final tip, keep an eye on kernel updates through the PPA to ensure your system remains optimized. Thanks for sticking with us, and here’s to a snappier Ubuntu experience!
For more information on Liquorix Kernel, visit the Liquorix Kernel features information page.


Thank you for the clear instructions!