Installing Firefox Beta and Nightly on Ubuntu gives you early access to upcoming browser features weeks or months before they reach stable releases. Beta updates roughly twice a week and represents the next stable version in testing, while Nightly delivers multiple daily builds with the most experimental changes from active development. Both channels install as separate APT packages from Mozilla’s official repository, each with its own binary and profile, so all three coexist on the same system without conflicts.
Mozilla maintains a dedicated APT repository at packages.mozilla.org that publishes firefox-beta and firefox-nightly as distinct binaries, each with its own profile and update path. The repository works on Ubuntu 26.04 LTS, 24.04 LTS, and 22.04 LTS and receives new builds automatically, so no manual downloads are needed after the initial setup.
Install Firefox Beta on Ubuntu
Update Ubuntu System Packages
Before adding external repositories, synchronize your local package index and upgrade any outdated packages to reduce dependency conflicts during installation:
sudo apt update && sudo apt upgradeIf your account lacks sudo privileges, see our guide on adding a user to sudoers on Ubuntu before proceeding.
Install the tools needed to fetch and verify the Mozilla signing key. These packages are present on most Ubuntu installations but may be absent from minimal or container environments:
sudo apt install curl ca-certificates gpg -yImport Mozilla GPG Key
APT uses GPG signatures to verify that packages come from their claimed source and have not been tampered with. Create the standard keyrings directory, then use curl to download Mozilla’s public signing key:
sudo install -d -m 0755 /etc/apt/keyringssudo curl -fsSLo /etc/apt/keyrings/packages.mozilla.org.asc https://packages.mozilla.org/apt/repo-signing-key.gpgVerify the key fingerprint matches Mozilla’s published value. The awk command strips whitespace from GPG’s verbose output to print just the fingerprint hash:
gpg -n -q --import --import-options import-show /etc/apt/keyrings/packages.mozilla.org.asc | awk '/pub/{getline; gsub(/^ +| +$/,""); print}'Expected output:
35BAA0B33E9EB396F59CA838C0BA5CE6DC6315A3
If the fingerprint does not match, delete the downloaded file with sudo rm /etc/apt/keyrings/packages.mozilla.org.asc and re-download before proceeding. A mismatched fingerprint can indicate a corrupted download or a man-in-the-middle attack.
Add Mozilla APT Repository
Create the repository configuration file using DEB822 format. The Signed-By field restricts this key to packages from this repository only, which is more secure than adding the key to the global trusted keyring:
printf '%s\n' \
'Types: deb' \
'URIs: https://packages.mozilla.org/apt' \
'Suites: mozilla' \
'Components: main' \
'Signed-By: /etc/apt/keyrings/packages.mozilla.org.asc' \
| sudo tee /etc/apt/sources.list.d/mozilla.sources > /dev/null
This uses the same Mozilla repository and signing key as Mozilla’s upstream Linux instructions, but stores the source as a DEB822 .sources file for easier auditing and cleanup.
Refresh the package index to pull metadata from the newly added repository:
sudo apt updateRelevant output includes the Mozilla repository fetch line:
Get:X https://packages.mozilla.org/apt mozilla InRelease
Configure APT Priority for Firefox
Ubuntu’s repositories include a firefox stub package that reinstalls the Snap version, and without explicit priority rules APT may prefer Ubuntu’s package over Mozilla’s during system upgrades. The following pin configuration gives Firefox packages from Mozilla’s repository priority during dependency resolution:
printf '%s\n' \
'Package: firefox*' \
'Pin: release o=namespaces/moz-fx-productdelivery-pr-38b5/repositories/mozilla' \
'Pin-Priority: 1000' \
| sudo tee /etc/apt/preferences.d/mozilla > /dev/null
A pin priority of 1000 exceeds APT’s default priority of 500, ensuring Mozilla’s Firefox packages win over Ubuntu’s Firefox stub. The release o= value matches the Mozilla repository’s current Origin field from its InRelease metadata, which APT uses for reliable matching.
Confirm the pin is active before installing packages:
apt-cache policy firefox-beta | sed -n '1,8p'The exact Beta version changes as Mozilla publishes new builds, but the candidate should come from packages.mozilla.org and the version line should show priority 1000:
firefox-beta:
  Installed: (none)
  Candidate: 151.0b6~build1
  Version table:
     151.0b6~build1 1000
        500 https://packages.mozilla.org/apt mozilla/main amd64 Packages
Install Firefox Beta via APT
Close any open Firefox windows to prevent lock conflicts, then install Firefox Beta:
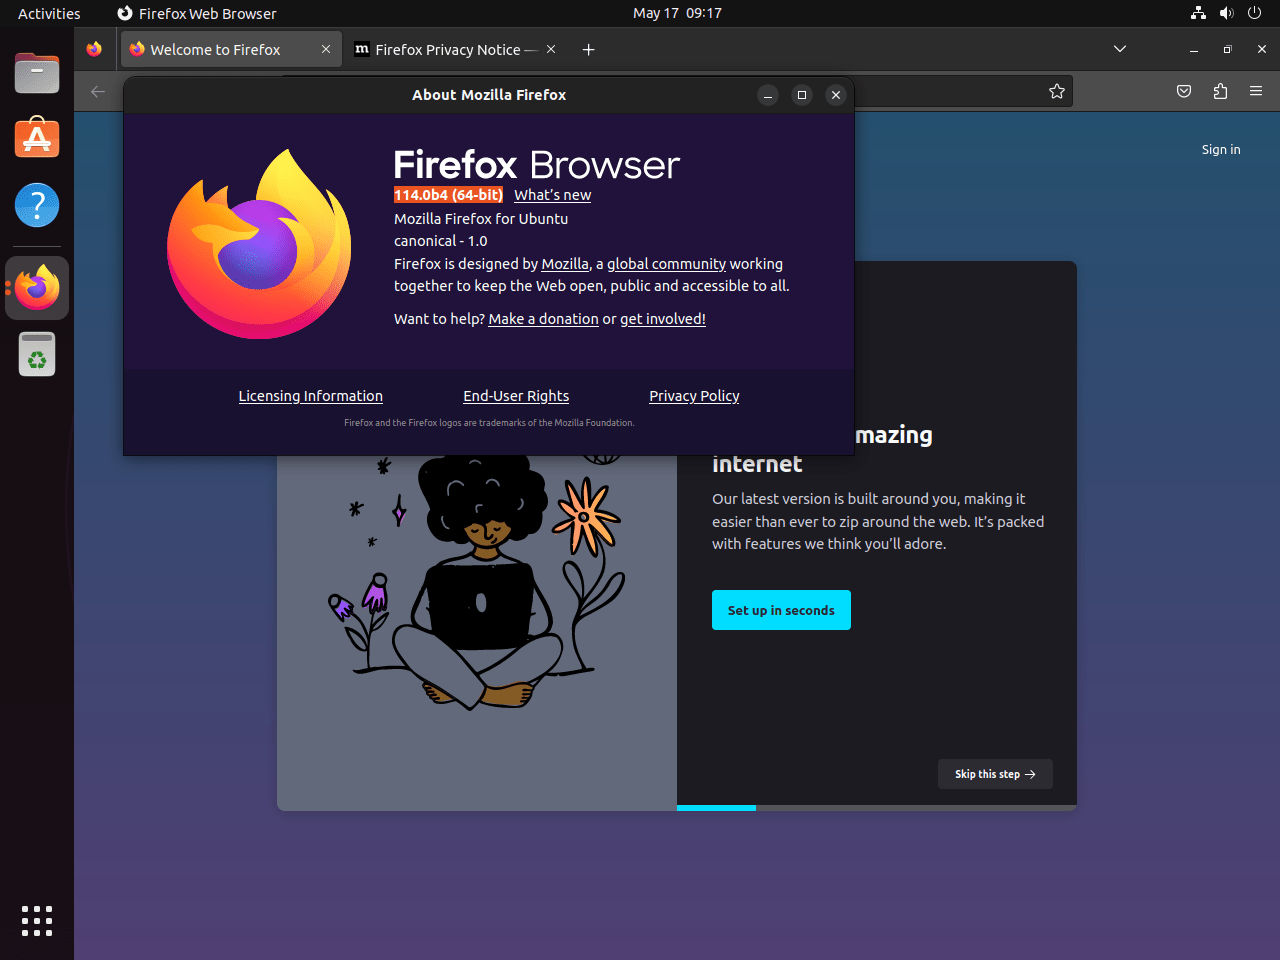
sudo apt install firefox-beta -yConfirm the installation by checking the version:
firefox-beta --versionRecent Beta builds use this output format; your installed build number may be newer:
Mozilla Firefox 151.0b6
The b suffix confirms this is a Beta build rather than a stable release, and the number after it identifies the specific build within that cycle.
Launch Firefox Beta on Ubuntu
Launch Firefox Beta from the terminal to see console output or debug web applications:
firefox-betaAppend & to run Firefox Beta in the background and return control to your terminal session:
firefox-beta &Alternatively, search for “Firefox Beta” in the applications menu. The installation creates a desktop entry automatically, so the browser appears alongside your other applications without additional configuration.
Install Firefox Nightly on Ubuntu
Firefox Nightly receives multiple automated builds per day directly from Mozilla’s main development branch. Unlike Beta, which tests features destined for the next stable release, Nightly contains the most recent code changes and is aimed at developers and enthusiasts who want to evaluate experimental features, reproduce regressions, and contribute feedback before changes reach a wider audience.
Firefox Nightly installs as a separate
firefox-nightlypackage with its own binary and profile directory. Your existing Firefox and Firefox Beta installations remain unaffected.
The Mozilla APT repository configured in the previous section already provides the firefox-nightly package, so no additional repository setup is needed. Older Ubuntu Nightly instructions may mention firefox-trunk from PPA workflows, but this repository publishes current Nightly builds as firefox-nightly.
Install Firefox Nightly via APT
Install the firefox-nightly package from the Mozilla repository configured in the previous section:
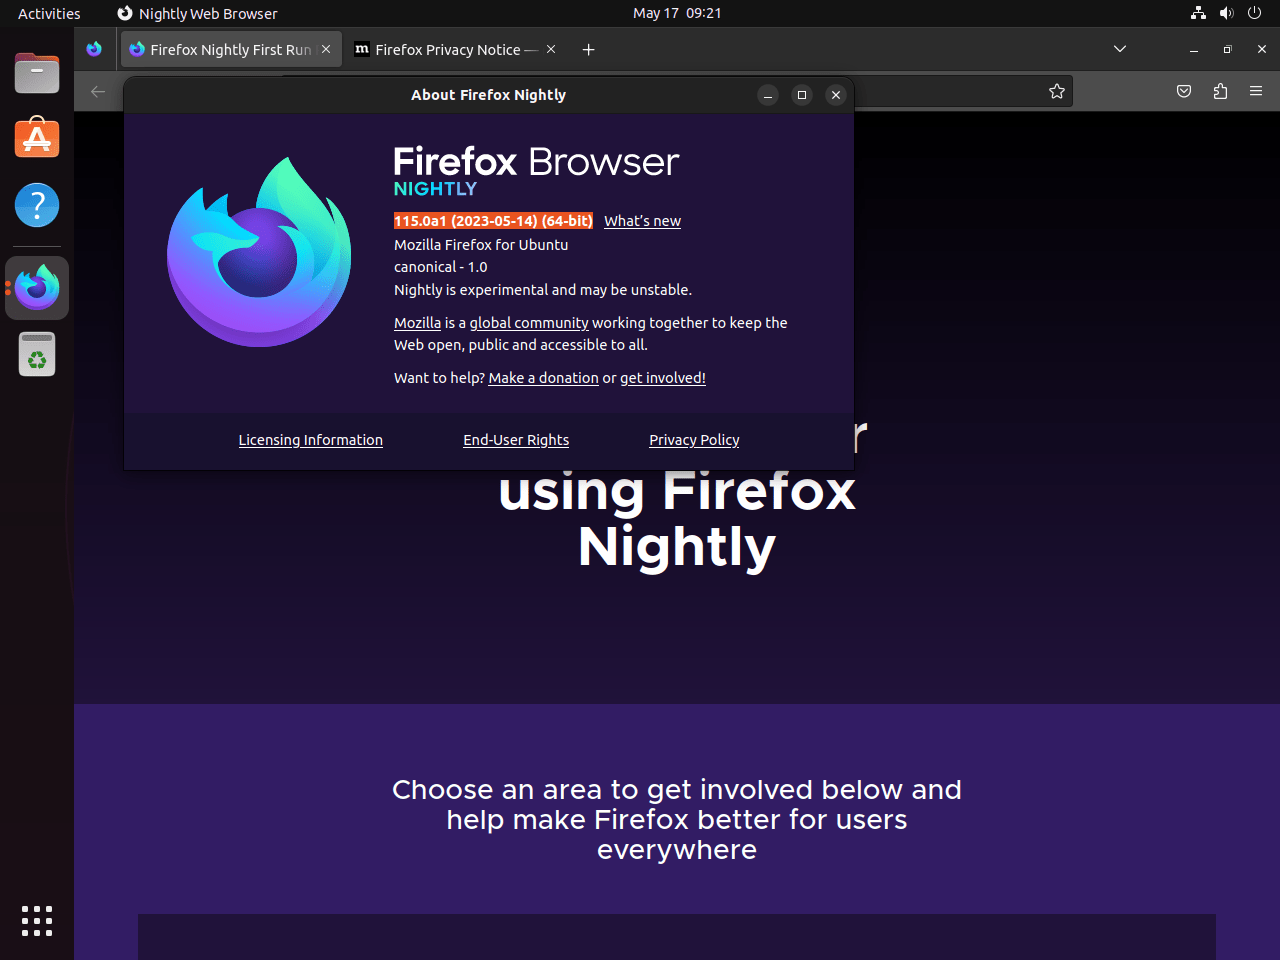
sudo apt install firefox-nightly -yVerify the installation by checking the version:
firefox-nightly --versionRecent Nightly builds use this output format; your installed build number may be newer:
Mozilla Firefox 152.0a1
The a1 suffix identifies a Nightly (alpha) build. The version number increments with each new Firefox development cycle as Mozilla lands code daily.
The Mozilla APT repository also provides
firefox(stable),firefox-esr(Extended Support Release), andfirefox-devedition(Developer Edition). Each uses a separate binary name, so multiple channels can run side by side with independent profiles. If you need Developer Edition instead of Beta or Nightly, use the Firefox Developer Edition on Ubuntu guide.
Launch Firefox Nightly on Ubuntu
Launch Firefox Nightly from the terminal:
firefox-nightlyThe Nightly icon uses a distinctly different dark blue and purple color scheme compared to Beta’s orange fox and the stable Firefox icon, making it easy to identify at a glance:
Compare Firefox Channels on Ubuntu
Choose the channel based on how much instability you can tolerate and whether you need a separate browser profile for testing:
| Channel | APT Package | Update Frequency | Stability | Best For |
|---|---|---|---|---|
| Stable | firefox | Every 4 weeks | Production-ready | Daily browsing; most users |
| Beta | firefox-beta | About twice weekly | Generally stable | Testing upcoming features before stable release |
| Nightly | firefox-nightly | Multiple times daily | Highly experimental | Developer and contributor testing of cutting-edge code |
For most users, Beta is the right starting point. It delivers pre-release features with reasonable stability. Nightly is better suited for developers actively contributing bug reports or those comfortable with daily instability and behavior changes.
Snap Channel Notes for Firefox Beta and Nightly
Firefox Snap uses channels instead of separate Beta and Nightly package names. On an Ubuntu desktop that already has the Firefox Snap installed, switch to Beta with:
sudo snap refresh firefox --channel=latest/betaFor the Nightly-equivalent Snap channel, use latest/edge. Snap does not publish a separate firefox-nightly snap package:
sudo snap refresh firefox --channel=latest/edgeIf the Firefox Snap is not installed, use the same channel with snap install instead of snap refresh; the package name remains firefox, not firefox-nightly. This swaps the active Firefox Snap channel instead of installing a second browser. Use Mozilla’s APT packages when you need stable Firefox, Beta, and Nightly running simultaneously with separate profiles.
Ubuntu installs Firefox as a Snap by default on standard desktop setups. If you prefer APT-managed Firefox as your only Firefox source, see removing Firefox Snap from Ubuntu.
Manage Firefox Beta and Nightly on Ubuntu
Update Firefox Beta and Nightly on Ubuntu
Both Firefox Beta and Nightly update automatically through the Mozilla APT repository. A standard system upgrade fetches the latest available build for each installed channel:
sudo apt update && sudo apt upgradeTo update a single channel without upgrading other packages, use the --only-upgrade flag:
sudo apt install --only-upgrade firefox-betasudo apt install --only-upgrade firefox-nightlyRemove Firefox Beta from Ubuntu
Removing Firefox Beta leaves your profile data intact. Bookmarks, history, and saved passwords remain in ~/.mozilla/ and reappear if you reinstall later:
sudo apt remove firefox-betaRemove Firefox Nightly from Ubuntu
Removing Firefox Nightly preserves your profile data. Bookmarks, history, and saved passwords remain in ~/.mozilla/ and reappear if you reinstall later:
sudo apt remove firefox-nightlyPreview APT Dependency Cleanup
Preview dependency cleanup before removing automatically installed packages, especially on a desktop that has accumulated packages from other software tests or older kernels:
sudo apt autoremove --dry-runContinue only if the preview lists packages you recognize as no longer needed by Firefox or other applications:
sudo apt autoremoveRemove Mozilla APT Repository from Ubuntu
Keep the Mozilla repository if you have other Firefox packages installed from it, such as
firefox(stable),firefox-esr, orfirefox-devedition. Removing the repository does not uninstall those packages, but APT will no longer receive updates for them.
Remove the APT priority pin, repository configuration, and signing key:
sudo rm -f /etc/apt/preferences.d/mozilla
sudo rm -f /etc/apt/sources.list.d/mozilla.sources
sudo rm -f /etc/apt/keyrings/packages.mozilla.org.asc
Refresh the package index so APT no longer queries the removed repository:
sudo apt updateConclusion
Mozilla’s APT repository is the cleanest path when you want Firefox Beta and Nightly as separate Ubuntu applications with normal package updates. Beta is the safer preview channel; Nightly is for daily development builds and regression testing. For long-term stability, see Firefox ESR on Ubuntu, and use the Firefox Snap removal guide if you want APT-managed Firefox to be your only Firefox source.

Formatting tips for your comment
You can use basic HTML to format your comment. Useful tags currently allowed in published comments:
<code>command</code>command<strong>bold</strong><em>italic</em><a href="https://example.com">link</a><blockquote>quote</blockquote>