Browser caches, thumbnail stores, crash logs, and old temporary files can consume space long before Ubuntu makes the problem obvious. To install BleachBit on Ubuntu, choose the package source that matches your update model: Ubuntu’s Universe package for low-maintenance installs, BleachBit’s official release package for the newest upstream build, or the Flathub package if you already standardize on Flatpak apps.
The official BleachBit Linux download page now publishes separate .deb builds for Ubuntu 26.04, 24.04, and 22.04. The manual method reads that page at runtime, selects the matching Ubuntu package, verifies the SHA256 checksum entry, and installs through APT so dependencies still come from Ubuntu’s repositories.
Install BleachBit on Ubuntu
Pick one install path unless you have a specific reason to compare package formats. The APT and official DEB methods both install the system package named bleachbit, while Flatpak uses the separate app ID org.bleachbit.BleachBit.
| Method | Source | Channel | Updates | Best For |
|---|---|---|---|---|
| APT Package Manager | Ubuntu Universe | Distribution package | Automatic via apt upgrade | Most users who want Ubuntu-managed packages |
| Official DEB Package | BleachBit Linux downloads | Latest upstream stable | Manual via update-bleachbit | Users who want the current BleachBit release without Flatpak |
| Flatpak | Flathub | Flathub stable package | Manual via flatpak update | Users who already manage desktop apps through Flathub |
APT is the quietest default because it stays inside Ubuntu’s normal package workflow. Use the official DEB method when you specifically want the newest BleachBit release from upstream; it does not add a repository, so future upstream updates need the reusable helper command. Flathub currently carries BleachBit v6.0.0, but the app page labels the package unverified and potentially unsafe because it has broad home and filesystem access, so treat Flatpak as a packaging choice rather than strong isolation.
These steps support Ubuntu 26.04, 24.04, and 22.04. The official DEB helper stops with an error if BleachBit does not publish a matching package for your Ubuntu release instead of guessing with a nearby build.
BleachBit can be installed from a terminal, but the graphical cleaner still needs an active desktop session when you launch it.
Update Ubuntu Before Installing BleachBit
Refresh the package index and apply pending upgrades first so BleachBit and its dependencies install against current system libraries.
sudo apt update && sudo apt upgradeThese commands use
sudofor tasks that need root privileges. If your account does not have sudo access yet, follow the guide to add a new user to sudoers on Ubuntu before continuing.
Install BleachBit from Ubuntu Repositories
The Ubuntu archive package is the simplest path. BleachBit lives in the Universe component on Ubuntu 26.04, 24.04, and 22.04, so if APT cannot find the package, first enable Universe and Multiverse in Ubuntu.
sudo apt install bleachbit -yVerify the APT BleachBit Installation
Use APT package metadata for a headless-safe installation check.
apt-cache policy bleachbitRelevant output on Ubuntu 24.04 includes:
bleachbit:
  Installed: 4.6.0-3
  Candidate: 4.6.0-3
  Version table:
 *** 4.6.0-3 500
        500 http://au.archive.ubuntu.com/ubuntu noble/universe amd64 Packages
        100 /var/lib/dpkg/status
Ubuntu 26.04 currently provides BleachBit 5.0.2-1, Ubuntu 24.04 provides 4.6.0-3, and Ubuntu 22.04 provides 4.4.2-1. If Installed and Candidate match for your release, the Ubuntu package is installed.
Install BleachBit from the Official DEB Package
BleachBit’s own Linux download page publishes the current upstream .deb package for each supported Ubuntu release. This method creates a reusable update-bleachbit command so the same download, checksum, and APT install workflow can be repeated later.
Install curl first because minimal or customized Ubuntu systems may not include it. If you want to understand the download flags used inside the helper, the curl command in Linux reference covers them separately.
sudo apt install curl ca-certificates -yCreate the helper in /usr/local/bin.
sudo tee /usr/local/bin/update-bleachbit > /dev/null << 'SCRIPT_EOF'
#!/usr/bin/env bash
set -euo pipefail

# shellcheck disable=SC1091
source /etc/os-release
UBUNTU_VERSION=${VERSION_ID//./}
DOWNLOAD_PAGE="https://www.bleachbit.org/download/linux"

echo "Checking BleachBit downloads for Ubuntu ${VERSION_ID}..."
PAGE=$(curl -A "Mozilla/5.0" -fsSL "$DOWNLOAD_PAGE")
PACKAGE_URL=$(printf "%s\n" "$PAGE" | grep -oE "https://download\.bleachbit\.org/(get/)?bleachbit_[0-9][A-Za-z0-9._-]+_ubuntu${UBUNTU_VERSION}\.deb" | sort -V | tail -n 1)

if [ -z "$PACKAGE_URL" ]; then
  echo "No official BleachBit .deb was found for Ubuntu ${VERSION_ID}."
  exit 1
fi

PACKAGE_FILE=${PACKAGE_URL##*/}
DIRECT_URL=${PACKAGE_URL/\/get\//\/}
LATEST_VERSION=$(printf "%s\n" "$PACKAGE_FILE" | sed -E 's/^bleachbit_([0-9][^-]*)-.*/\1/')
CURRENT_VERSION=$(dpkg-query -W -f='${Version}' bleachbit 2>/dev/null || true)

if [ -z "$CURRENT_VERSION" ]; then
  echo "Current installed version: not installed"
else
  echo "Current installed version: $CURRENT_VERSION"
fi

WORKDIR=$(mktemp -d)
trap 'rm -rf "$WORKDIR"' EXIT
cd "$WORKDIR"

echo "Latest available package: $PACKAGE_FILE"
curl -A "Mozilla/5.0" -fsSLo "$PACKAGE_FILE" "$DIRECT_URL"
curl -A "Mozilla/5.0" -fsSLo SHA256SUMS "https://download.bleachbit.org/bleachbit-${LATEST_VERSION}-sha256sum.txt"

EXPECTED_HASH=$(awk -v f="$PACKAGE_FILE" '{for (i=1; i<NF; i+=2) if ($(i+1)==f) {print $i; exit}}' SHA256SUMS)
if [ -z "$EXPECTED_HASH" ]; then
  echo "No checksum entry found for $PACKAGE_FILE."
  exit 1
fi

printf "%s  %s\n" "$EXPECTED_HASH" "$PACKAGE_FILE" | sha256sum -c -
LATEST_PACKAGE_VERSION=$(dpkg-deb -f "$PACKAGE_FILE" Version)
echo "Latest available package version: $LATEST_PACKAGE_VERSION"

if [ "$CURRENT_VERSION" = "$LATEST_PACKAGE_VERSION" ]; then
  echo "BleachBit is already current."
  exit 0
fi

read -r -p "Install or update BleachBit with this package? [y/N] " REPLY
case "$REPLY" in
  [Yy]|[Yy][Ee][Ss]) ;;
  *) echo "Canceled before installation."; exit 0 ;;
esac

sudo apt install -y "$WORKDIR/$PACKAGE_FILE"
INSTALLED_VERSION=$(dpkg-query -W -f='${Version}' bleachbit)
echo "BleachBit installed version: $INSTALLED_VERSION"
SCRIPT_EOF
Make the helper executable and confirm your shell can find it.
sudo chmod 0755 /usr/local/bin/update-bleachbit
command -v update-bleachbit
Relevant output includes:
/usr/local/bin/update-bleachbit
Run the helper and answer y when it asks whether to install the selected package.
update-bleachbitRelevant output on Ubuntu 24.04 currently includes:
Checking BleachBit downloads for Ubuntu 24.04...
Current installed version: not installed
Latest available package: bleachbit_6.0.0-0_all_ubuntu2404.deb
bleachbit_6.0.0-0_all_ubuntu2404.deb: OK
Latest available package version: 6.0.0-0
Install or update BleachBit with this package? [y/N] y
BleachBit installed version: 6.0.0-0
Verify the installed package version with dpkg-query.
dpkg-query -W -f='${Package} ${Version}\n' bleachbitRelevant output for the current upstream release includes:
bleachbit 6.0.0-0
Enable Flathub for BleachBit
Flathub provides the Flatpak build, so add the remote first if your system does not already have it configured.
Flatpak is not pre-installed on Ubuntu. If you have not set it up yet, follow the guide to install Flatpak on Ubuntu before continuing.
sudo flatpak remote-add --if-not-exists flathub https://dl.flathub.org/repo/flathub.flatpakrepoConfirm that Flathub is available at system scope before the install step.
flatpak remotes --columns=name,options | grep "^flathub"The grep command in Linux keeps the remotes output focused on the Flathub entry instead of printing every configured source.
Relevant output includes:
flathub system
Install the BleachBit Flatpak
BleachBit’s Flathub app ID is org.bleachbit.BleachBit. Because the Flathub remote was added with sudo, keep the install at the same system scope.
sudo flatpak install flathub org.bleachbit.BleachBit -yFlathub currently marks this app as unverified and potentially unsafe because it needs broad file access to clean user data. That permission model may still be acceptable for BleachBit, but it is not the same trust model as the Ubuntu archive or BleachBit’s own .deb package.
Verify the Flatpak BleachBit Installation
Flatpak reports installed app metadata without launching the GUI.
flatpak info org.bleachbit.BleachBit | grep -E '^[[:space:]]*(ID|Ref|Arch|Branch|Version|Origin|Installation):'Relevant output currently includes:
        ID: org.bleachbit.BleachBit
       Ref: app/org.bleachbit.BleachBit/x86_64/stable
      Arch: x86_64
    Branch: stable
   Version: v6.0.0
    Origin: flathub
Installation: system
Launch BleachBit on Ubuntu
BleachBit opens as a normal desktop application and also exposes command-line options for listing, previewing, and running cleaners. The GUI needs a graphical session, while the CLI remains useful from a terminal.
Open the BleachBit Graphical App from the Terminal
Use bleachbit for the Ubuntu archive package or the official DEB package.
bleachbitUse the Flatpak app ID if you installed BleachBit from Flathub.
flatpak run org.bleachbit.BleachBitUse BleachBit from the Command Line
BleachBit includes a real CLI, so you can inspect available cleaners before running a preview or cleanup job. Use the normal command for the Ubuntu archive package or the official DEB package.
bleachbit --list-cleanersUse the Flatpak app ID if you installed BleachBit from Flathub.
flatpak run org.bleachbit.BleachBit --list-cleanersRelevant cleaner names include:
adobe_reader.cache
adobe_reader.mru
adobe_reader.tmp
amsn.cache
amsn.chat_logs
amule.backup
amule.known_clients
apt.autoclean
apt.autoremove
apt.clean
Terminals without an active display can prepend a GDK warning before the cleaner list. The CLI options are still available through bleachbit --help, including --preview, --clean, and --shred.
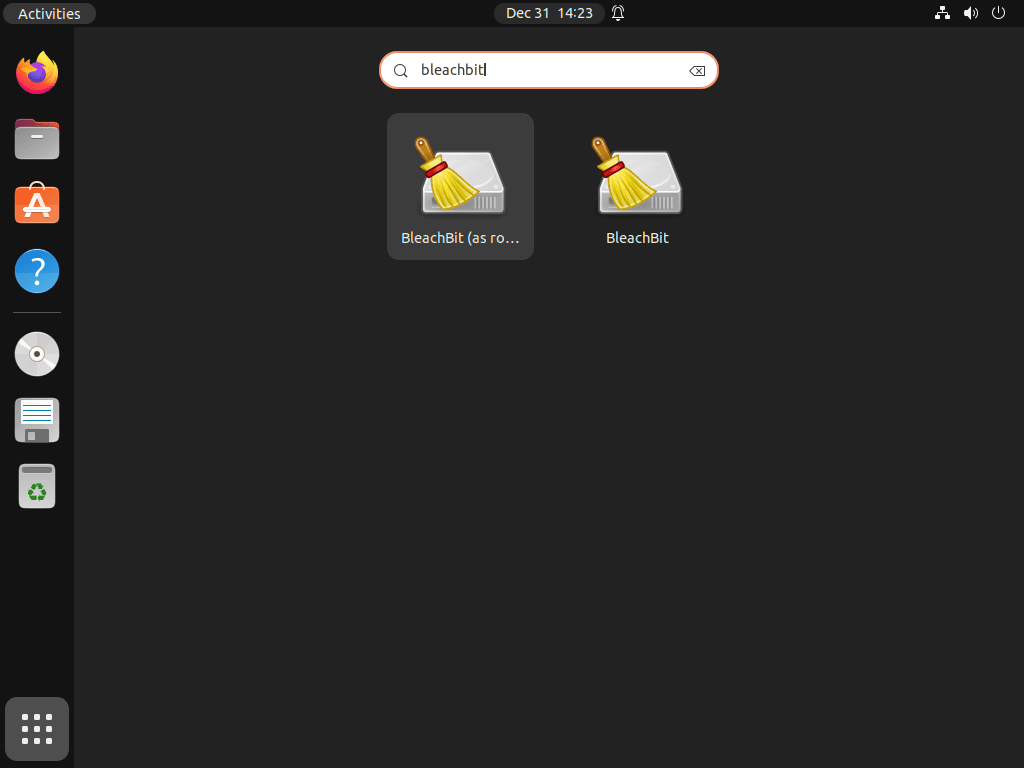
Open BleachBit from the Ubuntu Applications Menu
Open the applications menu or Activities overview, search for BleachBit, and start the app from there if you prefer a normal desktop launch.
Compare BleachBit Versions on Ubuntu
Ubuntu archive versions vary by release, while the official DEB and Flathub methods track newer upstream releases. This matters most when you want recent cleaners, bug fixes, or compatibility updates.
| Ubuntu Release | Ubuntu Archive | Official DEB | Flatpak | Notes |
|---|---|---|---|---|
| Ubuntu 26.04 LTS (Resolute) | BleachBit 5.0.x | BleachBit 6.0.x | BleachBit v6.0.x | Newest Ubuntu archive branch, newer upstream packages available |
| Ubuntu 24.04 LTS (Noble) | BleachBit 4.6.x | BleachBit 6.0.x | BleachBit v6.0.x | Official DEB gives the largest practical jump for most current LTS desktops |
| Ubuntu 22.04 LTS (Jammy) | BleachBit 4.4.x | BleachBit 6.0.x | BleachBit v6.0.x | Use the release-specific upstream package, not a newer Ubuntu package filename |
Update or Remove BleachBit on Ubuntu
Keep update and removal commands aligned with the package source you chose. The Ubuntu archive package and official DEB package share the same package name, but only the helper checks BleachBit’s upstream download page for new releases.
Update BleachBit on Ubuntu
Update the Ubuntu archive package with APT.
sudo apt install --only-upgrade bleachbitUpdate the official DEB package by rerunning the helper created earlier.
update-bleachbitUpdate the Flatpak app if you installed BleachBit through Flathub.
sudo flatpak update org.bleachbit.BleachBit -yAfter updating, rerun the matching verification command from the install section to confirm the installed source and version.
Remove BleachBit from Ubuntu
Remove the system package and the Flatpak app separately because each format keeps its own package records and user data paths.
Remove the APT or Official DEB BleachBit Package
Purge the bleachbit package if you installed either the Ubuntu archive package or the official DEB package.
sudo apt remove --purge -y bleachbitRemove the updater helper if you created it for the official DEB method.
sudo rm -f /usr/local/bin/update-bleachbitIf APT also offers unused dependencies afterward, review that list before confirming the cleanup.
sudo apt autoremoveConfirm that no installed bleachbit package remains.
dpkg-query -W -f='${db:Status-Abbrev} ${binary:Package}\n' bleachbit 2>/dev/null || echo "not installed"Relevant output after removal includes:
not installed
Remove the BleachBit Flatpak
Remove the Flatpak app with the same system scope used during installation.
sudo flatpak remove -y org.bleachbit.BleachBitCheck that the Flatpak app no longer appears in the system app list.
sudo flatpak list --app --columns=application | grep -Fx org.bleachbit.BleachBit || echo "NOT_INSTALLED"Relevant output after removal includes:
NOT_INSTALLED
Remove Leftover BleachBit Settings if Needed
BleachBit can leave user settings behind after package removal. Native system installs commonly keep ~/.config/bleachbit, while the Flatpak build uses ~/.var/app/org.bleachbit.BleachBit after it creates sandbox data.
Delete these paths only if you want a full cleanup with no saved preferences left behind.
find "$HOME" -maxdepth 3 \( -path "$HOME/.config/bleachbit" -o -path "$HOME/.var/app/org.bleachbit.BleachBit" \) -printDelete only the paths that the find command prints.
rm -rf ~/.config/bleachbit ~/.var/app/org.bleachbit.BleachBitTroubleshoot BleachBit on Ubuntu
The most common Ubuntu-specific issues come from Firefox’s Snap layout, root-mode launches, and terminals that do not have an active display available.
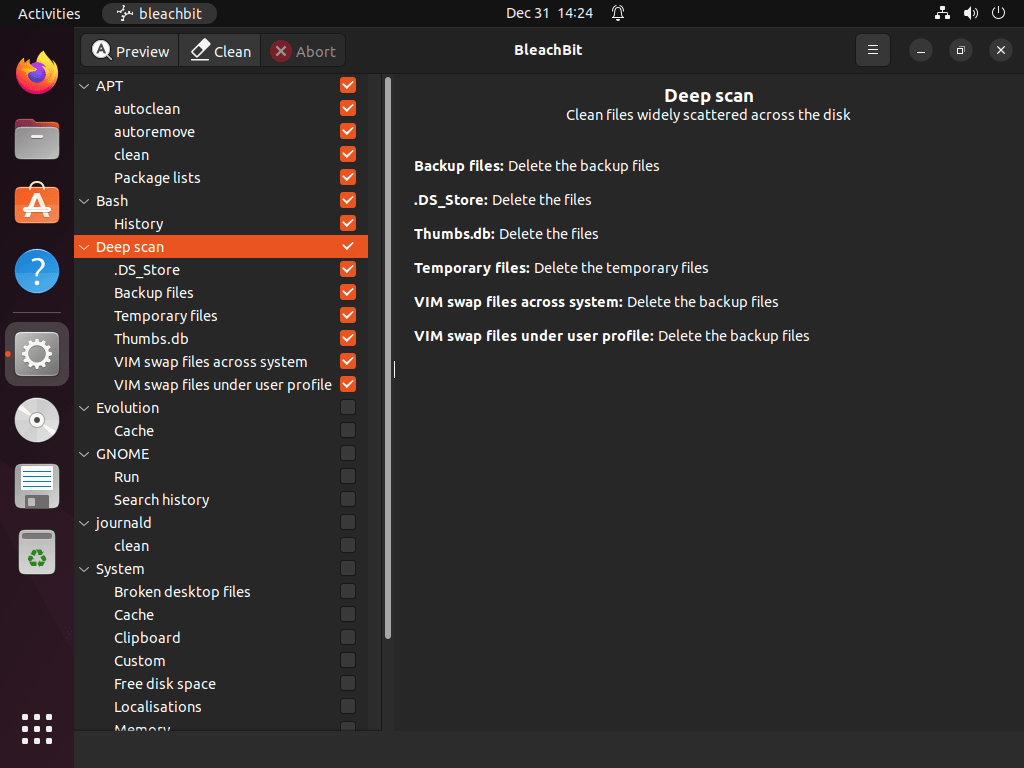
Fix Firefox Snap Cache Detection in BleachBit
Ubuntu ships Firefox as a Snap on current desktop installs, and that changes where BleachBit needs to look for browser cache files.
snap list firefoxIf Firefox appears in that list, BleachBit may need the Snap cache path instead of the older ~/.mozilla/ layout.
~/snap/firefox/common/.cache/
Use BleachBit’s Deep Scan preferences to add that directory, or remove Firefox Snap from Ubuntu if you want to move back to a non-Snap browser workflow.
Run BleachBit as Root on Ubuntu
BleachBit’s root mode exposes cleaners for system caches, logs, and other locations that a normal user account cannot edit. Use this launcher only for the Ubuntu archive package or the official DEB package.
pkexec bleachbitIf you only need to inspect the available command-line options first, run sudo bleachbit --help in a terminal. The full graphical root session still needs a desktop environment.
Handle BleachBit Version Warnings Without a Display
BleachBit can print GDK warnings in terminals without an active graphical display because parts of the program still probe the desktop before printing version or cleaner information.
bleachbit --versionIf a warning appears before the BleachBit version line, the install is not necessarily broken. For a quieter install check, use apt-cache policy bleachbit, dpkg-query -W bleachbit, or flatpak info org.bleachbit.BleachBit based on the method you installed.
Finalize BleachBit Setup on Ubuntu
BleachBit is ready on Ubuntu through the package source that fits your maintenance preference: Ubuntu’s archive for low-friction updates, the official DEB helper for current upstream packages, or Flathub for users already managing desktop apps with Flatpak. For a companion cleaner focused on Ubuntu package caches and old kernels, you can also install Ubuntu Cleaner on Ubuntu.

Formatting tips for your comment
You can use basic HTML to format your comment. Useful tags currently allowed in published comments:
<code>command</code>command<strong>bold</strong><em>italic</em><a href="https://example.com">link</a><blockquote>quote</blockquote>