

This guide will cover how to install Redis on AlmaLinux 9 or 8, utilizing the command line terminal. We’ll explore two methods: using AlmaLinux’s default RPM and Redis from Remi’s RPM Repository for the latest version, accommodating multiple active or security support versions.
Redis, an advanced key-value store, is renowned for its flexibility and performance in server environments. It’s not just a database but a versatile in-memory data structure store, used as a cache, message broker, and queue. Redis is designed with efficiency in mind, capable of handling vast datasets at high speed. Let’s delve into its key features:
- Fast Performance: Redis boasts exceptional speed, making it ideal for high-performance tasks.
- Data Structure Richness: It supports strings, hashes, lists, sets, sorted sets with range queries, bitmaps, hyperlogs, and more.
- Replication and Persistence: Offers master-slave replication, with data stored in memory and optionally written to disk.
- High Availability and Partitioning: Supports automatic partitioning and Redis Sentinel for high availability.
- Extensibility: Lua scripting capabilities allow for the customization of Redis operations.
- Wide Language Support: Redis is supported by most programming languages.
Its application ranges from simple caching to supporting real-time analytics and queuing systems. This adaptability makes Redis a top choice for both administrators and developers looking to optimize their server environments.
As we transition into the technical aspects, remember that installing Redis correctly is crucial for leveraging its full potential. Our step-by-step approach ensures a smooth installation process, whether you’re a seasoned sysadmin or new to server management. Let’s get started with the installation.
Install Redis on AlmaLinux via Appstream
Update AlmaLinux System Packages
Before installing Redis, it’s critical to update all system packages on AlmaLinux. This ensures your system has the latest updates and security patches, providing a stable foundation for Redis installation.
Execute the following command to refresh and upgrade your system:
sudo dnf upgrade --refreshInstall Redis with DNF Command
Now, to install Redis, use the command below. This utilizes AlmaLinux Appstream, the default repository, for installing the standard Redis package. While this version is stable, it may not be the most recent. If your needs require newer features or enhanced performance, consider sourcing a more updated version.
sudo dnf install redis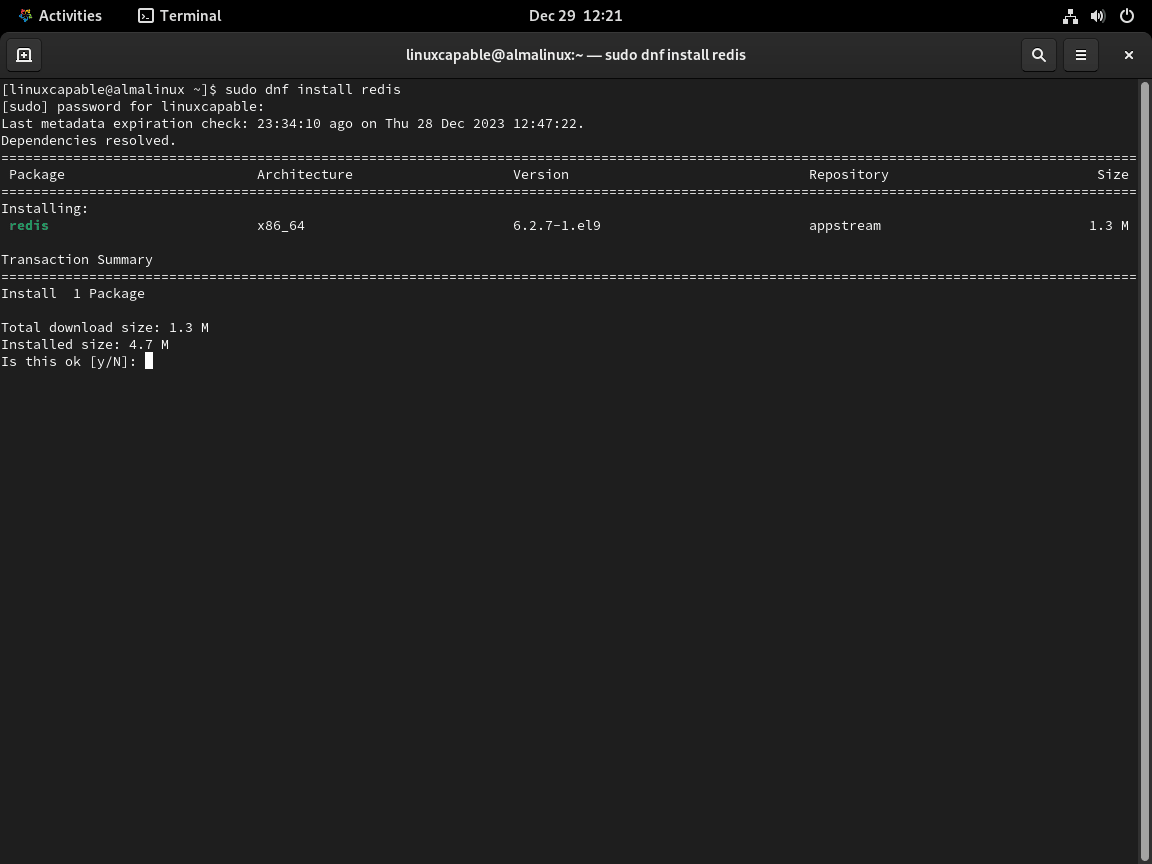
Verify Redis Installation
Post-installation, confirming that Redis is properly installed is a vital step. This verification process also displays the installed version of Redis, helping you understand the capabilities and potential limitations of your setup.
To check the installed version of Redis, run:
redis-server --versionWith these steps, you’ve successfully installed and verified Redis on AlmaLinux using the default Appstream repository. Remember, the version of Redis installed via Appstream is stable, but if your requirements are specific to newer versions, exploring alternative installation sources is recommended, which one is Remi’s RPM.
Install Redis on AlmaLinux via Remi RPM
Preparing AlmaLinux for Redis Installation
Setting Up EPEL Repository
The initial step in installing Redis on AlmaLinux involves setting up the EPEL (Extra Packages for Enterprise Linux) repository, which provides a range of additional software packages compatible with AlmaLinux.
For AlmaLinux 9
Enable the Code Ready Builder (CRB) and install EPEL for AlmaLinux 9 using the following commands:
sudo dnf config-manager --set-enabled crb
sudo dnf install \
    https://dl.fedoraproject.org/pub/epel/epel-release-latest-9.noarch.rpm \
    https://dl.fedoraproject.org/pub/epel/epel-next-release-latest-9.noarch.rpm
For AlmaLinux 8
Similarly, for AlmaLinux 8, enable the PowerTools repository and install EPEL:
sudo dnf config-manager --set-enabled powertools
sudo dnf install \
    https://dl.fedoraproject.org/pub/epel/epel-release-latest-8.noarch.rpm \
    https://dl.fedoraproject.org/pub/epel/epel-next-release-latest-8.noarch.rpm
Integrating Remi Repository
For AlmaLinux 9 and 8
After setting up EPEL, proceed with adding the Remi repository, known for providing the latest versions of Redis.
For AlmaLinux 9:
sudo dnf install dnf-utils http://rpms.remirepo.net/enterprise/remi-release-9.rpm -y
For AlmaLinux 8:
sudo dnf install dnf-utils http://rpms.remirepo.net/enterprise/remi-release-8.rpm -y
Enabling and Installing Redis from Remi RPM
Redis serves as a database, cache, and message broker in server environments.
First, identify available Redis modules:
sudo dnf module list redis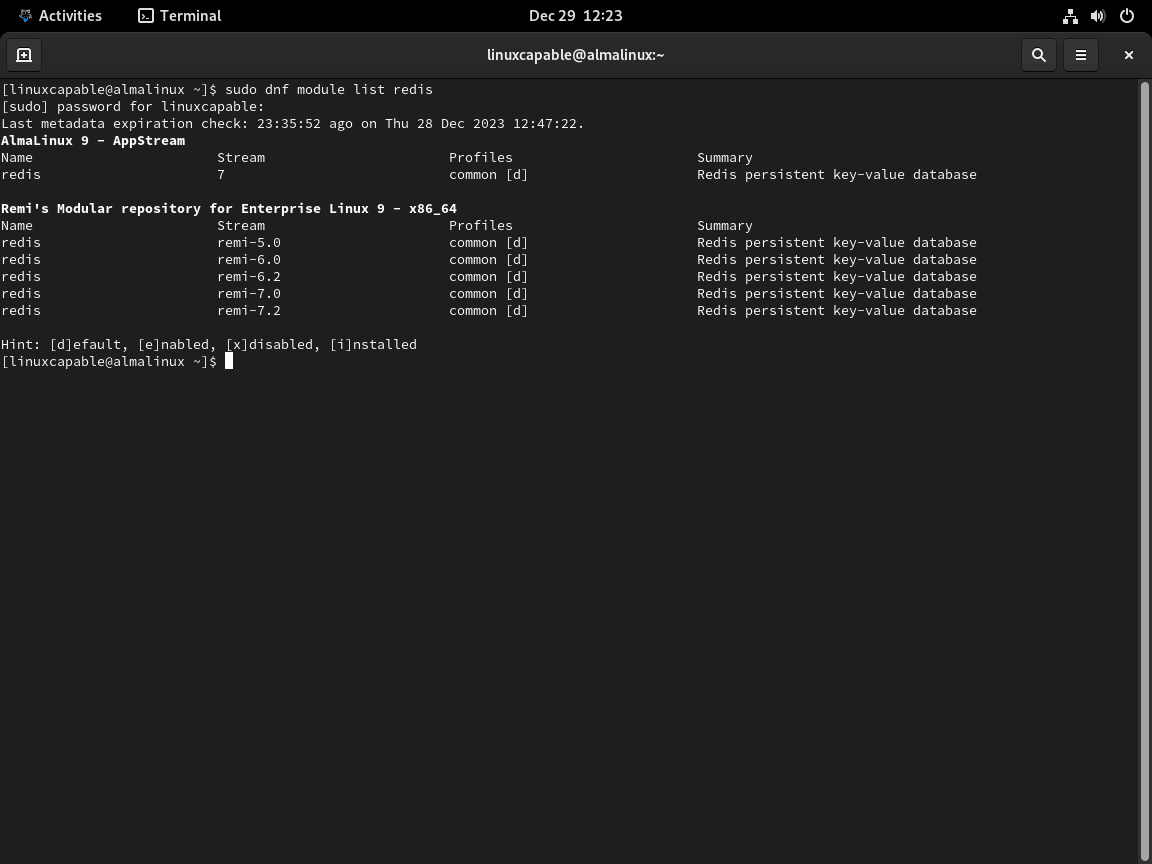
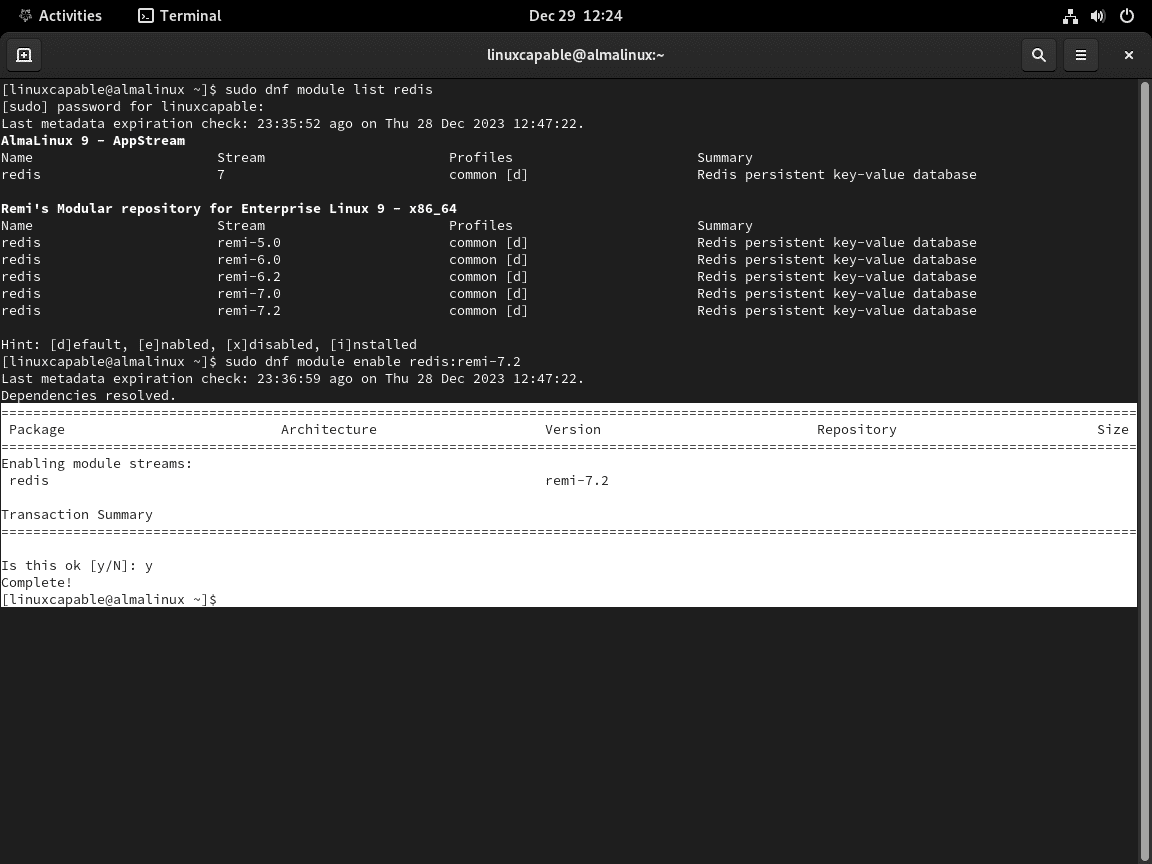
To enable a specific Redis version from Remi RPM, use:
sudo dnf module enable redis:remi-{version}Example for Redis version 7.2:
sudo dnf module enable redis:remi-7.2For versions like Redis 7.0, 6.2, or 5.0, simply replace {version} accordingly.
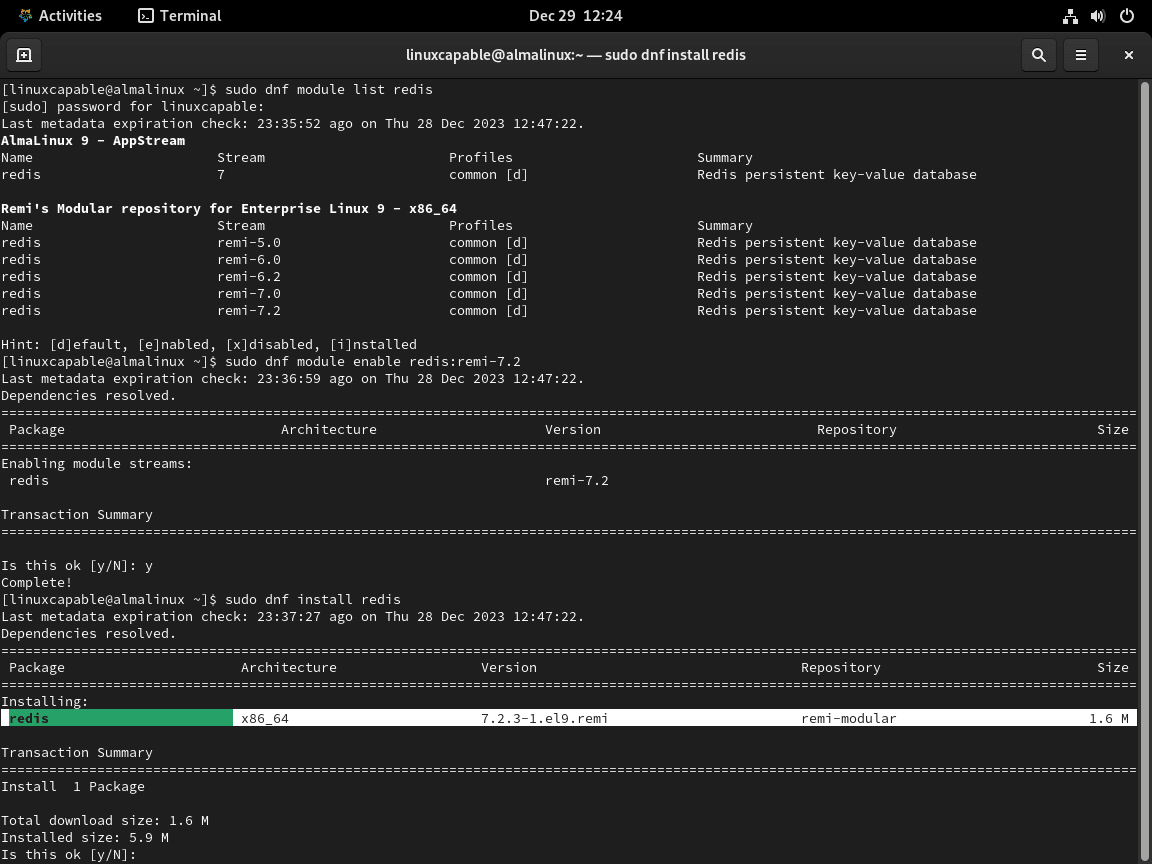
Following this, install Redis:
sudo dnf install redisThis installs the selected version or updates an existing installation to the latest version in the Remi repository.
For the devel package or docs, use the alternative command:
sudo dnf install redis redis-doc redis-develVerifying Redis Installation
To confirm Redis installation, check the version:
redis-server -vActivating Redis Service
Redis does not automatically start or enable on system boot. Use the following command to activate the Redis service and enable it at system startup:
sudo systemctl enable redis --nowChecking Redis Status
To ensure Redis is running correctly, verify its status:
systemctl status redis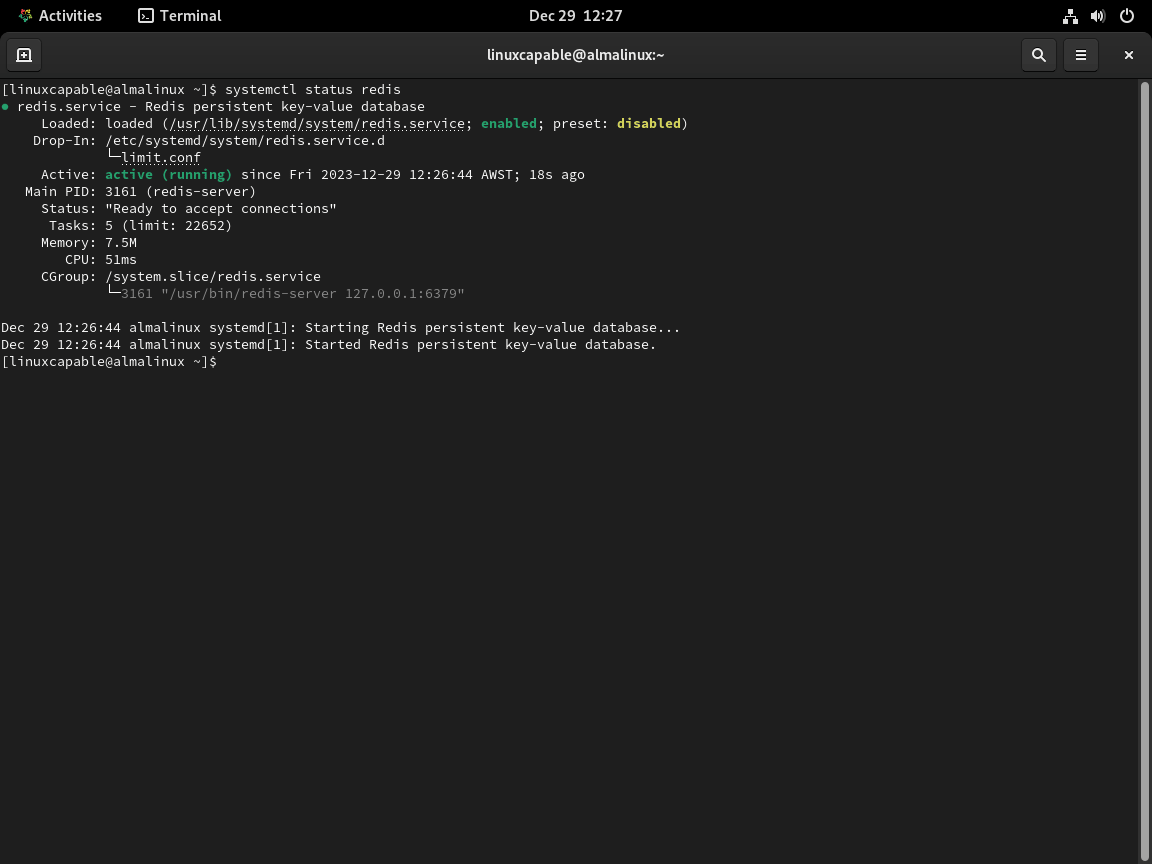
Confirming Redis Network Listening
Redis should actively listen on localhost, default port 6379. Check this with:
ps -ef | grep redisExample output:
redis         3845           1  0 12:15 ?            00:00:00 /usr/bin/redis-server 127.0.0.1:6379
joshua      3966    3929  0 12:16 pts/0    00:00:00 grep --color=auto redis
This confirms that Redis is correctly set up and operational on AlmaLinux.
Utilizing Redis CLI on AlmaLinux
Introduction to Redis CLI
Redis CLI (Command Line Interface) is an essential tool for managing Redis databases. It allows users to interact directly with Redis for various operations like setting values, retrieving data, and managing keys.
Connecting to Redis
To initiate a session with Redis, open a terminal window and execute:
redis-cliThis command connects you to the Redis server, enabling you to perform various database operations.
Setting a Value in Redis
Once connected to Redis, you can assign a value to a key. The syntax for this operation is:
SET key valueFor instance, to set the key message with the value Hello World, use:
SET message "Hello World"
Retrieving a Value from Redis
To fetch the value of a specific key, the syntax is:
GET keyFor example, to retrieve the value of message, input:
GET messageDeleting a Key in Redis
To remove a key from the database, the command is:
DEL keyFor example, to delete message, execute:
DEL messageListing All Keys in Redis
To display all keys stored in the Redis database, use:
KEYS *This command provides a list of all keys, helping you navigate the database.
Configuring Redis on AlmaLinux
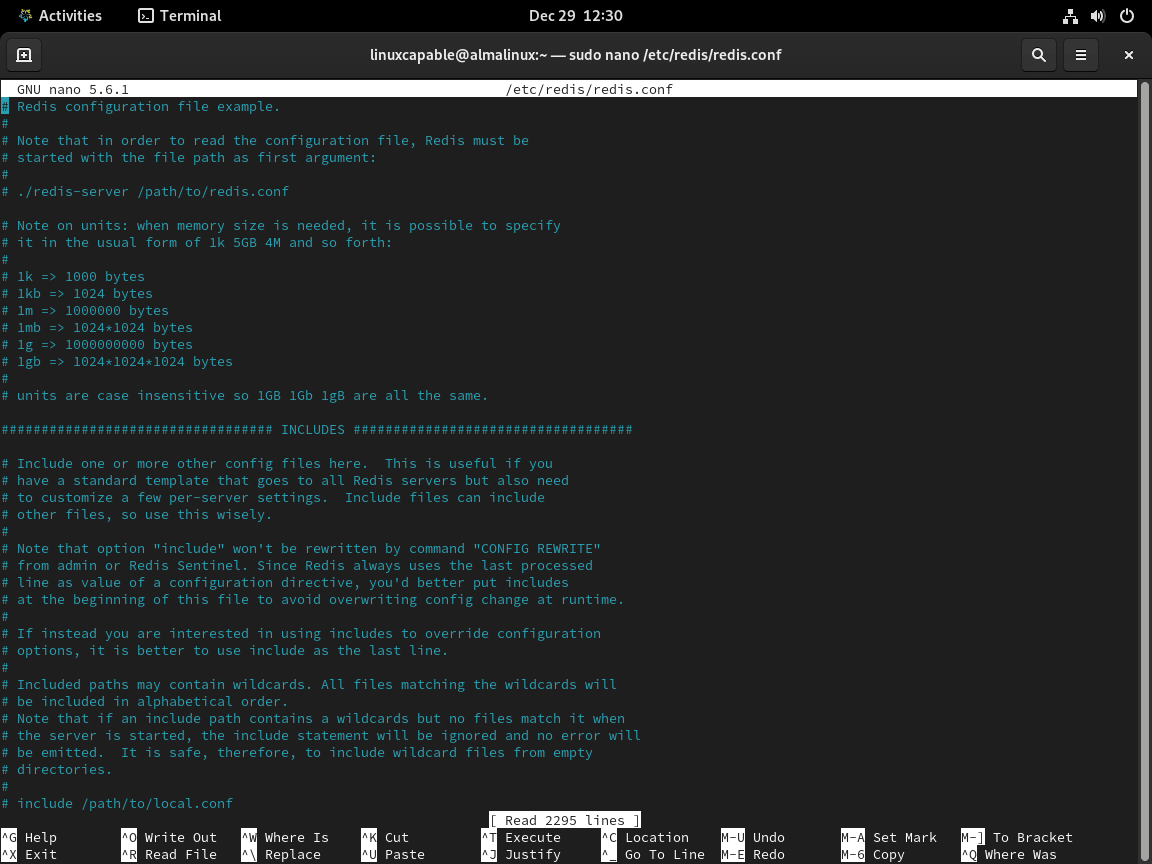
Editing the Redis Configuration File
Begin by accessing the Redis configuration file:
sudo nano /etc/redis/redis.confThis file contains various settings that control Redis’s behavior and performance.
To add to the configuration location, sometimes the location could be /etc/redis.conf, but if you cannot find it in either location, just run this command which will locate the configuration file:
sudo find / -name redis.confSetting Maximum Memory for Redis
The max memory setting limits the amount of memory Redis uses. This is crucial to prevent excessive memory consumption and to avoid Redis resorting to disk storage, which impacts performance.
In /etc/redis.conf, locate and adjust the maxmemory parameter:
# Set max memory to 512 MB
maxmemory 512mb
Configuring Network Access
Redis, by default, only listens on the loopback address (localhost). To enable access from other systems, modify the bind parameter in /etc/redis.conf to the desired IP address:
# Bind Redis to a specific IP address
bind 192.168.1.100
Alternatively, allow connections from any IP address (not recommended without security measures):
bind 0.0.0.0/0
Implementing Password Authentication
For enhanced security, configure a password for client connections. Set the requirepass parameter in /etc/redis.conf:
# Set Redis password
requirepass yourpassword
Clients will need this password to connect, receiving an error message without it:
(error) NOAUTH Authentication required.
Successful authentication will display:
OK
Configuring Redis as a Cache
To use Redis as a cache, choose an eviction policy that defines how Redis removes old data for new data. The main policies include:
- LRU (Least Recently Used): Removes data not recently accessed.
- LFU (Least Frequently Used): Removes least frequently accessed data.
Set the eviction policy in /etc/redis.conf:
# Set Redis eviction policy to LRU
maxmemory-policy LRU
Restarting Redis to Apply Changes
After making changes, restart Redis to apply them:
sudo systemctl restart redis-serverThese configurations ensure optimal operation and security for Redis on AlmaLinux. For further customization, consult the official Redis documentation.
Install Redis on AlmaLinux
Redis, a versatile in-memory data structure store, is widely used for caching, session management, and real-time applications. The following sections cover the installation and configuration of Redis and its libraries for PHP, Python, and Perl on AlmaLinux.
Setting up PHP Libraries for Redis
Installing PHP Libraries for Redis
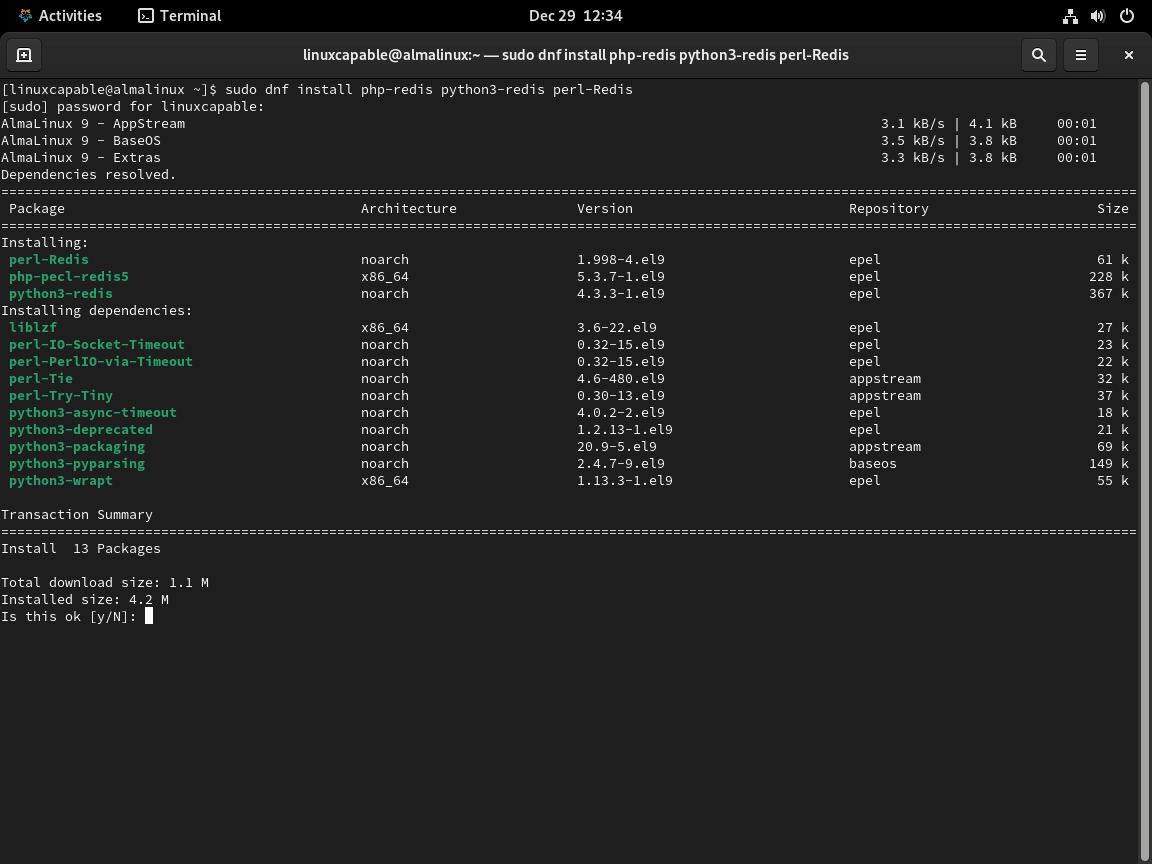
To enable Redis functionality in PHP applications, install the Redis PHP extension:
sudo dnf install php-redisExecuting this command installs the PHP extension for Redis, facilitating communication between PHP applications and the Redis server.
Configuring PHP to Use Redis
After installing the PHP Redis extension, modify the PHP configuration to use Redis for session handling. Add the following lines to your php.ini file:
session.save_handler = redis
session.save_path = "tcp://localhost:6379"
These settings direct PHP to use Redis for managing session data.
Integrating Redis with Python Applications
Installing Python Library for Redis
For Python applications, the redis-py library is essential. Install it using:
sudo dnf install python3-redisThis command installs the Python client for Redis, enabling Python applications to interact with Redis.
Enabling Redis in Perl Applications
Installing Perl Library for Redis
To integrate Redis with Perl, install the Redis.pm module:
sudo dnf install perl-RedisThis installation allows Perl applications to utilize Redis for various functionalities.
Create a Dedicated Redis Zone in Firewalld on AlmaLinux
Establishing a Dedicated Redis Zone
For enhanced security and control, create a dedicated zone in Firewalld specifically for Redis. This approach isolates Redis traffic, allowing for finer control over access and rules.
Creating the Zone
First, create a new zone named ‘redis-zone’:
firewall-cmd --permanent --new-zone=redis-zoneAdding Redis Service to the Zone
After creating the zone, add the Redis service to it:
firewall-cmd --permanent --zone=redis-zone --add-service=redisManaging IP Restrictions in the Redis Zone
Enhance security by managing which IP addresses can access Redis.
Allowing a Specific IP Address
To allow a single IP address access to the Redis zone:
firewall-cmd --permanent --zone=redis-zone --add-source=192.168.1.100
Allowing a Range of IP Addresses
For allowing a range of IP addresses:
firewall-cmd --permanent --zone=redis-zone --add-source=192.168.1.0/24Handling Port Access in the Redis Zone
If Redis is configured to use a non-standard port, or for additional port control:
Opening a Custom Port
To open a specific port (e.g., 6380) in the Redis zone:
firewall-cmd --permanent --zone=redis-zone --add-port=6380/tcpApplying and Verifying the Configuration
After configuring the rules, reload Firewalld to apply changes:
firewall-cmd --reloadVerify the rules in the Redis zone:
firewall-cmd --list-all --zone=redis-zoneTroubleshooting SELinux Issues with Redis on AlmaLinux
Understanding SELinux and Redis Interactions
SELinux (Security-Enhanced Linux) is a security module in Linux distributions like AlmaLinux that can impact the functioning of services like Redis. When misconfigured, SELinux may restrict Redis operations, leading to issues like inability to start the service or access certain files.
Identifying SELinux-Related Issues
To determine if SELinux is causing issues with Redis:
Checking SELinux Status
First, check the current status of SELinux:
sestatusReviewing SELinux Logs
Inspect the SELinux logs for any Redis-related denials. The logs are usually located in /var/log/audit/audit.log.
grep redis /var/log/audit/audit.logAdjusting SELinux Policies for Redis
If SELinux is restricting Redis, modify the policies to accommodate Redis operations.
Allowing Redis Network Access
To permit Redis network operations under SELinux, adjust the policy using setsebool:
setsebool -P redis_enable_notify 1Configuring SELinux for Custom Redis Port
If Redis is configured on a non-standard port, create a new SELinux policy to allow traffic on that port. For example, for port 6380:
semanage port -a -t redis_port_t -p tcp 6380Dealing with File Context Issues
Redis may face issues accessing certain files due to SELinux file context restrictions.
Updating File Context
To update the SELinux context for Redis configuration files or directories:
semanage fcontext -a -t redis_etc_t "/path/to/redis/config(/.*)?"
restorecon -Rv /path/to/redis/config
Using Audit2allow for Custom Policy Modules
If specific SELinux denials are preventing Redis from functioning properly, use audit2allow to generate a custom policy module.
Generating and Applying a Custom Module
Create a custom SELinux module based on logged denials:
grep redis /var/log/audit/audit.log | audit2allow -M myredis
semodule -i myredis.pp
Verifying SELinux Configuration
After applying changes, ensure SELinux is correctly configured and not hindering Redis:
getsebool -a | grep redisFinal Thoughts
Well, that wraps up our journey through setting up and securing Redis on AlmaLinux! We’ve navigated through installation nuances, fine-tuned Firewalld for optimum safety, and even tackled those tricky SELinux hurdles. Remember, keeping your Redis server secure is as vital as getting it up and running. So, double-check those firewall settings, keep an eye on SELinux policies, and you’ll be set for a smooth Redis experience.
Just installed with your guide on AlmaLinux 9 and everything worked great with Remi repo. Thanks for the clear instructions.