
Python projects are easier to explore when code, charts, and notes live in the same browser tab. To install Jupyter Notebook on Ubuntu, the cleanest path on the current supported Ubuntu LTS releases is a dedicated virtual environment that keeps notebook packages out of the system Python stack.
The current Project Jupyter install page documents pip install notebook for the classic interface, and that works well on Ubuntu when paired with venv. You do not need a separate Ubuntu download package for this workflow because pip pulls Notebook directly from PyPI inside the environment. The current Notebook install also pulls in JupyterLab, so you can switch to the tabbed jupyter lab interface later without rebuilding the environment.
Install Jupyter Notebook on Ubuntu
Ubuntu’s repositories also ship a jupyter-notebook package, but it stays on the older 6.4.x line across the supported Ubuntu LTS releases. A virtual-environment install gives you the current Notebook 7.x experience on the same commands from Ubuntu 26.04 LTS (Resolute Raccoon), 24.04 LTS (Noble Numbat), and 22.04 LTS (Jammy Jellyfish).
These steps support Ubuntu 26.04 LTS (Resolute Raccoon), 24.04 LTS (Noble Numbat), and 22.04 LTS (Jammy Jellyfish). On Ubuntu 24.04 and 26.04, plain
pipinstalls outside a virtual environment fail witherror: externally-managed-environmentunder the Python packaging rule for externally managed environments, so thevenvworkflow is the cleanest path across the full supported scope.
Most readers should use the Python virtual environment method so the notebook stack stays current and isolated from Ubuntu’s system Python packages. If a minimal or customized Ubuntu install does not expose Universe yet, start with our guide to enable Universe and Multiverse on Ubuntu.
Update Ubuntu and install venv support for Jupyter Notebook
Refresh the package index first so the virtual-environment package comes from the latest Ubuntu repositories.
sudo apt update && sudo apt upgrade -yThese commands use
sudofor tasks that need root privileges. If your account does not have sudo access yet, follow our guide to add a new user to sudoers on Ubuntu before continuing.
Install virtual-environment support next. Standard desktop installs usually already have Python 3 available, but server and minimal images may need the venv package first. The venv package includes the wheel files needed to bootstrap pip inside the environment, so this workflow does not require installing system python3-pip. The -y flag auto-confirms the APT prompt so the command stays copy-ready.
sudo apt install python3-venv -yCreate a Jupyter Notebook virtual environment on Ubuntu
Create a dedicated virtual environment so Notebook packages stay separate from Ubuntu’s system Python.
python3 -m venv ~/jupyter-envIf you want a different location, replace ~/jupyter-env consistently in the remaining commands. For a deeper walkthrough, see our guide to create a Python virtual environment on Ubuntu.
source ~/jupyter-env/bin/activateOnce the environment is active, your shell prompt usually shows the environment name in parentheses.
Install Jupyter Notebook with pip on Ubuntu
Upgrade pip inside the active environment before installing Notebook.
python -m pip install --upgrade pipInstall the classic Jupyter Notebook interface in that same environment.
python -m pip install notebookVerify that Jupyter Notebook is available. Current Notebook 7.x environments on Ubuntu also expose the jupyter lab command, so checking both commands gives you a quick verification check.
jupyter notebook --version
jupyter lab --version
Relevant output includes:
7.x.x
4.x.x
The exact version numbers change as PyPI updates. The key check is that both commands return versions instead of
command not found.
Installing notebook from PyPI currently brings JupyterLab into the same environment. Use jupyter lab when you want the tabbed interface, or install jupyterlab separately only when you want Lab without the classic Notebook package.
Launch Jupyter Notebook from the Ubuntu terminal
Start a local Notebook session from the active virtual environment with the classic browser-launch command.
If you are coming from Windows instructions that mention cmd or Command Prompt, use an Ubuntu terminal after the environment is active; the launch command remains jupyter notebook.
jupyter notebookOn desktop Ubuntu, that usually opens the default browser automatically. On server or minimal installs, start a headless session instead.
jupyter notebook --no-browserRelevant output includes a local URL with a token:
http://127.0.0.1:8888/tree?token=<long-token>
Open that URL locally if you are on the same Ubuntu machine, or keep Jupyter bound to localhost and use SSH tunneling if the system is remote. If you prefer the tabbed interface, run jupyter lab from the same environment.
Configure Jupyter Notebook as a systemd service on Ubuntu
A systemd service is useful when Jupyter needs to stay available after reboots or when the Ubuntu host is used as a remote notebook server.
Create a notebook directory for the Jupyter service
Create a working directory for notebooks before pointing a service at it.
mkdir -p ~/notebooksIf you already keep notebooks somewhere else, use that path instead in both the service file and the launch commands.
Create the Jupyter systemd service on Ubuntu
Open a new unit file, then point it at the Jupyter environment you created earlier.
sudo nano /etc/systemd/system/jupyter.servicePaste the following configuration, then replace your_username with the Ubuntu account that owns the virtual environment.
[Unit]
Description=Jupyter Notebook Service
After=network.target

[Service]
Type=simple
User=your_username
WorkingDirectory=/home/your_username/notebooks
ExecStart=/home/your_username/jupyter-env/bin/jupyter notebook --no-browser --ServerApp.ip=127.0.0.1 --ServerApp.port=8888 --ServerApp.root_dir=/home/your_username/notebooks
Restart=on-failure
RestartSec=10

[Install]
WantedBy=multi-user.target
Keeping ServerApp.ip on 127.0.0.1 means Jupyter only listens on the local Ubuntu host. That is the safer default when you plan to reach it through SSH tunneling instead of exposing it directly on the network.
Reload systemd and start the Jupyter service on Ubuntu
Reload systemd so it sees the new unit, then enable the service and start it immediately.
sudo systemctl daemon-reload
sudo systemctl enable --now jupyter.service
Check the service state first.
sudo systemctl status --no-pager --lines=3 jupyter.serviceRelevant output includes:
● jupyter.service - Jupyter Notebook Service
     Loaded: loaded (/etc/systemd/system/jupyter.service; enabled)
     Active: active (running) since ...
Then confirm that Jupyter is actually listening on localhost.
sudo ss -lntp | grep ':8888'Relevant output includes:
LISTEN 0 128 127.0.0.1:8888 0.0.0.0:*
If you did not set a password yet, print the newest tokenized URL from the service log.
sudo journalctl -u jupyter.service -n 50 --no-pager | grep -Eo 'http://127.0.0.1:8888/[^ ]+' | tail -n 1The grep -Eo filter keeps only the local URL from the newest log lines. If you want to adjust that pattern for a different port or another log source, our grep command guide has more examples. If you want a fixed login instead of a fresh token after each restart, activate the environment as the same user and run jupyter notebook password before you rely on the service long term.
Access Jupyter Notebook on Ubuntu through SSH tunneling
SSH tunneling keeps Jupyter bound to localhost while still letting you open it from a browser on your own machine. If the Ubuntu host still needs an SSH server, start with our guide to install SSH on Ubuntu. For more port-forwarding patterns, our SSH command guide is a useful companion.
Create the SSH tunnel from your local machine
Run the tunnel command on the local machine where your browser lives.
ssh -L 8888:localhost:8888 your_server_username@your_server_ipReplace the username and IP address with the Ubuntu account and remote host you actually use. If port 8888 is busy on your local machine, change the first 8888 to another free local port.
Start or reuse the Jupyter Notebook server on Ubuntu
Skip this step if the systemd service is already running. Otherwise activate the environment on the remote Ubuntu host and start a temporary headless session.
source ~/jupyter-env/bin/activate
jupyter notebook --no-browser
Once the tunnel is open, browse to http://localhost:8888 on your local machine and sign in with the token or password for that server. If you changed the local side of the tunnel, use that local port instead.
Explore the Jupyter Notebook interface on Ubuntu
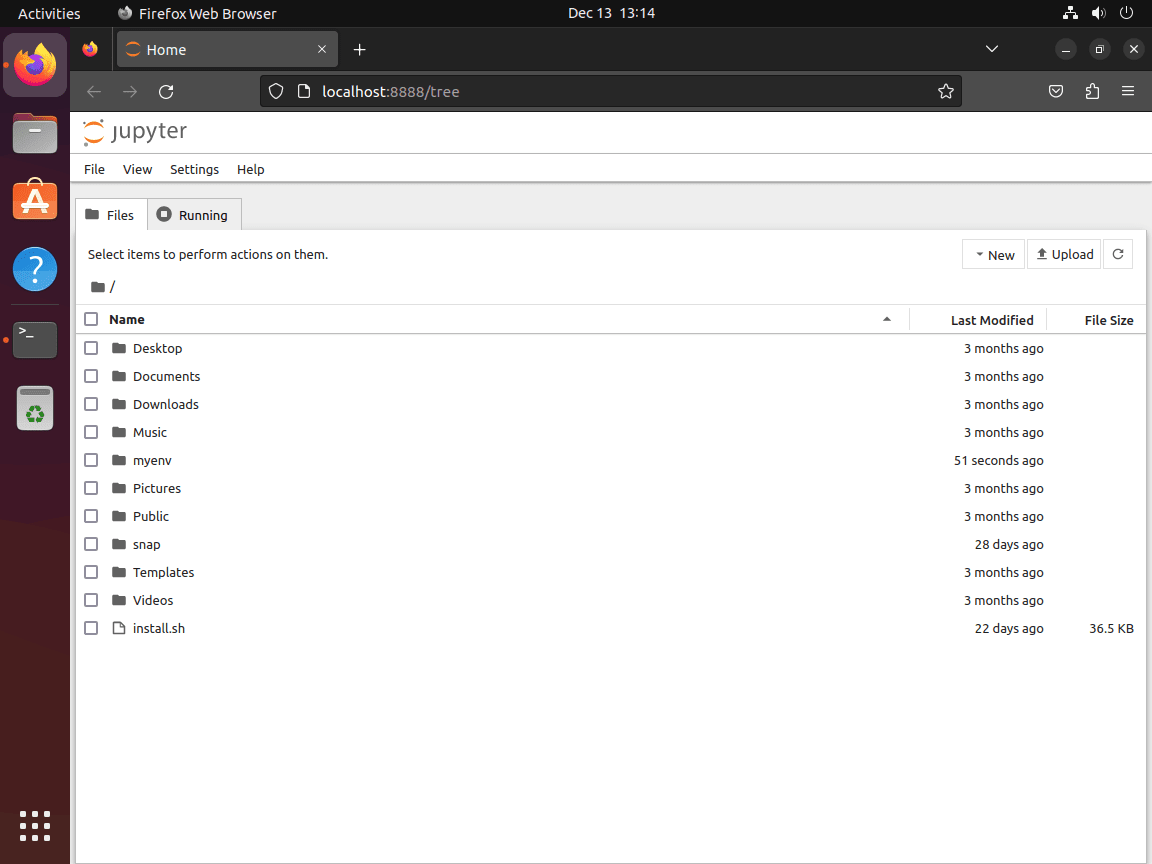
Navigate the Jupyter Notebook file browser on Ubuntu
The first screen shows the file browser for the directory where Jupyter started. From there you can open existing notebooks, upload datasets, or create a new notebook in the same project folder.
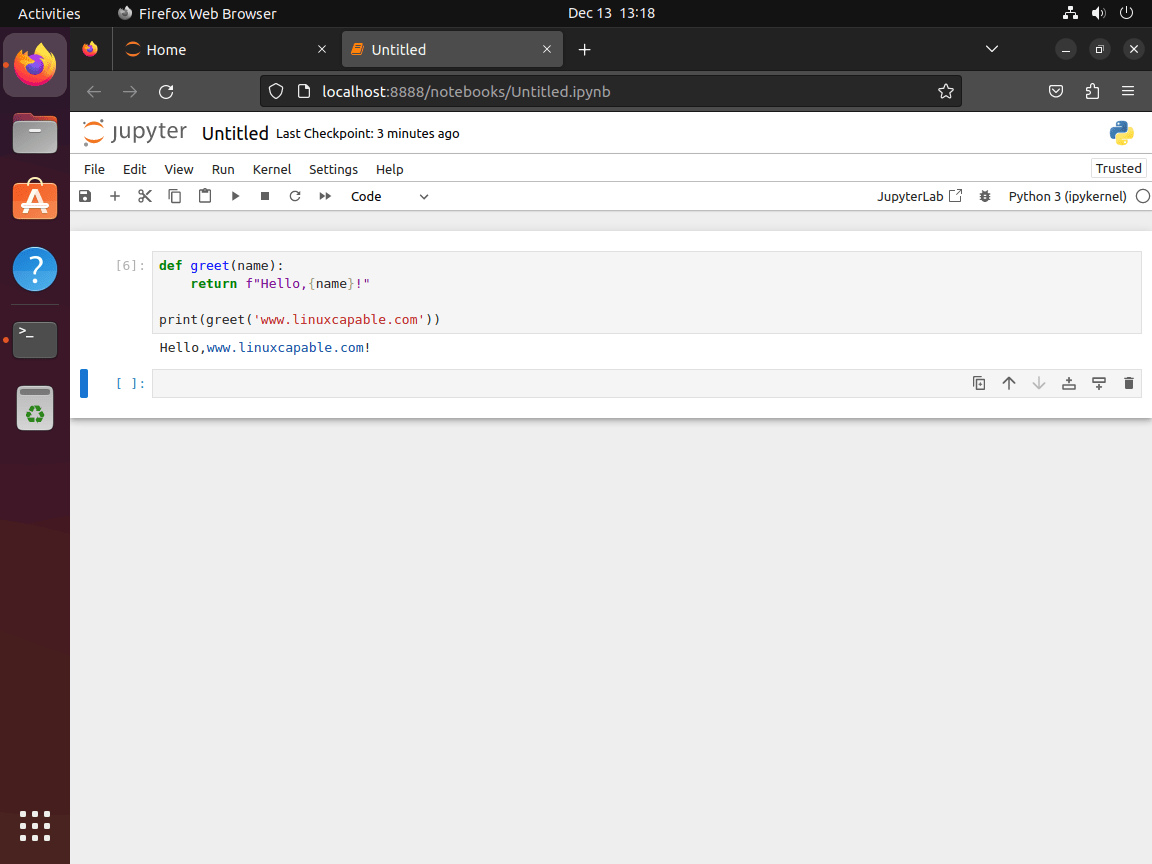
Run Python code in a Jupyter Notebook cell on Ubuntu
Create a new Python notebook, add a cell, and run a simple test snippet to confirm the kernel is working.
def greet(name):
    return f"Hello, {name}!"

print(greet("Ubuntu"))
If the cell runs successfully, the notebook kernel is connected and ready for normal Python work.
Troubleshoot Jupyter Notebook issues on Ubuntu
Fix the externally-managed-environment error on Ubuntu 24.04 and 26.04
If pip shows the message below, you are trying to install Notebook against Ubuntu’s system Python instead of the virtual environment.
error: externally-managed-environment

× This environment is externally managed
Ubuntu 24.04 and 26.04 enforce externally managed environment protection for the distro-managed Python installation, so plain pip installs fail by design. Create and activate a virtual environment, then install Notebook inside it.
python3 -m venv ~/jupyter-env
source ~/jupyter-env/bin/activate
python -m pip install notebook
Verify the fix with a version check from the active environment.
jupyter notebook --versionRelevant output includes:
7.x.x
Fix jupyter: command not found on Ubuntu
If the shell cannot find jupyter, the virtual environment is usually inactive or the shell is not using the environment’s bin directory.
bash: jupyter: command not found
Check whether the active shell can resolve the command and whether the virtual environment still contains the Jupyter launcher.
command -v jupyter
ls -l ~/jupyter-env/bin/jupyter
No output from command -v means the current shell is not using the virtual environment. Activate it again, or launch the binary directly for a one-off session.
source ~/jupyter-env/bin/activate
jupyter notebook
If you do not want to activate the environment in the current shell, run ~/jupyter-env/bin/jupyter notebook directly.
Fix a port already in use message in Jupyter Notebook
Current Notebook builds usually move to the next free port instead of stopping outright. The log message looks like this:
The port 8888 is already in use, trying another port.
If you want Jupyter to stay on a specific port, start it with a different value from the beginning.
jupyter notebook --no-browser --ServerApp.port=8899To see which process already owns port 8888, check the active listener on the Ubuntu host.
sudo ss -lntp | grep ':8888'Relevant output includes:
LISTEN 0 128 127.0.0.1:8888 0.0.0.0:*
If you change the notebook port, update your SSH tunnel and browser URL to match it.
Remove Jupyter Notebook from Ubuntu
A dedicated virtual environment makes removal straightforward because the Jupyter stack lives in one self-contained directory.
Remove the dedicated Jupyter virtual environment on Ubuntu
The next command permanently deletes the virtual environment and every Python package installed inside it. It does not remove notebooks stored elsewhere, such as
~/notebooksor another working directory you chose.
If the environment is active in your current shell, leave it first.
deactivateThen remove the directory that contains the Jupyter install.
rm -rf ~/jupyter-envRemove the Jupyter systemd service on Ubuntu
If you created a systemd unit for Jupyter, disable it, remove the file, and reload systemd.
sudo systemctl disable --now jupyter.service
sudo rm /etc/systemd/system/jupyter.service
sudo systemctl daemon-reload
Verify that systemd no longer sees the unit.
systemctl status jupyter.serviceExpected output:
Unit jupyter.service could not be found.
Clean up Jupyter settings and runtime files on Ubuntu
Jupyter creates per-user state outside the virtual environment after you launch it. Check what exists in your account before deleting anything.
find "$HOME" -maxdepth 3 \( -path "$HOME/.jupyter" -o -path "$HOME/.local/share/jupyter" -o -path "$HOME/.ipython" \)The next commands remove Jupyter settings, runtime files, and IPython history for your account. Delete these directories only if you no longer need that local state.
rm -rf ~/.jupyter
rm -rf ~/.local/share/jupyter
rm -rf ~/.ipython
If the earlier find command prints nothing after cleanup, there is no Jupyter state left in those standard paths. Remove your notebook directory separately only if you also want to delete saved notebooks and exported files.
Conclusion
Jupyter Notebook is ready on Ubuntu in its own virtual environment, with the newer Notebook 7.x workflow available on Ubuntu 26.04, 24.04, and 22.04. If you plan to reach it remotely, pair it with our guide to install SSH on Ubuntu. If the host still uses a shared admin account, clean that up first and add a new user to sudoers on Ubuntu.

Formatting tips for your comment
You can use basic HTML to format your comment. Useful tags currently allowed in published comments:
<code>command</code>command<strong>bold</strong><em>italic</em><a href="https://example.com">link</a><blockquote>quote</blockquote>