
Historical imagery, 3D terrain, and GIS imports still make Google Earth Pro useful when a browser map is not enough. You can install Google Earth on Ubuntu with Google’s official APT repository or a Flatpak build from Flathub, and the current package now works on Ubuntu 26.04, 24.04, and 22.04.
For most systems, Google’s repository is the cleaner path because Google Earth is not in Ubuntu’s default repositories and the repo delivers the newest official Linux build with APT-managed updates. Google still publishes a direct .deb download, but it installs the same package and is harder to keep tidy than the repository method. Flatpak is the Flathub alternative if you already use that store, with matching launch, update, removal, and minimal-install repair steps included here.
Install Google Earth on Ubuntu
Two practical installation paths are available for Google Earth Pro, depending on whether you want Google’s newest Linux package or a Flathub-packaged desktop build. Google does not publish an official Launchpad PPA for Google Earth on Ubuntu.
| Method | Source | Channel | Updates | Best Fit |
|---|---|---|---|---|
| Google APT repository | Google Earth Pro downloads | Official Linux package, amd64 | APT-managed package updates | Newest vendor package with clean APT source management |
| Flatpak | Flathub | Community-maintained stable build | sudo flatpak update | Flathub users who accept non-Google packaging |
Google’s direct google-earth-pro-stable_current_amd64.deb download resolves to the same google-earth-pro-stable package, so treat it as an official package-file fallback rather than a separate long-term update method.
These commands target Ubuntu 26.04 LTS, 24.04 LTS, and 22.04 LTS on
amd64systems. Google’s current APT package and the Flathub build both install on the supported Ubuntu LTS releases, so the olderlibxml2dependency problem no longer blocks Ubuntu 26.04.
Update Ubuntu Before Installing Google Earth
Refresh your package lists first so Google Earth installs against current system libraries and package metadata.
sudo apt update
sudo apt upgrade -y
These commands use
sudofor tasks that need root privileges. If your user is not in the sudoers file yet, see how to add a sudo user on Ubuntu.
Install Google Earth from Google’s APT Repository
The APT method gives you Google’s newest official Linux package. The package name is google-earth-pro-stable, while the launcher command and desktop menu entry use google-earth-pro and Google Earth Pro.
Install the packages needed for secure downloads, key handling, and desktop menu integration:
sudo apt install ca-certificates curl gpg xdg-utils -yThe -y flag accepts the package prompt automatically. This installs certificate handling for HTTPS downloads, the curl command for fetching the key, gpg for APT signature verification, and xdg-utils for the desktop launcher helpers Google Earth expects on minimal Ubuntu installs. Standard Ubuntu desktop systems usually already have those helper commands, but minimal or server-style images often do not.
Import Google’s signing key into a dedicated APT keyring:
curl -fsSL https://dl.google.com/linux/linux_signing_key.pub | sudo gpg --dearmor --yes -o /usr/share/keyrings/google-earth.gpgThe -fsSL flags tell curl to fail on HTTP errors, stay quiet unless something breaks, and follow redirects. The --dearmor flag converts the downloaded key into the binary format APT expects.
Create a DEB822 source file for the Google Earth repository:
printf '%s\n' \
'Types: deb' \
'URIs: https://dl.google.com/linux/earth/deb/' \
'Suites: stable' \
'Components: main' \
'Architectures: amd64' \
'Signed-By: /usr/share/keyrings/google-earth.gpg' | sudo tee /etc/apt/sources.list.d/google-earth.sources > /dev/null
The sudo tee part matters because plain > redirection does not inherit sudo. This writes the repository file with root privileges while keeping the source definition readable in one block.
Google Earth’s Debian package includes a helper that can recreate an older one-line APT source and legacy trusted key. Disable that helper before installation so the DEB822 source above stays authoritative:
printf '%s\n' 'repo_add_once="false"' 'repo_reenable_on_distupgrade="false"' | sudo tee /etc/default/google-earth-pro > /dev/null
sudo rm -f /etc/apt/sources.list.d/google-earth-pro.list /etc/apt/trusted.gpg.d/google-earth-pro.gpg
Refresh APT and confirm Ubuntu can see the Google Earth package:
sudo apt update
apt-cache policy google-earth-pro-stable
google-earth-pro-stable:
Installed: (none)
Candidate: 7.3.7.1155-r0
Version table:
7.3.7.1155-r0 500
500 https://dl.google.com/linux/earth/deb stable/main amd64 Packages
Install Google Earth Pro once the repository check shows the package candidate. On minimal systems, the package may need libglu1-mesa from Ubuntu’s Universe component; if APT reports that dependency has no installation candidate, enable Universe on Ubuntu and rerun sudo apt update.
sudo apt install google-earth-pro-stable -yVerify the installed package version with dpkg-query:
dpkg-query -W -f='${binary:Package} ${Version}\n' google-earth-pro-stablegoogle-earth-pro-stable 7.3.7.1155-r0
Google updates this package in place, so your installed version may be newer than the example shown here.
Install Google Earth with Flatpak on Ubuntu
Flathub provides a Google Earth Pro build that works across the supported Ubuntu LTS releases after Flatpak is installed. The current manifest runs the app with network, X11, audio, GPU, and Downloads-folder access, and Flathub marks the package as unverified rather than Google-supported.
Flatpak is not installed by default on Ubuntu. If you need it first, see how to install Flatpak on Ubuntu.
Add the Flathub remote at system scope and keep the command idempotent with --if-not-exists:
sudo flatpak remote-add --if-not-exists flathub https://dl.flathub.org/repo/flathub.flatpakrepoInstall the Google Earth Pro Flatpak from Flathub:
sudo flatpak install flathub com.google.EarthPro -yFlatpak will pull the required runtime automatically during the first install. Confirm the app ID, branch, and version after installation:
flatpak info com.google.EarthProGoogle Earth Pro - 3D planet viewer
ID: com.google.EarthPro
Ref: app/com.google.EarthPro/x86_64/stable
Arch: x86_64
Branch: stable
Version: 7.3.6
License: LicenseRef-proprietary
Origin: flathub
Collection: org.flathub.Stable
Installation: system
The Flathub build can lag behind Google’s repository, so use the APT method when the newest official Linux release matters more than Flathub packaging.
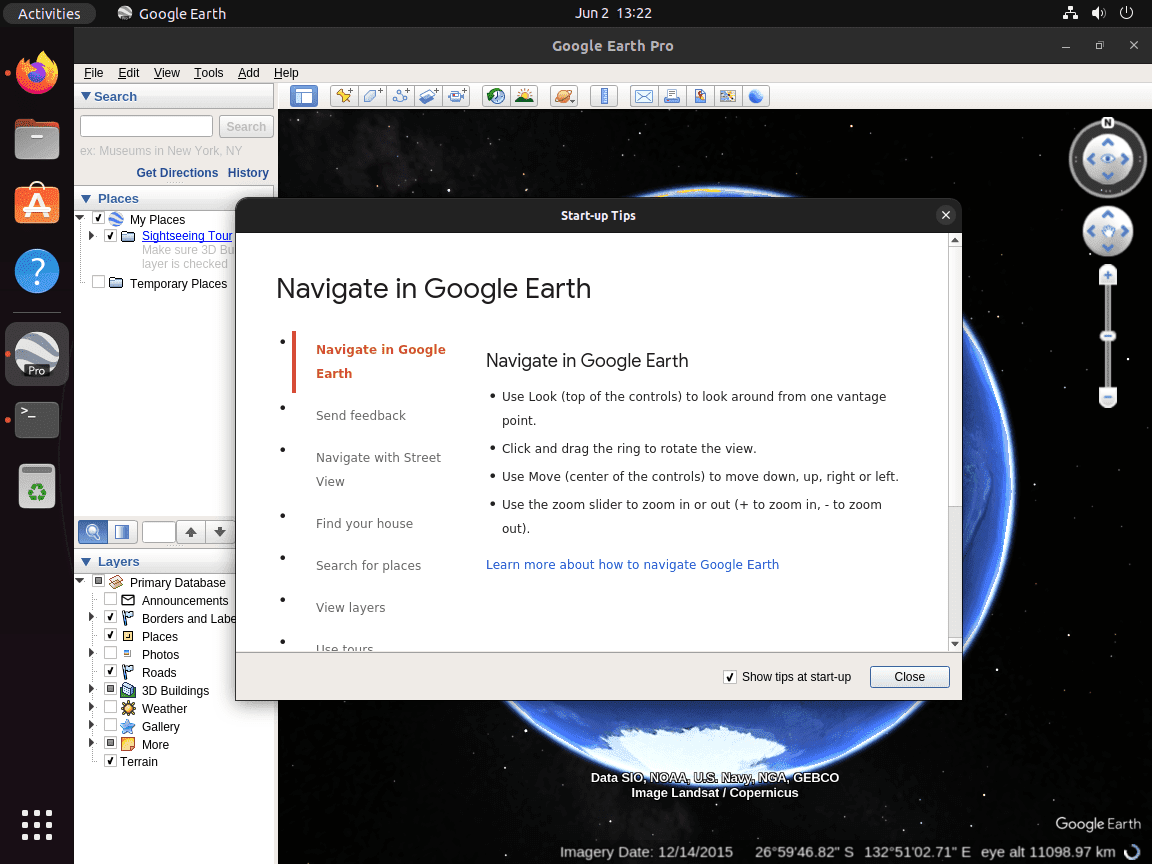
Launch Google Earth on Ubuntu
Google Earth Pro can be launched from the terminal or from Ubuntu’s application menu, depending on which package format you installed.
Launch the APT Build of Google Earth
The Google repository installs this standard desktop launcher command:
google-earth-proLaunch the Flatpak Build of Google Earth
The Flathub package runs through the Flatpak runtime, so use the application ID:
flatpak run com.google.EarthProOpen Google Earth from the Ubuntu Applications Menu
Open the Activities overview, search for Google Earth Pro, and select the launcher from the application results. Both the APT build and the Flatpak build register a desktop launcher with that name.
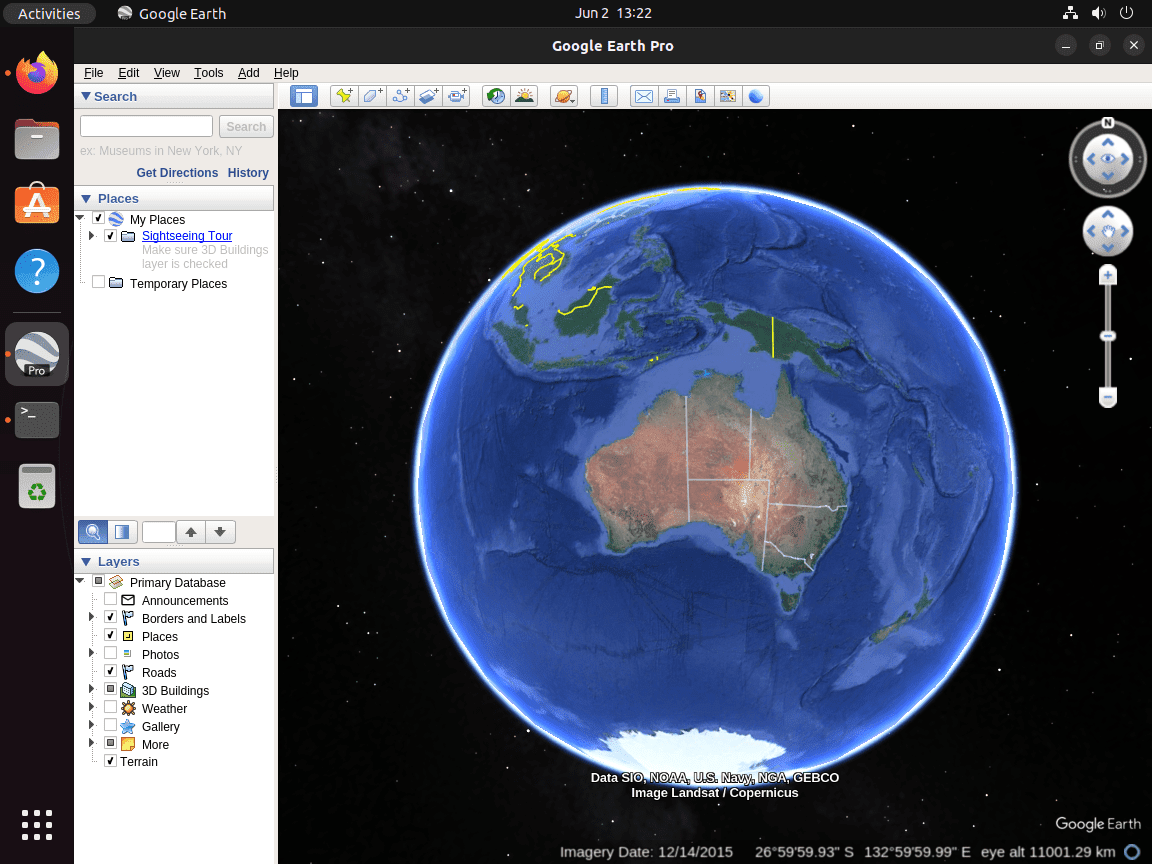
Get Started with Google Earth Pro on Ubuntu
Once Google Earth opens, a few built-in tools are worth checking right away if you want more than a quick globe view. Google Earth Pro does not need a paid Pro license key, so the Linux desktop build is ready to use after installation.
Explore Historical Imagery in Google Earth Pro
Historical imagery is still one of Google Earth’s best desktop features. Open the clock icon on the toolbar to move through older satellite captures and compare how cities, coastlines, or landmarks changed over time.
Import GIS Data into Google Earth Pro
Google Earth Pro can import KML, KMZ, CSV, and other mapped datasets, which makes it useful for site planning, field work, travel research, or classroom projects that need more context than a browser tab gives you.
Tune Google Earth Pro Performance on Ubuntu
If navigation feels heavy on older hardware, trim the rendering load before you assume the package install went wrong.
- Lower texture quality and disable extra layer effects if zooming and panning feel sluggish.
- Turn off 3D buildings in dense city views when you want faster redraws on integrated graphics.
- Keep only the layers you actually need enabled so Google Earth is not redrawing unnecessary overlays.
Update or Remove Google Earth on Ubuntu
Google Earth updates differently depending on whether you installed the official APT package or the Flathub build.
Update Google Earth from Google’s APT Repository
Refresh APT metadata, then upgrade only the Google Earth package:
sudo apt update
sudo apt install --only-upgrade google-earth-pro-stable -y
Re-run dpkg-query -W -f='${binary:Package} ${Version}\n' google-earth-pro-stable if you want to confirm the new package version after the upgrade.
Update Google Earth Flatpak
Update the Flathub build through Flatpak’s system scope:
sudo flatpak update com.google.EarthPro -yRe-run flatpak info com.google.EarthPro afterward if you want to confirm the updated Flatpak version and origin.
Remove the APT Build of Google Earth
Remove the Google Earth package first:
sudo apt remove google-earth-pro-stable -yPreview leftover dependencies before removing them. Continue only when the preview lists packages you no longer need:
sudo apt autoremove --dry-runRemove the previewed dependencies only after checking that list:
sudo apt autoremoveDelete the Google Earth source files, package defaults, and signing keys, then refresh APT:
sudo rm -f /etc/apt/sources.list.d/google-earth.sources /etc/apt/sources.list.d/google-earth-pro.list
sudo rm -f /usr/share/keyrings/google-earth.gpg /etc/apt/trusted.gpg.d/google-earth-pro.gpg
sudo rm -f /etc/default/google-earth-pro
sudo apt update
Verify that the package, launcher, and repository files are gone. The grep command filters for an installed ii package state, and the policy output should show no live Google source; relevant output includes:
hash -r
dpkg-query -W -f='${db:Status-Abbrev} ${binary:Package}\n' google-earth-pro-stable 2>/dev/null | grep '^ii' || echo google-earth-pro-stable not installed
command -v google-earth-pro || echo google-earth-pro not found
apt-cache policy google-earth-pro-stable
ls /etc/apt/sources.list.d/google-earth* /usr/share/keyrings/google-earth.gpg /etc/apt/trusted.gpg.d/google-earth-pro.gpg /etc/default/google-earth-pro 2>/dev/null || echo Google Earth repo files removed
google-earth-pro-stable not installed google-earth-pro not found google-earth-pro-stable: Installed: (none) Candidate: (none) Google Earth repo files removed
If you also want to remove saved places, cached imagery, and crash logs from the APT build, delete
~/.googleearthafter backing up anything you want to keep.
Remove the Flatpak Build of Google Earth
Remove the Flatpak app itself, then clear any runtimes that no installed Flatpak app still needs:
sudo flatpak remove com.google.EarthPro -y
sudo flatpak uninstall --unused -y
Confirm that Flatpak no longer sees the app:
flatpak info com.google.EarthProerror: com.google.EarthPro/*unspecified*/*unspecified* not installed
If you launched the Flatpak build and want to remove its app data too, delete
~/.var/app/com.google.EarthPro/after backing up anything you want to keep.
Troubleshoot Google Earth on Ubuntu
Most install problems now come from stripped-down Ubuntu images or leftovers from older Google Earth setup methods, not from the current package itself.
Fix xdg-utils Errors When Installing Google Earth on Ubuntu
Minimal Ubuntu installs can miss the desktop helper commands Google Earth’s post-install script expects. When that happens, package configuration usually stops with one of these errors:
Error: Could not find xdg-icon-resource
Error: Could not find xdg-desktop-menu
Install the missing desktop helper package, then finish the interrupted package configuration:
sudo apt install xdg-utils -y
sudo dpkg --configure -a
Clean Up Legacy Google Earth Source Files on Ubuntu
If you used an older guide or Google’s direct .deb download before switching to a DEB822 source file, you may still have a leftover google-earth-pro.list entry in /etc/apt/sources.list.d/ or a legacy key under /etc/apt/trusted.gpg.d/. Remove those files, keep the package helper disabled, and refresh APT:
printf '%s\n' 'repo_add_once="false"' 'repo_reenable_on_distupgrade="false"' | sudo tee /etc/default/google-earth-pro > /dev/null
sudo rm -f /etc/apt/sources.list.d/google-earth-pro.list /etc/apt/trusted.gpg.d/google-earth-pro.gpg
sudo apt update
If apt update finishes cleanly afterward, the legacy Google Earth source entry is no longer interfering with your DEB822 configuration.
Conclusion
Google Earth Pro is ready on Ubuntu through Google’s APT repository or the Flathub build, with launch, update, and cleanup commands matching the package source you chose. Use Google Earth Web when you only need browser access, or install Flatpak on Ubuntu first if you want more desktop apps through Flathub.

2 December 2025. Hi. Trying the same thing on Ubuntu 25.10 (the new Questing Quokka).
First I downloaded from Google website google-earth-pro-stable_current_amd64.deb
Tried opening the deb with App Center which failed to install (without error messages)
So I tried the steps here from top of the page including Troubleshooting then the comments above
At sudo apt install google-earth-pro-stable -y
“Solving dependencies… Error!
Some packages could not be installed. This may mean that you have
requested an impossible situation or if you are using the unstable
distribution that some required packages have not yet been created
or been moved out of Incoming.
The following information may help to resolve the situation:
Unsatisfied dependencies:
google-earth-pro-stable : Depends: libglu1-mesa but it is not going to be installed
Depends: libxml2 but it is not installable
Error: Unable to satisfy dependencies. Reached two conflicting decisions:
1. google-earth-pro-stable:amd64=7.3.6.10441-r0 is selected for install
2. google-earth-pro-stable:amd64 Depends libxml2
but none of the choices are installable:
[no choices]”
Then at sudo apt install libxml2 libxml-dev -y
“Package libxml2 is not available, but is referred to by another package.
This may mean that the package is missing, has been obsoleted, or
is only available from another source
Error: Package ‘libxml2’ has no installation candidate”
However find usr/lib did find two instances of libxml2.so* on this (brand new, nearly empty) Ubuntu 25.10
/usr/lib/x86_64-linux-gnu/libxml2.so.16
/usr/lib/x86_64-linux-gnu/libxml2.so.16.0.5
Matthew, thanks for the detailed error report. You’ve identified a real compatibility issue that affects Ubuntu 25.10 and newer releases.
Ubuntu 25.10 transitioned from
libxml2(providing libxml2.so.2) tolibxml2-16(providing libxml2.so.16). Google Earth Pro explicitly depends on the olderlibxml2package, which no longer exists in Ubuntu 25.10’s repositories. This is an ABI-breaking change that Google would need to address by rebuilding their package.Unfortunately, there’s no repository workaround for this. The
libxml2-16package cannot satisfy dependencies requiringlibxml2. Your options are to run Ubuntu 24.04 LTS or 22.04 LTS where Google Earth installs without issues, or use a virtual machine running a compatible Ubuntu version.I’ve updated the article with a compatibility warning at the top noting this limitation. Thanks for helping document this issue for other readers on newer Ubuntu releases.
You’re welcome. Thankyou Joshua for guiding us.
I lack accounts for the google/maps&earth developers’ site, so wrote a prompt for Google here:
https://support.google.com/earth/thread/391925027?hl=en&sjid=10638705475203542168-EU
placing a question mark (let’s see what AI does with that! ; ). Not insisting, just asking them.
Thanks for the update.
There is a reply at Google’s site.
how TF do I fix a libxml2 issue? earth needs it and I can’t find it and can’t get the terminal to install it
Scott, thanks for reporting this. The libxml2 dependency error typically indicates you’re running Ubuntu 25.10 or a newer development release. Could you confirm your Ubuntu version by running
lsb_release -a?Ubuntu 25.10 replaced the
libxml2package withlibxml2-16, breaking compatibility with Google Earth Pro. If you’re on 25.10, the only current solutions are using Ubuntu 24.04 LTS or 22.04 LTS, or running Google Earth in a VM with a compatible Ubuntu version.If you’re on Ubuntu 24.04 or 22.04 and still seeing this error, let me know and we can troubleshoot further.
Hi, Should be able to get working by copying the necessary library file across and updating any paths.
Thanks for raising this, WhiteBear. Manually copying old library files to work around the libxml2 dependency is not a safe solution. As PH 7174 correctly noted in that Google support thread, copying old libraries to newer Debian-based systems can cause system instability or subtle runtime crashes.
The
libxml2tolibxml2-16transition is an ABI-breaking change that affects the shared library version system-wide. Mixing library versions can cause unpredictable behavior in any application that links against libxml2, not just Google Earth.Google needs to rebuild their .deb package against the newer library. Until they do, the only reliable options are staying on Ubuntu 22.04 or 24.04 LTS, using a virtual machine, or using Google Earth Web in your browser. The article recommends these approaches specifically because they avoid the risks of manual library hacks.