LXDE, short for Lightweight X11 Desktop Environment, offers a fast and energy-efficient desktop experience. This guide will demonstrate how to install LXDE on Fedora Linux, ensuring you can leverage its benefits effectively. The process is straightforward, catering to both new and experienced users.
Key Features of LXDE:
- Lightweight & Fast: Consumes less CPU and RAM, enhancing overall performance.
- User-Friendly Interface: Offers an intuitive and easy-to-navigate design.
- Customizable: Allows users to tailor the desktop environment to their preferences.
- Compatibility: Works well with older hardware without compromising efficiency.
- Energy-Efficient: Reduces power consumption, ideal for laptops and eco-friendly computing.
Now, let’s dive into the installation process on Fedora Linux. This setup enhances your computing experience by combining LXDE’s lightweight nature with Fedora’s advanced features. The installation includes a few simple steps, ensuring a smooth transition for your system to LXDE.
Install LXDE on Fedora Linux via DNF
Step 1: Update Fedora Packages Before LXDE Installation
Updating your Fedora system is a crucial first step before installing new packages. This process ensures that your system has the latest security patches and system improvements, reducing vulnerabilities and enhancing stability.
Open your terminal and execute:
sudo dnf upgrade --refreshAfter entering your password, the system will search for updates and install them. The duration of this process depends on the number of updates and your internet speed.
Step 2: Verify LXDE Availability and Packages
It’s essential to confirm that LXDE is available for your Fedora workstation and to understand the included packages. This step helps you evaluate if LXDE meets your specific computing requirements.
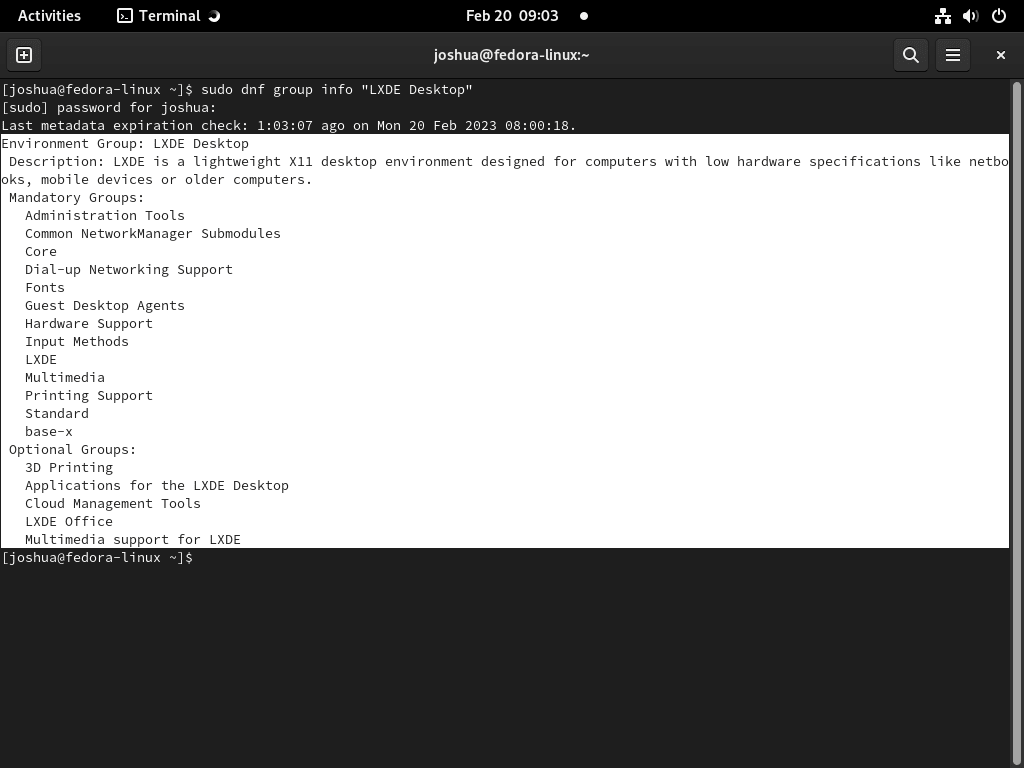
To check LXDE’s availability and its package contents, enter this command in your terminal:
sudo dnf group info "LXDE Desktop"This command lists all packages in the LXDE group, aiding you in assessing whether LXDE provides the necessary applications and utilities for your needs.
Step 3: Install LXDE on Fedora via DNF Command
Having confirmed the availability of LXDE and its packages, you can now proceed with the installation.
To install LXDE, open the terminal and type:
sudo dnf group install "LXDE Desktop"This will download and install LXDE along with all required packages and dependencies. A system restart is necessary post-installation to activate LXDE.
For additional features like LXDE Office and Multimedia support, use:
sudo dnf group install "LXDE Desktop" "LXDE Office" "Multimedia support for LXDE"This command installs LXDE, along with the Office and Multimedia support groups. Before installing these optional packages, review their contents to ensure they align with your needs.
Step 4: Restart Your Computer
To finalize the LXDE installation, a system restart is necessary. This ensures that the new desktop environment is initiated correctly.
For a restart, click on the “Activities” menu, select the power icon, and choose “Restart”. Alternatively, use the terminal command:
sudo rebootThis command promptly restarts your system, applying the recent changes efficiently.
Logging in to LXDE Desktop Environment
Step 1: Verify LXDE as Default Environment
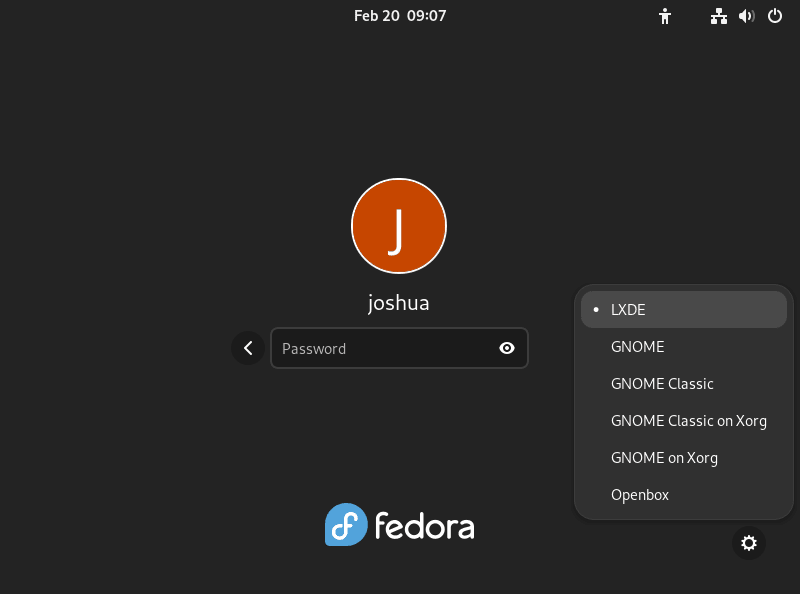
Upon restarting and reaching the login screen, confirming LXDE as your default desktop environment is crucial. This ensures access to LXDE’s full range of functionalities and features.
Look for a configuration icon next to the sign-in button. It may appear as a gear or vertical dots. Click this icon, then select “LXDE” from the drop-down menu. Fedora might set another environment as the default, so this verification step is important.
Step 2: Log in to LXDE
After setting LXDE as the default, proceed to log in. Enter your username and password, and click the sign-in button. This action will launch the LXDE desktop environment.
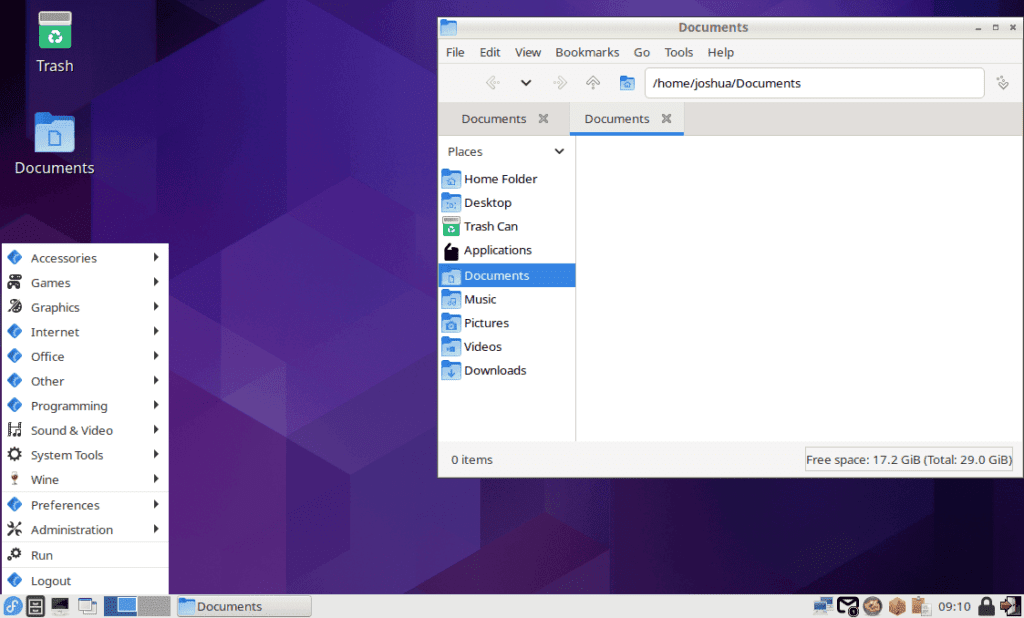
You will now see the LXDE desktop, ready for personalization and exploration. This environment is known for its efficiency and lightweight operation, making it ideal for various computing tasks.
First-Time Tips with the LXDE on Fedora Linux
This section will discuss tips and tricks to help you get the most out of the LXDE desktop environment on Fedora Linux. These tips will cover general usage, customization, and other essential aspects of the LXDE experience.
General LXDE Tips with Fedora
- Access the LXDE main menu: Right-click anywhere on the desktop to access the main menu. From here, you can launch applications, access settings, and manage your system.
- Manage open windows: Use the taskbar at the bottom of the screen to manage your open windows, switch between applications, and access the system tray.
- Open a terminal: Press
Ctrl+Alt+Tto quickly open a terminal window. You can use the terminal to execute commands, manage files, and perform various tasks.
LXDE Customization Tips with Fedora
- Change the desktop wallpaper: Right-click on the desktop, then select “Desktop Preferences” to access the wallpaper settings. Here, you can choose a new wallpaper and adjust other desktop appearance settings.
- Customize the panel: Right-click on the panel, then select “Panel Settings” to access the panel configuration options. You can change the panel’s size, position, and appearance, and add or remove applets.
- Configure application shortcuts: Right-click on the desktop, then select “Create Launcher” to create a new application shortcut. You can customize the launcher’s icon, name, and command.
- Adjust system settings: Click on the “Preferences” category in the main menu to access various system settings. Here, you can configure keyboard and mouse settings, display settings, and more.
Managing LXDE on Fedora Linux
Remove LXDE from Fedora
To uninstall LXDE from your Fedora system, use the command-line terminal. This process involves a few simple steps to remove LXDE and its associated packages.
Uninstall LXDE
Execute the following command to remove the LXDE desktop environment:
sudo dnf group remove "LXDE Desktop"Remove Additional LXDE Packages
If you have installed extra LXDE packages, such as LXDE Office or Multimedia support groups, use this command to remove them:
sudo dnf group remove "LXDE Office" "Multimedia support for LXDE"Clean Up Leftover Files and Dependencies
Post-uninstallation, it’s advisable to clean up any residual files and dependencies. Run this command for a thorough cleanup:
sudo dnf autoremoveThis command will eliminate any remaining dependencies and files associated with the LXDE desktop environment. Do not forget to reboot your system afterward.
Conclusion
To wrap up, we’ve navigated through the simple yet effective process of installing, managing, and, if necessary, removing the LXDE desktop environment on Fedora Linux. This guide aims to enhance your Fedora experience with LXDE’s lightweight and flexible nature, ensuring you can personalize and optimize your desktop to suit your needs. Remember, LXDE is ideal for those seeking efficiency without sacrificing functionality, and with these steps, you’re well-equipped to make the most of this versatile environment.


