Vivaldi Browser, renowned for its adaptability and user-focused design, stands out in the digital world where web browsers are more than just tools; they’re gateways to vast online landscapes. This guide will demonstrate the process of how to install Vivaldi Browser on Linux Mint 21 or 20, a task crucial for many tech enthusiasts and professionals. Vivaldi’s unique features make it a top choice for those seeking a browser that meets and anticipates their needs.
Key Features of Vivaldi Browser:
- Customizable Interface: Tailor the browser’s appearance to your preferences.
- Tab Management: Enhanced control over tabs for efficient browsing.
- Privacy and Security: Strong focus on protecting user data.
- Web Panels: Access websites in a side panel while browsing.
- Mouse Gestures and Keyboard Shortcuts: Streamlined navigation for efficiency.
- Ad and Tracker Blocking: Built-in tools for a smoother, safer online experience.
Transitioning to the technical aspect of installing Vivaldi on Linux Mint, it’s essential to understand the role of a browser like Vivaldi in augmenting your online experience. With its rich set of features, Vivaldi not only enhances productivity but also aligns with modern web users’ security and personalization needs.
The forthcoming steps will guide you through the installation process, ensuring you harness the full potential of Vivaldi on your Linux Mint system.
Install Vivaldi Browser on Linux Mint 21 or 20 via APT
Step 1: Update Linux Mint Before Vivaldi Browser Installation
Before starting the installation process, it is crucial to update your system to ensure all existing packages are up to date. This step minimizes the chances of conflicts during the Vivaldi installation. To update your Linux Mint system, open your terminal and run the following command:
sudo apt update && sudo apt upgradeStep 2: Install Required Packages
Some software packages are necessary to complete the Vivaldi installation. To install these packages, enter the following command in your terminal:
sudo apt install dirmngr ca-certificates software-properties-common apt-transport-https curl -yDon’t worry if you are unsure about these packages; running the command will not harm your system. These packages are common and found on nearly all Linux distributions.
Step 3: Import Vivaldi GPG Key
The next step is to download the GPG key, which ensures the authenticity of the packages you are downloading and installing. This security measure helps protect your system from unverified or malicious software. To import the GPG key, execute the following command in your terminal:
curl -fsSL https://repo.vivaldi.com/archive/linux_signing_key.pub | gpg --dearmor | sudo tee /usr/share/keyrings/vivaldi.gpg > /dev/nullStep 4: Import Vivaldi APT Repository
Finally, you need to add the Vivaldi repository to your system. This repository contains the necessary files and packages for the Vivaldi browser.
To add the repository, run the following command in your terminal:
echo deb [arch=amd64,armhf signed-by=/usr/share/keyrings/vivaldi.gpg] https://repo.vivaldi.com/stable/deb/ stable main | sudo tee /etc/apt/sources.list.d/vivaldi.listThis command adds the repository and ensures that your system will recognize and trust the packages provided by the Vivaldi developers.
Step 5: Update the Repository List
Refresh your repository list to ensure your system recognizes the new Vivaldi repository. Run the following command in your terminal:
sudo apt updateStep 6: Choose and Install Vivaldi Browser Version
You can install either the stable version or the snapshot (nightly) version of the Vivaldi Browser. Note that you can install both versions together if desired.
Install Vivaldi Browser Stable
To install the stable version of Vivaldi, run the following command in your terminal:
sudo apt install vivaldi-stableTo confirm the version and build of the Vivaldi Browser installed on your system, execute the following command:
vivaldi --versionOptional – Install Vivaldi Snapshot (Nightly)
If you’re interested in testing Vivaldi’s development version, run the following command to install the Vivaldi Snapshot:
sudo apt install vivaldi-snapshotTo confirm the version and build of the Vivaldi Snapshot installed on your system, run the following command:
vivaldi-snapshot --versionUsing the stable version of Vivaldi for daily browsing and any sensitive tasks or transactions is recommended. The development version (Snapshot) is primarily intended for testing and may not be as stable or secure.
Install Vivaldi on Linux Mint 21 or 20 via Flatpak and Flathub
Step 1: Verify Flatpak Installation on Linux Mint
Before installing Vivaldi, confirming that Flatpak is available on your Linux Mint system is important. Flatpak is usually pre-installed, but it’s wise to check its presence, mainly if recent changes to your system have occurred.
Execute the command below to verify the installation of Flatpak:
flatpak --versionStep 2: Add the Flathub Repository For Vivaldi Installation
Vivaldi Browser, a versatile and customizable web browser, is available through Flathub. Adding Flathub to your system expands your access to a wide range of Flatpak applications.
To integrate Flathub, use the following command:
sudo flatpak remote-add --if-not-exists flathub https://flathub.org/repo/flathub.flatpakrepo
This command adds the Flathub repository to your system, essential for installing many modern applications, including Vivaldi Browser.
Step 3: Install Vivaldi via Flatpak
Now that Flatpak and Flathub are set up, you can install Vivaldi Browser. Use the following command to install Vivaldi:
flatpak install flathub com.vivaldi.Vivaldi -yThis command will install Vivaldi Browser on your Linux Mint system, offering a rich browsing experience with extensive customization options.
Launch Vivaldi Browser on Linux Mint 21 or 20
CLI Commands to Launch Vivaldi
For users comfortable with the terminal, launching Vivaldi Browser can be achieved with a simple command. This method provides a quick and efficient way to access the browser without navigating through the graphical user interface.
To open Vivaldi Browser via the terminal, execute:
vivaldiIn case you installed Vivaldi using Flatpak, the command differs slightly. Use the following to launch the browser:
flatpak run com.vivaldi.VivaldiGUI Method to Launch Vivaldi
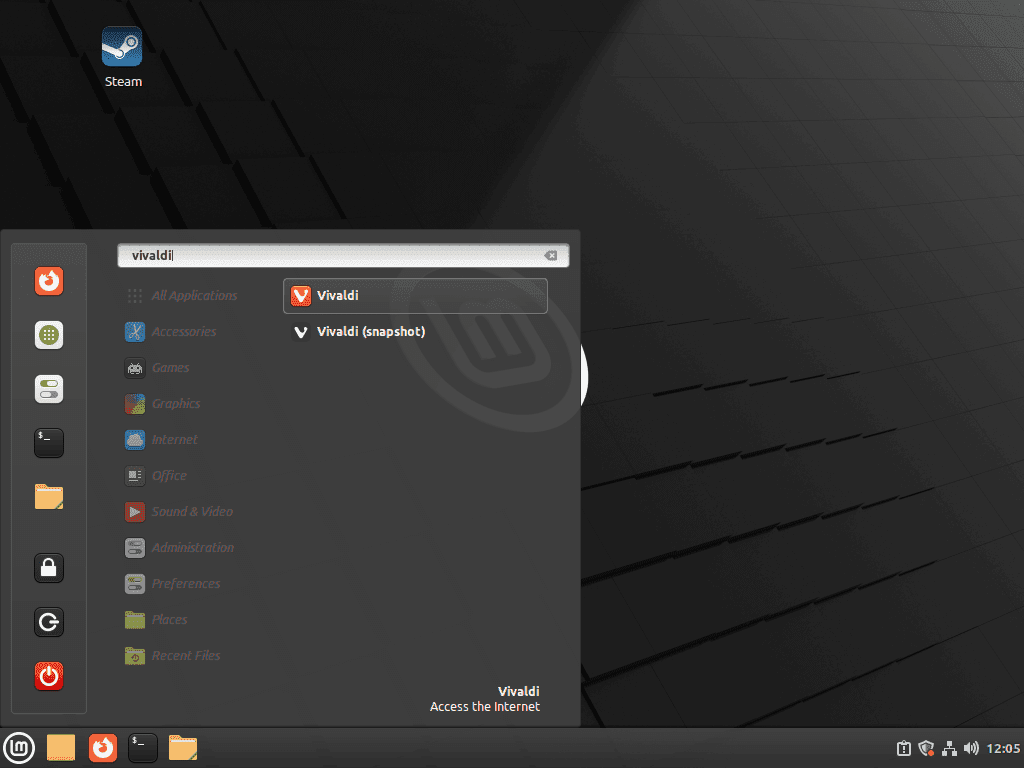
For users who prefer a graphical approach, Vivaldi can be easily accessed through the Linux Mint menu. This method is straightforward and well-suited for those who are not as familiar with command-line operations.
To open Vivaldi using the GUI:
- Navigate to the taskbar.
- Click on ‘Internet’.
- Select ‘Vivaldi’.
Tips on Getting Started with Vivaldi on Linux Mint 21 or 20
In this section, we’ll walk you through some essential tips and customizations to help you get the most out of your Vivaldi Browser experience on Linux Mint.
Customize Vivaldi Appearance on Linux Mint
Vivaldi offers extensive customization options, allowing you to tailor the browser to your preferences.
To access these settings, follow the steps below:
- Open Vivaldi Browser
- Click on the Vivaldi menu (the red “V” icon in the top-left corner)
- Select Settings
- Choose Appearance from the left sidebar
From here, you can adjust various aspects of the browser’s appearance, such as:
- Themes: Choose from pre-installed themes or create your own custom theme with unique colors and background images.
- Window appearance: Modify the window background color, adjust the size and style of tabs, and toggle the visibility of the bookmarks bar.
- Fonts and zoom: Configure default font styles and sizes and the default page zoom level.
Manage Vivaldi Bookmarks Efficiently on Linux Mint
Organizing your bookmarks is an essential part of an efficient browsing experience. Vivaldi provides a powerful bookmark manager to help you keep track of your favorite websites.
To access the bookmark manager:
- Click the Bookmarks icon in the left sidebar (or press Ctrl+Shift+B)
- Use the + button to add new bookmarks or folders
- Drag and drop bookmarks to organize them into folders or rearrange them as desired
Utilize Vivaldi Tab Management Features on Linux Mint
Vivaldi offers several unique tab management features that can improve your productivity.
Some of these features include:
- Tab Stacking: Group similar tabs together by dragging one tab onto another, creating a tab stack. This feature helps declutter your tab bar and makes it easier to switch between related tabs.
- Tab Tiling: View multiple tabs side by side within the same window. Right-click on a tab stack and select Tile Tab Stack to activate this feature.
- Tab Cycling: Quickly navigate through your open tabs using Ctrl+Tab or Ctrl+Shift+Tab.
Take Advantage of Vivaldi’s Web Panels on Linux Mint
Web Panels are a unique Vivaldi feature that allows you to display websites in a sidebar, making it easy to access your favorite sites or tools without switching tabs.
To add a Web Panel:
- Click the + button at the bottom of the left sidebar
- Enter the URL of the website you want to add
- Click the Add Web Panel button
Explore Vivaldi’s Built-in Privacy Features on Linux Mint
Vivaldi Browser has several built-in privacy features that help protect your data and online activities.
To access these settings:
- Open the Vivaldi menu
- Select Settings
- Choose Privacy from the left sidebar
Here, you can enable or disable various privacy features, such as:
- Tracker and ad blocker: Block ads and tracking scripts to enhance your privacy and browsing speed.
- Cookie management: Control how cookies are stored and used by websites you visit.
- Do Not Track: Send a “Do Not Track” request to websites, asking them not to track your browsing activities.
Managing Vivaldi on Linux Mint 21 or 20
Update Vivaldi Browser on Linux Mint
APT Vivaldi Installations Update Commands
When Vivaldi is installed via APT, checking and applying updates periodically is crucial. This ensures that you have the latest features and security patches.
To search for available updates, execute:
sudo apt updateIf an update for Vivaldi is available, upgrade it using:
sudo apt upgradeFlatpak Vivaldi Installations Update Command
For those who have installed Vivaldi through Flatpak, updating is a streamlined process encompassing all Flatpak applications.
To update Vivaldi along with other Flatpak applications, use:
flatpak updateRemove Vivaldi Browser From Linux Mint
APT Vivaldi Installations Remove Commands
Should you need to uninstall Vivaldi installed via APT, the command varies based on your installed version. Use one of the following commands based on your Vivaldi version:
sudo apt remove vivaldi-stablesudo apt remove vivaldi-snapshotRemove Vivaldi Repository and GPG Key
In scenarios where discontinuing the use of Vivaldi Browser or its repository is desired, the following command will remove the Vivaldi repository and its GPG key from your system:
sudo rm /etc/apt/sources.list.d/vivaldi.list /usr/share/keyrings/vivaldi.gpgFlatpak Vivaldi Installations Remove Command
For users who have installed Vivaldi via Flatpak, uninstallation is a straightforward process. Execute the following command to remove Vivaldi:
flatpak uninstall com.vivaldi.VivaldiConclusion: Installing Vivaldi Browser on Linux Mint
Wrapping up, this guide walked you through the essentials of managing Vivaldi Browser on Linux Mint 21 or 20, covering installation, updates, and removal. We navigated the process using both APT and Flatpak methods, ensuring you’re equipped with the know-how to keep Vivaldi up-to-date or uninstall it if needed. As a final tip, remember to regularly check for updates to maintain optimal performance and security for your browsing experience.


