A spare Linux Mint machine can become a private Jellyfin media server for movies, TV, music, photos, and live TV without a subscription account controlling access. The official Jellyfin APT repository is the cleanest way to install Jellyfin on Linux Mint because it provides the server packages, bundled Jellyfin FFmpeg build, systemd service, and future updates through APT.
Jellyfin is not part of Linux Mint’s default repositories. Linux Mint 22.x uses the Ubuntu 24.04 base, while Linux Mint 21.x uses the Ubuntu 22.04 base, so the repository source must use the Ubuntu suite name instead of the Mint codename.
Install Jellyfin Media Server on Linux Mint
The supported path here is Jellyfin’s official stable APT repository. It keeps package ownership simple: APT installs jellyfin, pulls the service and web packages, and keeps Jellyfin updated with the rest of the system.
Install Jellyfin from the Official Repository
Start with a package-index refresh, add Jellyfin’s signing key and source file, then install the metapackage. Manual repository setup keeps the source and key paths visible for later cleanup instead of hiding those changes inside the upstream helper script.
Prepare Linux Mint for Jellyfin
Refresh APT first so the base package metadata is current before you add the external repository.
sudo apt updateIf this Mint system uses a standard desktop account,
sudoasks for your own password instead of a separate root password. If you still need to grant administrator rights to another account, see create and add users to sudoers on Linux Mint.
Install the certificate, download, and key-management tools used by the repository setup.
sudo apt install ca-certificates curl gpgUse this Mint-to-Ubuntu mapping when you choose the source block.
| Linux Mint release | Ubuntu base | Jellyfin suite |
|---|---|---|
| Linux Mint 22.x | Ubuntu 24.04 LTS | noble |
| Linux Mint 21.x | Ubuntu 22.04 LTS | jammy |
Add Jellyfin Repository
Download Jellyfin’s signing key, convert it to a binary keyring, and install that keyring under /usr/share/keyrings/. This matches the source file used later and avoids placing the key in global APT trust.
curl -fsSLo jellyfin_team.gpg.key https://repo.jellyfin.org/jellyfin_team.gpg.key
gpg --dearmor --yes -o jellyfin.gpg jellyfin_team.gpg.key
sudo install -m 0644 jellyfin.gpg /usr/share/keyrings/jellyfin.gpg
rm -f jellyfin_team.gpg.key jellyfin.gpg
Write the DEB822 source file for the Linux Mint series you use. Do not replace noble with zena, xia, or another Mint codename; Jellyfin’s Ubuntu repository expects the Ubuntu base suite.
Linux Mint 22.x:
printf '%s\n' \
'Types: deb' \
'URIs: https://repo.jellyfin.org/ubuntu' \
'Suites: noble' \
'Components: main' \
'Architectures: amd64' \
'Signed-By: /usr/share/keyrings/jellyfin.gpg' \
| sudo tee /etc/apt/sources.list.d/jellyfin.sources > /dev/null
Linux Mint 21.x:
printf '%s\n' \
'Types: deb' \
'URIs: https://repo.jellyfin.org/ubuntu' \
'Suites: jammy' \
'Components: main' \
'Architectures: amd64' \
'Signed-By: /usr/share/keyrings/jellyfin.gpg' \
| sudo tee /etc/apt/sources.list.d/jellyfin.sources > /dev/null
Jellyfin also publishes unstable builds, but the stable
maincomponent is the right default for a normal Linux Mint media server. Use unstable only for testing and only after backing up the server data.
Refresh APT so Linux Mint can read the new Jellyfin repository metadata.
sudo apt updateRelevant output includes one of these Jellyfin repository lines.
Linux Mint 22.x:
Get:8 https://repo.jellyfin.org/ubuntu noble InRelease [10.6 kB]
Linux Mint 21.x:
Get:8 https://repo.jellyfin.org/ubuntu jammy InRelease [10.6 kB]
Check the package candidate before installing. This confirms that APT is selecting Jellyfin from the repository you just added.
apt-cache policy jellyfinLinux Mint 22.x:
jellyfin:
  Installed: (none)
  Candidate: 10.11.10+ubu2404
  Version table:
     10.11.10+ubu2404 500
        500 https://repo.jellyfin.org/ubuntu noble/main amd64 Packages
Linux Mint 21.x:
jellyfin:
  Installed: (none)
  Candidate: 10.11.10+ubu2204
  Version table:
     10.11.10+ubu2204 500
        500 https://repo.jellyfin.org/ubuntu jammy/main amd64 Packages
Install Jellyfin Package
Install the metapackage from Jellyfin’s repository.
sudo apt install jellyfinOn current Linux Mint systems, the install pulls in jellyfin-server, jellyfin-web, and jellyfin-ffmpeg7. Linux Mint 22.x also pulls libjemalloc2 on a clean install. After APT finishes, verify the service and local web endpoint.
systemctl is-enabled jellyfin
systemctl is-active jellyfin
curl -fsSI http://127.0.0.1:8096 | sed -n '1p;/^Server:/p;/^Location:/p'
enabled active HTTP/1.1 302 Found Server: Kestrel Location: web/
The redirect to web/ confirms that Jellyfin is listening on the default HTTP port. The first start can take a short time while Jellyfin creates its initial data directory, so rerun the HTTP check if the service is already active but the browser is not ready yet.
Finish Jellyfin Setup on Linux Mint
The package starts the server, but the initial Jellyfin setup still happens in the browser. Work through the wizard once, then use the dashboard for libraries, users, plugins, scheduled tasks, remote access, and backups.
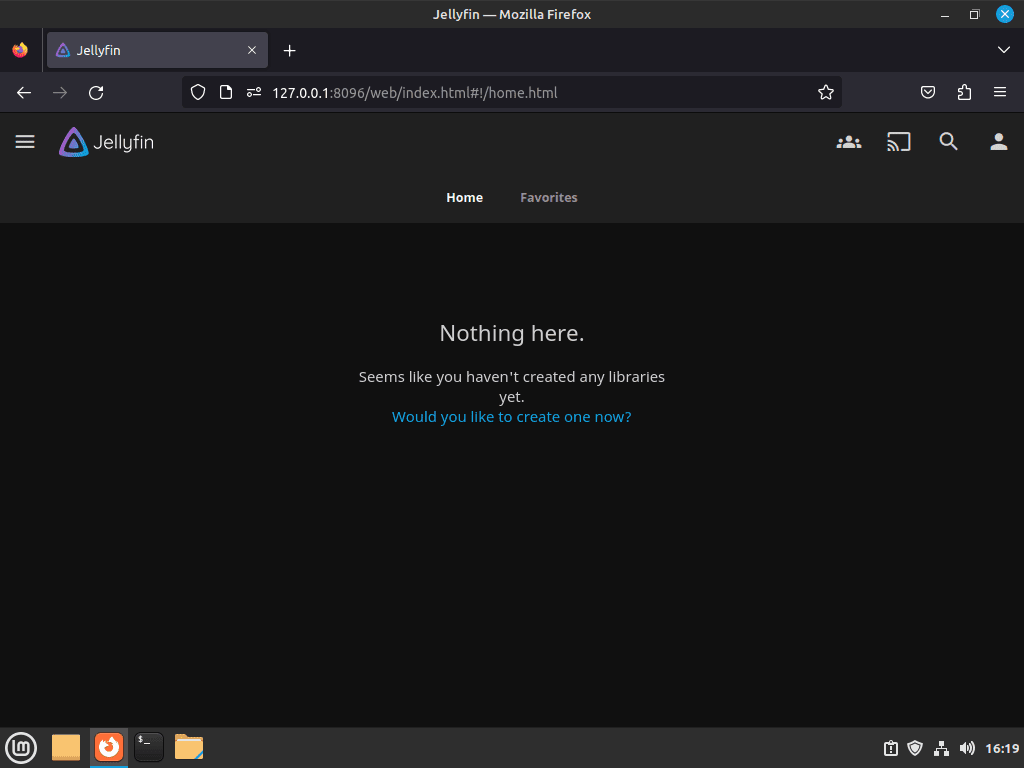
Open Jellyfin Web Interface
Open http://127.0.0.1:8096 on the same Linux Mint machine. From another computer on the same LAN, replace 127.0.0.1 with the Mint server’s LAN address, such as http://192.168.1.50:8096.

Create Jellyfin Administrator Account
The next screen creates the first administrator account. That account controls libraries, users, plugins, networking, transcoding, backups, and every other server-wide option.
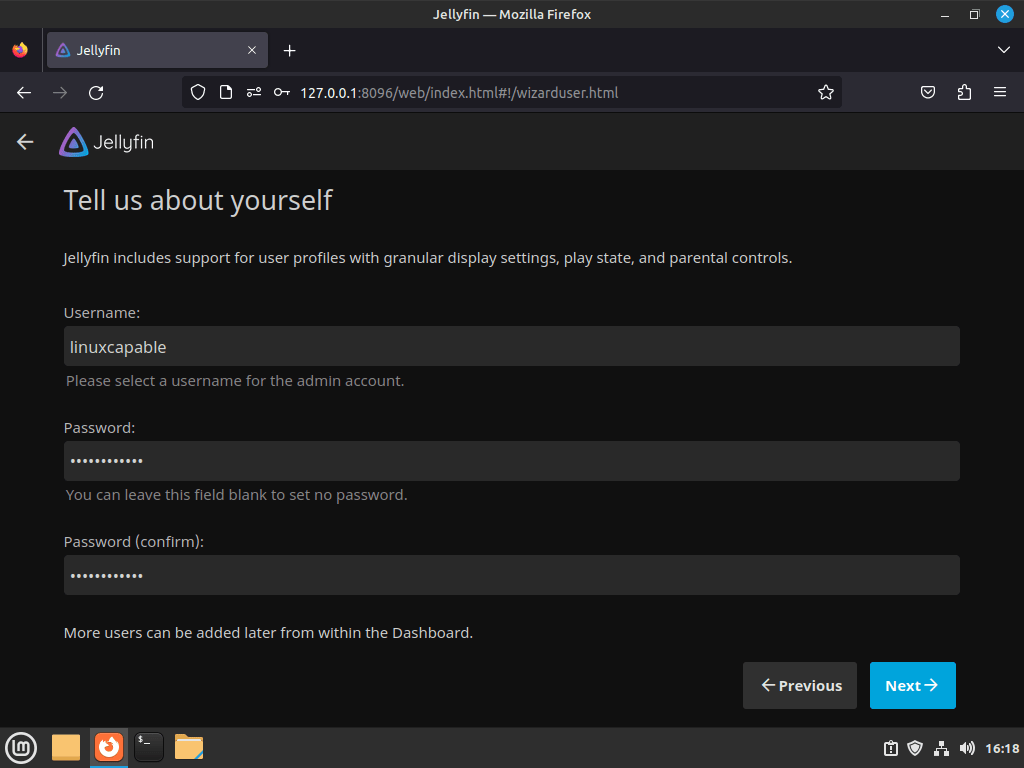
Use a strong password here, especially if the server will ever be reachable outside your home network.
Add Jellyfin Libraries
Jellyfin asks for the first media library during the initial wizard. Add movies, TV shows, music, photos, or mixed content now, then add more libraries later from the dashboard.
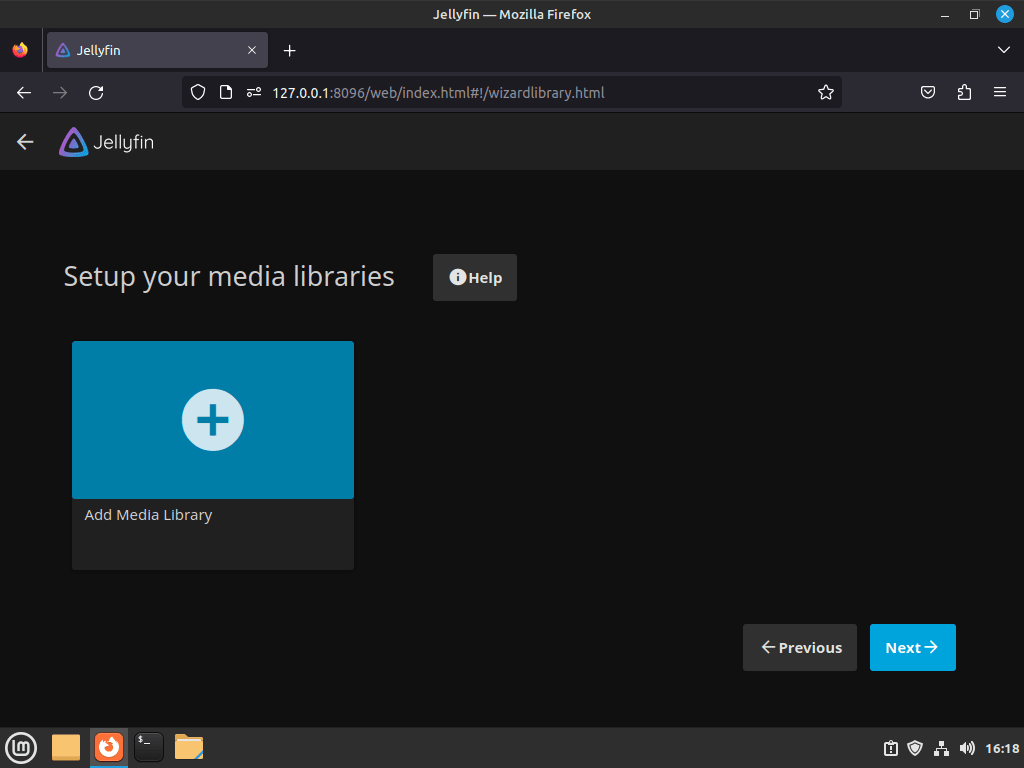
- Pick the library type, such as movies, television, music, photos, or mixed content.
- Browse to the folder that stores that media.
- Choose the metadata language and country that match the library.
- Let Jellyfin scan the folder and build the initial catalog.
If the media lives on another disk or mount point and the scan comes back empty, grant the jellyfin user access to that path first and then rescan the library from the dashboard.
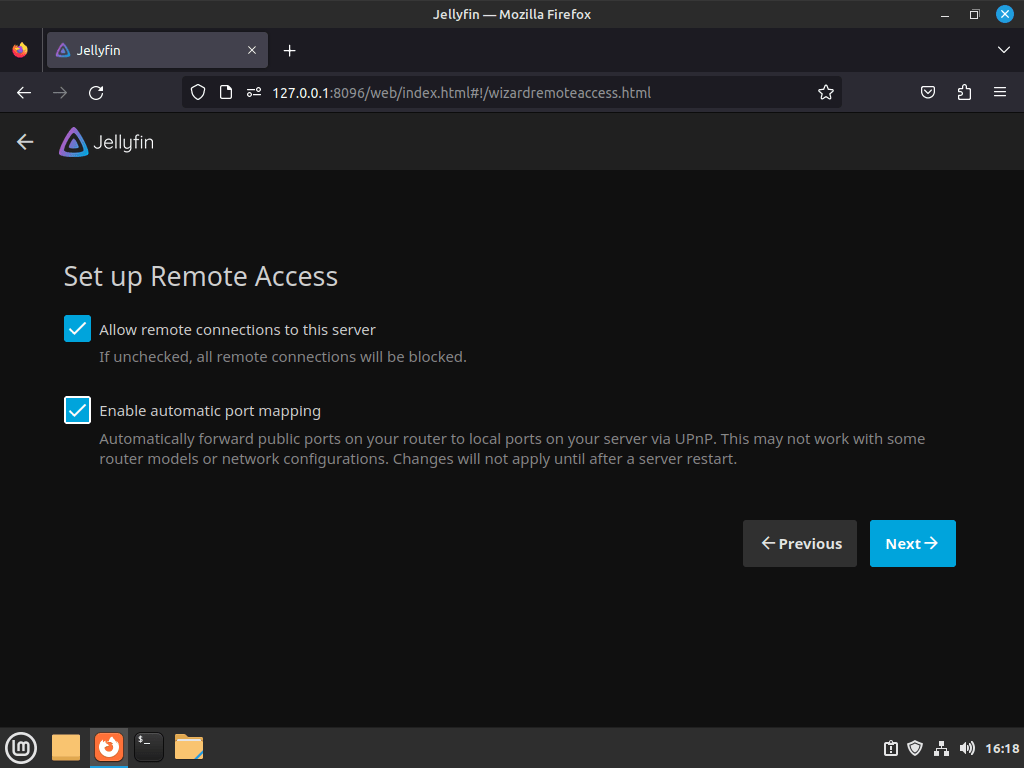
Review Jellyfin Remote Access Options
The setup wizard asks whether Jellyfin should accept remote connections. Leave this disabled for local-only playback, or enable it when you already plan to reach Jellyfin from other devices on the LAN or through a reverse proxy.
Review Jellyfin Dashboard
After the wizard finishes, sign in and open the main dashboard. From there, you can add more libraries, open Dashboard -> Plugins -> Catalog, rescan metadata, create users, and review scheduled tasks.
Configure Jellyfin Access on Linux Mint
Jellyfin works immediately from the local browser, but media-folder permissions and network access decide whether other devices can use the server cleanly.
Check Jellyfin Ports and Paths
Jellyfin’s default web interface listens on 8096/tcp. If you enable Jellyfin’s HTTPS listener later, the default HTTPS port is 8920/tcp. Local client discovery uses 7359/udp, while DLNA discovery uses 1900/udp after the DLNA plugin is installed.
For the APT packages used here, configuration lives under /etc/jellyfin/, server data under /var/lib/jellyfin/, cache files under /var/cache/jellyfin/, and logs under /var/log/jellyfin/. The main network settings file is /etc/jellyfin/network.xml, but use the dashboard first when a setting exists there.
sudo ss -ltn | grep ':8096'
ls -ld /etc/jellyfin /var/lib/jellyfin /var/cache/jellyfin /var/log/jellyfin
LISTEN 0 512 0.0.0.0:8096 0.0.0.0:* drwxr-x--- 2 jellyfin adm 4096 May 28 11:48 /etc/jellyfin drwxr-x--- 8 jellyfin adm 4096 May 28 11:48 /var/lib/jellyfin drwxr-x--- 3 jellyfin adm 4096 May 28 11:48 /var/cache/jellyfin drwxr-x--- 2 jellyfin adm 4096 May 28 11:48 /var/log/jellyfin
Grant Jellyfin Access to Media Folders
The service runs as the dedicated jellyfin user. If your libraries live under another account, a mounted drive, or a custom path such as /srv/media, grant that service account read and traverse access before you add the folder in Jellyfin.
This ACL example keeps the directory owner unchanged. Replace /srv/media with the directory that actually stores your media. For more ACL examples, see setfacl command examples.
sudo apt install acl
sudo setfacl -m u:jellyfin:rx /srv/media
getfacl /srv/media | grep '^user:jellyfin:'
user:jellyfin:r-x
The user:jellyfin:r-x line is the part that matters. Repeat the same access pattern for each parent directory Jellyfin must traverse before it reaches the media files.
Allow Jellyfin Through UFW
Linux Mint includes ufw on standard desktop installs, but the firewall is normally inactive until you enable it. If you decide to enable UFW on a remote server, allow the SSH rule before enabling the firewall, then allow Jellyfin’s web port.
If you manage the server over SSH, keep your current SSH session open and allow
OpenSSHbefore runningsudo ufw enable. If SSH is not installed yet, see install OpenSSH on Linux Mint.
sudo ufw allow OpenSSH
sudo ufw allow 8096/tcp
sudo ufw enable
sudo ufw status
The status output should show OpenSSH and 8096/tcp as allowed rules. If you do not enable UFW, the local Jellyfin service can still answer on the LAN as long as no other firewall or router rule blocks it.
Reach Jellyfin Through SSH
An SSH tunnel is the simplest secure option when you want remote access without exposing Jellyfin directly to the internet. Once the Mint server accepts SSH logins, forward your local port 8096 to the remote Jellyfin service.
ssh -L 8096:127.0.0.1:8096 username@server-ipKeep that SSH session open and browse to http://127.0.0.1:8096 on the client machine. The browser talks to the forwarded local port, and SSH carries the traffic back to the Mint host.
Use a Reverse Proxy with Jellyfin
A reverse proxy makes more sense once Jellyfin needs a public hostname and HTTPS endpoint. Forward the proxy to http://127.0.0.1:8096, keep WebSocket forwarding enabled, add the proxy address under Jellyfin’s known proxies when source IP handling matters, and review Jellyfin’s official reverse proxy notes for header and logging concerns. Use create a reverse proxy in Nginx as the Mint-side Nginx template.
Connect Jellyfin Clients and Enable DLNA
After the server works in a browser, connect the devices that will actually play media. Most Jellyfin clients use the web port, while local discovery and DLNA need extra dashboard settings and firewall rules.
Connect Phones, TVs, Consoles, and Browsers
Use the same server address format on phones, tablets, TV apps, consoles, and browser clients. On the same network, enter the Mint server’s LAN address with port 8096, such as http://server-lan-ip:8096.
The official Jellyfin clients page lists current client options for Android, Android TV, Fire TV, Roku, LG webOS, Xbox, desktop players, and web browsers. If a dedicated app is not available for a device, try the web interface first or use DLNA for basic local playback.
Enable Jellyfin Client Discovery
Jellyfin client discovery helps apps find the server on the local subnet. If UFW is active and you want discovery to work, allow 7359/udp in addition to the web interface port.
sudo ufw allow 7359/udp comment 'Jellyfin client discovery'
sudo ufw status
Discovery does not replace the server address. If a client does not find the server automatically, enter http://server-lan-ip:8096 manually.
Enable DLNA for Smart TVs
DLNA is now a first-party Jellyfin plugin rather than part of the base install. In the Jellyfin dashboard, open Dashboard -> Plugins -> Catalog, install the DLNA plugin, restart Jellyfin, and then open Dashboard -> DLNA to enable the DLNA server.
DLNA uses SSDP on 1900/udp and only discovers devices on the same subnet. If UFW is active, allow the DLNA discovery port and restart the service after the plugin is installed.
sudo systemctl restart jellyfin
sudo ufw allow 1900/udp comment 'DLNA SSDP discovery'
sudo ufw status
If a smart TV still cannot see Jellyfin, keep the TV and server on the same LAN segment, check that multicast or IGMP snooping is not blocked by the router, and review Jellyfin logs for DLNA plugin bind errors.
Manage Jellyfin on Linux Mint
Repository installs keep the normal lifecycle inside APT, but backups deserve separate attention because Jellyfin upgrades can migrate the server database.
Update Jellyfin
Routine system maintenance updates Jellyfin with the rest of the packages. To check only Jellyfin’s available package versions, use apt-cache policy.
sudo apt update
apt-cache policy jellyfin jellyfin-server jellyfin-web jellyfin-ffmpeg7
To upgrade only the installed Jellyfin packages after refreshing metadata, use --only-upgrade.
sudo apt install --only-upgrade jellyfin jellyfin-server jellyfin-web jellyfin-ffmpeg7Back Up Jellyfin
Use Jellyfin’s built-in backup first when the dashboard is available. Open Dashboard -> Backups, create a backup, and copy the resulting archive out of /var/lib/jellyfin/data/backups to storage that is not on the same disk.
A manual backup is still useful before a major package upgrade, migration, or risky plugin change. Stop the service first so the database is consistent, then copy both the data and configuration directories.
backup_dir="$HOME/jellyfin-backups/jellyfin-$(date +%Y%m%d-%H%M%S)"
sudo systemctl stop jellyfin
mkdir -p "$backup_dir"
sudo cp -a /etc/jellyfin "$backup_dir/config"
sudo cp -a /var/lib/jellyfin "$backup_dir/data"
sudo chown -R "$USER:$USER" "$backup_dir"
sudo systemctl start jellyfin
find "$backup_dir" -maxdepth 2 -type d | sed -n '1,6p'
/home/youruser/jellyfin-backups/jellyfin-20260528-114811 /home/youruser/jellyfin-backups/jellyfin-20260528-114811/config /home/youruser/jellyfin-backups/jellyfin-20260528-114811/data /home/youruser/jellyfin-backups/jellyfin-20260528-114811/data/.aspnet /home/youruser/jellyfin-backups/jellyfin-20260528-114811/data/metadata /home/youruser/jellyfin-backups/jellyfin-20260528-114811/data/plugins
Copy backups to another disk or another machine. The backup protects Jellyfin’s database, users, metadata, watched state, plugins, and server configuration, but it does not copy the actual media files unless you back those up separately.
Restore Jellyfin from a Backup
Restore built-in backups from Dashboard -> Backups when the current server can still reach the web interface. For a manual restore, stop Jellyfin, move the current package directories aside, copy the saved config and data directories back to their package paths, repair ownership, and start the service again.
Replace the sample restore_dir value with the backup directory you want to restore. Continue only after both saved directories exist.
restore_dir="$HOME/jellyfin-backups/jellyfin-20260528-114811"
ls -ld "$restore_dir/config" "$restore_dir/data"
Rollback copies keep the current directories available by adding a .before-restore suffix before the backup is copied into place.
restore_dir="$HOME/jellyfin-backups/jellyfin-20260528-114811"
stamp=$(date +%Y%m%d-%H%M%S)
sudo systemctl stop jellyfin
sudo mv /etc/jellyfin "/etc/jellyfin.before-restore-$stamp"
sudo mv /var/lib/jellyfin "/var/lib/jellyfin.before-restore-$stamp"
sudo cp -a "$restore_dir/config" /etc/jellyfin
sudo cp -a "$restore_dir/data" /var/lib/jellyfin
sudo chown -R jellyfin:adm /etc/jellyfin /var/lib/jellyfin
sudo systemctl start jellyfin
systemctl is-active jellyfin
active
Restore Jellyfin data into the same version or a supported upgrade path. After a newer Jellyfin release migrates the database, the older release may not be able to use that data again.
Plan Hardware Transcoding
A dedicated GPU is not required when clients can direct-play your media. Hardware acceleration matters when Jellyfin must transcode unsupported codecs, lower bitrates for remote streams, or serve multiple clients that cannot play the original file directly.
Start by checking whether Linux exposes a render device. Intel and AMD VA-API paths normally use /dev/dri/renderD128, while NVIDIA transcoding depends on the proprietary driver and NVENC support.
lspci | grep -Ei 'vga|3d|display'
ls -l /dev/dri 2>/dev/null || echo "No local GPU render device found"
If a render device exists for Intel or AMD hardware, confirm the hardware-access groups exist, add the service account to those groups, restart Jellyfin, then choose the matching option under Dashboard -> Playback -> Transcoding.
getent group render video
sudo usermod -aG render,video jellyfin
sudo systemctl restart jellyfin
For NVIDIA systems, install a working proprietary driver first, confirm nvidia-smi works, then choose the NVIDIA NVENC option in Jellyfin. The Linux Mint NVIDIA driver guide, Linux Mint Mesa upgrade guide, and Jellyfin’s official hardware selection guide are better places for hardware-specific codec details.
Remove Jellyfin
Use a normal remove when you want the packages gone but want to keep the existing server configuration and database on disk.
sudo apt remove --autoremove jellyfin jellyfin-server jellyfin-web jellyfin-ffmpeg7Use a purge only when you are finished with this Jellyfin instance or already have a backup. Purging removes package-owned configuration and can clear service state needed for an easy restore.
sudo apt purge --autoremove jellyfin jellyfin-server jellyfin-web jellyfin-ffmpeg7Verify that the package records are gone before cleaning up the repository metadata.
dpkg-query -W -f='${db:Status-Abbrev} ${binary:Package}\n' 'jellyfin*' 2>/dev/null || echo removedremoved
If you also want to unregister Jellyfin’s repository, remove the source file and keyring, refresh APT, and check that Jellyfin no longer has a live candidate from repo.jellyfin.org.
sudo rm -f /etc/apt/sources.list.d/jellyfin.sources /usr/share/keyrings/jellyfin.gpg
sudo apt update
apt-cache policy jellyfin
After purge, inspect
/usr/lib/jellyfin/before assuming every last file is gone. On some Linux Mint hosts that directory can remain behind withlibjemalloc.so, so remove it manually only when you are sure no Jellyfin package or rollback path still needs it.
Troubleshoot Jellyfin on Linux Mint
Most first-run problems fall into one of three layers: the service is not running, the browser or client cannot reach port 8096, or the service account cannot read the media directory.
Jellyfin Service or Web Interface Fails
Start with service state, recent logs, and the local listener before changing firewall or proxy settings.
systemctl is-active jellyfin
sudo journalctl -u jellyfin -n 50 --no-pager
sudo ss -ltnp | grep ':8096'
curl -fsSI http://127.0.0.1:8096 | sed -n '1,5p'
If the service is inactive or failed, the journal usually names the failing layer. If ss shows another process already bound to 8096, stop the conflicting service or change Jellyfin’s HTTP port from the dashboard networking page before restarting Jellyfin.
Media Files Do Not Appear in Libraries
Empty libraries usually mean Jellyfin can see the library entry but cannot traverse or read the underlying filesystem path. Test as the service account, then apply the ACL pattern from the media-folder section if the command reports permission errors.
sudo -u jellyfin test -r /srv/media && echo readable
sudo -u jellyfin find /srv/media -maxdepth 1 -mindepth 1 | sed -n '1,10p'
After fixing permissions, rescan the library from Dashboard -> Libraries. If the path is a removable drive, also make sure the drive is mounted before Jellyfin starts.
TV or DLNA Devices Do Not Discover Jellyfin
First decide whether the device is using a normal Jellyfin app or DLNA. Jellyfin apps can connect directly to http://server-lan-ip:8096; DLNA requires the DLNA plugin, same-subnet discovery, and 1900/udp open through any active local firewall.
sudo ufw status
sudo journalctl -u jellyfin -n 80 --no-pager | grep -i dlna
A DLNA bind error for port 1900 usually means another UPnP/DLNA service already owns that port. Stop the conflicting service or leave DLNA disabled and use the normal Jellyfin app or web client instead.
Conclusion
Jellyfin is running on Linux Mint from the official APT repository, with the service verified on port 8096 and the main access, backup/restore, client-discovery, DLNA, hardware-transcoding, update, and removal paths documented. Keep a fresh backup before major upgrades, then expand access with OpenSSH, a reverse proxy, or GPU acceleration only when your playback setup needs it.

Great script, worked well for me. I’d struggled for ages with Plex, never managed to get it to work and gave up because it seemed over the top for what I wanted. By comparison, this was straightforward and worked pretty well straightaway – with one exception: DLNA. I’m guessing that many users will want to use the server via DLNA / uPNP, but this isn’t mentioned at all – and only alluded to in the “Plugins” section. Once I’d discovered the DLNA Plugin and installed it everything worked fine. Maybe it’s ‘cos I’m a newbie that I hadn’t realised it, but just another sentence under Plugins that mentions DLNA would do it.
Thanks for the feedback, BilboJ. Glad the guide helped you get Jellyfin running after your Plex struggles. You make a good point about DLNA visibility for newcomers.
The guide has since been expanded with a dedicated “Enable Network Discovery and DLNA” section covering Dashboard settings, firewall rules for SSDP discovery (port 1900/udp), and smart TV detection. For anyone else reading, the DLNA server option is now found under Dashboard > DLNA rather than requiring a separate plugin installation.
Thanks for taking the time to share what tripped you up. Feedback like this helps improve the guide for other readers.
Thanks for your clear, one step tutorial. If I made it (in the end) anyone can ! Could be even better if you could please include real examples of various CLI commands that must be entered and how to connect f.eg from an Android smartphone to the platform or a SmartTV on the same network.
Thanks for the kind words, Ciribyte. Congrats on getting it working!
For Android, install the official Jellyfin app from Google Play or F-Droid, then enter your server address when prompted:
For Smart TVs, the guide now covers DLNA setup under “Enable Network Discovery and DLNA,” which lets most TVs discover Jellyfin automatically without installing anything.
Samsung, LG, and Android TV also have dedicated Jellyfin apps in their app stores. Just search for “Jellyfin” and connect using the same server address.
Great tutorial! Thank you so much.