
Fastfetch is useful when you want a clean system snapshot without stitching together separate commands for the OS, kernel, shell, desktop, CPU, GPU, memory, disks, and package counts. To install Fastfetch on Ubuntu Linux with current upstream updates, use the Launchpad PPA. Ubuntu 26.04 users who prefer distro packages can use the Universe package instead, while the GitHub .deb helper and Homebrew fit narrower workflows.
The upstream project points Ubuntu users to the Fastfetch Launchpad PPA for Ubuntu 22.04 or newer, while the Fastfetch GitHub releases page publishes direct Linux .deb packages. The PPA currently tracks the newer upstream release across Ubuntu 26.04, 24.04, and 22.04. Among the LTS releases covered here, Ubuntu’s own archive package is available only on Ubuntu 26.04.
Install Fastfetch on Ubuntu
Choose a Fastfetch Installation Method on Ubuntu
Fastfetch has four practical Ubuntu paths. Use the PPA for a normal APT-managed install across supported LTS releases, the Ubuntu Universe package when you want the Ubuntu 26.04 archive build, the GitHub helper when you want a direct upstream package without a persistent source, and Homebrew only when brew already manages your CLI tools.
| Method | Source or Channel | Update Behavior | Best For | Trade-offs |
|---|---|---|---|---|
| Launchpad PPA | ppa:zhangsongcui3371/fastfetch | Updates through APT | Ubuntu 26.04, 24.04, and 22.04 systems that want the current Fastfetch branch. | Community-maintained PPA, so you trust a third-party APT source. |
| Ubuntu Universe package | Ubuntu 26.04 Universe | Updates through Ubuntu package updates | Ubuntu 26.04 users who prefer the distro archive package. | Older branch, and no default Ubuntu 24.04 or 22.04 package candidate. |
GitHub .deb helper | Fastfetch GitHub releases | Rerun update-fastfetch | Systems where you prefer a direct local package and no ongoing PPA source. | Updates are manual unless you rerun the helper. |
| Homebrew formula | Homebrew fastfetch formula | brew upgrade fastfetch | Existing Homebrew users who keep CLI tools inside the brew prefix. | Packages and dependencies live outside APT. |
Pick one method unless you deliberately want both. The Ubuntu package, PPA, and GitHub
.debinstall the same Debian package name, and Homebrew can place anotherfastfetchbinary earlier on yourPATH. Check the active binary withcommand -v fastfetchbefore switching methods.
Update Ubuntu Before Installing Fastfetch
Refresh package metadata before adding a PPA, installing prerequisites, or resolving package dependencies:
sudo apt updateThese commands use
sudofor package-management tasks and system-wide files under/usr/local/bin. If your account cannot use sudo yet, follow the guide on how to add a new user to sudoers on Ubuntu.
Install Fastfetch from the Launchpad PPA on Ubuntu
The Launchpad PPA is the best default when you want Fastfetch to update with normal APT package upgrades. It currently publishes Fastfetch 2.62.1 for Ubuntu 26.04, 24.04, and 22.04.
Install Fastfetch PPA Prerequisites
Install Ubuntu’s repository helper package first. Desktop installs often already have it, but minimal and server images may not.
sudo apt install -y software-properties-commonAdd the Fastfetch PPA on Ubuntu
Add the PPA, then refresh APT so the new package source is available:
sudo add-apt-repository -y ppa:zhangsongcui3371/fastfetch
sudo apt update
APT should fetch metadata from the Launchpad content host for your release codename. The source file name differs by Ubuntu release because newer Ubuntu versions use DEB822 .sources files, while Ubuntu 22.04 can still create a legacy .list file.
Confirm the Fastfetch PPA Candidate
Check the package candidate before installing. On Ubuntu 26.04, the PPA candidate should appear above Ubuntu’s older Universe package:
apt-cache policy fastfetchfastfetch:
Installed: (none)
Candidate: 2.62.1~resolute
Version table:
2.62.1~resolute 500
500 https://ppa.launchpadcontent.net/zhangsongcui3371/fastfetch/ubuntu resolute/main amd64 Packages
2.57.1+dfsg-1ubuntu1 500
500 http://au.archive.ubuntu.com/ubuntu resolute/universe amd64 Packages
Your Ubuntu archive mirror may differ. The important details are the selected PPA candidate and any lower-priority Universe fallback on Ubuntu 26.04.
Ubuntu 24.04 currently reports 2.62.1~noble, and Ubuntu 22.04 reports 2.62.1~jammy. Ubuntu 24.04 and 22.04 do not currently show a default Ubuntu archive candidate for fastfetch, so the PPA is the APT path for those releases.
Install Fastfetch from the PPA
Install the package after the PPA candidate is visible:
sudo apt install -y fastfetchVerify the installed command:
fastfetch --versionfastfetch 2.62.1 (x86_64)
Install Fastfetch from Ubuntu Universe on Ubuntu 26.04
Use the Ubuntu package on Ubuntu 26.04 when you prefer the distro archive build and do not need the newest upstream release. Ubuntu 24.04 and 22.04 do not currently publish a default fastfetch package candidate.
Confirm the default candidate before installing. The source line should come from the resolute/universe component:
apt-cache policy fastfetchfastfetch:
Installed: (none)
Candidate: 2.57.1+dfsg-1ubuntu1
Version table:
2.57.1+dfsg-1ubuntu1 500
500 http://au.archive.ubuntu.com/ubuntu resolute/universe amd64 Packages
Your mirror hostname may differ, but the component should show resolute/universe.
Install the Universe package when that candidate is the one you want:
sudo apt install -y fastfetchCheck the installed command:
fastfetch --versionfastfetch 2.57.1 (x86_64)
Install Fastfetch from GitHub with a .deb Helper
Use the GitHub method when you want Fastfetch’s direct upstream .deb package without keeping a Launchpad source enabled. The helper resolves the current release tag, maps your CPU architecture to the matching Linux .deb, extracts the official SHA256 line from the release page, verifies the download, and installs the local file with APT. If upstream does not publish a matching asset for your architecture, the helper stops before installing anything.
Install Fastfetch GitHub Helper Prerequisites
The helper uses curl for GitHub requests and downloads. Ubuntu 26.04 minimal installs may not include it, so install it explicitly:
sudo apt install -y curl ca-certificatesCreate the update-fastfetch Helper on Ubuntu
Write the reusable helper to /usr/local/bin/update-fastfetch. The script uses normal sudo only for the final package install step, so it can prompt for your password when needed.
sudo tee /usr/local/bin/update-fastfetch > /dev/null <<'SCRIPT_EOF'
#!/usr/bin/env bash
set -euo pipefail

repo="fastfetch-cli/fastfetch"
latest_url="https://github.com/${repo}/releases/latest"

case "$(uname -m)" in
  x86_64) fastfetch_arch="amd64" ;;
  aarch64|arm64) fastfetch_arch="aarch64" ;;
  armv6l|armv7l|i686|ppc64le|riscv64|s390x) fastfetch_arch="$(uname -m)" ;;
  *) echo "Unsupported architecture: $(uname -m)" >&2; exit 1 ;;
esac

for cmd in curl awk sha256sum dpkg-deb dpkg-query apt-get sudo mktemp uname; do
  if ! command -v "$cmd" >/dev/null 2>&1; then
    echo "Missing required command: $cmd"
    exit 1
  fi
done

cache_root="${XDG_CACHE_HOME:-$HOME/.cache}"
mkdir -p "$cache_root"
workdir=$(mktemp -d "${cache_root}/fastfetch-update.XXXXXX")
trap 'rm -rf "$workdir"' EXIT

release_url=$(curl -fsSIL -o /dev/null -w '%{url_effective}' "$latest_url")
version=${release_url##*/}
if [ -z "$version" ] || [ "$version" = "latest" ]; then
  echo "Could not resolve the latest Fastfetch release."
  exit 1
fi

asset_dir="fastfetch-linux-${fastfetch_arch}"
deb_file="${asset_dir}.deb"
download_url="https://github.com/${repo}/releases/download/${version}/${deb_file}"

release_html=$(curl -fsSL "$release_url")
expected_sha=$(printf '%s\n' "$release_html" | awk -v path="${asset_dir}/${deb_file}" '
  index($0, path) {
    for (i = 1; i <= NF; i++) {
      if ($i ~ /^[0-9a-f]{64}$/) {
        print $i
        exit
      }
    }
  }
')

if [ -z "$expected_sha" ]; then
  echo "Could not find the SHA256 checksum for ${deb_file}."
  exit 1
fi

installed_version=$(dpkg-query -W -f='${db:Status-Abbrev} ${Version}\n' fastfetch 2>/dev/null | awk '$1 == "ii" { print $2 }' || true)

echo "Installed package version: ${installed_version:-not installed}"
echo "Latest release tag: ${version}"
echo "Download asset: ${deb_file}"

curl -fL --progress-bar -o "${workdir}/${deb_file}" "$download_url"
printf '%s  %s\n' "$expected_sha" "${workdir}/${deb_file}" | sha256sum --check --status
echo "Checksum verification: OK"

package_version=$(dpkg-deb -f "${workdir}/${deb_file}" Version)
echo "Downloaded package version: ${package_version}"

if [ "$installed_version" = "$package_version" ]; then
  echo "Fastfetch is already up to date."
  fastfetch --version
  exit 0
fi

sudo apt-get install -y "${workdir}/${deb_file}"
fastfetch --version
SCRIPT_EOF
Set executable permissions and confirm your shell can find the helper:
sudo chmod 0755 /usr/local/bin/update-fastfetch
command -v update-fastfetch
/usr/local/bin/update-fastfetch
Run the GitHub Fastfetch Helper
Run the helper to download, verify, and install the current upstream package:
update-fastfetchRelevant output includes the release tag, checksum status, downloaded package version, and Fastfetch version. Curl’s progress bar may also appear while the package downloads.
Installed package version: not installed
Latest release tag: 2.62.1
Download asset: fastfetch-linux-amd64.deb
Checksum verification: OK
Downloaded package version: 2.62.1
fastfetch 2.62.1 (x86_64)
When Fastfetch is already current, the same helper exits without reinstalling the package:
Installed package version: 2.62.1
Latest release tag: 2.62.1
Download asset: fastfetch-linux-amd64.deb
Checksum verification: OK
Downloaded package version: 2.62.1
Fastfetch is already up to date.
fastfetch 2.62.1 (x86_64)
Install Fastfetch with Homebrew on Ubuntu
Use Homebrew only when it already manages part of your Ubuntu CLI stack. The current Homebrew formula publishes Linux bottles for x86_64_linux and arm64_linux, depends on yyjson, and installs under the Homebrew prefix instead of Ubuntu’s package database. If brew is not installed yet, use the separate guide to install Homebrew on Ubuntu before returning here.
Load Homebrew’s shell environment, then install the formula:
eval "$(/home/linuxbrew/.linuxbrew/bin/brew shellenv)"
brew update
brew install fastfetch
Confirm that your shell is running the Homebrew binary, not an APT-installed Fastfetch package. The command path should point inside the Homebrew prefix, and brew list --versions should report the installed formula version.
command -v fastfetch
fastfetch --version
brew list --versions fastfetch
Use Fastfetch on Ubuntu
Run Fastfetch with Default Output
Start with the default output when you want the normal logo and system summary:
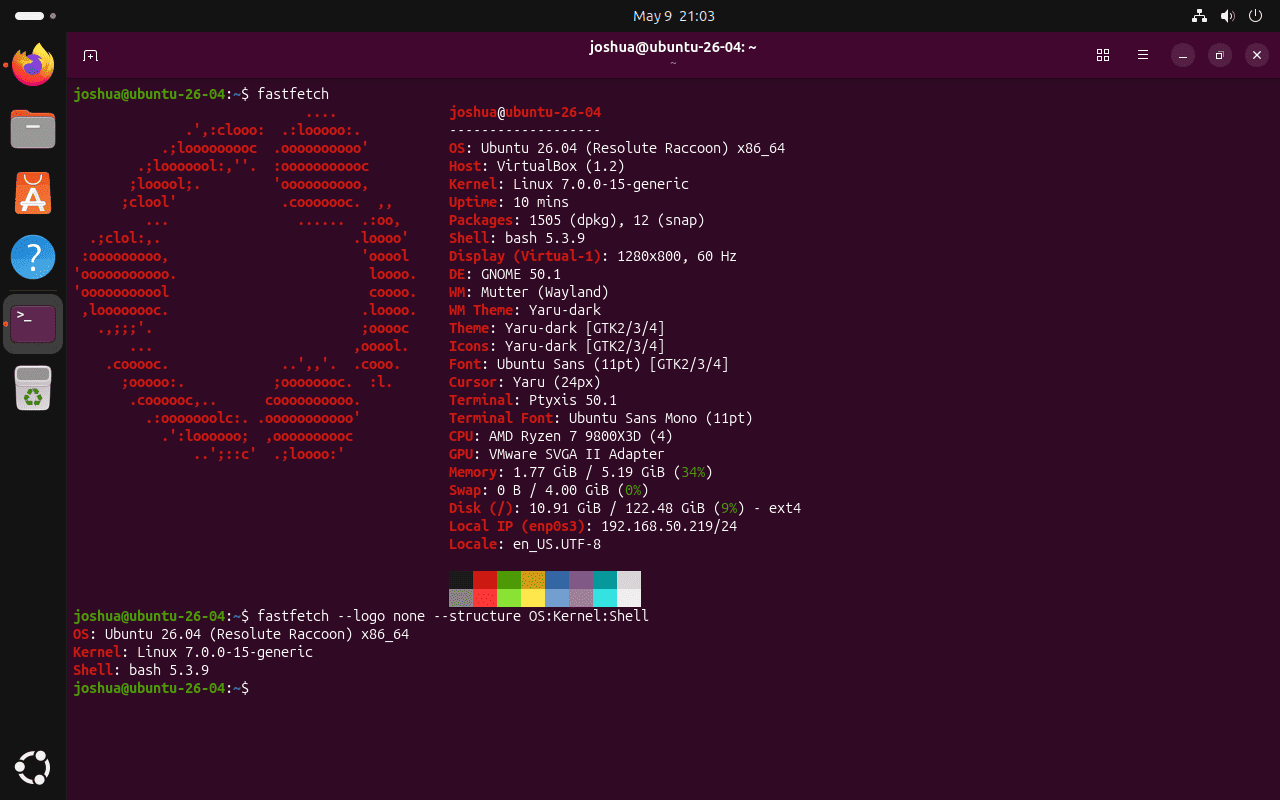
fastfetchDefault output prints the Ubuntu logo beside detected system fields such as OS, host, kernel, uptime, packages, shell, display, CPU, GPU, memory, disk, and locale. The no-logo examples are better when you need copyable output for logs, tickets, or inventory notes.
Run a Compact Fastfetch Module Set
Disable the logo and select a few modules when you want a compact terminal or SSH summary:
fastfetch --logo none --structure OS:Kernel:ShellRelevant output includes the selected module names and current system values:
OS: Ubuntu 26.04 (Resolute Raccoon) x86_64
Kernel: Linux 7.0.0-15-generic
Shell: bash 5.3.9
Export Fastfetch Output as JSON
Use JSON output when another script or inventory tool needs structured system details:
fastfetch --logo none --structure OS --format jsonThe output is a JSON array. The exact fields depend on the modules you request and the hardware Fastfetch detects.
[
  {
    "type": "OS",
    "result": {
      "buildID": "",
      "codename": "resolute",
      "id": "ubuntu",
      "idLike": "debian",
      "name": "Ubuntu",
      "prettyName": "Ubuntu 26.04 (Resolute Raccoon)",
      "variant": "",
      "variantID": "",
      "version": "26.04 (Resolute Raccoon)",
      "versionID": "26.04"
    }
  }
]
Create a Fastfetch Config File
Generate a user configuration file when you want persistent module, logo, color, or formatting choices. Use an explicit path so you know which file Fastfetch will create:
mkdir -p ~/.config/fastfetch
fastfetch --gen-config ~/.config/fastfetch/config.jsonc
Confirm that the config file now exists:
test -f ~/.config/fastfetch/config.jsonc && echo "Fastfetch config exists"Fastfetch config exists
Fastfetch uses JSONC configuration. The Fastfetch configuration documentation explains the file format, and the project also maintains example presets in its GitHub repository.
Update Fastfetch on Ubuntu
Update Fastfetch with the same package source you used for installation. Mixing update tools is the usual reason a system keeps an older binary on PATH.
Update APT-Installed Fastfetch on Ubuntu
The Ubuntu Universe and PPA methods both follow normal APT upgrades. APT upgrades from whichever enabled source currently provides your installed package:
sudo apt update
sudo apt install --only-upgrade fastfetch
Update GitHub .deb Fastfetch on Ubuntu
Rerun the helper whenever you want to check GitHub for a newer direct package:
update-fastfetchUpdate Homebrew Fastfetch on Ubuntu
Homebrew updates stay inside the brew workflow:
brew update
brew upgrade fastfetch
Remove Fastfetch from Ubuntu
Remove Fastfetch with the matching method so the package, source, helper, and shell path state stay aligned.
Remove Ubuntu Repository Fastfetch from Ubuntu 26.04
Remove the Ubuntu archive package when you installed Fastfetch from Universe and did not add the PPA:
sudo apt purge -y fastfetch
hash -r
Verify that the package is no longer installed before checking command lookup:
dpkg-query -W -f='${db:Status-Abbrev} ${binary:Package}\n' fastfetch 2>/dev/null | grep '^ii' || echo "fastfetch not installed"
command -v fastfetch || echo "fastfetch removed"
fastfetch not installed fastfetch removed
The Ubuntu 26.04 package can leave automatically installed dependencies such as libyyjson0 eligible for cleanup. Preview the list first because APT may also show unrelated old kernels or packages from earlier system maintenance:
sudo apt autoremove --dry-runIf the preview only lists Fastfetch-related dependencies you no longer need, run sudo apt autoremove and review APT’s prompt before approving the cleanup.
Remove PPA Fastfetch from Ubuntu
Remove the package first, then remove the PPA and refresh APT metadata:
sudo apt purge -y fastfetch
sudo add-apt-repository -y -r ppa:zhangsongcui3371/fastfetch
sudo apt update
hash -r
Confirm that the package is no longer installed:
dpkg-query -W -f='${db:Status-Abbrev} ${binary:Package}\n' fastfetch 2>/dev/null | grep '^ii' || echo "fastfetch not installed"fastfetch not installed
Verify that the PPA source file is gone. Ubuntu 26.04 and 24.04 normally use .sources files for this PPA, while Ubuntu 22.04 can use a .list file.
ls -1 /etc/apt/sources.list.d/*fastfetch* /etc/apt/sources.list.d/*zhangsongcui3371* 2>/dev/null || echo "No Fastfetch PPA source files found"No Fastfetch PPA source files found
Ubuntu 22.04 can leave matching PPA trust files after the source is removed. Remove only the files with this exact Fastfetch PPA name, then verify that no matching trust files remain:
sudo rm -f /etc/apt/trusted.gpg.d/zhangsongcui3371-ubuntu-fastfetch.gpg /etc/apt/trusted.gpg.d/zhangsongcui3371-ubuntu-fastfetch.gpg~
ls -1 /etc/apt/trusted.gpg.d/*zhangsongcui3371*fastfetch* 2>/dev/null || echo "No Fastfetch PPA trust files found"
No Fastfetch PPA trust files found
Confirm that the removed Launchpad source no longer appears in APT policy:
apt-cache policy fastfetch | grep 'ppa.launchpadcontent.net' || echo "Fastfetch PPA no longer appears in APT policy"Fastfetch PPA no longer appears in APT policy
Remove GitHub .deb Fastfetch from Ubuntu
Remove the locally installed package and the reusable helper:
sudo apt purge -y fastfetch
sudo rm -f /usr/local/bin/update-fastfetch
hash -r
Check package state before relying on command lookup:
dpkg-query -W -f='${db:Status-Abbrev} ${binary:Package}\n' fastfetch 2>/dev/null | grep '^ii' || echo "fastfetch not installed"fastfetch not installed
Confirm that neither command remains available in the current shell:
command -v fastfetch || echo "fastfetch removed"
command -v update-fastfetch || echo "update-fastfetch removed"
fastfetch removed update-fastfetch removed
Remove Homebrew Fastfetch from Ubuntu
Remove the formula from the Homebrew prefix, then clear unused brew dependencies if Homebrew says they are no longer needed:
brew uninstall fastfetch
brew autoremove
hash -r
Confirm that Homebrew no longer lists the formula. If no other method provides fastfetch, command lookup should also fail:
brew list --versions fastfetch || echo "fastfetch formula removed"
command -v fastfetch || echo "fastfetch removed"
fastfetch formula removed fastfetch removed
Remove Fastfetch User Configuration
Package removal does not delete your account’s Fastfetch configuration. Remove it only when you want a full reset.
This command permanently deletes Fastfetch configuration files for your current user account.
rm -rf ~/.config/fastfetchTroubleshoot Fastfetch on Ubuntu
APT Cannot Locate Fastfetch on Ubuntu
If APT cannot locate fastfetch on Ubuntu 24.04 or 22.04, that is expected before the PPA is added. On Ubuntu 26.04, the default package comes from Universe, so missing output can also mean that the Universe component is disabled.
apt-cache policy fastfetchIf you specifically want Ubuntu’s default 26.04 package instead of the PPA, confirm Universe is enabled first. The guide to enable Universe and Multiverse on Ubuntu explains that component layout.
Fastfetch PPA Source Has the Wrong Release
Check the release codename and source file when APT fetches the wrong suite or reports a missing PPA candidate:
. /etc/os-release
printf '%s\n' "$VERSION_CODENAME"
ls -1 /etc/apt/sources.list.d/*fastfetch* /etc/apt/sources.list.d/*zhangsongcui3371* 2>/dev/null
Remove and re-add the PPA if the filename or suite does not match your Ubuntu release:
sudo add-apt-repository -y -r ppa:zhangsongcui3371/fastfetch
sudo add-apt-repository -y ppa:zhangsongcui3371/fastfetch
sudo apt update
GitHub Helper Cannot Find a Fastfetch Checksum
The helper expects the GitHub release page to include a SHA256 line for the chosen Linux .deb. If upstream changes the release format, inspect the current release page before forcing an install:
release_url=$(curl -fsSIL -o /dev/null -w '%{url_effective}' https://github.com/fastfetch-cli/fastfetch/releases/latest)
printf '%s\n' "$release_url"

case "$(uname -m)" in
  x86_64) asset_dir="fastfetch-linux-amd64" ;;
  aarch64|arm64) asset_dir="fastfetch-linux-aarch64" ;;
  *) asset_dir="fastfetch-linux-$(uname -m)" ;;
esac

release_html=$(curl -fsSL "$release_url")
printf '%s\n' "$release_html" | awk -v path="${asset_dir}/${asset_dir}.deb" '
  index($0, path) && !found {
    print path
    for (i = 1; i <= NF; i++) {
      if ($i ~ /^[0-9a-f]{64}$/) {
        print $i
      }
    }
    found = 1
  }
'
If the command prints the asset path and a 64-character SHA256 value, recreate /usr/local/bin/update-fastfetch from the helper script section. If it prints nothing after the release URL, use the PPA until upstream publishes matching assets again.
Ubuntu Runs the Wrong Fastfetch Binary
Use command -v to see which installation method your shell is using:
command -v fastfetch
fastfetch --version
An APT or GitHub .deb install normally resolves to /usr/bin/fastfetch, while Homebrew normally resolves to /home/linuxbrew/.linuxbrew/bin/fastfetch. After removing a method, run hash -r so Bash forgets any cached command path.
Fastfetch Output Is Too Large for Logs
For logs, tickets, or inventory snippets, disable the logo and request only the modules you need:
fastfetch --logo none --structure OS:Kernel:Shell:PackagesUse --format json when another tool needs to parse the result instead of reading a terminal table.
Related Ubuntu Guides
If you keep developer tools outside APT, the guide to install Homebrew on Ubuntu explains the brew prefix and shell setup. For package-source troubleshooting, enable Universe on Ubuntu helps with missing default packages, and remove a PPA from Ubuntu covers broader Launchpad cleanup. The curl command guide covers the download flags used by the GitHub helper.
Conclusion
Fastfetch is ready on Ubuntu once fastfetch --version returns the branch you installed and command -v fastfetch points at the expected package source. The Launchpad PPA is the cleanest current APT path across Ubuntu 26.04, 24.04, and 22.04. Ubuntu 26.04’s Universe package is useful when you prefer the distro archive branch, while the GitHub helper and Homebrew formula suit workflows where you intentionally manage Fastfetch outside a persistent PPA.

Formatting tips for your comment
You can use basic HTML to format your comment. Useful tags currently allowed in published comments:
<code>command</code>command<strong>bold</strong><em>italic</em><a href="https://example.com">link</a><blockquote>quote</blockquote>