

This guide will cover how to install Cockpit on Ubuntu 24.04, 22.04, or 20.04 utilizing the command-line terminal. You can choose between two methods via apt: Ubuntu’s default repository or a third-party PPA.
Cockpit is an innovative, web-based server management tool that streamlines the process of managing servers, making it accessible even to those with limited command-line experience. It provides a user-friendly interface that simplifies complex server tasks. Here’s what makes Cockpit stand out:
- Real-time System Monitoring: Offers an overview of essential system metrics, including CPU load, memory usage, and network activity.
- Service Management: Easily start, stop, and restart services directly from the web interface.
- Log Viewer: Access and analyze system logs without delving into command-line tools.
- Storage Management: Manage disk partitions, RAID devices, and logical volumes intuitively.
- User Account Management: Create and manage user accounts, ensuring straightforward user and permission handling.
- Container Management: Integrated support for Docker and Kubernetes, providing insights into your containers’ operations.
As an all-encompassing tool, Cockpit bridges the gap between advanced server administration and user-friendliness. Its robust feature set, combined with an intuitive interface, makes it an ideal choice for both new and experienced system administrators. The upcoming sections will delve into the technical aspects of installing Cockpit, ensuring you have it up and running on your Ubuntu system efficiently and effectively.
Install Cockpit on Ubuntu via APT
In this section, we will walk through the process of installing Cockpit on your Ubuntu system. Following the steps below will ensure a smooth installation and setup of the Cockpit web interface.
Update Ubuntu Before Cockpit Installation
Before installing Cockpit, it is essential to update your Ubuntu system to ensure you have the latest packages and security updates. This helps minimize potential issues during the installation process. To update your system, open the terminal and execute the following command:
sudo apt update && sudo apt upgradeSelect APT Installation Method for Cockpit
Cockpit is available in the default Ubuntu repository, but a PPA also exists for users wanting the latest Cockpit version available.
Method 1: Install Cockpit via Ubuntu’s Default APT Repository
To install Cockpit on your system, execute the following command in your terminal:
sudo apt install cockpitMethod 2: Install Cockpit on Ubuntu via PPA
Alternatively, you can enable a third-party repository maintained by ViViD that provides the latest versions for Ubuntu Focal Fossa and Jammy Jellyfish. To install this version, first import the PPA:
sudo add-apt-repository ppa:vivnet/cockpit -yNow update the packages list to reflect the newly imported PPA with the following command:
sudo apt updateIf you have or have not installed Cockpit, run this command as it will upgrade or install the software:
sudo apt install cockpitStart Cockpit Service on Ubuntu
After the installation is complete, Cockpit’s service is not active by default. Therefore, you will need to use a few systemctl commands to start and enable Cockpit on your system.
To start the Cockpit service, run the following command:
sudo systemctl start cockpit.socketEnable Cockpit on Ubuntu System Startup
To ensure that Cockpit automatically starts when your system boots up, execute the following command:
sudo systemctl enable cockpit.socketVerify Cockpit Status on Ubuntu
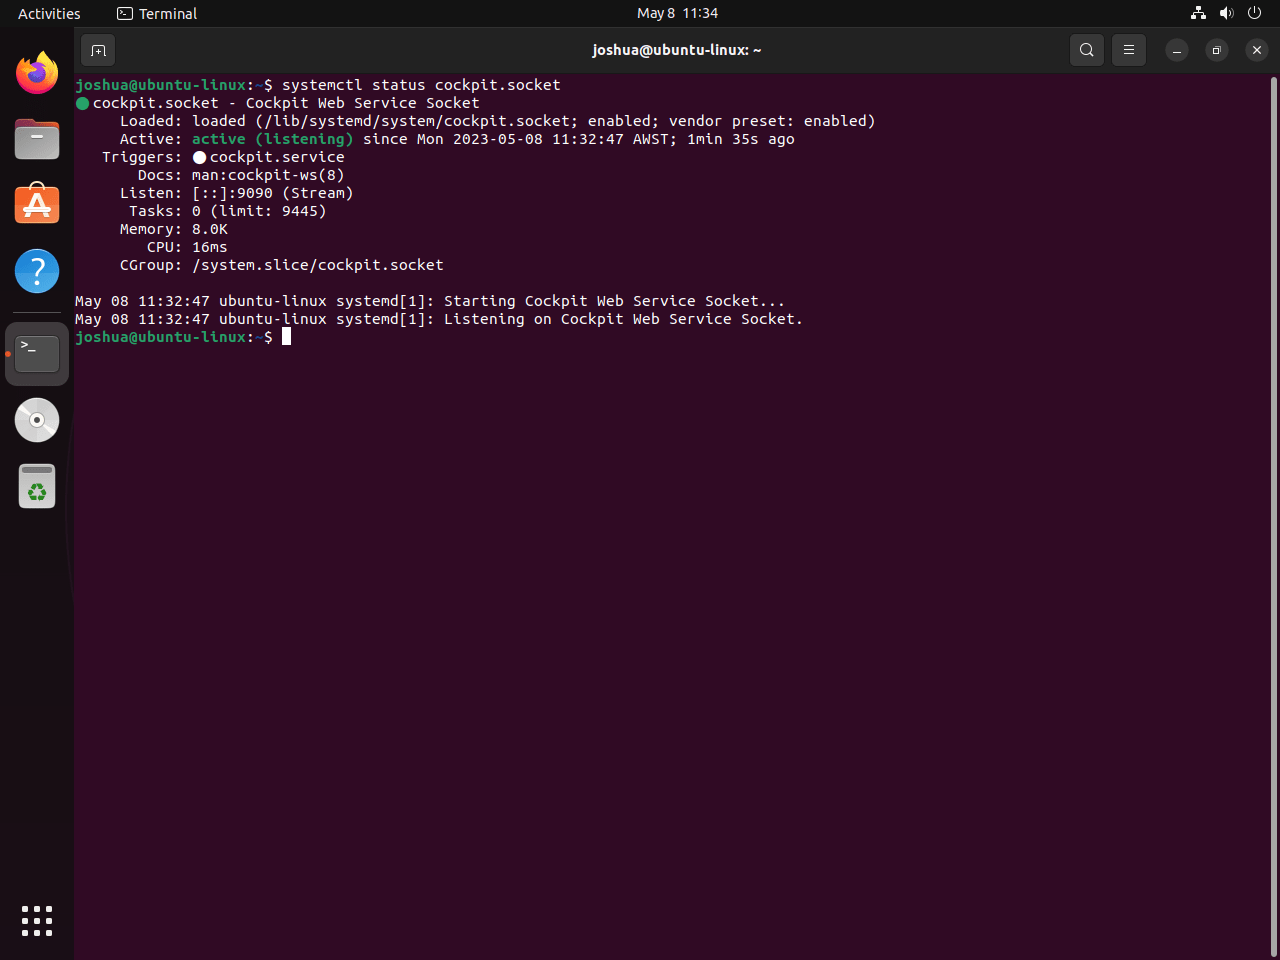
Finally, verifying that Cockpit is running correctly on your system is essential. To check the status of the Cockpit service, use the following command:
systemctl status cockpit.socketThe service status will appear active if you’ve set up everything correctly.
Configure UFW Firewall for Cockpit on Ubuntu
In this section, the guide walks you through configuring the UFW (Uncomplicated Firewall) to allow Cockpit access. Cockpit defaults to listening on port 9090, so you must ensure the firewall rules allow incoming connections on this port.
Check UFW Status
Before making any changes, it’s essential to check the current status of the UFW firewall. To do so, run the following command:
sudo ufw statusIf the firewall is inactive, you will need to enable it before proceeding. To enable UFW, use the following command:
sudo ufw enableAllow Cockpit Through UFW on Ubuntu
To configure the UFW firewall to allow incoming connections for Cockpit, execute the following command in your terminal:
sudo ufw allow 9090If the command executes successfully, you should see the following output:
Rules updated
Rules updated (v6)
This output updates IPv4 and IPv6 rules, allowing traffic on port 9090.
Verify UFW Configuration For Cockpit
Verifying that the firewall configuration is correct and allows Cockpit access is essential. To check the UFW rules, use the following command:
sudo ufw statusThe output should show that port 9090 is open for incoming connections:
Status: active

To                         Action      From
--                         ------      ----
9090                       ALLOW       Anywhere
9090 (v6)                  ALLOW       Anywhere (v6)
With the firewall correctly configured, Cockpit should now be accessible on port 9090, and you can proceed with further setup and configuration tasks.
Accessing the Cockpit Web Interface on Ubuntu
In this section, we’ll walk you through the process of accessing the Cockpit web interface. Once you’ve successfully installed and configured Cockpit and allowed access through the firewall, you can manage your Linux server via the intuitive web interface.
Open Your Web Browser
To access the Cockpit web interface, you’ll need a web browser on any device within the same network as the server running Cockpit. You can use popular web browsers such as Google Chrome, Mozilla Firefox, or Microsoft Edge.
Navigate to the Cockpit Web Interface
In the address bar of your web browser, enter the IP address or hostname of the server running Cockpit, followed by the port number on which Cockpit is listening (by default, port 9090). The URL should look like this:
https://<your-server-ip-or-hostname>:9090For example, if your server’s IP address is 192.168.1.100, you would enter:
https://192.168.1.100:9090Accept the SSL Warning (Optional)
Since Cockpit uses a self-signed SSL certificate by default, you may encounter a security warning in your web browser. This is normal, and you can safely proceed by accepting the warning and adding an exception for the Cockpit web interface. The steps to do this vary depending on the web browser you are using.
Note: For production environments, it is recommended to configure Cockpit with a valid SSL certificate from a trusted Certificate Authority (CA). This configuration prevents security warnings and secures the connection to the web interface.
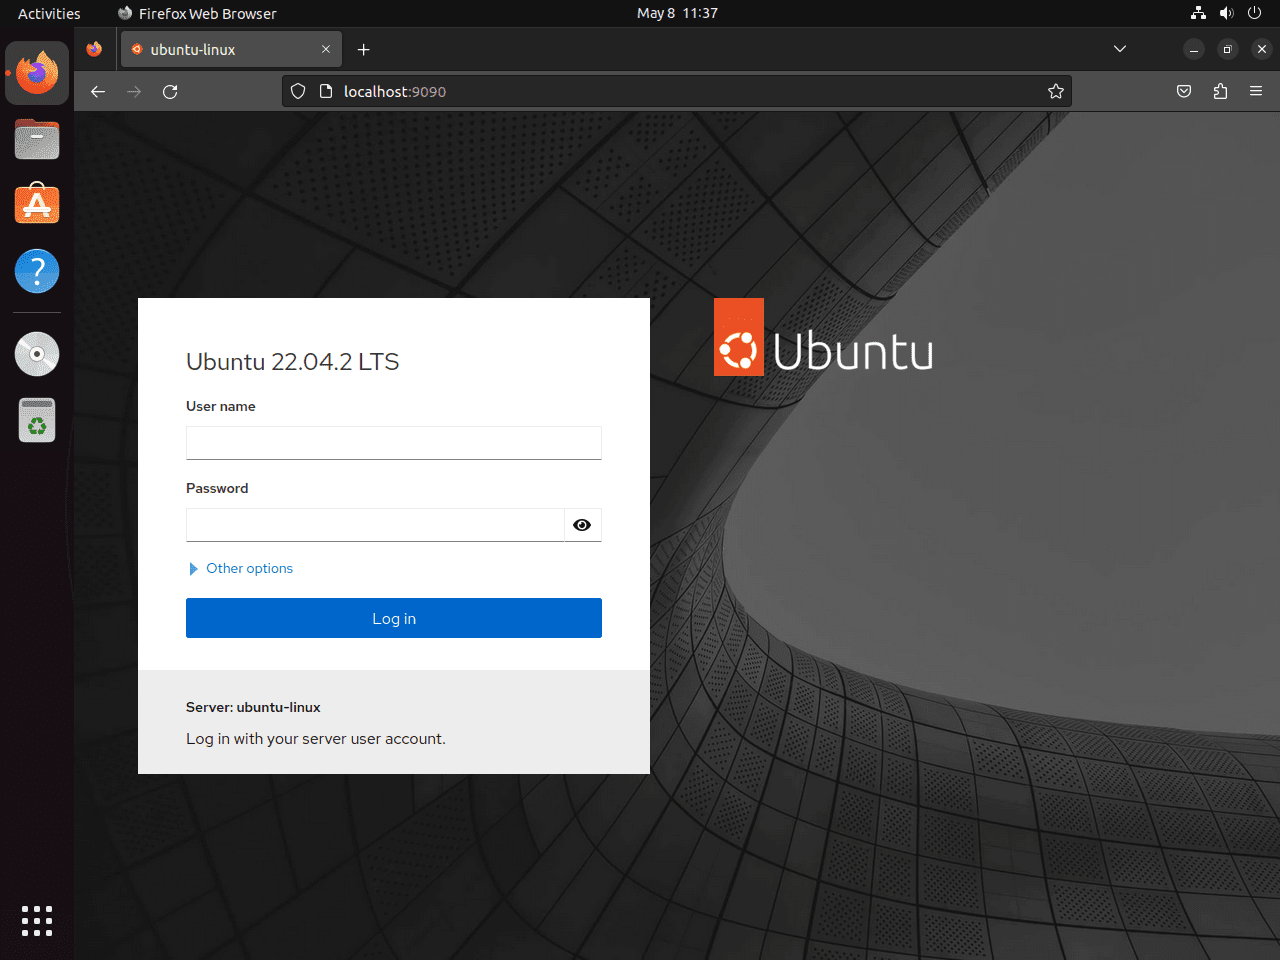
Log In to Cockpit
You should see the login screen after navigating to the Cockpit web interface and accepting the SSL warning (if necessary). Log in using your server’s system credentials (username and password). These are the same credentials you use when logging in via SSH or the local console.
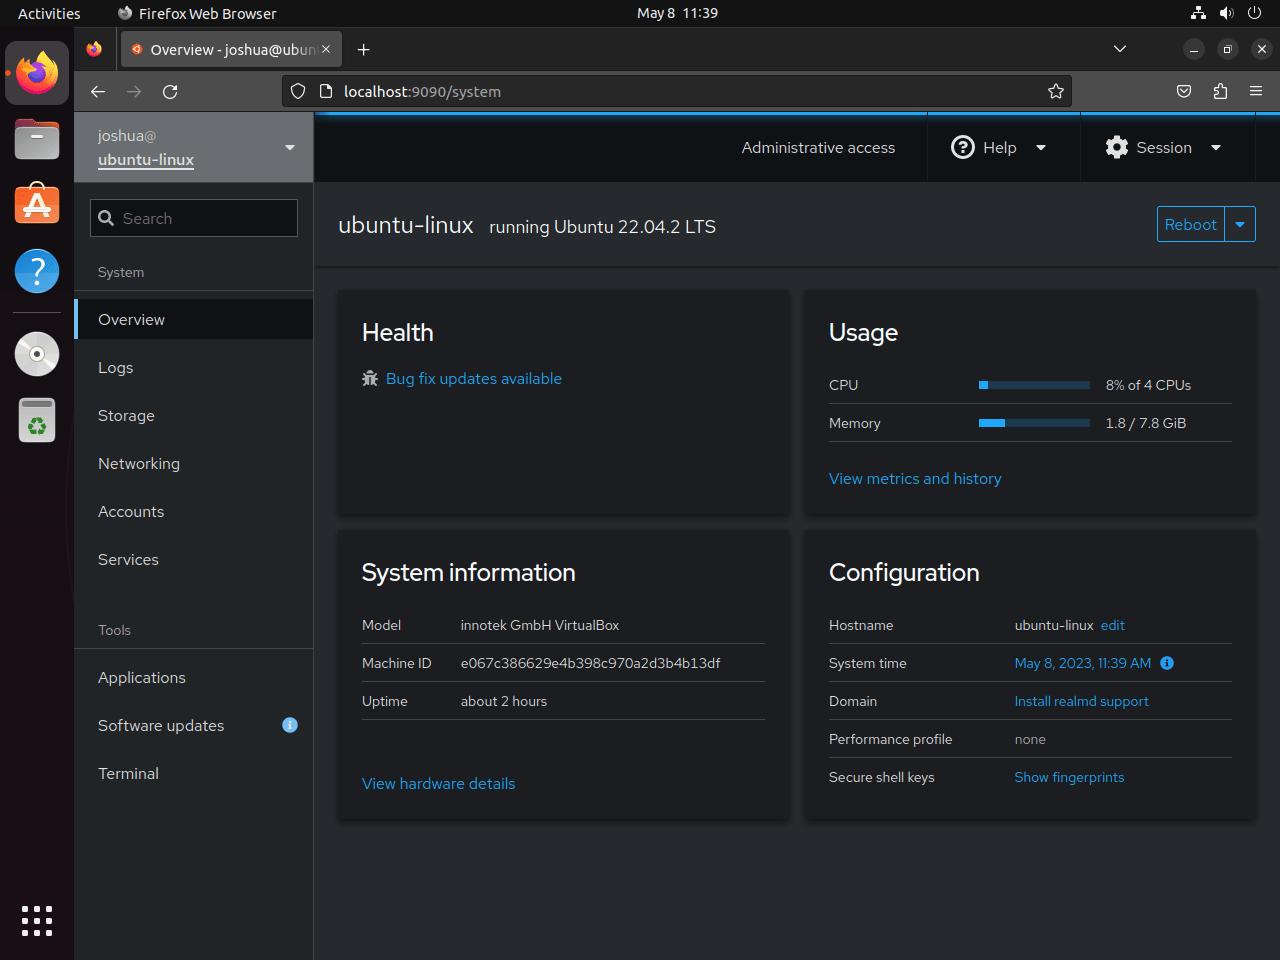
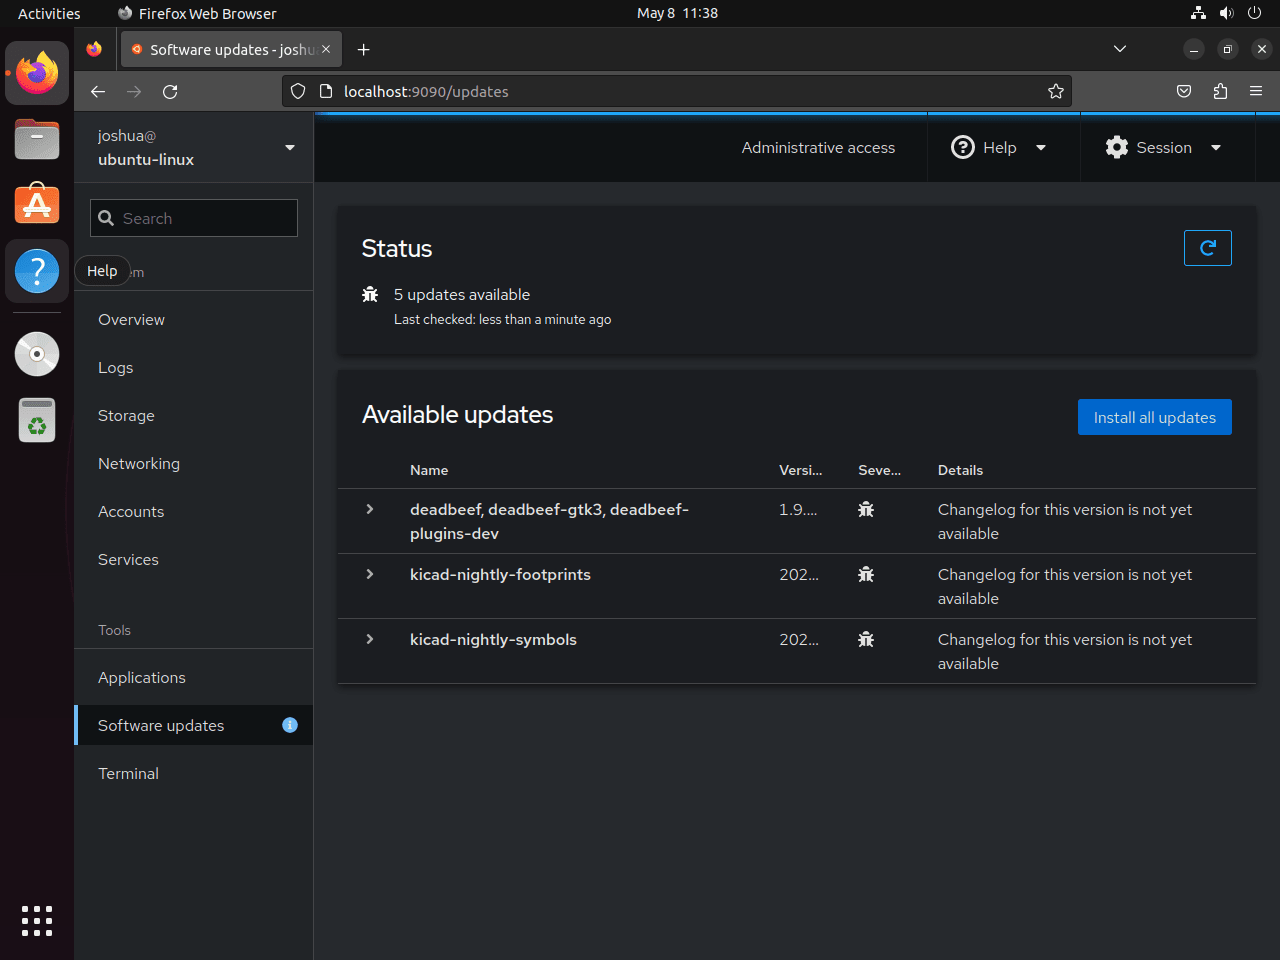
Upon successful login, the Cockpit dashboard will greet you, where you can monitor, manage, and configure various aspects of your Linux server through the user-friendly web interface.
Tips on Getting Started with Cockpit with Ubuntu
In this section, we will provide you with some tips and tricks to help you make the most of your experience with Cockpit on Ubuntu Linux. These suggestions cover various aspects of Cockpit, from customizations to general tips.
Cockpit General Tips on Ubuntu
- Keep Your System Up-to-Date: Regularly update your Ubuntu system to ensure you have the latest packages and security updates. This will minimize potential issues and help you stay on top of new features and improvements.
- Explore Available Modules: Cockpit offers numerous modules to help manage different aspects of your Linux server. Some modules may not be installed by default, but you can easily install them using the package manager. Examples include
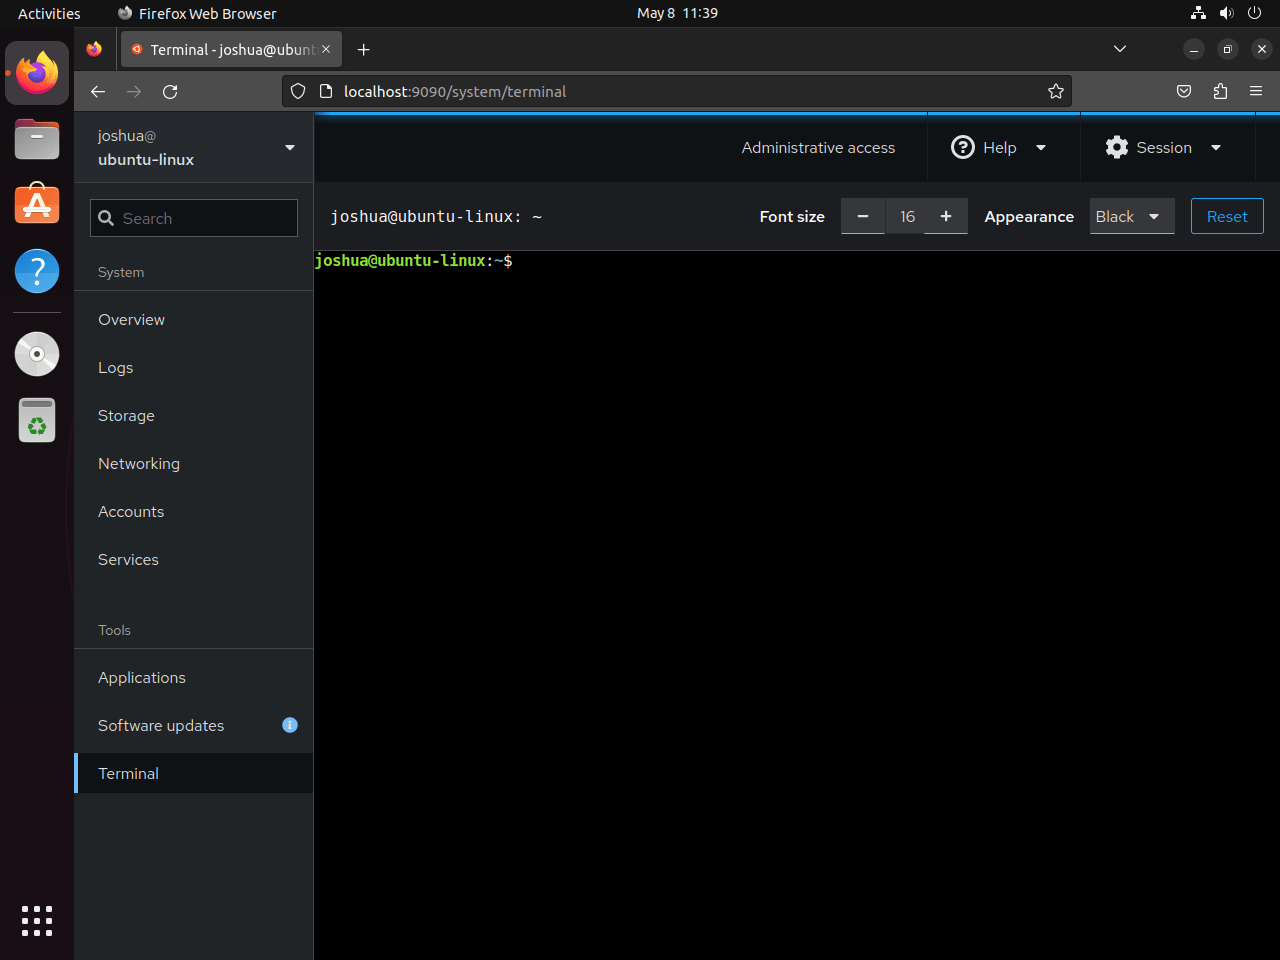
cockpit-dockerfor managing Docker containers andcockpit-machinesfor managing virtual machines. - Use the Terminal in Cockpit: Cockpit includes a built-in terminal that allows you to execute commands directly within the web interface. This can be a convenient way to perform tasks on your server without having to switch between the web interface and a separate terminal or SSH session.
Customizations with Cockpit on Ubuntu
- Change the Listening Port: By default, Cockpit listens on port 9090. If you prefer to use a different port, edit the
/lib/systemd/system/cockpit.socketfile and change theListenStreamvalue to the desired port number. After making the change, restart thecockpit.socketservice. - Configure SSL Certificates: Cockpit uses a self-signed SSL certificate by default, which can result in security warnings in web browsers. To avoid this, you can configure Cockpit to use a valid SSL certificate from a trusted Certificate Authority (CA).
Other Cockpit Tips on Ubuntu
- Monitor System Performance: Use Cockpit’s built-in system monitoring features to keep an eye on your server’s resource usage, such as CPU, memory, and network activity. This can help you identify potential bottlenecks and optimize your server for better performance.
- Manage User Accounts: With Cockpit, you can easily create, modify, and delete user accounts on your Linux server. Use the Accounts module to manage users and their privileges, making user administration simple and efficient.
- Configure Storage: Cockpit offers a powerful storage management interface that allows you to create and manage logical volumes, RAID arrays, and iSCSI targets. Use the Storage module to keep your data organized and secure.
- Backup Your Configuration: Before making significant changes to your server’s configuration using Cockpit, ensure you have a backup of your configuration files. This will allow you to quickly revert any changes if needed.
These tips will assist you in starting with Cockpit on Ubuntu Linux and enable you to leverage its powerful features fully. Explore various modules and settings to tailor Cockpit to your server management needs.
Additional Cockpit Commands on Ubuntu
Update Cockpit
To ensure that Cockpit stays up to date on your Ubuntu 20.04 system, you should regularly check for updates. This is crucial for maintaining the security and stability of your server. To check for updates, execute the following command in your terminal:
sudo apt updateAfter fetching the updates, you can upgrade your system packages, including Cockpit, by running:
sudo apt upgradeThis command will upgrade all the available packages, keeping your Cockpit installation up to date alongside other system packages.
Remove Cockpit
If you find that you no longer require Cockpit on your system, you can easily remove it by executing the following command:
sudo apt remove cockpitThis command will uninstall Cockpit and remove all its unused dependencies initially installed. Removing unused software is essential for maintaining a clean, secure system environment. For PPA installations, use the following command to remove the PPA:
sudo add-apt-repository --remove ppa:vivnet/cockpit -yClosing Thoughts
We’ve walked through the steps of installing Cockpit on Ubuntu Linux, whether you’re using version 24.04, 22.04, or 20.04. This guide aimed to make the process seamless, using Ubuntu’s default repository or a third-party PPA. My final piece of advice? Dive in and explore Cockpit’s features. It’s a powerful tool that simplifies server management, and you’ll likely find it a valuable addition to your admin toolkit.