VirtualBox 7, the latest version of the renowned open-source virtualization software, offers many new features and improvements tailored for Debian users. This guide will focus on how to install VirtualBox 7.0 on Debian 12 Bookworm, Debian 11 Bullseye, or Debian 10 Buster using the official APT repository.
Key Features of VirtualBox 7 for Debian Users
- Full VM Encryption: Enhanced security measures include the ability to encrypt virtual machines, safeguarding your data thoroughly.
- Cloud VM Integration: VirtualBox 7 allows for seamless management of Oracle Cloud Infrastructure virtual machines alongside your local VMs.
- Performance Monitoring: A new utility has been added to the GUI, offering real-time performance statistics for virtual machines.
- Guest Control Improvements: The latest version simplifies maintenance by automatically updating Guest Additions for Linux guests.
- Enhanced 3D Support: Improved graphics capabilities are now available thanks to new 3D support based on DirectX 11.
- Virtual TPM Devices: Virtual TPM 1.2 and 2.0 devices have been added for cryptographic operations, offering a secure and isolated environment.
With these robust features, VirtualBox 7.0 elevates the virtualization experience, offering Debian users a secure, efficient, and user-friendly platform. Stay tuned for the step-by-step guide on installing VirtualBox 7.0 on your Debian system.
Import VirtualBox APT Repository into Debian 12, 11, or 10
Step 1: Updating Your Debian System Before VirtualBox Installation
Before we dive into the installation of VirtualBox 7.0, it’s crucial to ensure your Debian system is up-to-date. Keeping your system’s packages current helps avoid any potential hiccups during installation due to outdated software components.
First, let’s update the package list on your Debian system. This step keeps your system informed about the latest available versions of each package. Open your terminal and run the following command:
sudo apt updateAfter updating the package list, let’s upgrade the packages themselves. This step will replace any outdated packages with their latest versions. You can do this by executing the following command:
sudo apt upgradeStep 2: Install Initial Packages Required By VirtualBox on Debian
For a successful installation of VirtualBox, specific prerequisite packages must be present on your system. While most of these packages are likely already installed on your Debian system, it’s always a good practice to double-check.
Run the following command to ensure all the required dependencies are installed:
sudo apt install dirmngr ca-certificates software-properties-common apt-transport-https curl -yIf you encounter installation issues in the following steps, consider revisiting this step and re-running the command.
Step 3: Import VirtualBox GPG Key on Debian
For package authenticity and integrity, you should add the GPG (GNU Privacy Guard) key. This key from the public key cryptography system ensures the packages come from the official VirtualBox repository.
Run this command to add the GPG key:
curl -fSsL https://www.virtualbox.org/download/oracle_vbox_2016.asc | gpg --dearmor | sudo tee /usr/share/keyrings/virtualbox.gpg > /dev/nullStep 4: Adding the VirtualBox Repository on Debian
The following command is compatible with all currently supported stable releases of Debian, which at this time are Bookworm, Bullseye, and Buster.
Now, let’s add the VirtualBox repository to your system. This repository contains the VirtualBox packages we will install in the following steps.
Run the following command to add the repository:
echo "deb [arch=$( dpkg --print-architecture ) signed-by=/usr/share/keyrings/virtualbox.gpg] http://download.virtualbox.org/virtualbox/debian $(lsb_release -cs) contrib" | sudo tee /etc/apt/sources.list.d/virtualbox-7.listAfter adding the VirtualBox repository, update your system’s repository list again. This step ensures that your system recognizes the newly added VirtualBox repository. You can do this by executing the following command:
sudo apt updateWith these steps, you’ve successfully incorporated the VirtualBox APT repository into your system. You’re now ready to proceed with the installation of VirtualBox 7.0.
Install VirtualBox 7.0 on Debian 12, 11, or 10 via APT
Now that we’ve successfully incorporated the VirtualBox repository, let’s install VirtualBox 7.0 on your Debian system.
Step 1: Install VirtualBox 7.0 and Debian Headers
The first step is to install VirtualBox 7.0 and the corresponding Debian headers for your system’s kernel version. These headers are necessary for VirtualBox to function correctly. Run the following command to install VirtualBox 7.0 and the appropriate Linux headers:
sudo apt install virtualbox-7.0 linux-headers-$(uname -r) -yThis command instructs Debian to fetch and install VirtualBox 7.0 and the suitable Linux headers from the repository for your specific kernel version.
Step 2: Verifying VirtualBox Installation on Debian
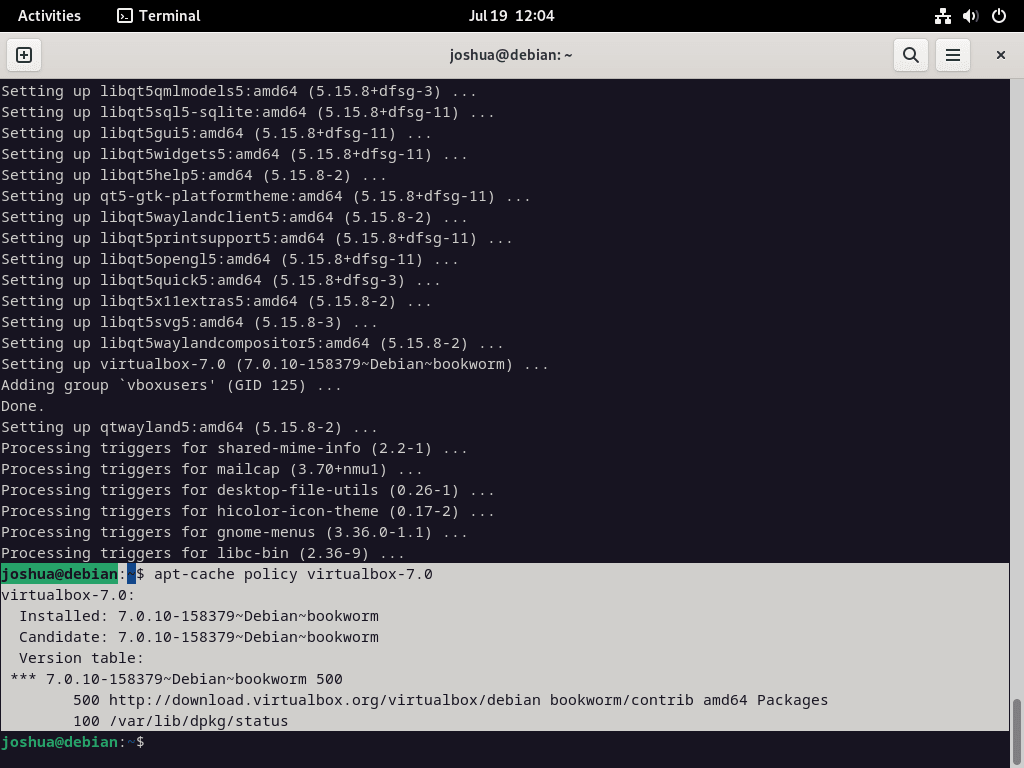
As an optional but recommended step, you can verify that the VirtualBox installation was sourced from the repository we added earlier. We can use the apt-cache policy command for this provides information about the installed package’s priority, version number, and origin repository.
Run the following command to check the installation:
apt-cache policy virtualbox-7.0Upon executing the command, you’ll receive an output similar to the following:
Carefully examine the output, ensuring that the version number matches VirtualBox 7.0 and the repository is indeed the official VirtualBox repository we previously added.
Step 3: Checking the VirtualBox Service Status on Debian
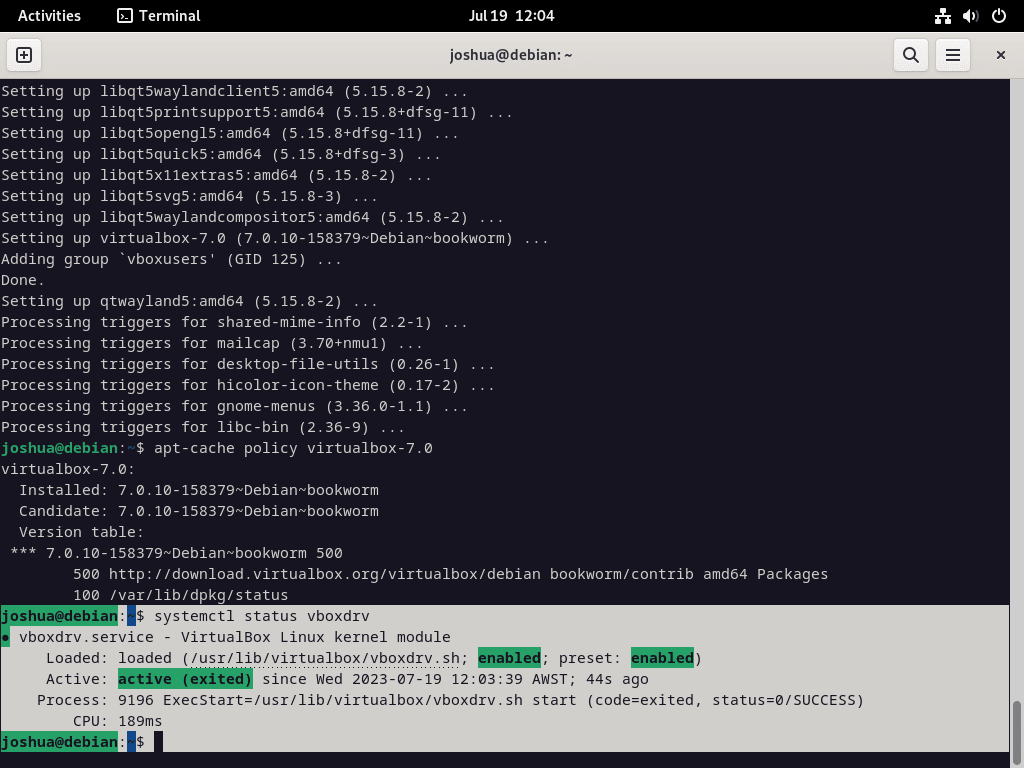
With the installation confirmed, let’s check the current status of the vboxdrv service. This service is responsible for managing VirtualBox kernel modules. We can check the service status by executing the following command:
systemctl status vboxdrvThis command provides the service’s status, detailing whether it’s active or running. Here’s an example of what you might see:
You should see an output indicating that the service is active, which signifies a successful installation.
Step 4: Enabling and Starting the VirtualBox Service (If Required)
In some cases, the vboxdrv service may not be activated by default after the installation. To start the service and set it to run automatically at system boot, use the following command:
sudo systemctl enable vboxdrv --nowRunning this command ensures the VirtualBox service operates correctly and your system is ready for VirtualBox 7 usage.
Initiating VirtualBox 7.0 on Debian 12, 11 or 10
We can now initialize the application with VirtualBox 7.0 successfully installed, and the essential service is confirmed operational. This enables us to begin creating and managing our virtual machines.
Starting VirtualBox via the Terminal on Debian (Optional)
VirtualBox can be launched via a simple command for those who prefer working directly from the terminal.
To do so, enter the following command in your terminal:
virtualboxThis command starts up the VirtualBox application, giving you the power to manage your virtual machines directly from your terminal.
Launching VirtualBox from the Desktop on Debian
Launching VirtualBox through the desktop environment may be more convenient for users who favor a graphical interface.
- Locate the Activities option at the top of your screen and click on it.
- Choose Show Applications from the dropdown menu.
- Find and select Oracle VM Virtualbox from the list of applications.
Install VirtualBox Extension Pack on Debian 12, 11, or 10
The VirtualBox Extension Pack is an optional but highly beneficial add-on that can significantly enhance your VirtualBox experience by providing several advantageous features. Here’s a step-by-step guide on how to install it.
Step 1: Download the VirtualBox 7.0 Extension Pack on Debian
The Extension Pack version you download should match the version of VirtualBox installed on your Debian system. To determine your VirtualBox version, execute the following command:
vboxmanage -v | cut -dr -f1This command will return the version number in a format similar to ‘7.0.x’. With this information, you can proceed to download the appropriate Extension Pack using the wget command:
wget https://download.virtualbox.org/virtualbox/7.0.x/Oracle_VM_VirtualBox_Extension_Pack-7.0.x.vbox-extpackIn this command, replace each instance of ‘7.0.x’ in the URL with your specific VirtualBox version.
Step 2: Install the VirtualBox 7.0 Extension Pack on Debian
Use the following command to install the Extension Pack you downloaded:
sudo vboxmanage extpack install Oracle_VM_VirtualBox_Extension_Pack-7.0.x.vbox-extpackDuring the installation, the system will prompt you to accept Oracle’s license terms.
Type “y” and hit Enter to agree.
Step 3: Verifying the Version of the Installed Extension Pack on Debian
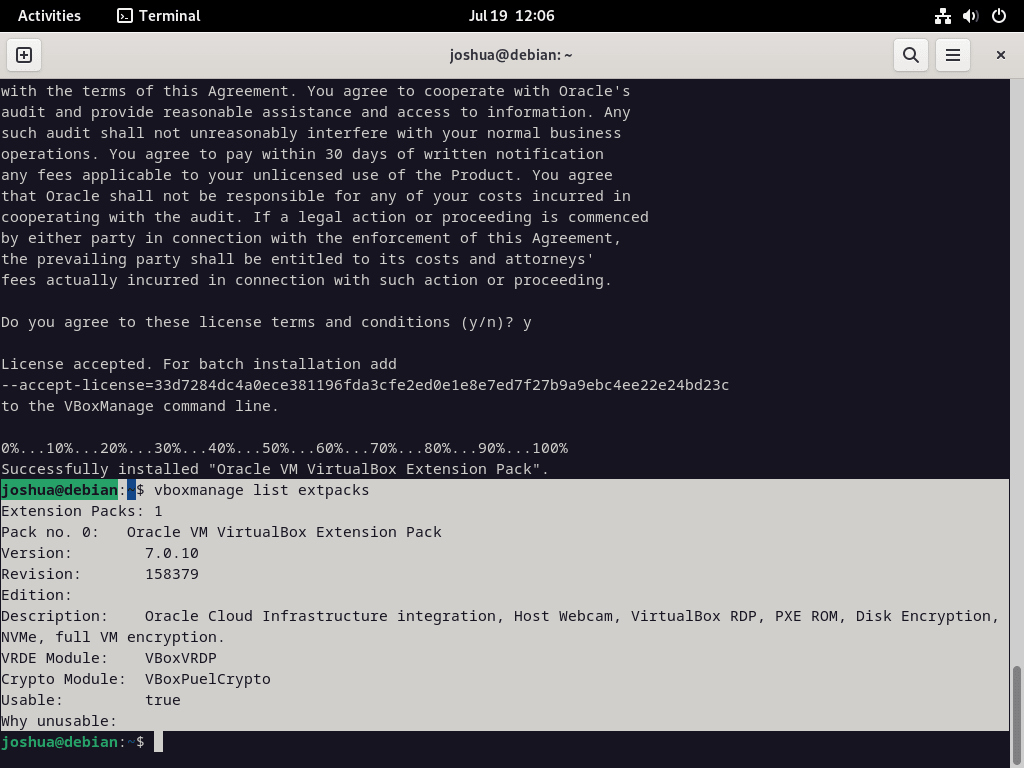
To validate the version of the Extension Pack that you installed, use the following command:
vboxmanage list extpacksThis command will display vital information about the installed Extension Packs, including their version numbers.

Step 4: Adding User to the vboxusers Group on Debian
To use VirtualBox, add your user account to the vboxusers group.
Run the following command:
sudo usermod -a -G vboxusers $USERAfter running the command, reboot your system. Once you log back in, check if you successfully added your user account to the vboxusers group. Run:
groups $USERThis command shows the groups to which your user account belongs. Make sure vboxusers appear in the list.
Additional Commands for VirtualBox on Debian 12, 11 or 10
This section provides insights into various supplementary commands and strategies that can streamline the management of VirtualBox on your Debian system.
Update VirtualBox 7.0 on Debian
It’s essential to update your VirtualBox installation regularly. To check and apply updates, use the terminal with the command below:
sudo apt update && sudo apt upgradeRemove VirtualBox 7.0 From Debian
If at any point you decide to remove VirtualBox from your system entirely, the following command allows you to do so:
sudo apt remove virtualbox-7.0Removing the VirtualBox 7.0 Repository Sources File
If you wish to remove the repository sources file, you can accomplish this by executing the following command:
sudo rm /etc/apt/sources.list.d/virtualbox-7.listOption to Remove the VirtualBox GPG Key
To delete the GPG key, use the following command:
sudo rm /usr/share/keyrings/virtualbox.gpgWith these commands and techniques, you can effectively manage your VirtualBox installation, ensuring it remains updated and removing it entirely if necessary.
Conclusion
This guide has offered a comprehensive walkthrough for installing VirtualBox 7.0 on Debian 12 Bookworm, Debian 11 Bullseye, or Debian 10 Buster. We’ve covered updating your Debian system, installing dependencies, adding the GPG key, and including the VirtualBox repository. The guide also addresses the actual VirtualBox 7.0 installation process, confirming the installation, checking VirtualBox service status, and launching the service. We’ve briefly discussed the optional VirtualBox Extension Pack installation for added features. Additionally, we’ve shared supplementary commands and techniques to manage your VirtualBox setup, such as updates and uninstallation instructions if needed.


