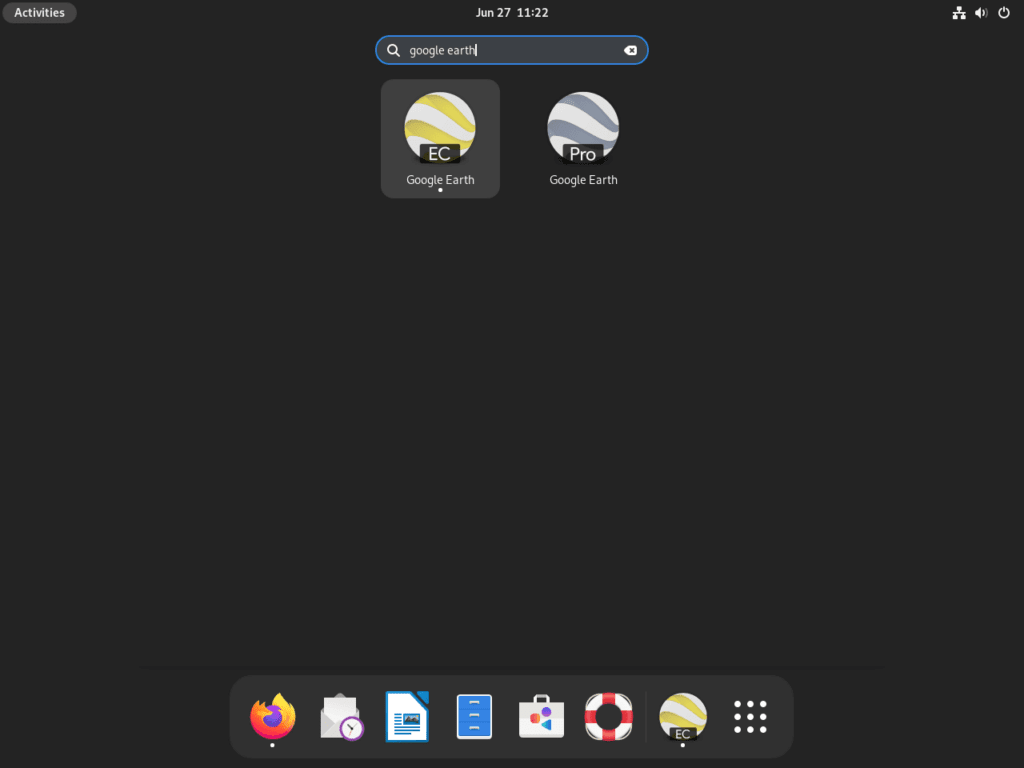
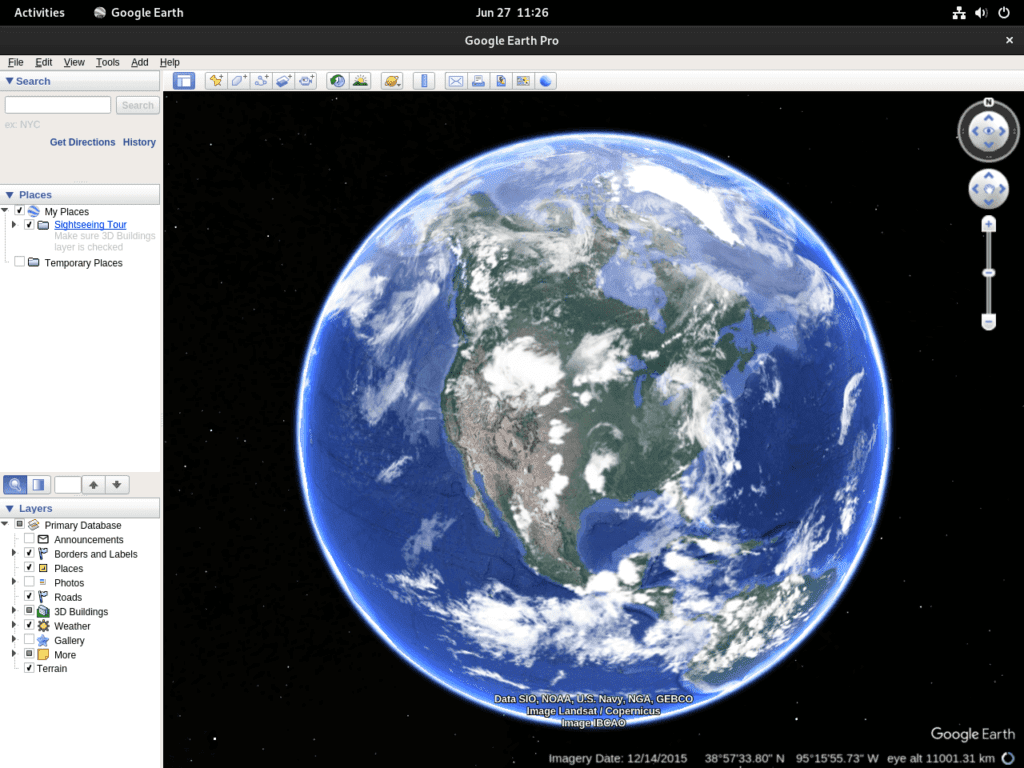
For those interested in digital geography, Google Earth offers a comprehensive platform to explore the world virtually. This guide focuses on how to install Google Earth on Debian 12 Bookworm, Debian 11 Bullseye, or Debian 10 Buster. Google Earth has two main versions: Google Earth Pro and Google Earth EC (Enterprise Client), each catering to different user needs.
Key Features of Google Earth Versions
- Google Earth Pro:
- Aimed at educators, students, and general users.
- Offers global satellite imagery and geographic data.
- Features tools for map creation and storytelling.
- Free to use, no commercial license needed.
- Google Earth EC:
- Designed for business and enterprise applications.
- Provides advanced data visualization and site planning tools.
- Allows integration with proprietary and GIS data.
- Requires a commercial license and offers customer support.
Google Earth has become indispensable for various sectors, from education to business. Its rich set of features allows users to explore geographic data in a detailed and interactive manner. Whether you’re an educator enriching your teaching materials or a business leveraging geographic data, Google Earth offers solutions tailored to your needs.
This guide will provide step-by-step instructions for installing Google Earth, enabling you to tap into a world of geographic information from your Debian system. Stay tuned for the detailed installation steps.
Section 1: Import Google Earth Repository on Debian 12, 11 or 10
Before delving into the installation of Google Earth on your Debian Linux system, it is crucial to configure the system aptly. This involves updating the system packages, installing the required dependencies, and setting up the Google Earth repository. These steps ensure a stable environment for Google Earth’s seamless installation and functioning.
Step 1: Updating Your Debian Linux System Before Google Earth Installation
Ensuring that your Debian Linux system is up to date is fundamental. An updated system reduces the possibility of software conflicts during the installation of new packages, enhancing security and performance.
Execute the following command in the terminal to fetch the latest package information from all configured sources:
sudo apt updateNow that we have an updated list of packages, let’s upgrade any outdated software on your system with the following command:
sudo apt upgradeThis command installs the newest versions of the software packages available in the repositories, and your system is now prepared for Google Earth’s installation.
Step 2: Install Initial Packages for Google Earth Installation on Debian
Though the installation of Google Earth is usually straightforward, specific packages need to be in place for an untroubled installation process. It is wise to ensure that these packages are installed, even if they are familiar and might already be present in your Debian Linux system.
Use the following command to install the necessary packages:
sudo apt install curl software-properties-common apt-transport-https ca-certificates -yThis command installs curl (used for transferring data with URLs), software-properties-common (for managing repositories), apt-transport-https (for secure package downloads), and ca-certificates (for standard SSL/TLS certificates). If these packages are installed, executing this command won’t adversely affect your system.
Step 3: Add Google Earth Repository on Debian
One of the indispensable steps in installing Google Earth is importing the GPG key associated with its digital signature. This GPG key is essentially a cryptographic identity confirming that the software you install is genuine and hasn’t been tampered with.
Use the following command to import the GPG key:
curl -fSsL https://dl.google.com/linux/linux_signing_key.pub | gpg --dearmor | sudo tee /usr/share/keyrings/google-earth.gpg > /dev/nullHaving successfully imported the GPG key, we can now add the Google Earth repository. This repository is the authenticated source from which the software will be downloaded. To add the repository, execute the following command:
echo "deb [arch=amd64 signed-by=/usr/share/keyrings/google-earth.gpg] http://dl.google.com/linux/earth/deb/ stable main" | sudo tee /etc/apt/sources.list.d/google-earth.listWith these steps completed, your Debian Linux system is now well-configured and ready to install Google Earth on Debian 12, 11, or 10 Linux.
Section 2: Install Google Earth on Debian 12, 11 or 10
Having configured the repository and ensured all necessary packages are in place, we are poised to execute the principal task – installing Google Earth on your Debian Linux system.
Step 1: Updating the APT Repository List for Google Earth on Debian
Before we install Google Earth on Debian 12, 11, or 10 Linux, it is vital to refresh the APT sources list to include the recently added Google Earth repository. Doing this guarantees that the package manager is aware of the latest metadata associated with the packages within the repository.
To update the APT sources list, run the following command:
sudo apt updateStep 2: Install Google Earth Pro or Google Earth Enterprise (EC) on Debian
Now that our system is primed, it’s time to install Google Earth. It’s worth mentioning that Google Earth comes in two flavors: Google Earth Pro and Google Earth Enterprise (EC). Google Earth Pro is free and suffices for most users, offering comprehensive features for geographic exploration. On the other hand, Google Earth Enterprise is a premium service that avails additional features and capabilities tailored for businesses and professionals.
To install Google Earth Pro, input the following command:
sudo apt install google-earth-pro-stableIf your preference leans towards Google Earth Enterprise, the following command will install it:
sudo apt install google-earth-ec-stableThese commands initiate the download of the selected version of Google Earth from the official repository, followed by the installation on your Debian Linux system. Once the installation concludes, Google Earth is at your disposal, equipped to provide a remarkable experience as you explore the Earth’s geography.
Section 3: Launching Google Earth on Debian 12, 11 or 10
Having successfully installed Google Earth on your Debian Linux system, you are now geared up for an immersive virtual exploration of our planet. Google Earth can be activated through the terminal or Debian’s Graphical User Interface (GUI). In this section, we will delineate both methods to furnish a comprehensive guide catering to all users, irrespective of their affinity for system interaction.
Step 1: Launching Google Earth via Terminal on Debian
Launching Google Earth from the command line is a practical and elementary procedure for users proficient in terminal utilization. This approach is typically faster and is favored by those who prefer keyboard-centric operations.
Execute the following command to launch Google Earth Pro from the terminal:
google-earth-pro-stableIf you have installed the Enterprise version, modify the command as follows:
google-earth-ec-stableRemember that these commands are explicitly tied to the variant of Google Earth installed on your system, so selecting the correct command is indispensable for a successful launch.
Step 2: Launching Google Earth through the Graphical User Interface on Debian
Though the terminal is a formidable instrument for administering your Debian Linux system, not all users are comfortable with command-line engagements. Debian acknowledges this and offers an accessible and intuitive GUI for various system activities, including initiating applications like Google Earth.
To launch Google Earth via the GUI, adhere to the following course of action:
Step 1: Access the Activities Overview
Click on Activities, positioned at the top-left corner of your screen.
Step 2: Open Show Applications
Next, click on Show Applications. Typically, this option is signified by a grid of dots at the screen’s lower-left corner.
Step 3: Locate and Launch Google Earth
Within the applications list, seek out Google Earth. If you have installed multiple versions, they will be itemized accordingly. For example, Google Earth Pro will be labeled Google Earth Pro, while Google Earth Enterprise will be designated Google Earth EC. Click on the version you are interested in launching.

Section 4: Tips for Getting Started with Google Earth Pro on Debian
After successfully installing and launching Google Earth Pro on your Debian Linux system, you may be eager to dive into its extensive features and start exploring. Here are some valuable tips tailored exclusively for Google Earth Pro on Debian Linux to streamline your experience and ensure you’re utilizing the program to its fullest potential.
Tip 1: Make Use of Layers
Google Earth Pro offers a myriad of layers that can be superimposed on the map to provide additional information. For instance, there’s a layer for traffic, one for terrain, and even historical imagery. To access the Layers panel, look towards the lower-left section of the Google Earth Pro window. Here, you can select or deselect layers based on your interests.
Tip 2: Import Custom Data
One of the powerful features of Google Earth Pro is the ability to import custom data. You can overlay KML, KMZ, or GPS data on the map. This is particularly useful for professionals who need to analyze geographical data. To import data, navigate to the “File” menu and select “Import”.
Tip 3: Use the Flight Simulator
Few users know that Google Earth Pro has a built-in flight simulator. It’s an engaging way to explore different parts of the world virtually. Go to the “Tools” menu to access the flight simulator and choose “Enter Flight Simulator.”
Tip 4: Leverage the Ruler Tool for Measurements
Google Earth Pro is not just for visualization; you can also use it for measurements. The Ruler tool allows you to measure distances and areas. Whether you want to measure the length of a river or the area of a city, the Ruler tool is indispensable. Access it by clicking the “Tools” menu and selecting “Ruler”.
Tip 5: Customizing the Toolbar
Optimizing your workflow in Google Earth Pro can be achieved by customizing the toolbar. Add or remove buttons depending on your usage patterns. This will enable quicker access to the tools you use frequently. To customize the toolbar, right-click and select “Customize Toolbar.”
Tip 6: Save and Share Your Projects
Google Earth Pro allows you to save your projects, which is helpful for future reference or sharing with colleagues. Save your work as a KML or KMZ file, which other Google Earth Pro users can easily share and open. Use the “File” menu to save your project.
Tip 7: Explore Historical Imagery
Dive into the past with Google Earth Pro’s historical imagery feature. This allows you to view older satellite images of locations, which is especially useful for observing how places have evolved. To access historical imagery, click the “View” menu and select “Historical Imagery”.
Tip 8: Optimize Preferences for Performance
On Debian Linux, it might be beneficial to tweak the Google Earth Pro preferences for optimal performance, especially if you’re running on a system with limited resources. Go to the “Edit” menu, select “Preferences,” and adjust the graphics settings according to your system’s capabilities.
This compilation of tips aims to enhance your proficiency and efficacy when using Google Earth Pro on Debian Linux. Remember, exploration and experimentation within the application can often reveal additional features and functionalities that can be of immense value in your geospatial endeavors.

Section 5: Managing Google Earth on Debian 12, 11 or 10
As you gain expertise in using Google Earth Pro or EC on Debian Linux, there might be times when you need to perform advanced operations like updating or uninstalling the application. This section will guide you through these tasks to ensure you can manage Google Earth efficiently on your Debian Linux system.
How to Update Google Earth on Debian 12, 11, or 10
The first action is to refresh the package list on your Debian Linux system. This step ensures that your system knows the latest versions of all packages. To do this, execute the following command in the terminal:
sudo apt updateThis command retrieves the latest package information from all configured sources, including the Google Earth Pro repository.
Upgrading Specific Packages
Once the package list is refreshed, you need to update the packages. If you want to specifically update Google Earth Pro without altering other packages, use this command:
sudo apt install --only-upgrade google-earth-pro-stableThis command instructs APT to concentrate solely on updating Google Earth Pro.
Or blanket upgrade all available packages:
sudo apt upgradeHow to Remove Google Earth from Debian 12, 11, or 10
To remove Google Earth Pro, use the following command:
sudo apt remove google-earth-pro-stableFor the Enterprise version, the command changes slightly:
sudo apt remove google-earth-ec-stableAfter uninstalling the application, removing the Google Earth repository and GPG key is a good practice to ensure your system remains clean. Use these commands:
sudo rm /usr/share/keyrings/google-earth.gpg
sudo rm /etc/apt/sources.list.d/google-earth.list
Section 6: Troubleshooting Google Earth Multiple Sources.list Conflicts on Debian Linux
You may occasionally face challenges while utilizing Google Earth Pro on your Debian Linux system. A common issue is conflicts arising from having multiple versions of Google Earth installed, which creates multiple sources.list files. In this section, we delve into the details of resolving these conflicts, thereby ensuring a smooth operation of your system.
Step 1: Grasping the Nature of the Conflict
The Origin of Multiple Sources.list Files
When you install different versions of Google Earth Pro, each installation generates a unique sources.list file. These files are situated within the /etc/apt/sources.list.d/ directory. This redundancy can cause conflicts during the execution of the apt update command because the system detects multiple sources.list files for Google Earth. This is akin to having multiple roadmaps for the same destination, causing confusion.
Step 2: Pinpointing the Conflict
Signs of a Sources.list Conflict
For example, if you used this guide for installing Google Earth Pro and subsequently installed additional versions, you might face issues. These additional installations create supplementary source files, and this redundancy can cause conflicts.
Step 3: Resolving the Sources.list Conflict
Removing Redundant Sources
To resolve the conflict, it’s imperative to eliminate the conflicting sources from your system. The following terminal commands will remove the surplus source files for Google Earth Pro and Google Earth EC installations while retaining the original “google-earth.list”:
sudo rm /etc/apt/sources.list.d/google-earth-pro.list
sudo rm /etc/apt/sources.list.d/google-earth-ec.list
Updating the Package List
After cleaning up the redundant sources, you must update the package list to reflect these changes. This step ensures that your system knows the correct sources for Google Earth. Use the following command:
sudo apt updateBy executing these steps, you effectively eliminate the conflicts caused by multiple sources.list files for Google Earth. This ensures that your system will receive updates for Google Earth Pro or EC without interruptions and maintains optimal functionality.
Please note that regular maintenance and understanding the underlying mechanisms of package management are integral to proficiently handling Debian Linux systems, especially when working with complex software like Google Earth Pro.
Conclusion
Throughout this article, we have meticulously navigated the process of installing Google Earth on Debian Linux, versions 12/11/10. We commenced with the fundamental prerequisites and entered the installation procedure, employing GUI and command-line methods. Moreover, we discussed updating Google Earth Pro to benefit from improved features and security patches and addressed the uninstallation process for different scenarios. Furthermore, we tackled a common challenge by troubleshooting multiple sources.list conflicts that may arise from installing various versions of Google Earth.
For a seamless experience with Google Earth on Debian Linux, it is imperative to keep the application updated and periodically review the sources to prevent conflicts.


