This guide will demonstrate how to install TeamViewer on Fedora Linux using the command-line terminal with the TeamViewer RPM via the DNF package manager.
TeamViewer is a versatile tool that bridges the gap between various platforms, offering a seamless and efficient solution for remote control, file transfer, and desktop sharing. Its robust set of features allows users to connect to multiple workstations, providing a lifeline for IT support and remote collaboration.
Here’s what sets TeamViewer apart:
- Cross-platform compatibility: Works effortlessly across Windows, macOS, Linux, and mobile operating systems.
- Secure connection: Ensures end-to-end encryption, safeguarding your data during every session.
- Intuitive interface: Designed for ease of use, enabling quick and hassle-free remote access.
- File transfer: Facilitates smooth and secure file sharing between devices.
- Multi-user support: Allows multiple participants to join a session, enhancing collaborative efforts.
- Remote printing: Print documents from a remote device to a local printer, streamlining workflow.
- Wake-on-LAN: Remotely wake up your device, providing flexibility in accessing systems.
- High performance: Optimized for connections over LAN and the internet, delivering high-speed and reliable remote access.
With these features, TeamViewer stands out as a comprehensive solution for remote access needs.
Now, let’s dive into the technical how-to, ensuring you can leverage TeamViewer’s capabilities on your Fedora system.
Install TeamViewer on Fedora via RPM
Before starting the installation, ensure that all existing packages on your system are up-to-date to avoid potential conflicts:
sudo dnf upgrade --refreshFirst, import the TeamViewer repository and create the necessary file using a text editor like Nano:
sudo nano /etc/yum.repos.d/teamviewer.repoCopy and paste the following content into the file:
[teamviewer]
name=TeamViewer - $basearch
baseurl=https://linux.teamviewer.com/yum/stable/main/binary-$basearch/
gpgkey=https://linux.teamviewer.com/pubkey/currentkey.asc
gpgcheck=1
repo_gpgcheck=1
enabled=1
type=rpm-md
Ensure that $basearch is included in the configuration; otherwise, you might encounter a 403 error. Save the file by pressing CTRL+O and exit nano with CTRL+X.
With the repository configured, proceed with the TeamViewer installation using the following command:
sudo dnf install teamviewerYou’ll be prompted to import the GPG key if you’re new to Linux. When you see this prompt, type “Y” and press Enter to continue.
Launch TeamViewer on Fedora
Now that TeamViewer is installed on your system, there are several ways to launch the application, catering to users with different preferences.
Command-Line Launch Method For TeamViewer
For those who prefer using the command line terminal, TeamViewer can be quickly launched by entering the following command:
teamviewerGUI Launch Method For TeamViewer
For desktop users who would instead not use the command line terminal, TeamViewer can be opened through the graphical user interface (GUI) by navigating the application menu:
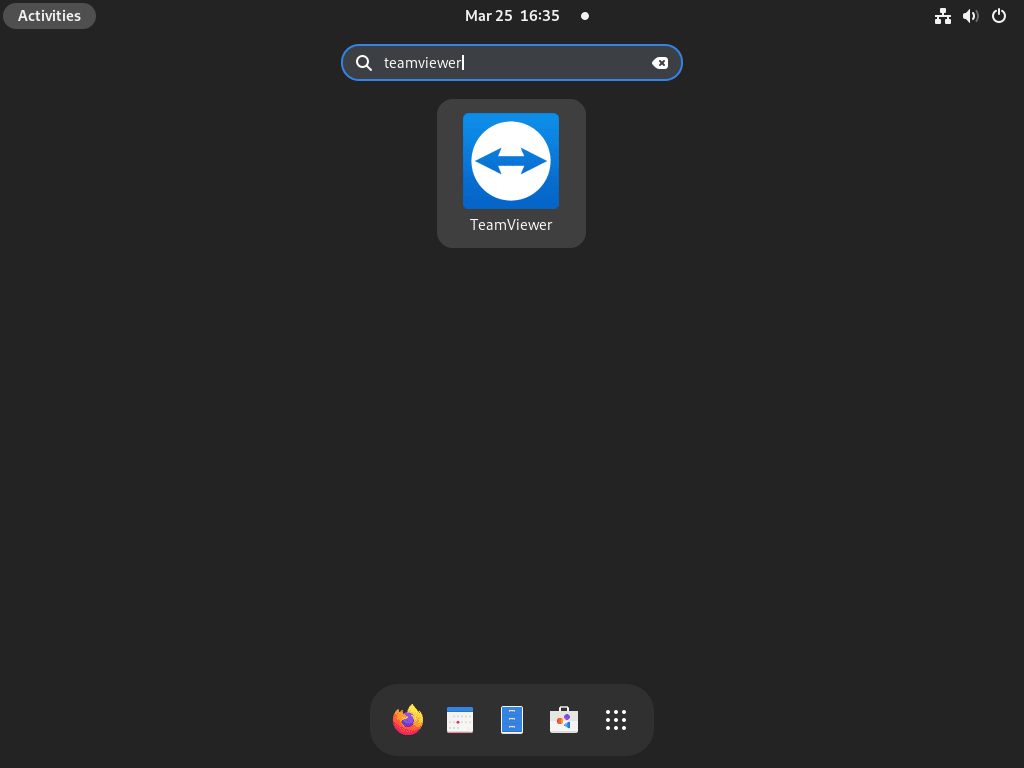
- Click on Activities in the top-left corner of your screen.
- Select Show Applications (represented by a grid icon) at the bottom of the Activities panel.
- Search for “TeamViewer” in the search bar or locate the TeamViewer icon among the listed applications.
- Click on the TeamViewer icon to launch the application.

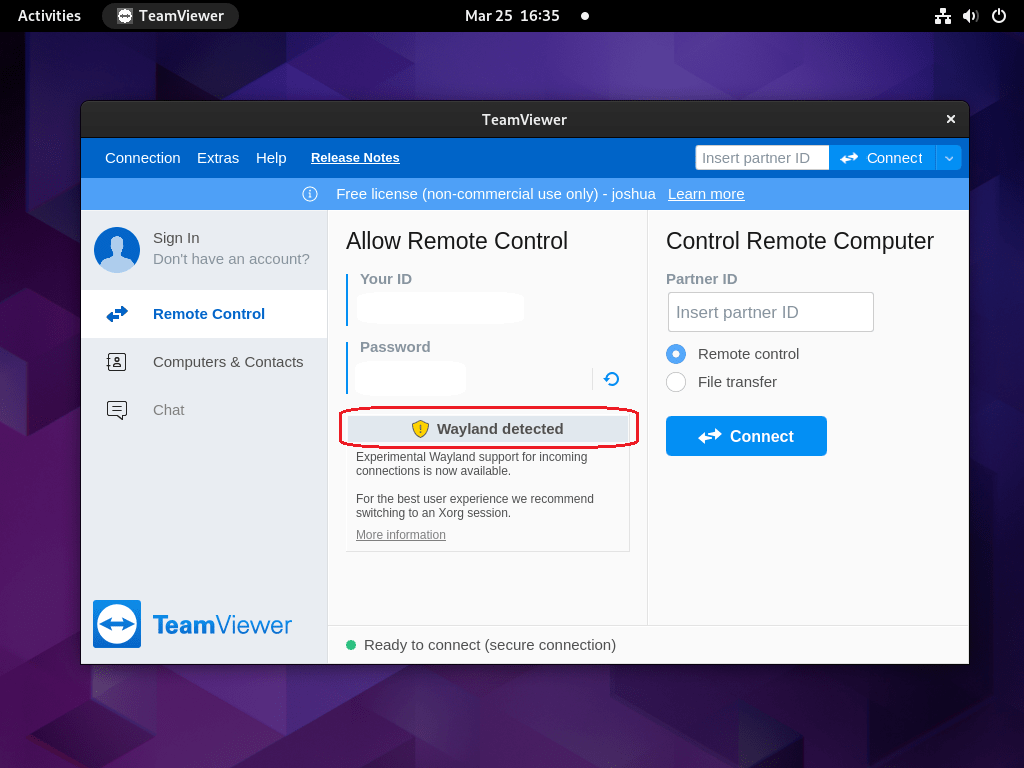
Many Fedora users have adopted Wayland as their display server protocol or prefer using it over X.Org. However, it’s essential to note that TeamViewer does not support Wayland.

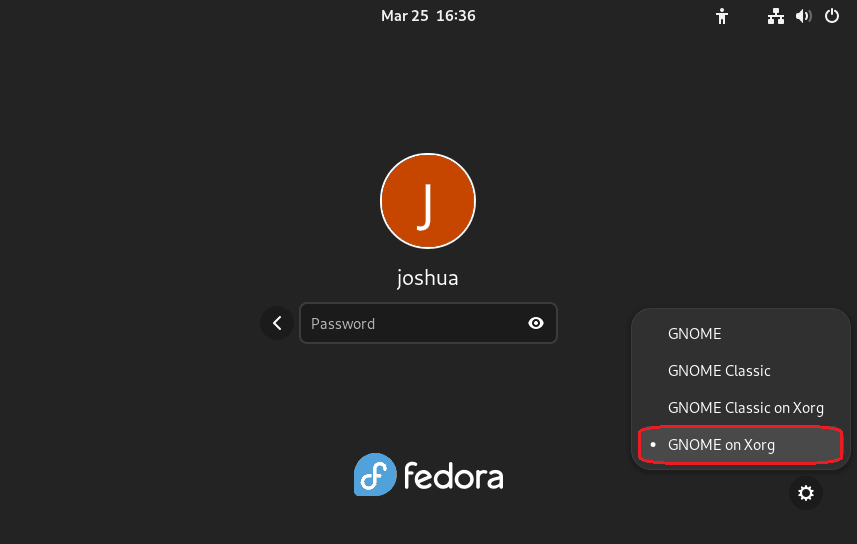
Unfortunately, Wayland’s support in TeamViewer is not expected to arrive soon. Discussions regarding this compatibility have been ongoing for several years. Given the progress, implementing Wayland support in TeamViewer might take another decade. In the meantime, to use TeamViewer on Fedora, you’ll need to switch from Wayland to GNOME on Xorg by following these steps:
- Log out of your current session.
- Click the gear icon (⚙️) next to the “Sign In” button on the login screen.
- Choose “GNOME on Xorg” from the available options.
- Log back into your Fedora system.

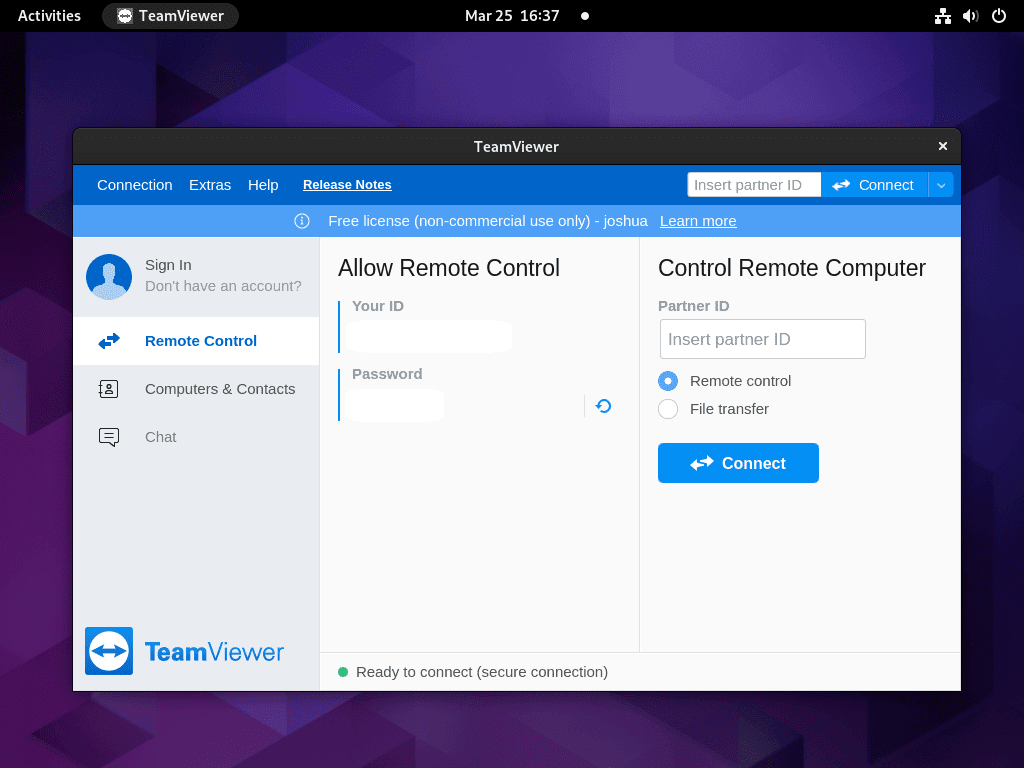
After launching TeamViewer with Xorg, you are ready to utilize its features. To connect to a remote PC, you can obtain the remote computer’s TeamViewer ID or share your ID with another user.
First-Time Tips with TeamViewer on Fedora
Now that you have successfully installed TeamViewer on Fedora, here are some first-time tips to help you get started with the software and make the most of your remote access experience:
General Tips for TeamViewer on Fedora
- Check Compatibility: Ensure that your Fedora system meets the necessary requirements for TeamViewer to function optimally.
- Secure Your Connection: Always use a strong, unique password for unattended access and enable two-factor authentication to enhance security.
- Understand the Interface: Familiarize yourself with TeamViewer’s user interface to navigate and access its features efficiently.
- Network Configuration: Ensure that your firewall settings on Fedora allow TeamViewer to communicate through the network.
Customization Tips for TeamViewer on Fedora
- Personalize Settings: Dive into TeamViewer’s settings to customize aspects like default connection quality, audio sharing preferences, and remote display resolution.
- Manage Your Contacts: Organize your TeamViewer contacts and devices for quick access, simplifying the process of establishing connections.
- Adjust Display Quality: Tailor the display quality and speed to suit your network conditions, optimizing performance.
- Use Wake-on-LAN: Set up Wake-on-LAN to remotely turn on your Fedora machine when needed, a handy feature for remote access.
Keyboard Shortcuts for TeamViewer on Fedora
- Quick Connect: Learn the shortcut keys to quickly start a remote session without navigating through the menu.
- Switch Between Monitors: Master the keyboard shortcuts to switch between multiple monitors of the remote device.
- File Transfer Shortcut: Use keyboard shortcuts to initiate file transfers between connected devices.
- Chat and VoIP: Familiarize yourself with shortcuts for instant messaging and voice calls during a TeamViewer session.
Additional Tips for TeamViewer on Fedora
- Utilize the Chat Feature: Use TeamViewer’s built-in chat for communication with the remote user, enhancing collaboration.
- Take Advantage of VPN: Explore TeamViewer’s VPN feature for a secure connection, allowing you to access remote network resources as if you were physically present.
- Session Recording: Record your remote sessions for future reference, training, or auditing purposes.
- Explore Advanced Features: Delve into advanced features like remote printing or file sharing to fully leverage TeamViewer’s capabilities on Fedora.
Incorporating these tips into using TeamViewer on Fedora will enhance your remote access experience, ensuring efficient and secure connections.
Additional Commands with TeamViewer on Fedora
Update TeamViewer
The software should update itself with your system packages for desktop users using the DNF package manager. Use the following command in your terminal for users who want to check manually.
sudo dnf update --refreshRemove TeamViewer
When you no longer want the video conference software installed on your system, use the following command to remove it.
sudo dnf remove teamviewerRemove the repository if you plan not to re-install the software again.
sudo rm /etc/yum.repos.d/teamviewer.repoConclusion
Throughout this guide, we’ve walked you through the steps to install TeamViewer on Fedora, shared some essential first-time tips, and explored customization and keyboard shortcuts to enhance your TeamViewer experience. Remember, keeping your TeamViewer installation secure and personalized is key to a smooth remote access experience. Whether you’re assisting a colleague or accessing your own device from afar, TeamViewer on Fedora is a powerful tool at your disposal. Keep experimenting with its features to find what works best for you, and enjoy the convenience and efficiency it brings to your remote connections.


