
qBittorrent fits two common Debian workflows: a full desktop BitTorrent client for local sessions and qbittorrent-nox for a browser-managed WebUI on a headless server. To install qBittorrent on Debian cleanly, choose the package source first, because APT, Flatpak, and AppImage each handle updates, configuration paths, and removal differently.
APT is the safest default for most Debian systems because it uses Debian’s own packages and normal system updates. Flatpak is useful on desktops when you want Flathub packaging and separate app data, while AppImage is a portable desktop-only option for testing the official upstream build outside APT.
Install qBittorrent on Debian
Pick one installation method for the role you need. The desktop client and qbittorrent-nox can coexist, but they serve different jobs: the desktop package opens a graphical app, while qbittorrent-nox runs as a service and exposes the WebUI on port 8080.
| Method | Source or Channel | Update Behavior | Best For | Trade-offs |
|---|---|---|---|---|
| APT Desktop | Debian package archive | Updates through normal APT upgrades | Debian desktops that favor stability and simple maintenance | Version follows your Debian release, so it can lag behind upstream |
APT Headless (qbittorrent-nox) | Debian package archive | Updates through normal APT upgrades; restart the service after package updates | Servers, NAS systems, and always-on torrent hosts without a graphical session | Requires WebUI credential setup and careful network exposure |
| Flatpak | Flathub app | Updates through Flatpak and Flathub runtimes | Desktop users who want Flathub packaging without replacing Debian APT packages | Uses separate Flatpak configuration under ~/.var/app/ |
| AppImage | Official qBittorrent Linux AppImage hosted on SourceForge | Manual replacement or rerun the helper script in this section | Portable desktop testing, especially when you do not want an installed package | x86_64 desktop-only workflow; minimal or headless systems may lack graphics libraries |
Use APT when you are unsure. It installs the Debian-maintained package, keeps updates inside the package manager, and removes cleanly. Choose qbittorrent-nox instead of the desktop package when the machine will run unattended and you plan to control downloads from another browser.
qBittorrent does not publish a separate official Debian
.debinstaller for normal use. Use Debian packages, the Flathub app page, or the official qBittorrent AppImage instead of random repackaged installers from download mirrors.
Default qBittorrent Versions by Debian Release
Debian package versions differ by release, and that changes the WebUI password flow for qbittorrent-nox. The APT package candidates checked for the supported Debian releases are:
| Debian Release | APT Package Version | qbittorrent-nox Service File | Initial WebUI Password Behavior |
|---|---|---|---|
| Debian 13 (Trixie) | 5.1.0-2 | Included at /usr/lib/systemd/system/qbittorrent-nox@.service | Temporary password is written to the service log until permanent credentials are saved |
| Debian 12 (Bookworm) | 4.5.2-3+deb12u1 | Included at /lib/systemd/system/qbittorrent-nox@.service | Legacy default password adminadmin |
| Debian 11 (Bullseye) | 4.2.5-0.1 | Not included; create a local unit file if you want a systemd service | Legacy default password adminadmin |
The Debian 11 path applies while Bullseye remains in LTS coverage for your architecture. New installations should generally use Debian 13 or Debian 12 unless you are maintaining an existing Bullseye system.
Install qBittorrent Desktop with APT
The APT desktop package is the best first choice for a normal Debian workstation. It installs the graphical qBittorrent application, desktop launcher, Qt libraries, and libtorrent dependency set from Debian’s repositories.
Update Debian Before Installing qBittorrent
Refresh APT metadata and apply pending package updates before installing the client:
sudo apt update
sudo apt upgrade
These commands use
sudobecause package changes require administrator privileges. If your account cannot runsudoyet, configure access with the Debian sudoers setup guide before continuing.
Reboot only when the upgrade installs a new kernel, graphics stack, or system library that your desktop session needs to reload:
sudo rebootInstall the qBittorrent Desktop Package
Install the desktop package from Debian’s default repositories:
sudo apt install qbittorrentAPT resolves the Qt and libtorrent dependencies automatically. On minimal systems, this package can install several graphical libraries because the desktop client needs a graphical session to launch.
Verify the APT Desktop Installation
Use dpkg-query to confirm that the Debian package is installed. This check works even from SSH or a text console where the graphical binary cannot open a display:
dpkg-query -W -f='${db:Status-Abbrev} ${binary:Package} ${Version}\n' qbittorrentExample Debian 13 output:
ii qbittorrent 5.1.0-2
The first field should begin with ii, which means the package is installed. The version number should match your Debian release’s package candidate from the version table.
Launch qBittorrent on the Debian Desktop
Launch qBittorrent from the application menu by opening Activities, selecting Show Applications, and searching for qBittorrent. You can also start it from a terminal inside your graphical desktop session:
qbittorrentDo not run the graphical qBittorrent client with
sudo. Running desktop apps as root can create root-owned configuration files in your home directory and cause permission problems later.
Accept the qBittorrent Legal Notice
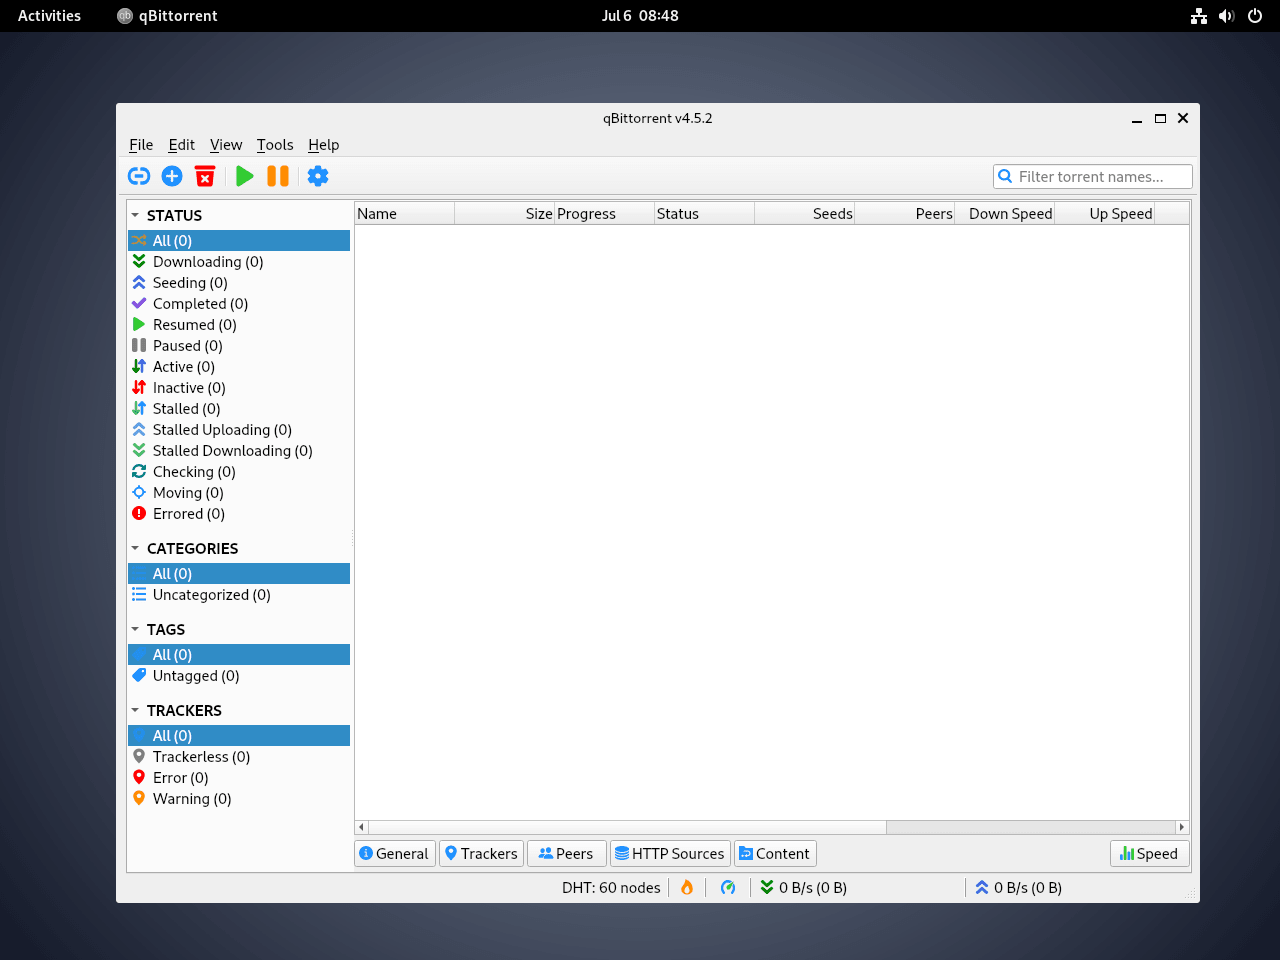
The first desktop launch shows a legal notice about responsible BitTorrent use. Accept it once, then continue to the main qBittorrent window. After that, choose a download directory and review connection, bandwidth, and queue settings before adding torrents or magnet links.
Install qBittorrent-nox on Debian for Headless Servers
qbittorrent-nox is the headless qBittorrent package. It runs without an X or Wayland session and provides the WebUI, making it the right package for a home server, NAS, seedbox-style host, or remote Debian machine you manage through a browser.
Install the qBittorrent-nox Package
Install qbittorrent-nox from Debian’s repositories:
sudo apt update
sudo apt install qbittorrent-nox
Verify the installed headless binary:
qbittorrent-nox --versionExample Debian 13 output:
qBittorrent v5.1.0
Create a Dedicated qBittorrent Service User
A dedicated system user keeps qBittorrent configuration, session data, and default download paths separate from your personal login account. Create the account with a real home directory so the WebUI can write its configuration under /var/lib/qbittorrent:
sudo adduser --system --group --home /var/lib/qbittorrent qbittorrentThe --system option creates a locked service account, --group creates a matching group, and --home avoids the Debian system-user default of /nonexistent. If you store completed downloads on another disk, create that directory separately and give the qbittorrent user access to it.
Start qBittorrent-nox on Debian 12 and 13
Debian 12 and Debian 13 include the templated service file qbittorrent-nox@.service. Enable and start an instance for the dedicated service user:
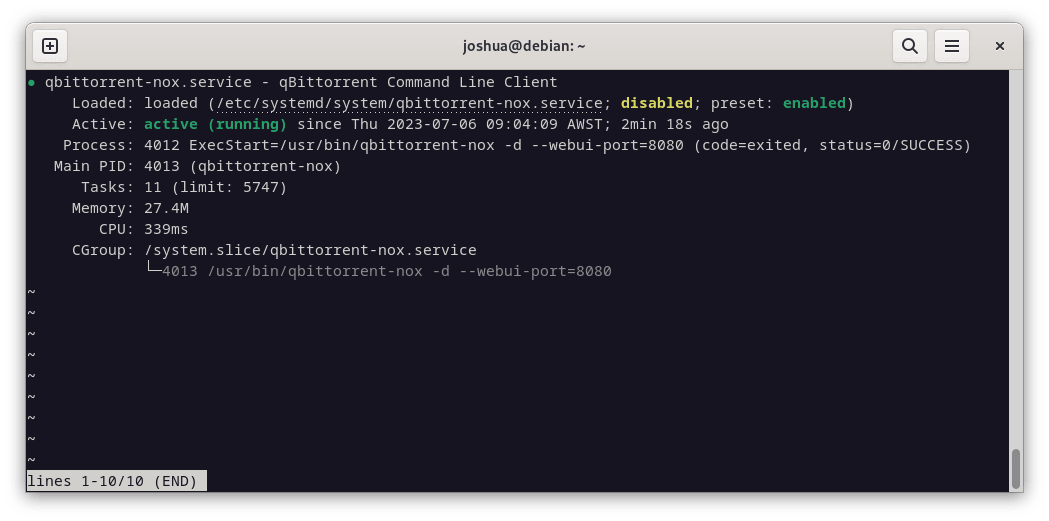
sudo systemctl enable --now qbittorrent-nox@qbittorrentConfirm systemd reports the instance as active:
systemctl is-active qbittorrent-nox@qbittorrentThe command should print:
active
Debian 12 can show the packaged service path under /lib/systemd/system/, while Debian 13 can show /usr/lib/systemd/system/. Both paths are normal for the packaged unit on those releases.
Create a qBittorrent-nox Service on Debian 11
Debian 11 packages qbittorrent-nox without the templated service file. Create a local systemd unit before enabling the service:
sudo tee /etc/systemd/system/qbittorrent-nox@.service >/dev/null <<'EOF'
[Unit]
Description=qBittorrent-nox service for user %I
Documentation=man:qbittorrent-nox(1)
Wants=network-online.target
After=local-fs.target network-online.target nss-lookup.target

[Service]
Type=simple
PrivateTmp=false
User=%i
ExecStart=/usr/bin/qbittorrent-nox
TimeoutStopSec=1800

[Install]
WantedBy=multi-user.target
EOF
sudo systemctl daemon-reload
Enable and start the Debian 11 service instance:
sudo systemctl enable --now qbittorrent-nox@qbittorrentThen confirm systemd reports the service as active:
systemctl is-active qbittorrent-nox@qbittorrentactive
Verify the qBittorrent-nox WebUI Listener
Confirm that the WebUI is listening on the default TCP port 8080:
sudo ss -tlnp | grep ':8080'Relevant output should include qbittorrent-nox:
LISTEN 0 50 *:8080 *:* users:(("qbittorrent-nox",pid=100995,fd=44))
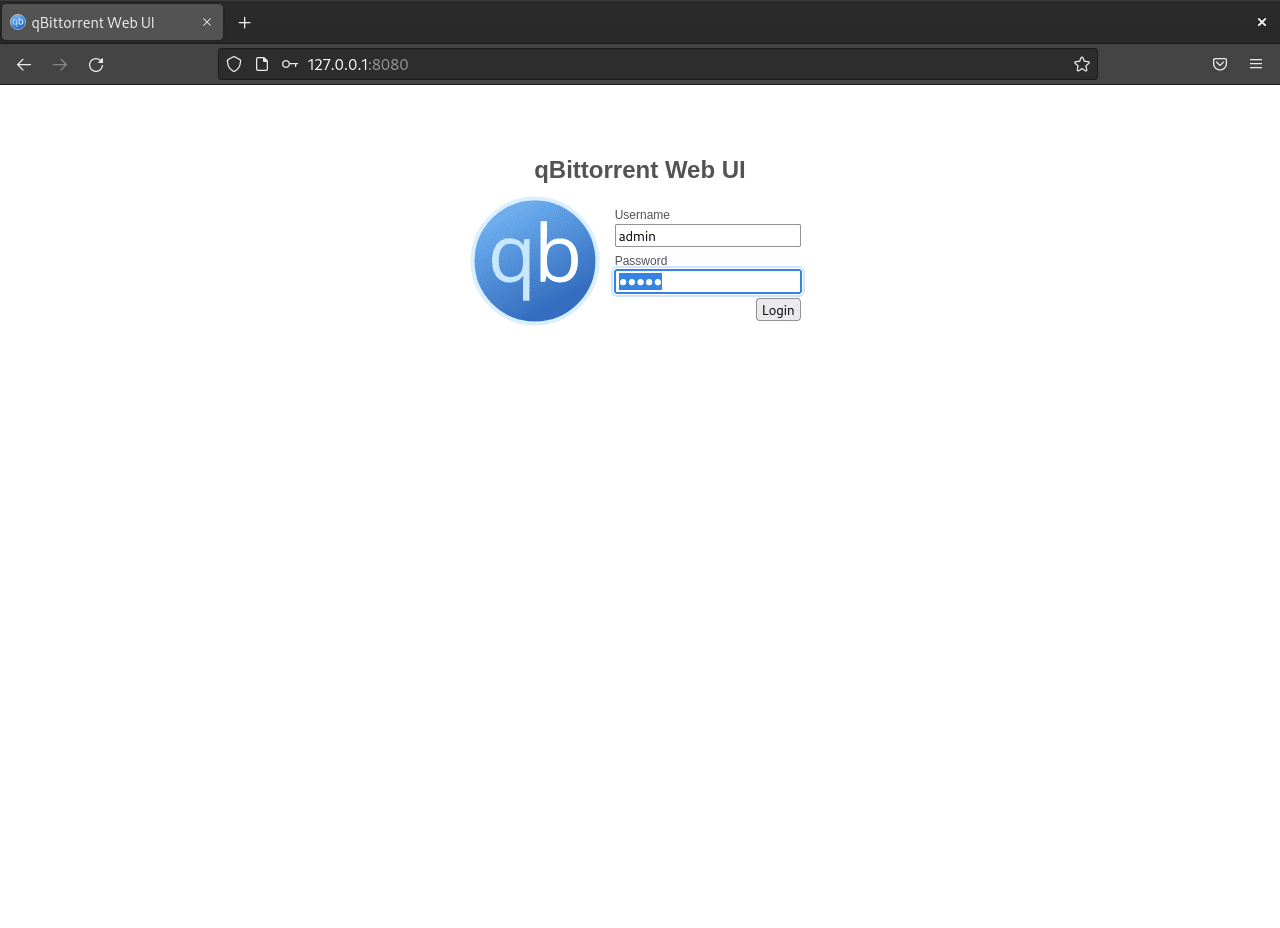
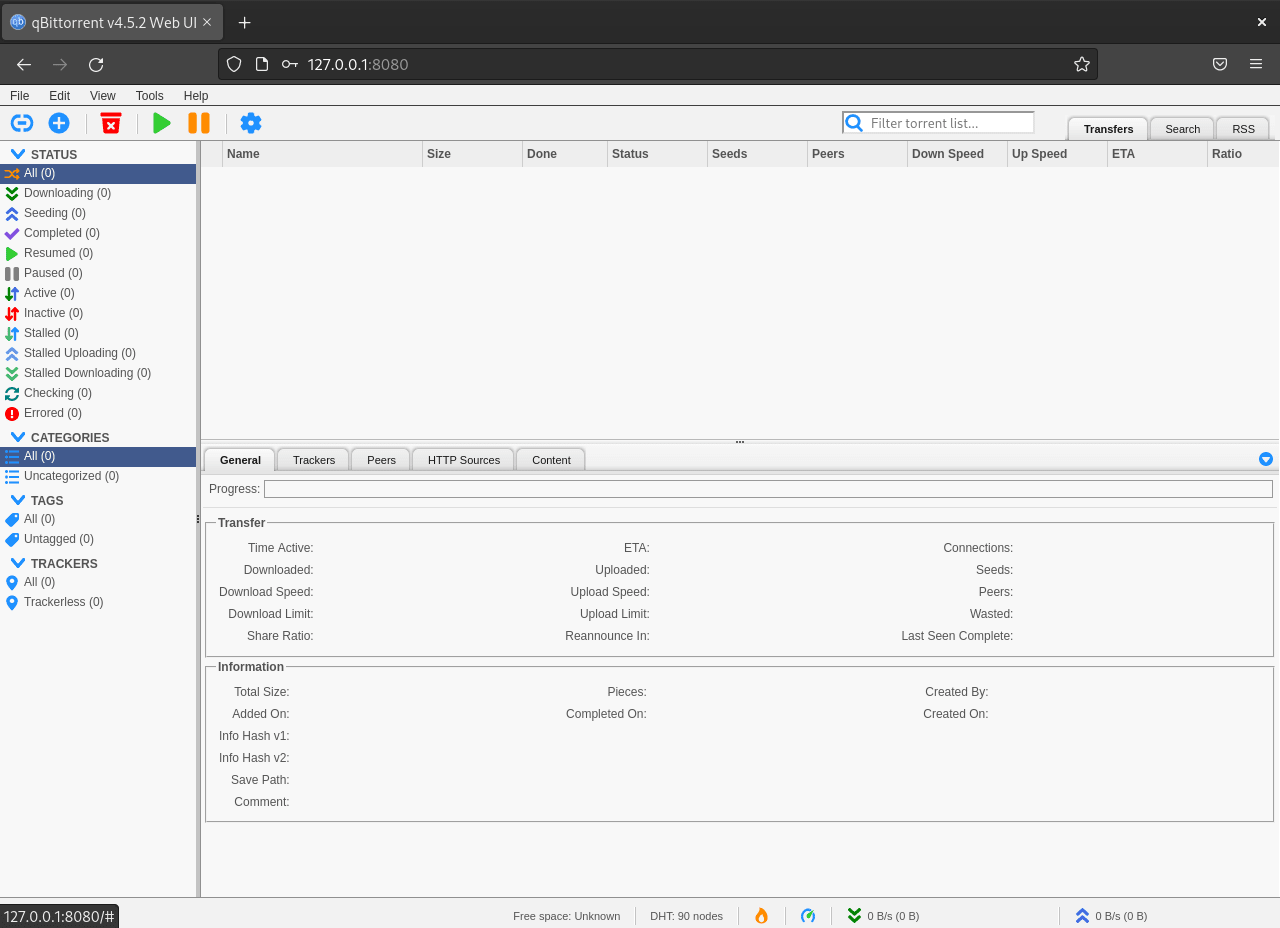
From the Debian machine itself, open http://localhost:8080. From another device on your LAN, replace the host with the server’s local address, such as http://192.168.1.50:8080.
Allow WebUI Access Through a Debian Firewall
Only open port 8080 if another trusted device needs to reach the WebUI. For a home LAN, prefer a source-restricted rule instead of opening the port to every network. If you use UFW on Debian, replace 192.168.1.0/24 with your trusted subnet:
sudo ufw allow from 192.168.1.0/24 to any port 8080 proto tcpIf you use firewalld on Debian, add an equivalent rich rule and reload the active configuration:
sudo firewall-cmd --permanent --add-rich-rule='rule family="ipv4" source address="192.168.1.0/24" port port="8080" protocol="tcp" accept'
sudo firewall-cmd --reload
Do not expose the qBittorrent WebUI directly to the public internet. Keep access on a trusted LAN, restrict it to known source addresses, or reach it through SSH on Debian instead.
Log In to the qBittorrent WebUI
The default WebUI username is admin. The initial password depends on the qBittorrent version packaged by your Debian release.
Debian 11 and Debian 12 WebUI Password
Debian 11 and Debian 12 package qBittorrent versions earlier than 4.6.1, so the legacy initial WebUI credentials are:
- Username:
admin - Password:
adminadmin
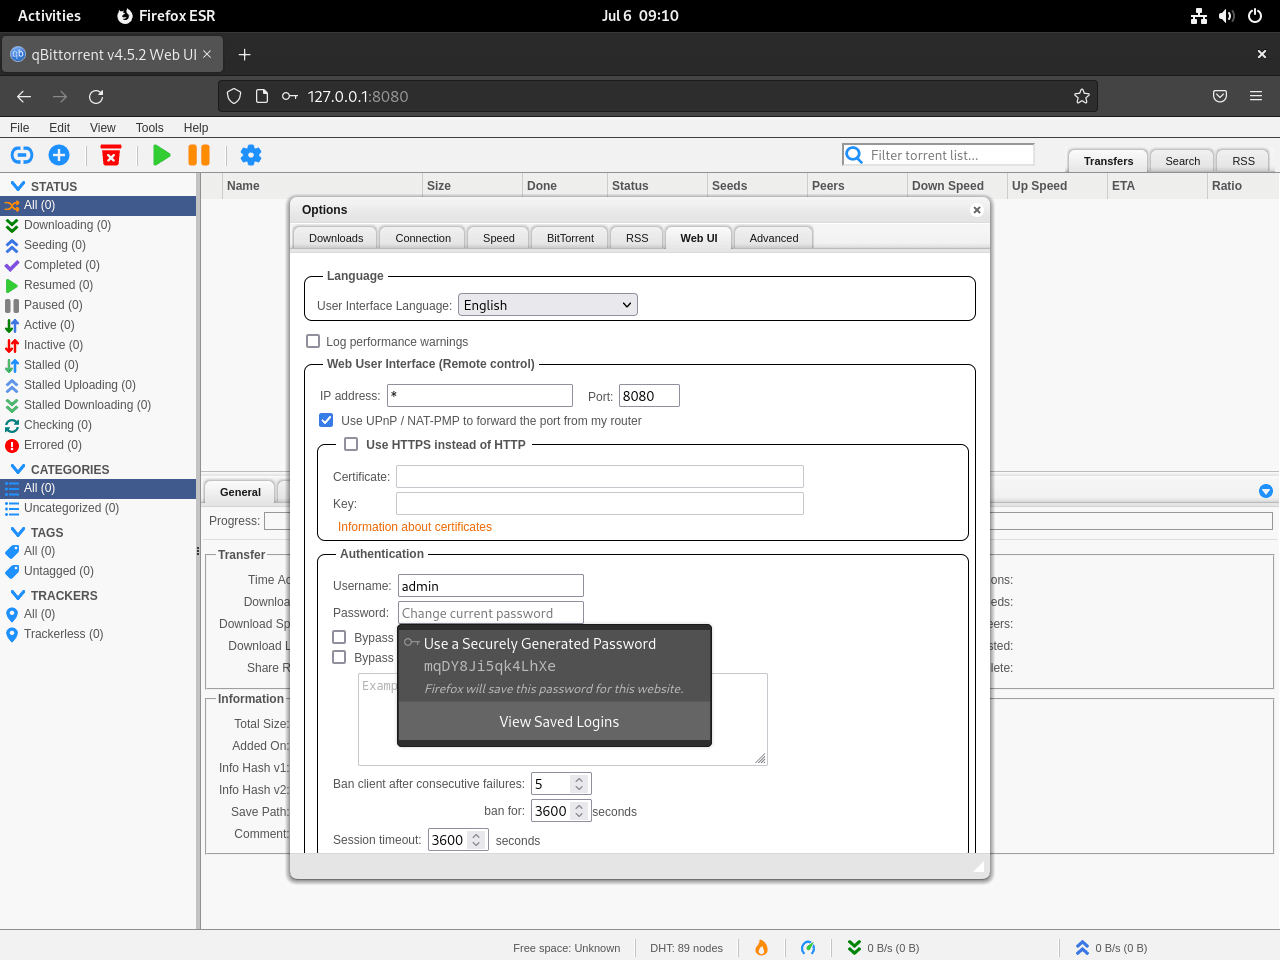
Change the password immediately after the first login. Open Tools > Options > Web UI > Authentication, set permanent credentials, save the settings, then log out and log back in.
Debian 13 Temporary WebUI Password
Debian 13 packages qBittorrent 5.1.0, which follows the newer upstream behavior. If no permanent password exists yet, qBittorrent writes a temporary admin password to the service log at startup.
sudo journalctl -u qbittorrent-nox@qbittorrent -n 80 --no-pager | grep -i "temporary password"Example log pattern with the temporary password redacted:
The WebUI administrator username is: admin
The WebUI administrator password was not set. A temporary password is provided for this session: [redacted]
Use the temporary password only for the first login. Save permanent credentials under Tools > Options > Web UI > Authentication; otherwise a service restart can generate a different temporary password.
After saving the credentials, configure your default download directory, listening port, queue limits, and authentication settings before adding torrents. The service user’s default data location is under /var/lib/qbittorrent unless you change it in the WebUI.
Install qBittorrent on Debian with Flatpak
The Flatpak method installs the Flathub build of qBittorrent and keeps its application data separate from the APT package. Use this on a Debian desktop when you already manage apps through Flatpak or want Flathub’s packaging instead of your release’s APT version.
Treat Flatpak as a packaging and update choice, not as a stronger isolation guarantee. Flathub currently labels qBittorrent as potentially unsafe because a BitTorrent client needs broad network and file-access capabilities for normal use.
Install Flatpak and add Flathub if they are not configured yet. The dedicated Flatpak on Debian guide covers the full setup, but the standard system-wide commands are:
sudo apt install flatpak
sudo flatpak remote-add --if-not-exists flathub https://dl.flathub.org/repo/flathub.flatpakrepo
Install qBittorrent from Flathub:
sudo flatpak install flathub org.qbittorrent.qBittorrentVerify the installed Flatpak app:
flatpak info --system org.qbittorrent.qBittorrent | grep '^Version:'Version: 5.2.0
The exact version changes as Flathub publishes updates. Launch the app from the desktop menu or from a terminal:
flatpak run org.qbittorrent.qBittorrentThe Flatpak build stores its settings under ~/.var/app/org.qbittorrent.qBittorrent/. Existing APT desktop settings under ~/.config/qBittorrent/ are not automatically reused, so close both apps before copying settings or moving torrent session data between methods.
Install qBittorrent on Debian with AppImage
The official Linux AppImage is useful when you want a portable qBittorrent desktop build without installing the APT or Flatpak app. It is not a headless-server method; use qbittorrent-nox for a service-managed WebUI.
Upstream builds the current AppImage on Ubuntu 22.04 and publishes x86_64 files. It is a better fit for Debian 12 and Debian 13 desktops than for minimal or older systems. On Debian 11, prefer APT unless you have verified the AppImage dependencies on that desktop.
Prepare Debian for AppImage Downloads
Install the download, certificate, and signature tools first:
sudo apt update
sudo apt install curl ca-certificates gpg
Some minimal desktops also need the FUSE 2 compatibility library and OpenGL library used by AppImage desktop builds. Use the branch that matches your Debian release:
. /etc/os-release
case "$VERSION_ID" in
  13)
    sudo apt install libfuse2t64 libopengl0
    ;;
  12|11)
    sudo apt install libfuse2 libopengl0
    ;;
esac
Create a Verified qBittorrent AppImage Helper
The helper resolves the newest stable or preview AppImage from the official SourceForge directory, downloads the matching detached signature, imports the qBittorrent signing key into a temporary keyring, verifies the fingerprint, checks the signature, then installs the AppImage under ~/.local/bin. The setup also makes a short update-qbittorrent command available, so future updates do not require typing the full helper path. It selects the standard x86_64 AppImage; the alternate lt20 AppImage remains a separate upstream choice for users who intentionally need the libtorrent 2.0 build.
Create the helper in one pasteable block:
mkdir -p ~/.local/bin
touch ~/.bashrc
grep -qxF 'export PATH="$HOME/.local/bin:$PATH"' ~/.bashrc || printf '\nexport PATH="$HOME/.local/bin:$PATH"\n' >> ~/.bashrc
export PATH="$HOME/.local/bin:$PATH"

cat > ~/.local/bin/update-qbittorrent <<'EOF'
#!/usr/bin/env bash
set -euo pipefail

channel="${1:-stable}"
case "$channel" in
stable | preview) ;;
*)
  echo "Usage: ${0##*/} [stable|preview]" >&2
  exit 2
  ;;
esac

need_cmd() {
  if ! command -v "$1" >/dev/null 2>&1; then
    echo "Missing required command: $1" >&2
    exit 1
  fi
}

need_cmd curl
need_cmd gpg
need_cmd awk
need_cmd sed
need_cmd sort
need_cmd install

source_root="https://sourceforge.net/projects/qbittorrent/files/qbittorrent-appimage"
key_url="https://raw.githubusercontent.com/qbittorrent/qBittorrent/master/5B7CC9A2.asc"
expected_fpr="D8F3DA77AAC6741053599C136E4A2D025B7CC9A2"
install_dir="$HOME/.local/bin"
appimage_path="$install_dir/qbittorrent.AppImage"

if [ "$channel" = "preview" ]; then
  appimage_path="$install_dir/qbittorrent-preview.AppImage"
fi

listing=$(curl -fsSL "$source_root/")

if [ "$channel" = "preview" ]; then
  version=$(printf '%s\n' "$listing" | sed -n 's/.*>qbittorrent-\([0-9][0-9.]*\(beta\|rc\)[0-9][0-9]*\)<.*/\1/p' | sort -V | tail -n 1)
else
  version=$(printf '%s\n' "$listing" | sed -n 's/.*>qbittorrent-\([0-9][0-9.]*[0-9]\)<.*/\1/p' | sort -V | tail -n 1)
fi

if [ -z "$version" ]; then
  echo "Could not find a $channel qBittorrent AppImage release." >&2
  exit 1
fi

file="qbittorrent-${version}_x86_64.AppImage"
tmpdir=$(mktemp -d)
gnupg_home=$(mktemp -d)

cleanup() {
  rm -rf "$tmpdir" "$gnupg_home"
}
trap cleanup EXIT

chmod 700 "$gnupg_home"

curl -fsSL --retry 3 -o "$tmpdir/$file" "$source_root/qbittorrent-${version}/$file/download"
curl -fsSL --retry 3 -o "$tmpdir/$file.asc" "$source_root/qbittorrent-${version}/$file.asc/download"
curl -fsSL -o "$tmpdir/qbittorrent-signing-key.asc" "$key_url"

GNUPGHOME="$gnupg_home" gpg --import "$tmpdir/qbittorrent-signing-key.asc" >/dev/null 2>&1
actual_fpr=$(GNUPGHOME="$gnupg_home" gpg --with-colons --fingerprint 5B7CC9A2 | awk -F: '/^fpr:/ {print $10; exit}')

if [ "$actual_fpr" != "$expected_fpr" ]; then
  echo "Unexpected qBittorrent signing-key fingerprint: $actual_fpr" >&2
  exit 1
fi

GNUPGHOME="$gnupg_home" gpg --verify "$tmpdir/$file.asc" "$tmpdir/$file"
install -m 0755 -d "$install_dir"
install -m 0755 "$tmpdir/$file" "$appimage_path"

echo "Installed qBittorrent $version at $appimage_path"
EOF
chmod +x ~/.local/bin/update-qbittorrent
Download the Stable AppImage
Run the helper with no argument to install or replace the stable AppImage:
update-qbittorrentRelevant output includes a Good signature line from gpg and the installed path:
gpg: Good signature from "sledgehammer_999 (Used for signing git commits/tags/etc) <hammered999@gmail.com>" [unknown]
Installed qBittorrent 5.2.0 at /home/example/.local/bin/qbittorrent.AppImage
The [unknown] trust warning is normal when you import a key into a temporary keyring. The important checks are the fingerprint match and the Good signature result.
Download a Preview AppImage
Use the preview channel only for testing release candidates or beta builds. The helper saves it as a separate file so it does not replace your stable AppImage:
update-qbittorrent previewPreview AppImages can contain bugs or behavior changes. Do not use them as the only client for important long-running downloads.
Run the qBittorrent AppImage
The helper setup adds ~/.local/bin to your current shell path and Bash startup file. Start the stable AppImage from a graphical desktop session:
qbittorrent.AppImageRun the preview AppImage only when you intentionally installed it:
qbittorrent-preview.AppImageCreate an AppImage Desktop Launcher
Create a desktop entry if you want the AppImage to appear in your application menu:
mkdir -p ~/.local/share/applications
cat > ~/.local/share/applications/qbittorrent-appimage.desktop <<EOF
[Desktop Entry]
Name=qBittorrent (AppImage)
Exec=$HOME/.local/bin/qbittorrent.AppImage
Icon=qbittorrent
Type=Application
Categories=Network;FileTransfer;P2P;
Comment=qBittorrent BitTorrent client (AppImage)
EOF
command -v update-desktop-database >/dev/null 2>&1 && update-desktop-database ~/.local/share/applications
The launcher uses the qbittorrent icon name from your icon theme when available. If your desktop shows a generic icon, the AppImage still launches normally.
Update qBittorrent on Debian
Update qBittorrent with the same tool that installed it. Mixing update methods can leave one copy current while another copy remains unchanged.
Update an APT Installation
Update the desktop package through APT:
sudo apt update
sudo apt install --only-upgrade qbittorrent
Update the headless package separately when you use qbittorrent-nox:
sudo apt update
sudo apt install --only-upgrade qbittorrent-nox
sudo systemctl restart qbittorrent-nox@qbittorrent
The restart applies the new binary to the running service. Check the WebUI afterward to confirm your torrents and settings loaded normally.
Update a Flatpak Installation
Update the Flathub app with Flatpak:
sudo flatpak update org.qbittorrent.qBittorrentDesktop software centers can also update Flatpak apps automatically, depending on your desktop environment and update settings.
Update an AppImage Installation
AppImages do not update themselves. Rerun the verified helper to replace your stable AppImage with the current official stable build:
update-qbittorrentUpdate the preview file only if you intentionally use preview builds:
update-qbittorrent previewTroubleshoot qBittorrent on Debian
Start troubleshooting from the install method you used. A desktop launch problem, a WebUI service issue, and a Flatpak data-path mismatch usually have different causes.
WebUI Does Not Load
Check whether the service is running:
systemctl is-active qbittorrent-nox@qbittorrentactive
Confirm the listener:
sudo ss -tlnp | grep ':8080'If the service is active and listening locally, check the firewall, the server IP address, and whether you are connecting from the same network. If the service is not active, read the recent logs:
sudo journalctl -u qbittorrent-nox@qbittorrent -n 50 --no-pagerqBittorrent-nox Service Fails to Start
Verify that the service user exists and has the expected home directory:
getent passwd qbittorrentExample output; the numeric user and group IDs can differ:
qbittorrent:x:999:999::/var/lib/qbittorrent:/usr/sbin/nologin
Repair the home directory if it is missing or owned by the wrong account:
sudo install -d -o qbittorrent -g qbittorrent -m 0755 /var/lib/qbittorrent
sudo systemctl restart qbittorrent-nox@qbittorrent
On Debian 11, also confirm that the local unit file exists if you used the manual service path:
systemctl --no-pager cat qbittorrent-nox@qbittorrentTemporary Password Is Missing on Debian 13
If the temporary password does not appear in the journal, a previous configuration may already contain WebUI credentials. Back up the config file, remove only the stored WebUI password lines, then restart the service so qBittorrent writes a new temporary password.
config=/var/lib/qbittorrent/.config/qBittorrent/qBittorrent.conf

if sudo test -f "$config"; then
  sudo systemctl stop qbittorrent-nox@qbittorrent
  sudo cp "$config" "$config.bak"
  sudo sed -i '/^WebUI\\Password_PBKDF2=/d;/^WebUI\\Password_ha1=/d' "$config"
  sudo systemctl start qbittorrent-nox@qbittorrent
  sudo journalctl -u qbittorrent-nox@qbittorrent -n 80 --no-pager | grep -i "temporary password"
else
  echo "Config file not found: $config"
fi
Keep the backup until you have logged in and saved new credentials. Removing the full configuration file resets more than the password, including WebUI settings and other qBittorrent preferences.
Flatpak Opens with Fresh Settings
The Flatpak app uses ~/.var/app/org.qbittorrent.qBittorrent/, not the normal APT desktop path. If you are switching from the APT desktop package, export or pause active torrents first, close qBittorrent, then copy only the configuration and session files you intend to reuse.
AppImage Does Not Start
Run the AppImage from a graphical desktop session, not a headless SSH shell. If the error mentions libOpenGL.so.0, install the OpenGL library for your release:
sudo apt install libopengl0If the error mentions FUSE, install the FUSE 2 compatibility package listed in the AppImage preparation section. For a server without a desktop stack, switch to qbittorrent-nox instead of trying to force the AppImage into a service role.
Remove qBittorrent from Debian
Use the removal commands that match your installation method. Data removal commands are separate because they delete settings, torrent metadata, and download history.
Remove the APT Desktop Package
sudo apt remove qbittorrentReview the package list before removing unused dependencies:
sudo apt autoremoveThe next command permanently deletes qBittorrent desktop settings, torrent metadata, and local history for your user account. It does not delete downloaded files stored elsewhere unless you placed them inside these configuration paths.
Inspect the desktop data paths first; no output means neither path exists for your account:
find ~/.config/qBittorrent ~/.local/share/qBittorrent -maxdepth 0 -print 2>/dev/nullrm -rf ~/.config/qBittorrent ~/.local/share/qBittorrentRemove the APT Headless Package
Stop and disable the service before removing the package:
sudo systemctl stop qbittorrent-nox@qbittorrent
sudo systemctl disable qbittorrent-nox@qbittorrent
sudo apt remove qbittorrent-nox
On Debian 11, remove the local unit file if you created it manually:
sudo rm -f /etc/systemd/system/qbittorrent-nox@.service
sudo systemctl daemon-reload
The next command permanently deletes the
qbittorrentservice account and everything under/var/lib/qbittorrent. Move any wanted downloads or configuration backups before running it.
sudo userdel -r qbittorrentRemove the Flatpak App
sudo flatpak uninstall org.qbittorrent.qBittorrentRemove unused Flatpak runtimes only after reviewing the list Flatpak shows:
sudo flatpak uninstall --unusedThe next command permanently deletes qBittorrent data stored inside the Flatpak sandbox. It does not remove APT desktop settings or AppImage settings stored outside the Flatpak path.
Check whether Flatpak data exists before deleting it:
find ~/.var/app/org.qbittorrent.qBittorrent -maxdepth 0 -print 2>/dev/nullrm -rf ~/.var/app/org.qbittorrent.qBittorrentRemove the AppImage Files
Remove the stable AppImage, preview AppImage, helper script, and desktop entry:
rm -f ~/.local/bin/qbittorrent.AppImage
rm -f ~/.local/bin/qbittorrent-preview.AppImage
rm -f ~/.local/bin/update-qbittorrent
rm -f ~/.local/share/applications/qbittorrent-appimage.desktop
command -v update-desktop-database >/dev/null 2>&1 && update-desktop-database ~/.local/share/applications
The next command deletes normal qBittorrent desktop configuration shared by AppImage and APT desktop runs. Skip it if you still use another qBittorrent desktop installation.
Inspect the shared desktop configuration paths before deleting them:
find ~/.config/qBittorrent ~/.local/share/qBittorrent -maxdepth 0 -print 2>/dev/nullrm -rf ~/.config/qBittorrent ~/.local/share/qBittorrentVerify qBittorrent Removal
Run the checks that apply to your install methods:
apt_remaining=$(dpkg-query -W -f='${db:Status-Abbrev} ${binary:Package}\n' qbittorrent qbittorrent-nox 2>/dev/null | awk '$1 ~ /^ii/ {print}')
if [ -n "$apt_remaining" ]; then
  printf '%s\n' "$apt_remaining"
else
  echo "APT packages removed"
fi

if command -v flatpak >/dev/null 2>&1; then
  flatpak list --system --app --columns=application | grep -Fx org.qbittorrent.qBittorrent || echo "Flatpak app removed"
fi

test ! -e ~/.local/bin/qbittorrent.AppImage && echo "Stable AppImage removed"
test ! -e ~/.local/bin/qbittorrent-preview.AppImage && echo "Preview AppImage removed"
test ! -e ~/.local/bin/update-qbittorrent && echo "AppImage helper removed"
APT packages removed Flatpak app removed Stable AppImage removed Preview AppImage removed AppImage helper removed
Conclusion
qBittorrent is installed on Debian through the method that matches the machine: APT for the stable desktop package, qbittorrent-nox for WebUI service hosting, Flatpak for Flathub-managed desktop packaging, or AppImage for a portable upstream build. Keep WebUI access private, save permanent credentials early, and update through the same tool that installed your chosen copy.

I ran into a problem where the default password is no longer “adminadmin”.
This reddit post helped me change the config file to allow login and changing the password:
https://www.reddit.com/r/unRAID/comments/180ou0b/psa_if_you_cant_login_to_qbittorrent_pass/
Thanks for sharing this, bhoriss. qBittorrent recently changed how WebUI authentication works, so the old
adminadmindefault password no longer applies on newer releases.On current versions, the service generates a random temporary password the first time the WebUI starts without saved credentials and prints it once in the logs. On Debian, the recommended approach is to read that temporary password from the systemd journal, log in with username
admin, then set a permanent username and password in the Web UI settings instead of relying on the legacy default.The Reddit thread you linked is helpful for recovering access when the config is in a bad state, but for fresh setups the log-based temporary password flow is safer and aligns with the upstream security changes. I have adjusted the guide so new readers are not told to expect the old
adminadminpassword.this does not work – get constant error about service has a bad unit file setting
Thanks for reporting this, William. The “bad unit file setting” error usually means systemd is unhappy with how the qBittorrent-nox service is being called, often because the username part of
qbittorrent-nox@...is wrong or the service file was edited.First, check that the unit exists and loads cleanly:
If you created a dedicated user (for example
qbittorrent), make sure you enable the service with that exact name and that the account really exists:If those commands still show a bad setting, there might be a broken override in
/etc/systemd/system/qbittorrent-nox@*.service.d/. Removing any custom overrides and reloading systemd usually clears it up. If you can share the exact error line fromsudo systemctl status qbittorrent-nox@your-user, I can help narrow it down further.The article is not relevant. The default password is no longer relevant starting with torrent version 4.6.1. Now a temporary password is automatically generated and the problem is that due to this installation method I did not see this password and it is not in the logs. As a newbie, it is easier for me to reinstall the system and start all over again with a different instruction and this time on a virtual machine.
Thanks for the detailed feedback, SK. You are right that the old default password is no longer used from qBittorrent 4.6.1 onward. Newer versions generate a random temporary WebUI password on first start and print it once to the service logs instead of using the legacy
adminadminvalue.The Debian guide has been updated so it now explains how to install
qbittorrent-noxas a systemd service, read the temporary password fromjournalctl, and then set permanent WebUI credentials from the browser. This avoids situations where users expect a hardcoded password that no longer exists.If you try again on a fresh Debian setup, start the service for your user and immediately query the last log lines for the “temporary password” message before restarting it or changing anything else. That workflow should prevent the “no password visible in logs” problem and lets you avoid reinstalling just to regain access.
Thank you so much!!
Great guide! it was all straightfoward
THANK YOU A LOT for the fix when qbitorrent-nox won’t start, I’ve been stuck on this for far too long!!!!