This guide will demonstrate how to install PostgreSQL 15 on Ubuntu 24.04, 22.04 or 20.04 using the command-line terminal and PostgreSQL’s official APT repository for the latest version and future upgrades.
PostgreSQL 15 brings an array of enhancements and new features, further cementing its reputation as a robust, open-source relational database system. With a focus on performance, data management, and developer-friendly capabilities, this release introduces improvements that cater to a wide range of applications, from small projects to large-scale enterprise systems.
Key highlights of PostgreSQL 15 include:
- Performance Enhancements: Significant improvements in partitioned tables, speeding up data retrieval and management for large datasets.
- Improved Query Parallelism: Enhanced parallel query execution, making complex queries faster and more efficient.
- Robust Security Features: Enhanced security measures, including better access control and encryption options, to safeguard sensitive data.
- Advanced Internationalization Support: Extended support for international characters and time zones, facilitating global applications.
- Logical Replication on Partitioned Tables: Simplified data replication and scaling with support for logical replication directly on partitioned tables.
- Enhanced Monitoring and Management Tools: New system views and functions for monitoring database performance and managing resources more effectively.
- SQL/JSON Path Expressions: Extended support for JSON data types, allowing for more complex queries and data manipulation.
- Continuous Improvements: Ongoing optimizations and bug fixes, ensuring stability and compatibility with various platforms and tools.
These features make PostgreSQL 15 ideal for developers seeking advanced data management capabilities and high-performance solutions. Now, let’s dive into the installation process.
Import PostgreSQL APT Repository on Ubuntu
Update Ubuntu Before PostgreSQL Installation
Before proceeding with the tutorial, ensuring your system is up-to-date with all existing packages is good.
sudo apt updateProceed to upgrade any outdated packages using the following command.
sudo apt upgradeInstall Initial Packages for PostgreSQL 15
To assist in installing the database software, install the following packages:
sudo apt install dirmngr ca-certificates software-properties-common apt-transport-https lsb-release curl -yImport PostgreSQL 15 APT Repository
First, you will need to import the PostgreSQL GPG key to verify the authenticity of the installation package.
curl -fSsL https://www.postgresql.org/media/keys/ACCC4CF8.asc | gpg --dearmor | sudo tee /usr/share/keyrings/postgresql.gpg > /dev/nullNext, import the stable, snapshot, or testing repository based on your installation preference. Opt for the stable repository for production due to its frequent updates from direct PostgreSQL repository installations. The testing repository, unsuitable for production, might lag or lead to updates.
Import PostgreSQL 15 stable APT repository
For most circumstances, import the PostgreSQL 15 stable repository below, as its title suggests it contains the latest secure, working, and stable version.
echo deb [arch=amd64,arm64,ppc64el signed-by=/usr/share/keyrings/postgresql.gpg] http://apt.postgresql.org/pub/repos/apt/ $(lsb_release -cs)-pgdg main | sudo tee /etc/apt/sources.list.d/postgresql.listImport PostgreSQL 15 Snapshot or Testing APT Repositories
Next, install the PostgreSQL 15 snapshot or testing repositories exclusively for testing purposes, avoiding use on a live server.
Import PostgreSQL 15 Snapshot repository, use the following command:
echo deb [arch=amd64,arm64,ppc64el signed-by=/usr/share/keyrings/postgresql.gpg] http://apt.postgresql.org/pub/repos/apt/ $(lsb_release -cs)-pgdg-snapshot main | sudo tee /etc/apt/sources.list.d/postgresql.listTo import the testing repository that contains the latest packages (also known as a nightly repository), use the following command:
echo deb [arch=amd64,arm64,ppc64el signed-by=/usr/share/keyrings/postgresql.gpg] http://apt.postgresql.org/pub/repos/apt/ $(lsb_release -cs)-pgdg-testing main | sudo tee /etc/apt/sources.list.d/postgresql.listInstall PostgreSQL 15 on Ubuntu via APT Command
Now that you have imported the stable or testing repository of PostgreSQL, you need to update your repository sources list to reflect the new addition with the following command.
sudo apt updateNow proceed to install PostgreSQL with the following command:
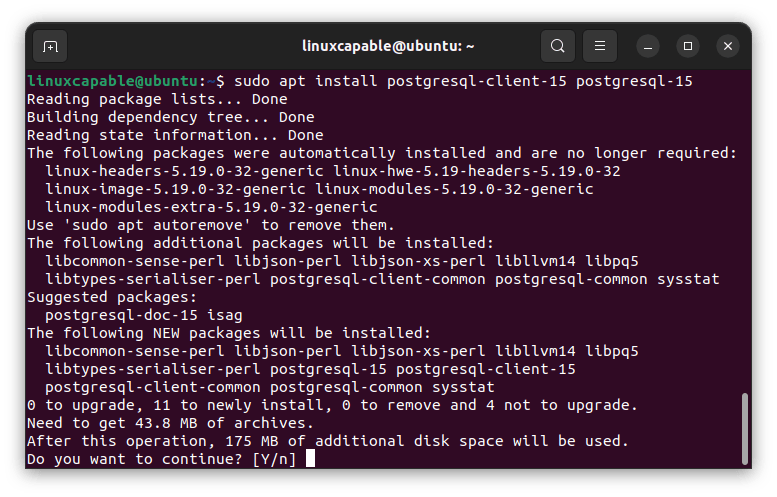
sudo apt install postgresql-client-15 postgresql-15Next, verify the software’s status to ensure installation and activation occurred without errors using the following command:
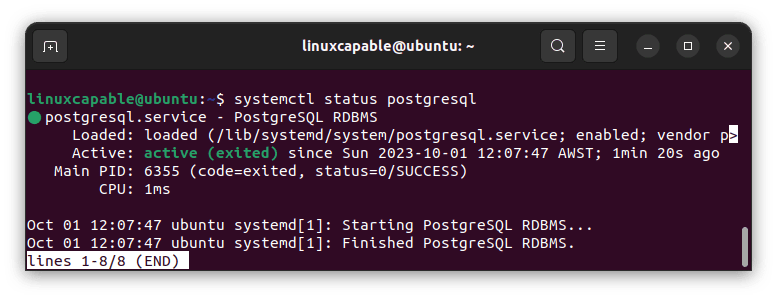
systemctl status postgresqlIf PostgreSQL is inactive, use the following command to activate it immediately and on system boot:
sudo systemctl enable postgresql --nowPostgreSQL Service Commands on Ubuntu
The “PostgreSQL” service runs the PostgreSQL database server, and you can manage it using the systemd with the commands provided below.
Stop PostgreSQL server:
sudo systemctl stop postgresqlStart PostgreSQL server:
sudo systemctl start postgresqlRestart the PostgreSQL server:
sudo systemctl restart postgresqlReload PostgreSQL server:
sudo systemctl reload postgresqlCheck PostgreSQL status:
systemctl status postgresqlConfigure PostgreSQL on Ubuntu
Switch to the Postgres account
Only superusers and those with role privilege can create new roles in Postgres. The installation process creates the default Postgres role and its associated user account.
To engage with the account, you can do the following commands:
sudo -i -u postgresBy entering the above, you can immediately access the PostgreSQL prompt by typing “psql”.
psqlNext, you will notice that the terminal has changed with “postgres=#” now being in the terminal command line. This means you have successfully connected to the database.
To exit the Postgres database, you can do this by typing the following:
exitAlternative to Postgres account on Ubuntu
An alternative way to interact with the Postgres database without changing user accounts is to use a sudo command to connect directly. You can do this by typing:
sudo -u postgres psqlThis is ideal to use more, as it saves time logging you directly without having to do extra terminal bash commands.
As the first option, you can exit by typing the following to exit the terminal.
exitCreate New PostgreSQL User
Now, you can create user roles if you wish. Only superusers and roles with “createrole” privilege can create new roles.
Create a new user; type the following.
sudo su - postgres -c "createuser <name>"Create New PostgreSQL Database
Now you can create a PostgreSQL database for the new user you created:
sudo su - postgres -c "createdb <namedb>"To finish off, you need to switch to the superuser Postgres account to grant permission to the new database.
Connect to Postgres superuser account
sudo -u postgres psqlGrant access to <username database> to <username>
GRANT ALL PRIVILEGES ON DATABASE <usernamedb> TO <name>;Example in your terminal output:
psql (15.0 (Ubuntu 15.0-1.pgdg22.04+1))
Type "help" for help.

postgres=# GRANT ALL PRIVILEGES ON DATABASE testdb TO josh;
GRANT
postgres=#
Once done, to exit, type the following
exitConfigure UFW Firewall For PostgreSQL
Create a UFW firewall rule to allow PostgreSQL communication on its default port, 5432, which is necessary for using anything other than localhost. First, ensure installation and activation of UFW:
sudo apt install ufw
sudo ufw enable
Next, as an example, you can either allow a subnet or individual IP addresses:
Subnet range:
sudo ufw allow proto tcp from 192.168.1.0/24 to any port 5432Individual IP:
sudo ufw allow proto tcp from 192.168.1.0 to any port 5432Remember to modify the addresses to fit your requirements; the examples provided here serve as a starting point for securing your PostgreSQL installation. You’ll likely need to refine further, especially when exposing the software to the public.
Enable Remote Access with PostgreSQL on Ubuntu
To gain default access to PostgreSQL, quickly change the default listening from the local interface of (127.0.0.1) to a specific IP, subnet, or all interfaces in the configuration file.
First, determine which version of Postgresql you are using the ls command:
ls /etc/postgresql/If you’ve installed other versions of PostgreSQL, you’ll notice the folder contains these versions. This guide will walk you through opening the postgresql.conf for PostgreSQL 15 using the following command:
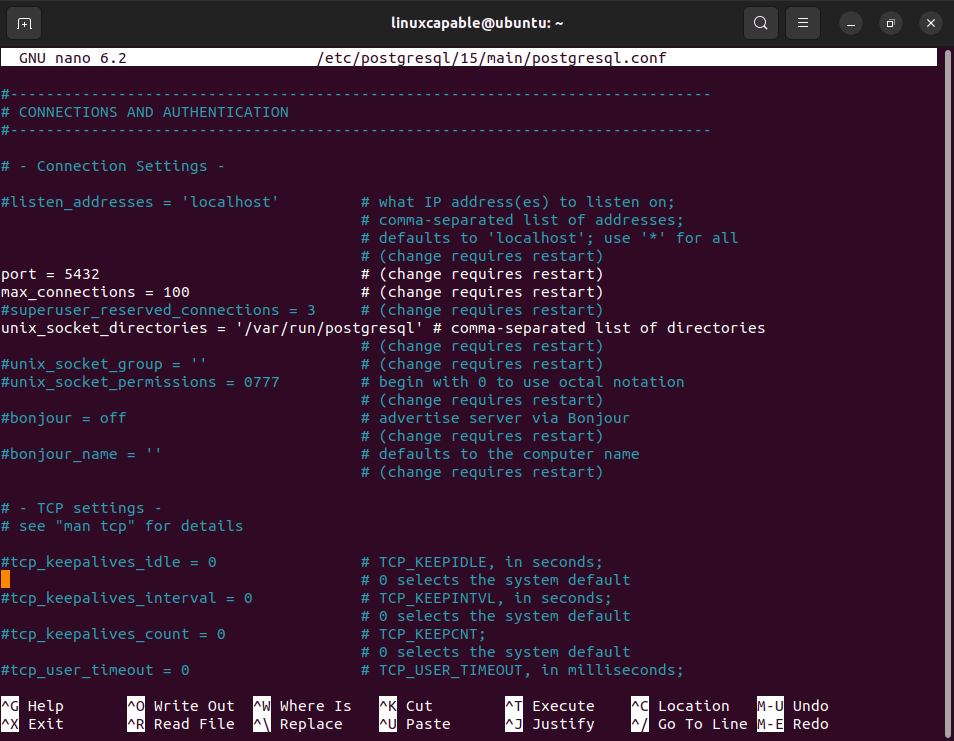
sudo nano /etc/postgresql/15/main/postgresql.confScroll down to “Connection Settings” and change (listen_addresses = ‘localhost’) to the <IP> address. To allow connection to the PostgreSQL database from multiple servers, change localhost to (*), especially if running on multiple servers.
Save the file using CTRL+O, exit with CTRL+X, and restart your PostgreSQL instance.
sudo systemctl restart postgresqlUsers can do this with the ss utility built into Ubuntu to check that your changes are live.
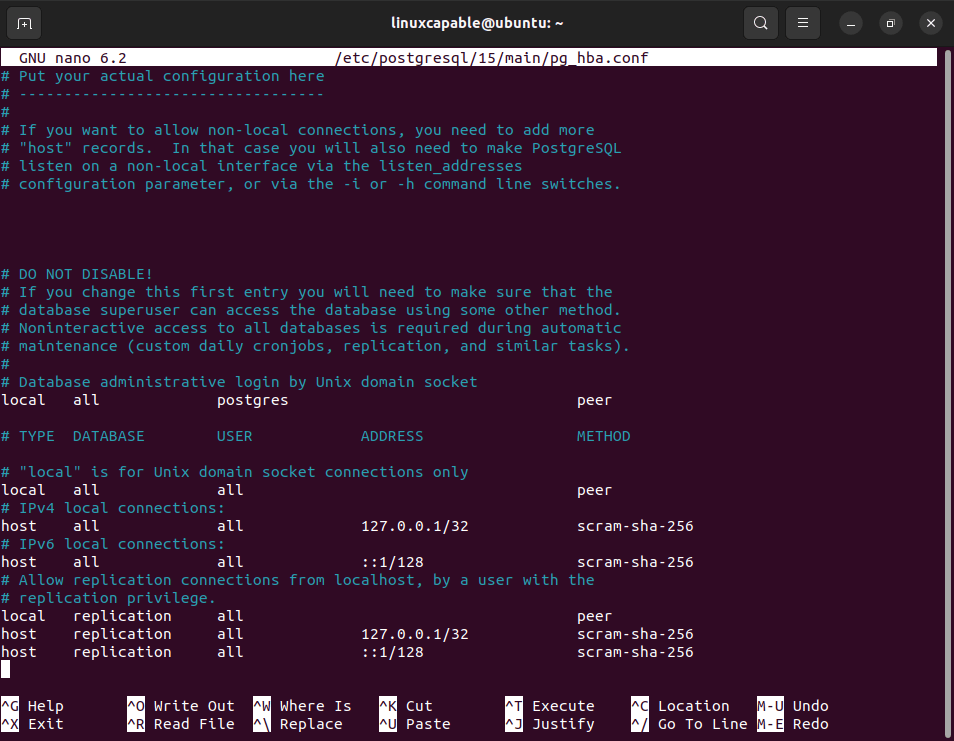
ss -nlt | grep 5432For further customization and securing PostgreSQL, you can configure the server to accept remote connections by editing the “pg_hba.conf” file using the nano text editor.
sudo nano /etc/postgresql/15/main/pg_hba.confYou can set up various options from this point, such as changing “all” to a specific username and database, address, and authentication methods.
Conclusion
Throughout this guide, we walked through the steps to install PostgreSQL 15 on your system using the command-line terminal and leveraging PostgreSQL’s official APT repository, ensuring you’re set up with the latest version for both immediate use and future updates. As you embark on your journey with PostgreSQL 15, remember the importance of staying updated with the latest versions for performance improvements and security patches. This version, with its robust features and enhancements, is particularly well-suited for those running on Ubuntu and Debian distros. Keep experimenting, stay curious, and don’t hesitate to dive deeper into the documentation for advanced features and tips. Happy querying!


