Otter Browser still appeals when you want the classic Opera 12.x layout, sidebar panels, and local session controls without adopting a sync-first modern browser. You can install Otter Browser on Fedora from Fedora’s default repository, but Fedora 44 users should verify the runtime before relying on it because the current package can install cleanly and still fail to launch with a Qt symbol lookup error.
Fedora packages otter-browser as a native RPM with Qt dependencies from the standard repository. The upstream Otter Browser site remains useful for project news and binaries, but DNF is the safer Fedora path when the packaged runtime is working because updates, dependencies, and removal stay inside Fedora’s package manager.
Install Otter Browser on Fedora
Update Fedora Before Installing Otter Browser
Refresh Fedora’s package metadata before you install the browser.
sudo dnf upgrade --refreshThese commands use
sudofor system-level package changes. If your account does not have sudo access yet, follow the guide to add a user to sudoers on Fedora.
Install Otter Browser with DNF
Fedora packages Otter Browser in the default repository, so the standard install path does not need a third-party repo, COPR, or manual download from the upstream binaries page.
sudo dnf install otter-browserThe package depends on Qt5 components, including Qt WebEngine, so a fresh install can pull in a sizeable Qt dependency set when those libraries are not already present. For a broader walkthrough of Fedora package management after this install, see DNF5 install examples on Fedora.
Verify the Otter Browser Package on Fedora
Use rpm -q to confirm the RPM is installed. This proves the package state, not that the graphical browser runtime can start.
rpm -q otter-browserExample output from Fedora 44:
otter-browser-1.0.03-12.fc44.x86_64
Check the Fedora 44 Launch Status
Start Otter Browser from a terminal once before treating it as a daily browser.
otter-browserOn the current Fedora 44 package set, the executable can fail before the browser window opens with this error:
otter-browser: symbol lookup error: otter-browser: undefined symbol: _ZTISt9bad_alloc, version Qt_5
If you see that error, the install finished but the Fedora package runtime is not usable. Refresh Fedora and retry after DNF offers newer Otter Browser or Qt builds; avoid mixing Qt packages from another Fedora release or random RPM mirrors because that can break other Qt applications.
sudo dnf upgrade --refreshIf DNF reports no relevant updates and the launch error remains, use another Fedora browser until Fedora ships a fixed package. If your system opens Otter Browser successfully, use the normal desktop launch paths.
Launch Otter Browser on Fedora
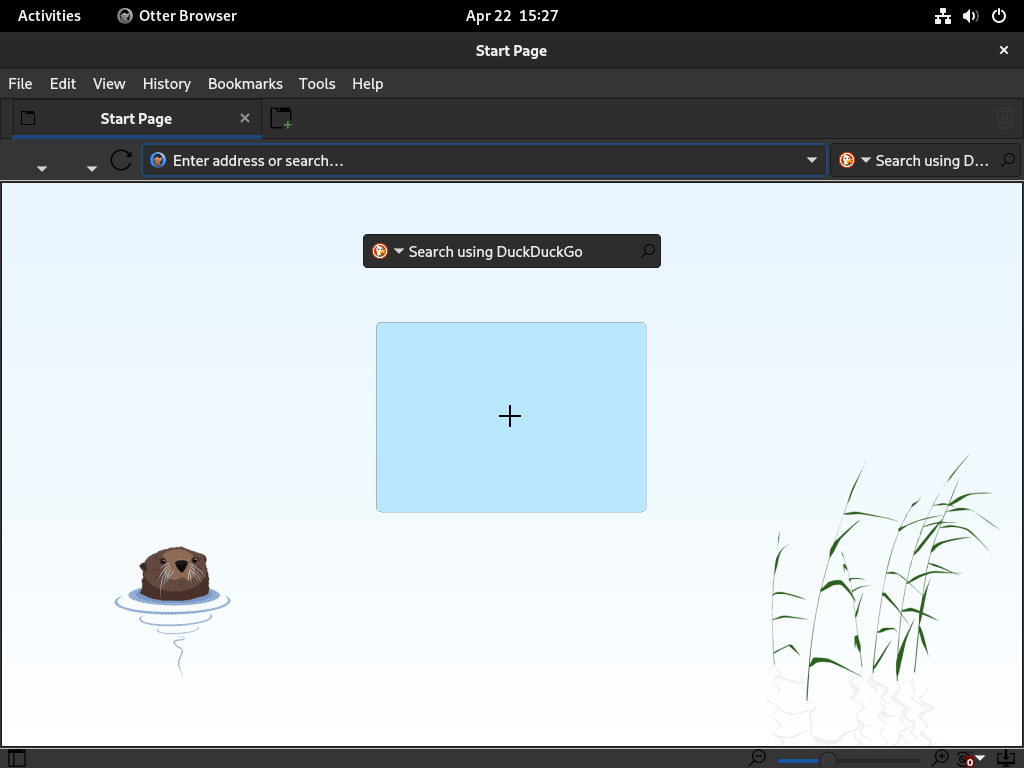
After the terminal launch check opens a window, Otter Browser can start from Activities or from a terminal inside your graphical desktop session.
Launch Otter Browser from the Terminal
The otter-browser command opens the graphical browser window from a terminal inside GNOME, KDE Plasma, Xfce, or another desktop session.
otter-browserAppend an ampersand if you want your terminal prompt back immediately.
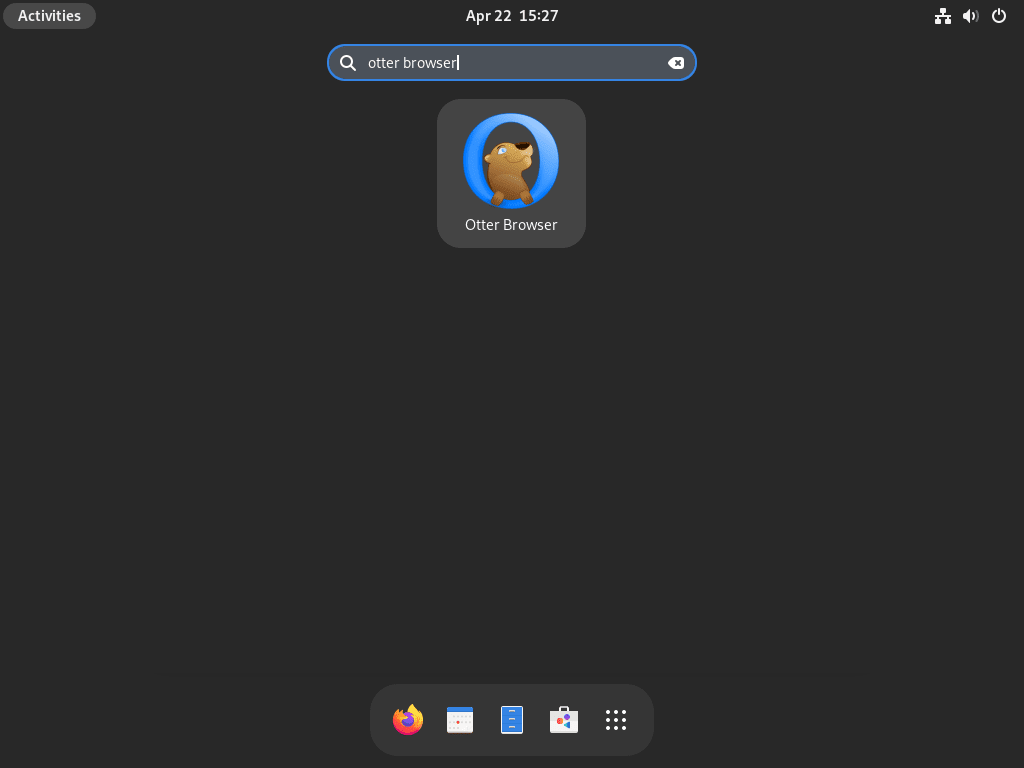
otter-browser &Open Otter Browser from Activities
Search for Otter Browser in Activities and open the launcher.
Manage Otter Browser on Fedora
Update Otter Browser on Fedora
Otter Browser updates through Fedora’s normal package workflow. The same update path is also how Fedora will deliver a fixed build if the Fedora 44 Qt launch error affects your system.
sudo dnf upgrade --refreshDNF refreshes repository metadata and installs newer Otter Browser or Qt packages when Fedora publishes them.
Remove Otter Browser from Fedora
Remove the package with DNF when you no longer want the browser.
sudo dnf remove otter-browserDNF can also remove unused dependencies that were installed only for Otter Browser. Review the transaction before approving it when other Qt applications are installed.
Confirm the package is gone after the removal finishes.
rpm -q otter-browserAfter removal, rpm -q reports:
package otter-browser is not installed
Browser profiles can contain bookmarks, cookies, sessions, and saved form data. Back up anything you need before removing profile directories from your home folder.
for path in "$HOME/.config/otter-browser" "$HOME/.cache/otter-browser" "$HOME/.local/share/otter-browser" "$HOME/.otter-browser"; do
    if [ -d "$path" ]; then
        printf '%s\n' "$path"
    fi
done
No output means those common profile paths do not exist for that account. Delete only paths printed by the check and only after backing up data you want to keep.
Conclusion
The Fedora Otter Browser package is easy to install and remove, but Fedora 44 needs a launch check before it is useful as a browser. Treat the Qt symbol error as a Fedora package runtime problem; for an actual Opera build, install Opera on Fedora, or use Vivaldi on Fedora as a modern Chromium-based fallback.

I left a comment (regarding the dated verions of this browser) which did appear here with no reply for few days and then, not sure why, it got deleted.
I was curious to know the relevance and safety of this browser having the publicly released versions so old.
Thank you.
Hi Gio,
I apologize for any confusion caused by the missing comments. I was testing out a new comment system, and some messages got lost in the process. I’m sorry for any inconvenience this may have caused.
Regarding the Otter Browser, it is currently up-to-date with version 1.0.03. Although it may seem unusual for a web browser not to have a major release in about two years, the project is still actively maintained. You can view the development history here: GitHub Otter Browser.
The Otter Browser follows more of a long-term support (LTS) model, meaning it doesn’t push code changes frequently unless necessary. This approach ensures stability and reliability for its users. If you are interested, I can provide instructions on how to build and compile the latest version. However, please note that you would need to do this frequently since it would be the daily build, and any changes could potentially cause issues with your browser. The GitHub history shows regular improvements and code clean-ups, which you can check for yourself.
For most systems, the current version should work fine, and if there were a major exploit, I believe it would be patched promptly given the active development. Alternatively, you could try using Pale Moon, another unique browser, if you are concerned about the release timeline.
Thank you.
Thank You Joshua. 🙏