This guide will demonstrate how to install FFmpeg on Fedora Linux using the command-line terminal with either Fedora’s default RPM or RPM Fusion.
FFmpeg stands as a pivotal tool in multimedia processing, offering a versatile suite of libraries and programs for handling video, audio, and other multimedia files and streams. At its core, FFmpeg provides powerful capabilities for recording, converting, and streaming multimedia content, making it an essential utility for developers, content creators, and multimedia enthusiasts alike. The tool is renowned for its robustness, offering extensive format support, which facilitates handling a vast array of multimedia types and codecs.
Before delving into the installation process, it’s crucial to understand the key features and capabilities of FFmpeg:
- Comprehensive Format Support: FFmpeg excels in its ability to process numerous multimedia formats, ensuring compatibility across a wide spectrum of files and codecs.
- High-Quality Conversion: Users can rely on FFmpeg for high-quality audio and video conversion, preserving the integrity of their media.
- Efficient Streaming: FFmpeg is adept at streaming audio and video, catering to various network demands and formats.
- Advanced Encoding and Decoding: The tool offers advanced options for encoding and decoding, allowing precise control over media processing.
- Filtering: Users can apply a range of filters to enhance or alter their multimedia content, tailoring outputs to specific requirements.
- Batch Processing: FFmpeg supports batch processing, enabling the handling of multiple files efficiently, saving time and effort.
- Scripting and Automation: Its compatibility with scripting languages facilitates automation, making repetitive tasks more manageable.
With these features, FFmpeg stands as a cornerstone in multimedia processing, ready to address a myriad of tasks with precision and efficiency.
Now, let’s move forward with the technical how-to, ensuring you can harness the full potential of FFmpeg on your Fedora Linux system.
Install FFMpeg on Fedora via DNF
Refresh Fedora Packages Before FFmpeg Installation
To ensure a smooth installation process for FFmpeg, begin by updating your Fedora system. This step is crucial to prevent potential conflicts with existing packages.
Execute the following command in the terminal:
sudo dnf upgrade --refreshThis command refreshes the repository indexes and updates all the packages to their latest versions.
Install FFmpeg via DNF Command
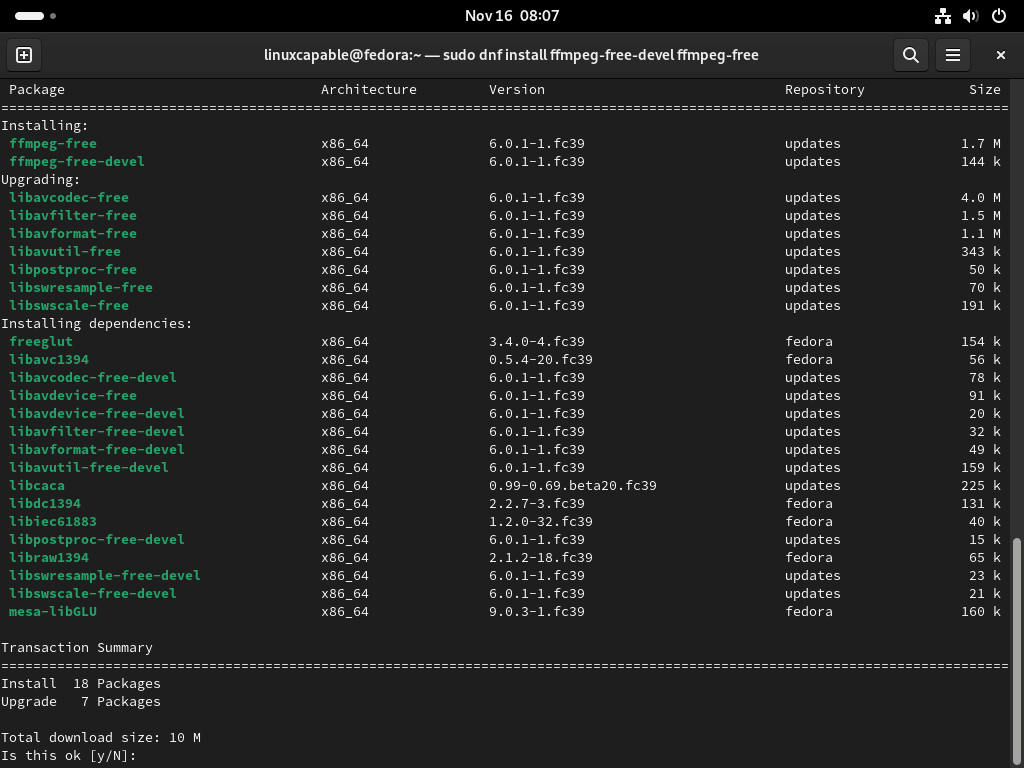
Fedora includes FFmpeg in its default repository and typically updates it regularly to align with its commitment to offering the latest software versions. This approach simplifies the FFmpeg installation process.
To install FFmpeg, use this command:
sudo dnf install ffmpeg-freeFor users requiring advanced features and the ability to compile software that depends on FFmpeg, installing the development packages is necessary.
Use this command for the development packages:
sudo dnf install ffmpeg-free-develVerifying FFmpeg Installation
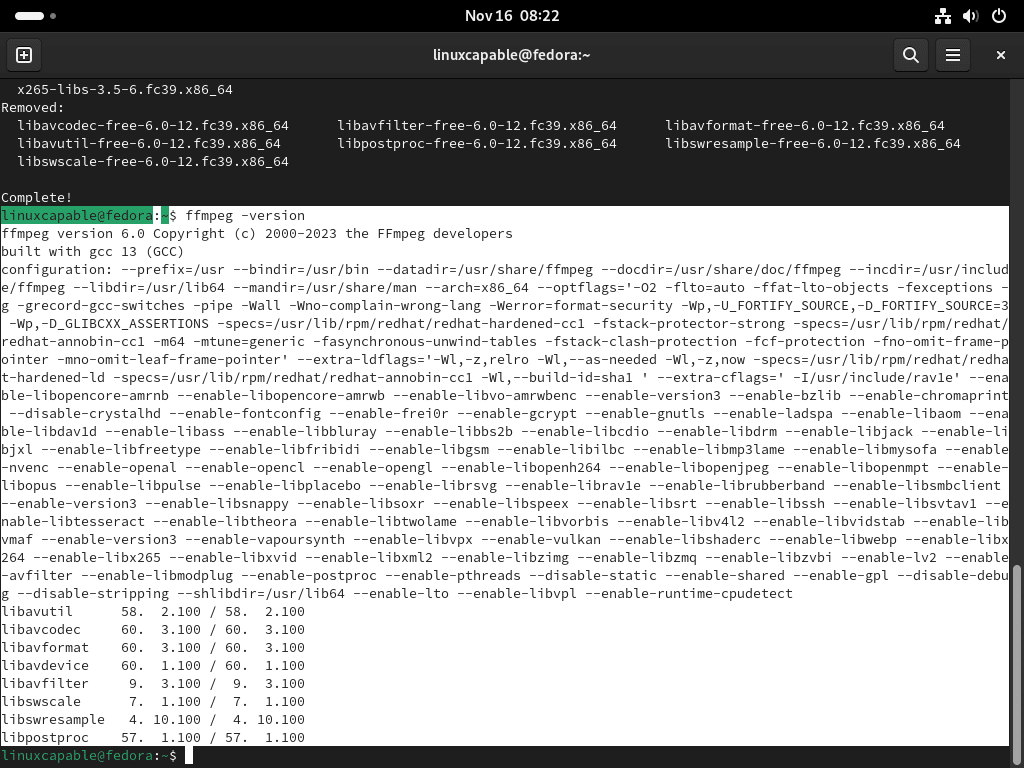
After installing FFmpeg, you should verify its correct installation. Check the installed version by running the following command in the terminal:
ffmpeg -versionThis command displays the installed version of FFmpeg, along with its configuration details and the supported libraries. It’s an essential step to ensure that the installation is successful and the software is ready for use.
Install FFMpeg on Fedora Linux via RPM Fusion
Enable RPM Fusion
If you haven’t already imported RPM Fusion into your Fedora system, it’s the first essential step. RPM Fusion provides a broader range of software that is not included in Fedora by default.
Use these commands to enable RPM Fusion:
sudo dnf install https://download1.rpmfusion.org/free/fedora/rpmfusion-free-release-$(rpm -E %fedora).noarch.rpm

sudo dnf install https://download1.rpmfusion.org/nonfree/fedora/rpmfusion-nonfree-release-$(rpm -E %fedora).noarch.rpm
These commands add the free and non-free repositories of RPM Fusion to your system, expanding the range of available software.
Install FFmpeg via DNF Command from RPM Fusion
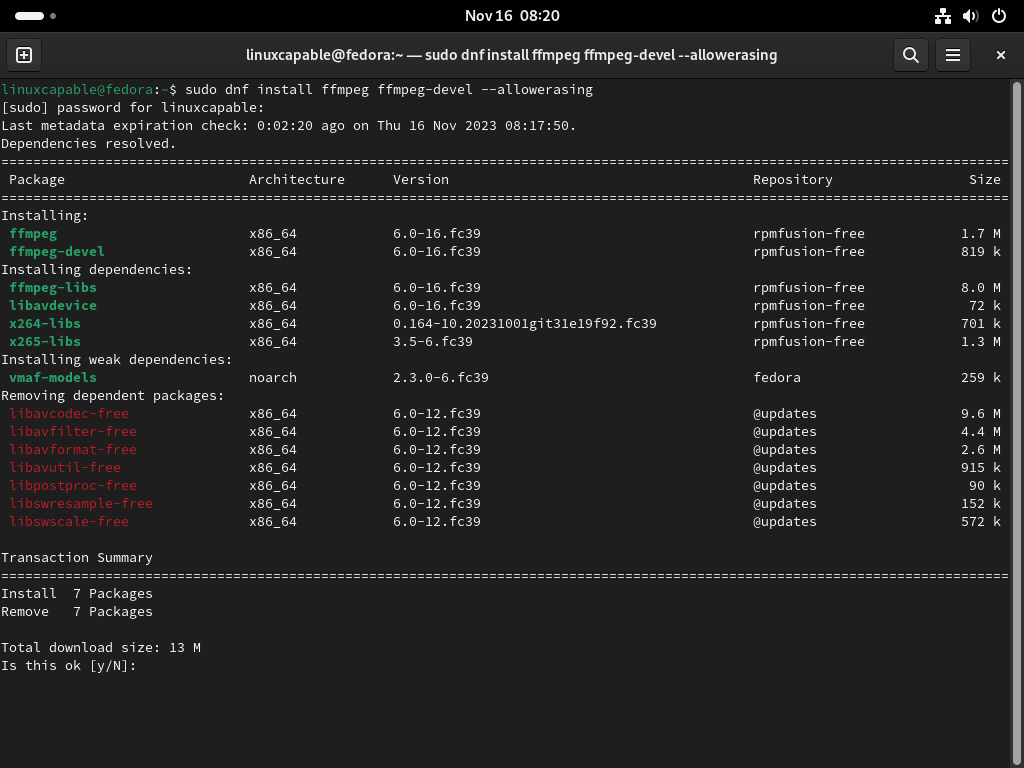
For users who haven’t installed FFmpeg yet, the following command will install it from RPM Fusion:
sudo dnf install ffmpeg --allowerasingTo install the development package, similar to the previous method, use:
sudo dnf install ffmpeg-devel --allowerasingThis step ensures you have the latest version of FFmpeg with additional development tools.
Note: For the FFmpeg installation command from RPM Fusion, it’s important to include --allowerasing. This option ensures that libavcodec-freeworld and other related libraries, which are specifically designed to complement the ffmpeg-free package, are not required when installing FFMpeg direct from RPM Fusion.
Switch FFmpeg-Free to FFmpeg (Situational)
If you already have the Fedora version of FFmpeg installed, switching to the RPM Fusion-provided build is recommended for better support.
Use this command:
sudo dnf swap ffmpeg-free ffmpeg --allowerasingThis command replaces the Fedora-provided FFmpeg with the RPM Fusion version, which may include more features or better compatibility.
Verify FFmpeg RPM Fusion Installation
To confirm that you have installed the correct version of FFmpeg from RPM Fusion, run the following:
ffmpeg -versionThis command will display the version and configuration details of the installed FFmpeg, ensuring that you are using the version provided by RPM Fusion.
Verify FFmpeg Decoders and Encoders on Fedora
Listing FFmpeg Encoders and Decoders
To explore the encoders and decoders available in your FFmpeg installation, you can use specific commands in the terminal. This is useful for understanding the capabilities of FFmpeg in handling various media formats.
Encoders:
To view the list of available encoders, use:
ffmpeg -encodersThis command displays all the encoders that FFmpeg can use to encode or convert your media files.
Decoders:
For the list of decoders, execute:
ffmpeg -decodersDecoders are essential for FFmpeg to interpret and process different media file formats.
Additional FFmpeg Capabilities
FFmpeg provides a range of functionalities beyond encoding and decoding. To fully leverage its capabilities, you can explore the following commands:
Formats:
To see the supported formats, use:
ffmpeg -formatsThis command lists all the media formats that FFmpeg can handle, including both input and output formats.
Codecs:
For a comprehensive list of codecs, execute:
ffmpeg -codecsFFmpeg uses codecs to encode and decode audio and video streams.
Bitstream Filters:
View the available bitstream filters with:
ffmpeg -bsfsBitstream filters process bitstreams (raw data streams) in various ways.
Protocols:
To check the supported protocols, use:
ffmpeg -protocolsProtocols in FFmpeg are used for data streaming and communication.
Filters:
For a detailed list of filters, execute:
ffmpeg -filtersFilters in FFmpeg are used for complex operations like editing or transforming audio and video streams.
Pixel Formats:
To view supported pixel formats, use:
ffmpeg -pix_fmtsPixel formats define how pixels are stored in the media files.
Channel Layouts:
For audio channel layouts, use:
ffmpeg -layoutsThis command shows the supported audio channel configurations.
Audio Sample Formats:
Finally, to view audio sample formats, execute:
ffmpeg -sample_fmtsAudio sample formats determine how audio data is represented in your files.
FFmpeg Basic Commands on Fedora
Understanding FFmpeg Command Syntax
FFmpeg is a versatile tool for processing multimedia content. To effectively utilize FFmpeg, understanding its command syntax is crucial. The general format of an FFmpeg command is as follows:
ffmpeg [global_options] {[input_file_options] -i input_url} …{[output_file_options] output_url} …This structure allows for a variety of operations on multimedia files. Each operation on a new file requires a separate command execution, as FFmpeg does not currently support a method to save command configurations for repeated use.
FFmpeg Conversion Example
FFmpeg simplifies the process of converting audio and video files by auto-detecting the input file format. The output format is inferred from the file extension provided.
Converting Video Formats:
For example, to convert a video file from MP4 to WebM, use the following command:
ffmpeg -i existingfile.mp4 newfile.webmThis command facilitates the conversion process without the need to specify formats explicitly.
Handling Multiple Outputs:
FFmpeg also allows for converting a single input file into multiple output formats simultaneously. For instance:
ffmpeg -i existingfile.wav newfile.mp3 newfile.oggHere, an audio file in WAV format is converted into both MP3 and OGG formats.
To ensure compatibility and successful conversions, always verify the list of supported formats with:
ffmpeg -formatsFFmpeg Extract Audio from Video Example
Extracting audio from a video file in FFmpeg involves using the -vn option.
Basic Audio Extraction:
To extract audio without altering its bitrate, use:
ffmpeg -i video.mp4 -vn audio.mp3This command retains the original audio bitrate from the video file.
Specifying Audio Bitrate:
If you wish to specify a different bitrate for the extracted audio, the command is:
ffmpeg -i video.mp4 -vn -ab 128k audio.mp3This example sets the audio bitrate to 128k, but other common bitrates include 96k, 192k, 256k, and 320k. Adjusting the bitrate can affect the audio quality and file size, providing flexibility based on your requirements.
Managing FFMpeg on Fedora Linux
Remove FFmpeg
Uninstalling FFmpeg from your Fedora Linux system requires a specific command, which ensures the removal of both the FFmpeg software and its development packages. This ensures a thorough and clean uninstallation.
For Standard Fedora Packages:
If you installed FFmpeg using Fedora’s standard repositories, execute this command in the terminal:
sudo dnf remove ffmpeg-free ffmpeg-free-develThis command tells the system’s package manager to remove ffmpeg-free and its development package ffmpeg-free-devel. Remember to remove ffmpeg-free-devel if you installed it for development purposes, ensure all related components are fully uninstalled.
For RPM Fusion Installation:
In case you installed FFmpeg from RPM Fusion, the uninstallation command differs slightly:
sudo dnf remove ffmpeg ffmpeg-develThis command is tailored for systems where FFmpeg was installed via RPM Fusion, targeting both the main FFmpeg package and its development counterpart, ffmpeg-devel.
Final Thoughts
We’ve walked through the steps to install FFmpeg on Fedora Linux, using either the default RPM or RPM Fusion. Now that you’ve got FFmpeg up and running, dive into its vast array of features for your multimedia projects. Remember, whether you’re converting formats, streaming content, or tweaking your audio and video, FFmpeg is your go-to tool. Keep exploring and experimenting with its capabilities to make the most of your multimedia endeavors. And hey, don’t hesitate to lean on the community if you hit a snag or need some inspiration. Happy media manipulating!


