
A full GNOME or KDE Plasma desktop can use more resources than an older laptop, small virtual machine, or occasional server console needs. To install LXQt on Debian, use Debian’s own APT packages: task-lxqt-desktop for a complete desktop task or lxqt for a leaner package set that still stays inside the default Debian repositories.
Debian 13 (Trixie), Debian 12 (Bookworm), and Debian 11 (Bullseye) all provide LXQt packages from the main archive. For a fresh operating-system install or ISO download, use official Debian installation media and select LXQt during Debian Installer’s software-selection step. Use the package commands after Debian is already installed and you want to add LXQt to the current system.
Install LXQt on Debian
Choose an LXQt Package Set
Choose the package set before installing LXQt. Both methods update through APT, but they install different desktop surfaces.
| Package Set | APT Package | What It Installs | Best For |
|---|---|---|---|
| Full desktop task | task-lxqt-desktop (package search) | Debian desktop task, LXQt, SDDM, and expected desktop applications such as LibreOffice and printer/scanner helpers | Most desktops, laptops, and VMs where LXQt should feel ready after login |
| Leaner LXQt metapackage | lxqt (package search) | LXQt desktop components without the broader Debian task wrapper | Custom workstations, small VMs, or servers where you want fewer task-level applications |
Use task-lxqt-desktop unless you already know which desktop applications, login manager, and extras you want to keep out. Do not substitute lxqt-core for a normal first install; it is a lower-level metapackage for custom session builds, not the standard LXQt desktop path.
Plan LXQt for Low-Resource Debian Systems
Do not rely on a single fixed LXQt system requirements number for Debian. The base install, display manager, browser, office suite, and printer or scanner helpers change the real footprint. Use the full desktop task when you want a ready desktop; use lxqt when disk space, memory, or package count matters and you prefer to add applications later.
Update Debian Before Installing LXQt
Refresh package metadata and apply pending upgrades before bringing in a large desktop package set:
sudo apt update
sudo apt upgrade
These commands use sudo for root-level package management. If your account cannot run administrative commands, add a Debian sudo-enabled user before continuing.
Install the Full LXQt Desktop Task
The full desktop task is the safest default because it depends on lxqt, sddm, task-desktop, and Debian’s expected desktop application set.
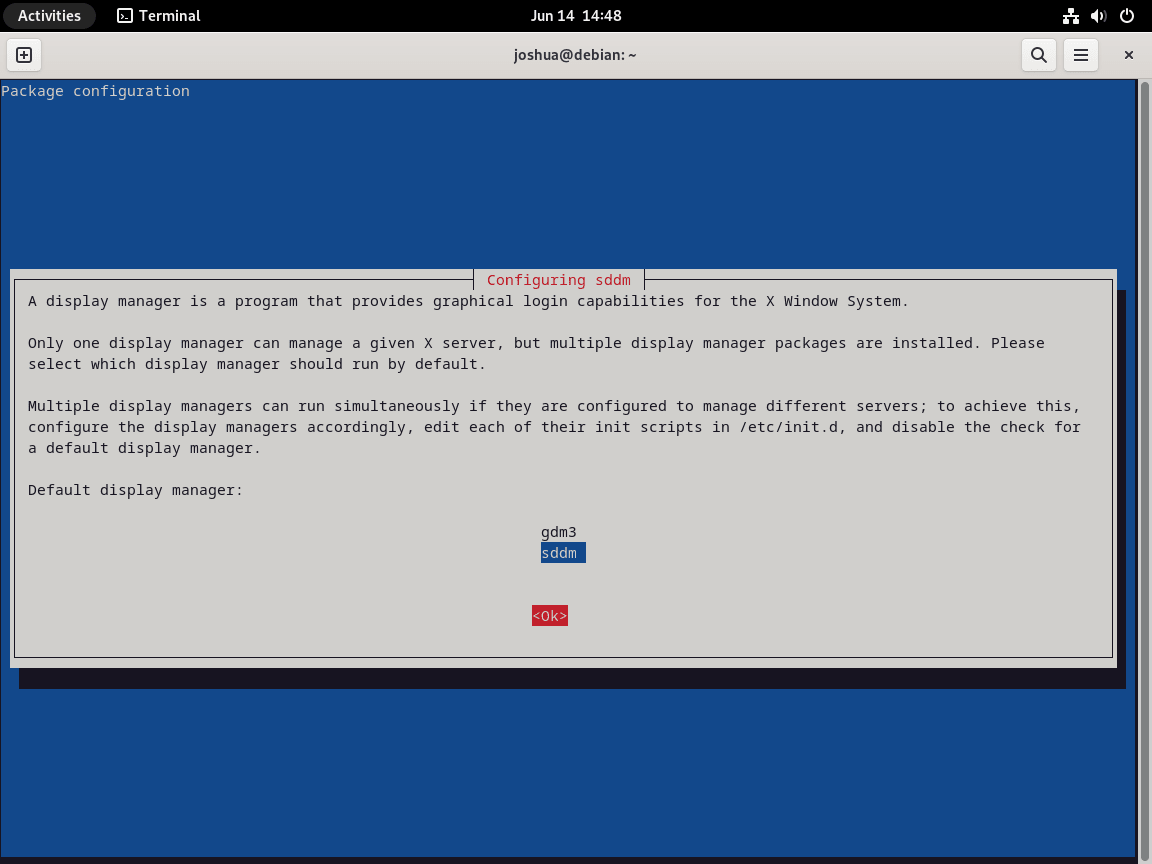
sudo apt install task-lxqt-desktopIf Debian asks which display manager should run by default, choose sddm for the normal LXQt login screen. Use Tab to move to <Ok>, then press Enter.
Install a Leaner LXQt Package Set
The lxqt metapackage installs the LXQt desktop without the broader Debian task package. Keep recommended packages enabled for a first install; suppressing recommendations removes optional desktop applications and integration packages that make the first login more complete.
sudo apt install lxqtOn systems without a display manager, APT can install one to satisfy LXQt’s display-manager dependency. If GNOME, LightDM, or another display manager is already present, Debian may keep that existing login manager unless you reconfigure the default.
Verify LXQt Packages on Debian
Check that Debian installed the main LXQt metapackage and session package:
dpkg-query -W -f='${db:Status-Abbrev} ${binary:Package}\n' lxqt lxqt-session 2>/dev/null | grep '^ii'The output should include both lxqt and lxqt-session with an ii status. The session package provides /usr/share/xsessions/lxqt.desktop, which is the file display managers use to list LXQt at login.
Use APT policy when you need the release-specific package branch and source:
apt-cache policy lxqt lxqt-sessionThe Candidate: lines depend on your Debian release, and the package source should point to that release’s main archive.
| Debian Release | lxqt Candidate | lxqt-session Candidate | Default Session Path |
|---|---|---|---|
| Debian 13 (Trixie) | 33.2 | 2.1.1-1 | X11 login through SDDM; upstream Wayland work exists, but Debian’s default stable package set does not provide lxqt-wayland-session |
| Debian 12 (Bookworm) | 31 | 1.2.0-3 | X11 login through a display manager |
| Debian 11 (Bullseye) | 30 | 0.16.0-1 | X11 login through a display manager |
These values are package candidates from Debian’s default repositories on amd64 systems. Point releases can adjust package revisions, so use apt-cache policy on your own system when you need the exact installed version.
Start LXQt on Debian
Reboot after installing the desktop so the display manager starts from a clean boot state:
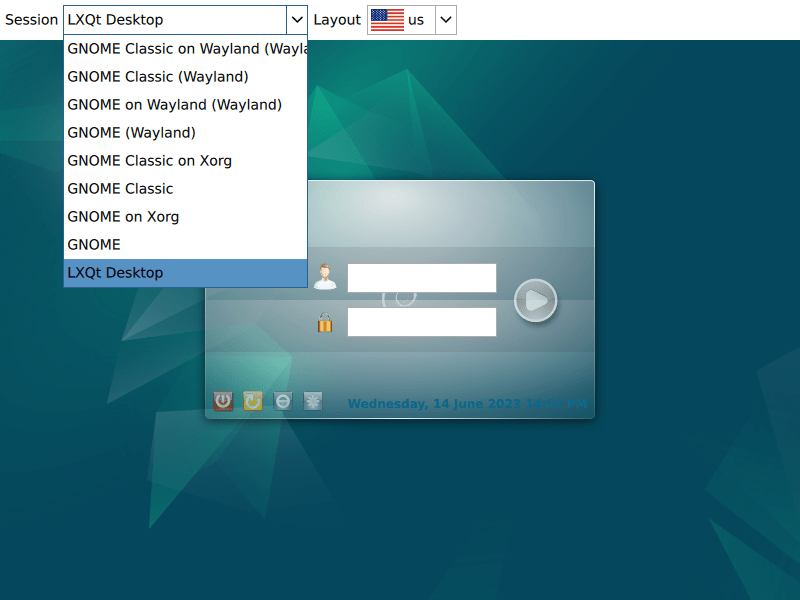
sudo rebootAt the SDDM login screen, open the session selector and choose LXQt Desktop if Debian does not select it automatically. Systems with several desktops can keep GNOME, Xfce, KDE Plasma, Cinnamon, or another session installed and switch at login.
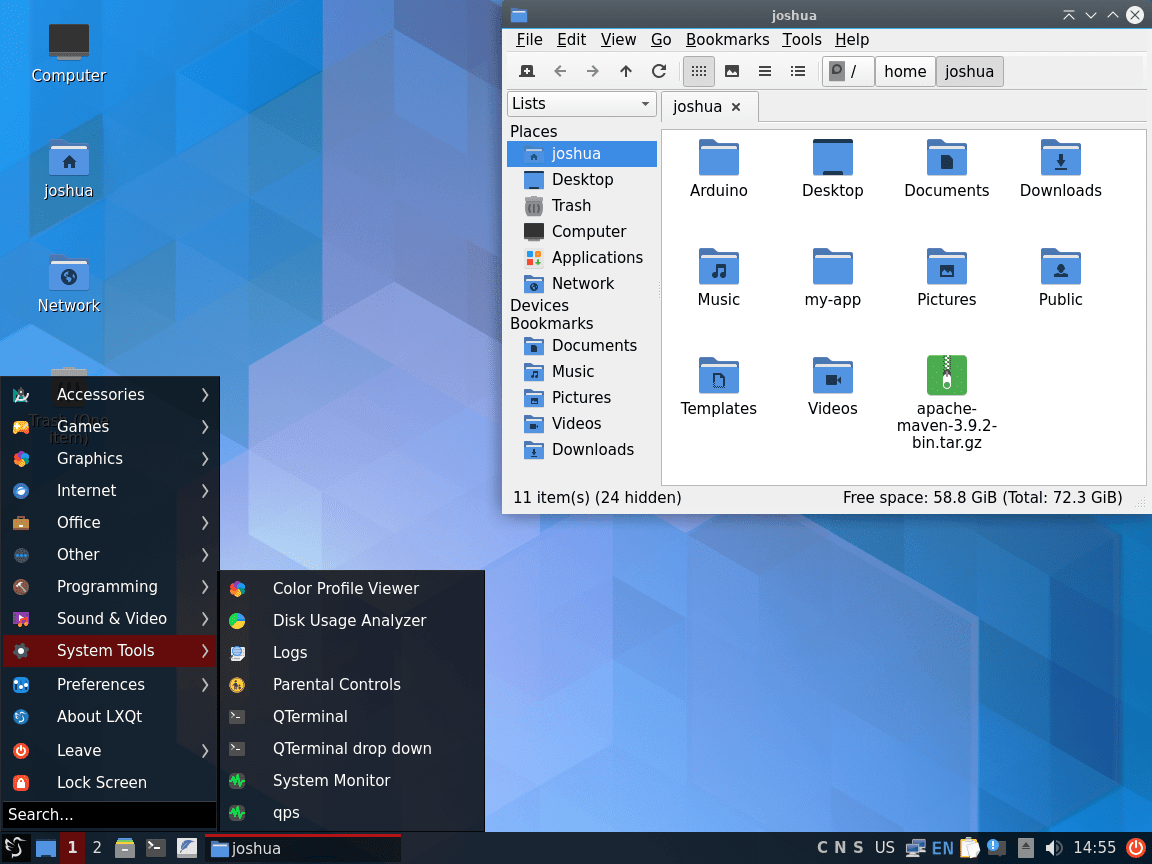
After logging in, LXQt opens to a panel-based desktop with PCManFM-Qt, QTerminal, the application menu, and LXQt configuration tools available from the menu.
Manage LXQt on Debian
Switch the Default Display Manager
Reconfigure SDDM when you installed LXQt beside another desktop and want to choose which login manager starts by default:
sudo dpkg-reconfigure sddmSelect the preferred display manager in the dialog, then reboot so the graphical login path restarts cleanly:
sudo rebootUpdate LXQt Packages
LXQt packages installed from Debian’s repositories update with normal APT upgrades. Use the standard update flow instead of adding a third-party LXQt repository:
sudo apt update
sudo apt upgrade
Remove LXQt from Debian
Remove the LXQt metapackages first. This leaves shared desktop dependencies, another display manager, and user configuration alone until you decide what should be cleaned up.
sudo apt purge task-lxqt-desktop lxqtCheck whether either LXQt metapackage remains installed:
dpkg-query -W -f='${db:Status-Abbrev} ${binary:Package}\n' task-lxqt-desktop lxqt 2>/dev/null | grep '^ii' || trueNo output means those two metapackages are no longer installed. If package names still appear with an ii status, rerun the purge command and review APT’s transaction output before confirming.
Removing SDDM can leave the system without a graphical login screen if no other display manager is installed or configured. Keep SDDM when KDE Plasma or another desktop still uses it.
Remove SDDM only when LXQt was the only desktop that needed it, or after another display manager such as GDM3 or LightDM is active:
sudo apt purge sddmReview orphaned packages after the main removal. Do not accept the transaction until you have checked that APT is not removing another desktop or application set you still use.
sudo apt autoremovePer-user LXQt settings can remain after package removal. List the common paths before deleting anything:
find "$HOME/.config" "$HOME/.cache" "$HOME/.local/share" -maxdepth 1 -type d -name 'lxqt' -print 2>/dev/nullThe next command permanently deletes LXQt panel layouts, session preferences, cache files, and per-user desktop settings for the current account. Back up any settings you may want to reuse.
rm -rf -- "$HOME/.config/lxqt" "$HOME/.cache/lxqt" "$HOME/.local/share/lxqt"Restore GNOME After Removing LXQt
Reinstall Debian’s GNOME task if the system should return to the default GNOME desktop and GDM3 login manager:
sudo apt install task-gnome-desktop gdm3
sudo dpkg-reconfigure gdm3
sudo reboot
Troubleshoot LXQt on Debian
LXQt Session Is Missing from the Login Screen
Confirm that Debian installed the LXQt X11 session file:
test -f /usr/share/xsessions/lxqt.desktop && echo "LXQt session file found"If the command prints nothing, reinstall the package that provides the LXQt session files:
sudo apt install --reinstall lxqt-sessionRetest the session file before restarting the login manager:
test -f /usr/share/xsessions/lxqt.desktop && echo "LXQt session file found"If the file exists but SDDM still does not show LXQt, save open work first. Restarting SDDM ends current graphical sessions:
sudo systemctl restart sddmSDDM Does Not Start
Check whether SDDM is enabled and active:
systemctl is-enabled sddm
systemctl is-active sddm
An enabled and running login manager reports enabled and active. Enable and start SDDM when either check fails:
sudo systemctl enable --now sddmIf SDDM still fails, inspect the service journal before changing more packages:
sudo journalctl -xeu sddmLXQt Wayland Session Is Not Available
Debian’s LXQt packages use X11 for the normal login session. Upstream maintains a separate LXQt Wayland session component, but that package is not available from the default Debian 13, 12, or 11 repositories.
apt-cache search --names-only '^lxqt-wayland-session$'No output means your enabled Debian sources do not provide that exact package. Avoid mixing Debian unstable packages into a stable desktop just to add an experimental Wayland session unless you intentionally maintain a mixed-source system and understand the upgrade risk.
Explore Other Debian Desktop Environments
Other Debian desktop packages may fit better when you want a different toolkit, workflow, or resource profile:
- Install Xfce on Debian for a lightweight GTK-based desktop with a traditional workflow.
- Install KDE Plasma on Debian when you want a more configurable Qt desktop with a larger feature set.
- Install Cinnamon on Debian for a familiar panel-and-menu desktop layout.
- Install Budgie on Debian for a modern desktop shell with a simpler settings surface.
Conclusion
LXQt is installed through Debian packages, with SDDM handling the normal login flow and APT handling future updates. Keep the full desktop task for a ready workstation, or use the leaner lxqt metapackage when you want a smaller desktop on a VM or server. The session selector can switch between LXQt and any other installed desktop.

Very good, I finally got rid of the gnome – it got too big!
Thanks for the feedback! Indeed, LXQt desktop environment is indeed much better on resources compared to GNOME.
Ah!
your pieces of advice are NOT only an annoying collection of command like in a recipe book.
Every command is explained, thks you.
Thanks for the feedback.