This guide will cover how to install Telnet on Ubuntu 24.04, 22.04, or 20.04 using the command-line terminal. It will provide step-by-step instructions, ensuring a smooth and efficient installation process for all versions.
Telnet, a network protocol used for remote communication, is a vital tool for system administrators and IT professionals. Its simplicity and efficiency make it a popular choice for managing servers and network devices. In this guide, we delve into the practicalities of Telnet, highlighting its utility in various network environments:
- Remote Access: Enables users to connect to remote servers or devices, providing a command-line interface for direct control.
- Network Testing: Useful for diagnosing issues with network services, Telnet can be employed to test connectivity and troubleshoot problems.
- Cross-Platform Compatibility: Functions seamlessly across different operating systems, making it a versatile tool in heterogeneous network environments.
- Simple User Interface: Offers a straightforward, text-based interface that is easy to navigate for experienced users.
As we move forward, we’ll explore the nuances of installing Telnet on Ubuntu. From the basic prerequisites to the final steps of verification, this guide will walk you through the entire process, ensuring you’re equipped to utilize Telnet effectively in your network management tasks.
Install Telnet on Ubuntu via APT
Update Ubuntu Before Telnet Installation
Before installing Telnet, update your Ubuntu system fully by running the following command in the terminal:
sudo apt update && sudo apt upgradeThis command will check for updates and upgrade the existing packages to their latest versions. It is an excellent practice to update your system to ensure the smooth running of Telnet and other installed packages.
Install Telnet on Ubuntu via APT Command
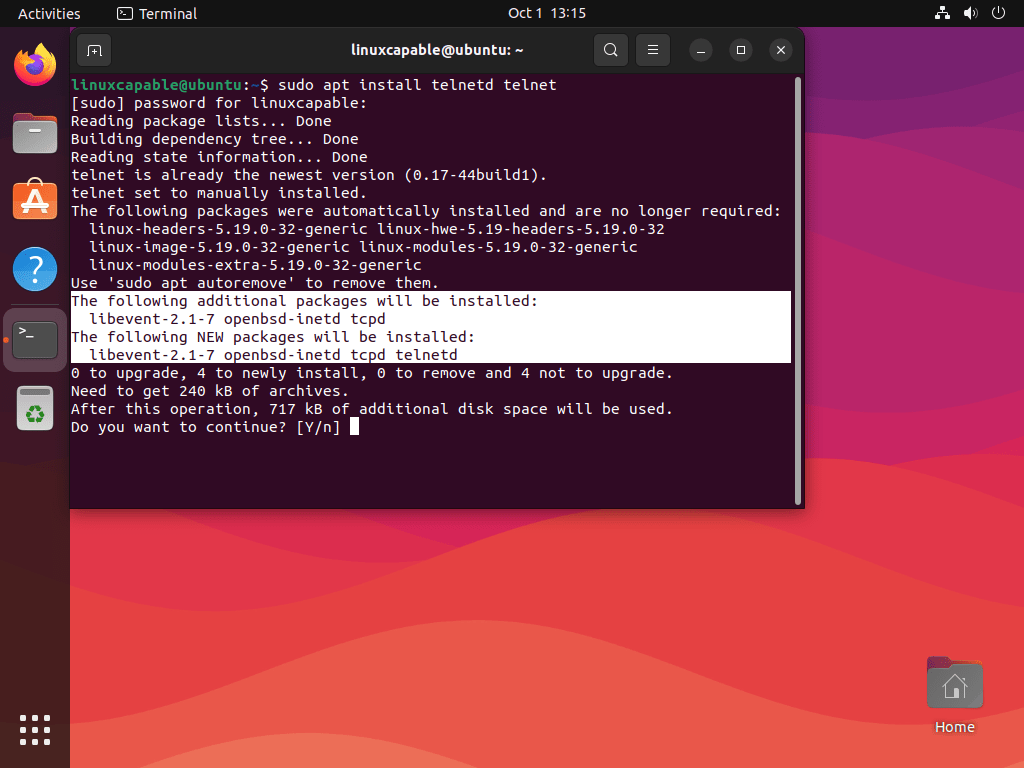
Telnet, included in Ubuntu’s standard repository, simplifies the installation process. To install Telnet on Ubuntu, execute the following command in the terminal:
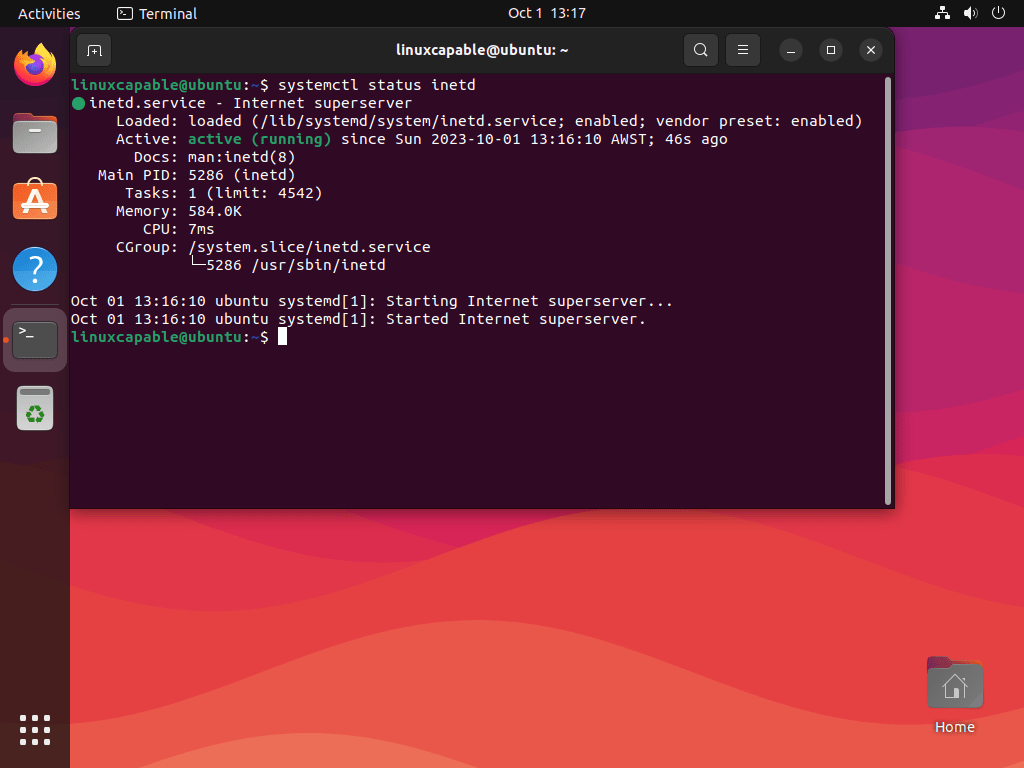
sudo apt install telnetd telnetOnce installed, ensure the Telnet status is okay with the following command.
systemctl status inetdIf the Telnet service is not active, run the following command to start it immediately.
sudo systemctl start inetdTelnet Command Examples on Ubuntu
With Telnet now installed and running on your Ubuntu system, the following are examples of using Telnet via the command line.
Connect to a specific host on a specific port.
telnet [hostname or IP address] [port]Example:
telnet example.com 23Connect to a specific host on a specific port with a specified timeout.
telnet [hostname or IP address] [port] [timeout in seconds]Example:
telnet example.com 80 20Connect to a specific host on a specific port with a specified timeout and several attempts.
telnet [hostname or IP address] [port] [timeout in seconds] [attempts]Example:
telnet example.com 80 20 3After running the commands, the terminal may prompt you to enter your credentials and follow additional instructions to complete the task. Completing these steps is standard when modifying firewall rules. If you intend to use Telnet often on sensitive networks, secure it using step 4 and the UFW firewall for maximum protection. This approach safeguards your system against unauthorized access and potential security threats.
Secure Telnet via UFW Firewall on Ubuntu
Securing Telnet on Ubuntu using the ufw firewall can help protect against unauthorized access and potential security threats.
Verify UFW is Installed and enabled on Ubuntu
Before securing Telnet on Ubuntu with the UFW firewall, first check the firewall’s status. Run the following command in the terminal to accomplish this.
sudo ufw statusThis command furnishes information about the UFW firewall’s current status and existing rules. Notably, all Ubuntu systems have UFW pre-installed, ensuring its presence on your system.
Enable the UFW firewall on your Ubuntu system, if not already active, by running the following command in the terminal:
sudo ufw enableThis command will activate the firewall and begin enforcing the rules set. It’s essential to enable the firewall to secure Telnet and protect your system from unauthorized access and potential security threats.
After enabling UFW, the next step is configuring the firewall’s basic rules. This includes denying all incoming and outgoing connections by default. You can set these rules by running the following commands in the terminal.
sudo ufw default deny incoming
sudo ufw default allow outgoing
Note that the system might have these rules set by default. If not, you should set them. These rules block all incoming connections while allowing outgoing connections by default, providing an extra layer of security to shield your system from unauthorized access and potential security threats.
Basic Telnet UFW Application Rules with Ubuntu
To enable Telnet connections through the UFW firewall, you can use the following command in the terminal:
sudo ufw allow telnetTo block Telnet connections through the UFW firewall, you can use the following command in the terminal.
sudo ufw deny telnetThis command will add a firewall rule blocking incoming Telnet connections. This will prevent any unauthorized access to your system using Telnet. This command helps avoid potential security threats and secure Telnet on your Ubuntu system.
Advanced Telnet UFW Example Rules For Ubuntu
Here are some examples of how to use the ufw firewall to secure Telnet on Ubuntu.
To allow Telnet connections on port 23, use the command:
sudo ufw allow 23/tcpBlock Telnet connections on port 23; use the command:
sudo ufw deny 23/tcpAllow Telnet connections from a specific IP address; use the command:
sudo ufw allow from 192.168.1.10 to any port 23Block Telnet connections from a specific IP address; use the command:
sudo ufw deny from 192.168.1.10 to any port 23Allow Telnet connections from a specific IP range; use the command:
sudo ufw allow from 192.168.1.0/24 to any port 23Additional Telnet Commands on Ubuntu
Remove Telnet From Ubuntu
To remove Telnet from your Ubuntu system, you can use the following command in the terminal:
sudo apt remove telnet telnetdConclusion
We’ve successfully navigated through the steps of installing Telnet on Ubuntu Linux, covering versions 24.04, 22.04, and 20.04. I hope this guide made your experience smooth and straightforward. Remember, while Telnet is a great tool for remote communication and network testing, always prioritize secure connections, especially when dealing with sensitive data.


