Rust, a modern programming language known for its safety and performance, has gained significant popularity among developers. This guide will demonstrate how to install Rust on Linux Mint 21 or 20, providing a clear pathway for those eager to explore its capabilities.
Rust stands out for several reasons:
- Safety: Emphasizes memory safety without using a garbage collector.
- Concurrency: Offers advanced features to write concurrent code safely.
- Performance: Achieves C-like performance, making it suitable for systems programming.
- Cross-platform Development: Compiles on numerous platforms.
- Zero-cost Abstractions: Allows higher-level programming without runtime overhead.
The seamless integration of Rust into various development environments, including Linux Mint, makes it a versatile tool for a wide range of applications. The following sections will guide you through the installation process on Linux Mint.
Install Rust on Linux Mint 21 or 20 via RustUp.RS
Step 1: Update Linux Mint Before Rust Installation
To ensure a smooth installation of Rust, start by updating your Linux Mint system. This process refreshes your system’s package list and upgrades existing packages to their latest versions.
Open your command terminal and execute the following commands:
sudo apt update
sudo apt upgrade
These commands first update the package list and then upgrade the packages, ensuring your system is current and secure.
Step 2: Install Initial Packages for Rust Installation
Prior to installing Rust, certain prerequisite packages are required. These packages include curl for downloading the installation script, build-essential for compiling software, and gcc and make for managing dependencies and builds.
Install these packages with the following command:
sudo apt install curl build-essential gcc make -yThis command installs all necessary packages, preparing your system for the Rust installation.
Step 3: Install Rust on Linux Mint 21 or 20 via RustUp
With the prerequisites in place, the next step is to download and run the Rust installation script.
Use curl to fetch the script securely via HTTPS:
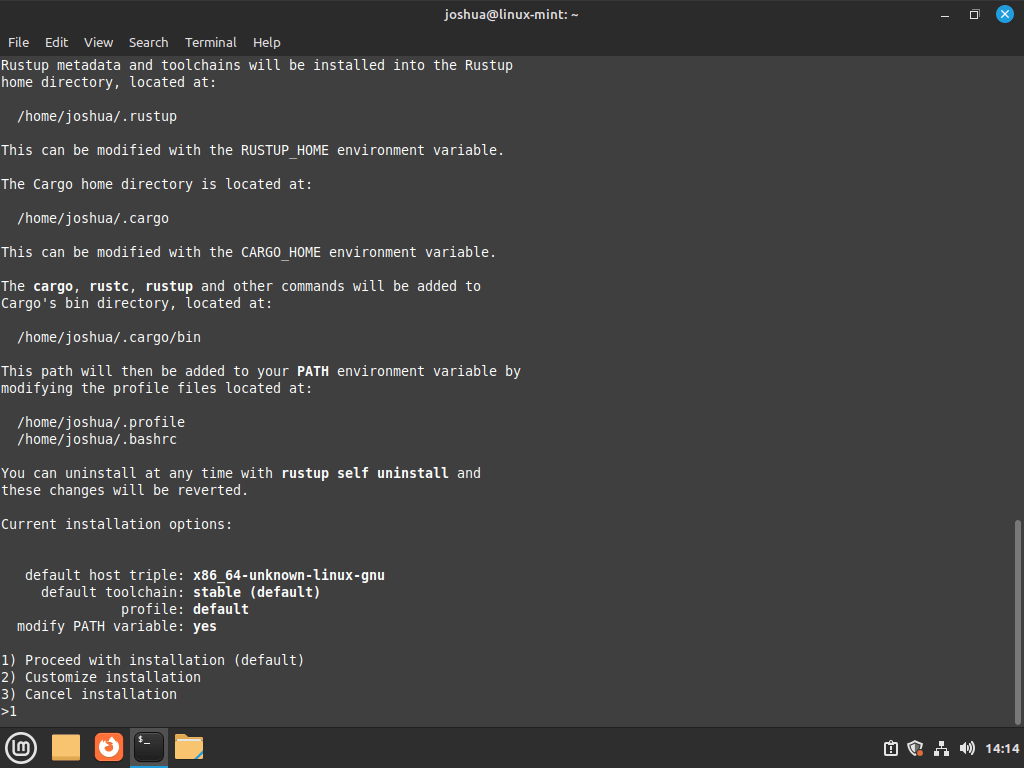
curl --proto '=https' --tlsv1.2 -sSf https://sh.rustup.rs | shAfter running this command, you’ll see an output prompting you to choose the installation type. For most users, the default installation suffices. To proceed with it, type “1” and press Enter.
The installation process varies in duration, typically taking between 1 to 5 minutes, depending on your internet speed and hardware capabilities.
Once installed, activate the Rust environment for your current shell. This step is crucial as it enables Rust commands in your terminal.
Run the following command:
source "$HOME/.cargo/env"This command activates the Rust environment, allowing you to use Rust immediately.
Verifying Rust Installation
To confirm that Rust is installed correctly, check the installed version with:
rustc -VIf this command displays the Rust version, it confirms a successful installation. If you encounter any issues or the version doesn’t display, recheck the previous steps, especially the environment activation step, to ensure everything is set up correctly.
Create Rust Sample Project Application on Linux Mint 21 or 20
Setting Up a Workspace for Rust Projects
After installing Rust on Linux Mint, it’s vital to validate its functionality. A practical approach is to create a test application. Start by establishing a dedicated workspace for your Rust projects. This workspace organizes your development projects and ensures that all files are stored systematically.
Create the workspace directory with the following command:
mkdir ~/rust-projectsThis command creates a new directory named rust-projects in your home directory, dedicated to housing your Rust projects.
Creating a “Hello World” Application in Rust
Navigate to your new workspace and begin crafting your first Rust application:
cd rust-projects && nano helloworld.rsThis command changes your current directory to rust-projects and opens a new file helloworld.rs in the nano text editor. Here, you will write your test application.
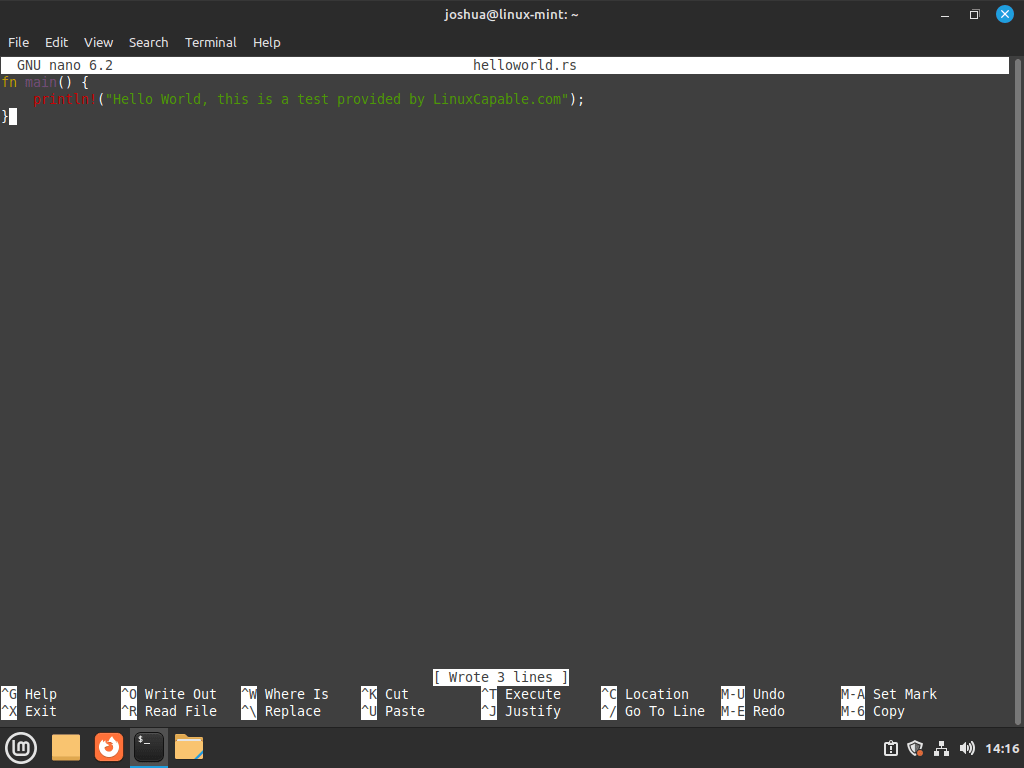
In the nano editor, enter the following Rust code for a simple “Hello World” program:
fn main() {
    println!("Hello World, this is a test provided by LinuxCapable.com");
}This Rust program, when executed, will print the specified message to the console.
Save and exit the nano editor using “CTRL+O” to write the changes and “CTRL+X” to exit.
Compiling the Rust Application
Compile the “Hello World” application with:
rustc helloworld.rsThis command compiles the Rust source file helloworld.rs into an executable. After successful compilation, you should see a new executable file in your current directory.
To confirm the creation of the executable, list the contents of the current directory with:
lsExecuting the Compiled Rust Application
Finally, execute your newly created “Hello World” application with the following command:
./helloworldRunning this command should display the message from your Rust application, confirming that Rust is installed correctly and is ready for further development projects.
Additional Commands For Rust on Linux Mint 21 or 20
Update Rust on Linux Mint 21 or 20 via RUSTUP Command
Rust’s built-in updater, rustup, simplifies keeping your installation current. To update Rust on Linux Mint, open your terminal and run the following command:
rustup updateThis command checks for any available updates for Rust and applies them, ensuring your Rust environment is up-to-date with the latest features and security patches.
Remove (Uninstall) Rust from Linux Mint 21 or 20 via RUSTUP Command
In the event that Rust is no longer required on your system, it can be uninstalled cleanly using the rustup tool. To remove Rust from your Linux Mint system, execute this command in your terminal:
rustup self uninstallThis command initiates the uninstallation process of Rust, effectively removing it from your system. Upon successful completion, a confirmation message will appear, indicating that Rust has been completely uninstalled from your Linux Mint system.
Conclusion
To sum up, this guide has demonstrated a clear and easy path to install Rust on Linux Mint 21 or 20. Rust, known for its impressive performance, safety, and reliability, is a powerful tool for developers to create robust applications. By following the outlined steps, you’ve now set up Rust, created a sample project, and learned how to update or uninstall it as needed. As you dive into Rust’s world, remember that this language is all about efficient and secure coding, setting the stage for advanced and scalable software development.


