This guide will demonstrate how to install qBittorrent on Ubuntu 24.04, 22.04, or 20.04 LTS using the command-line terminal and the qBittorrent-team PPA for the latest version and future upgrades.
qBittorrent is a robust, open-source software application that offers a compelling alternative to other BitTorrent clients. It’s designed with simplicity and efficiency in mind, providing users with a feature-rich environment without the bloat of unnecessary tools.
Here’s a quick overview of what makes qBittorrent stand out:
- Cross-platform Support: Runs seamlessly on various operating systems, ensuring a broad user base.
- User-friendly Interface: Intuitive and clean, making navigation and operation straightforward.
- Advanced RSS Support: With integrated RSS feed reader and downloader, staying updated with your favorite content is effortless.
- Comprehensive Search Engine: Built-in search engine allows for easy torrent searching without leaving the app.
- Sequential Downloading: Option to download files in sequence, ideal for streaming video content.
- IP Filtering and Encryption: Enhanced security features to protect your privacy.
- Remote Control: Through a web user interface, manage your downloads remotely.
- Extensible: Supports plugins, expanding its functionality to meet user needs.
These features, among others, position qBittorrent as a top choice for users seeking a powerful yet straightforward torrent client.
Now, let’s dive into the technical steps to get qBittorrent up and running on your Ubuntu system.
Import qBittorrent PPA on Ubuntu
In this section, we’ll import the qBittorrent Launchpad PPA (Personal Package Archive) to access the qBittorrent packages for Ubuntu.
Update Ubuntu Before qBittorrent Installation
Before we start, it’s essential to update your Ubuntu system to ensure all packages are up-to-date, which helps avoid conflicts during the qBittorrent installation.
First, update the package list by running the following:
sudo apt updateNext, proceed to upgrade any outdated packages using the following command:
sudo apt upgradeInstall Initial Packages for qBittorrent
With your system up-to-date, you must install the necessary dependencies for qBittorrent. These packages ensure your Ubuntu system can securely access and import the qBittorrent PPA. Run the command:
sudo apt install dirmngr ca-certificates software-properties-common apt-transport-httpsThis command will either install the necessary packages or check if they are already installed.
Import qBittorrent PPA
To install qBittorrent, we must import the “qBittorrent Team” PPA containing the latest software version. You can choose between the stable PPA and the unstable PPA. The stable PPA contains well-tested versions, while the unstable PPA contains the latest features that may not be thoroughly tested.
Run the following command to import the PPA of your choice:
Option 1: Import qBittorrent stable PPA:
sudo add-apt-repository ppa:qbittorrent-team/qbittorrent-stable -yOption 2: Import qBittorrent unstable PPA:
sudo add-apt-repository ppa:qbittorrent-team/qbittorrent-unstable -yUpdate Packages List After qBittorrent PPA Import on Ubuntu
After importing the qBittorrent PPA, update the packages list to include the newly added PPA. This ensures that your system can access the qBittorrent packages during installation. Run the following command:
sudo apt updateInstall qBittorrent Desktop Client on Ubuntu
In this section, we’ll install the qBittorrent desktop client on your Ubuntu system and launch it for the first time. For those that require the Web Interface version of qBittorrent, which is most commonly run on an Ubuntu server, check the next section.
Install qBittorrent Desktop Client via APT command
Now that your system has the necessary dependencies and the qBittorrent PPA, it’s time to install the qBittorrent desktop client. Install qBittorrent using the updated package list by executing the following command:
sudo apt install qbittorrentThis command will fetch the appropriate qBittorrent package from the PPA and install it on your system.
Launch qBittorrent Desktop Client via CLI Command
With qBittorrent installed, you can launch and start using the application. To launch the qBittorrent desktop client (either stable or unstable, depending on which PPA you imported), you can use the following command in your terminal session:
qbittorrentThis command will open the qBittorrent client, and you can begin managing your torrents.
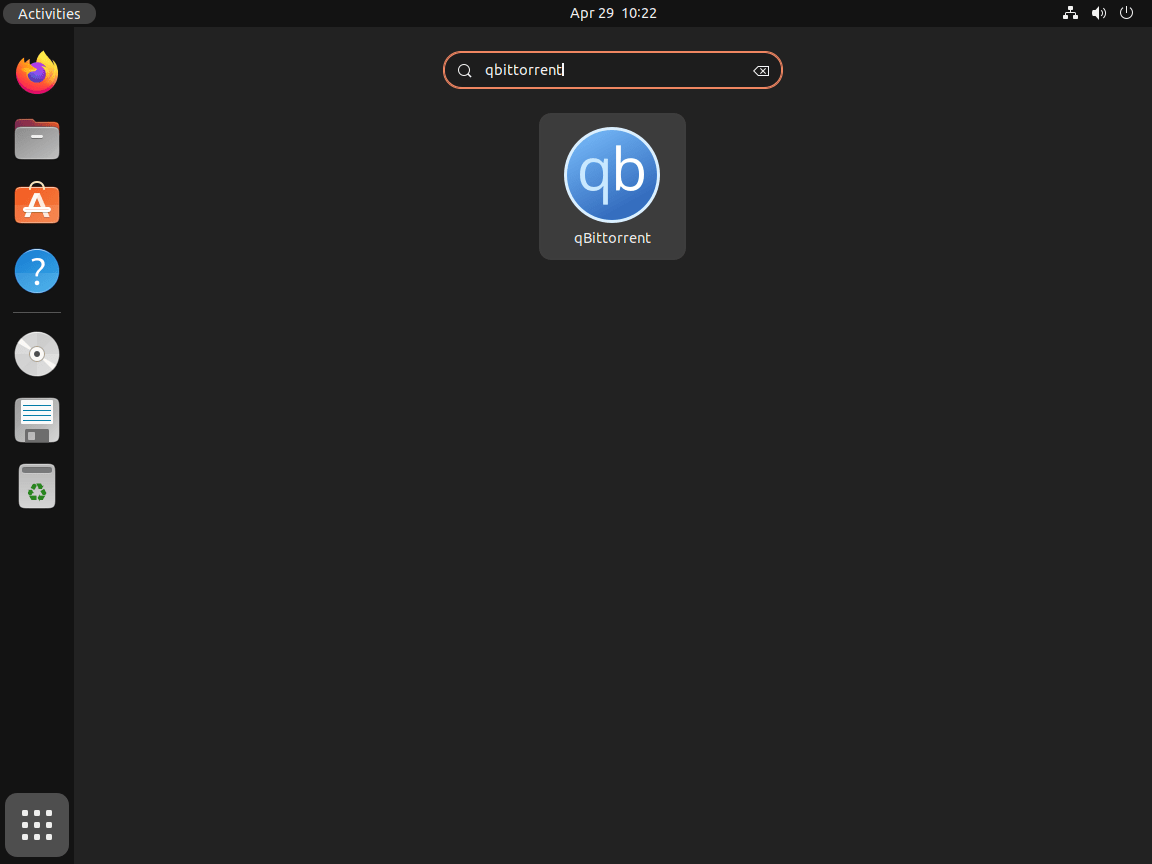
Alternatively, if you prefer to launch qBittorrent using an application icon instead of the terminal, you can access it through your system’s application menu. To do this, follow the path:
Activities > Show Applications > qBittorrentUpon using the qBittorrent program for the first time, you will encounter a pop-up window displaying a legal notice. This notice protects qBittorrent from legal liabilities, as torrents play a substantial role in unauthorized downloads today.
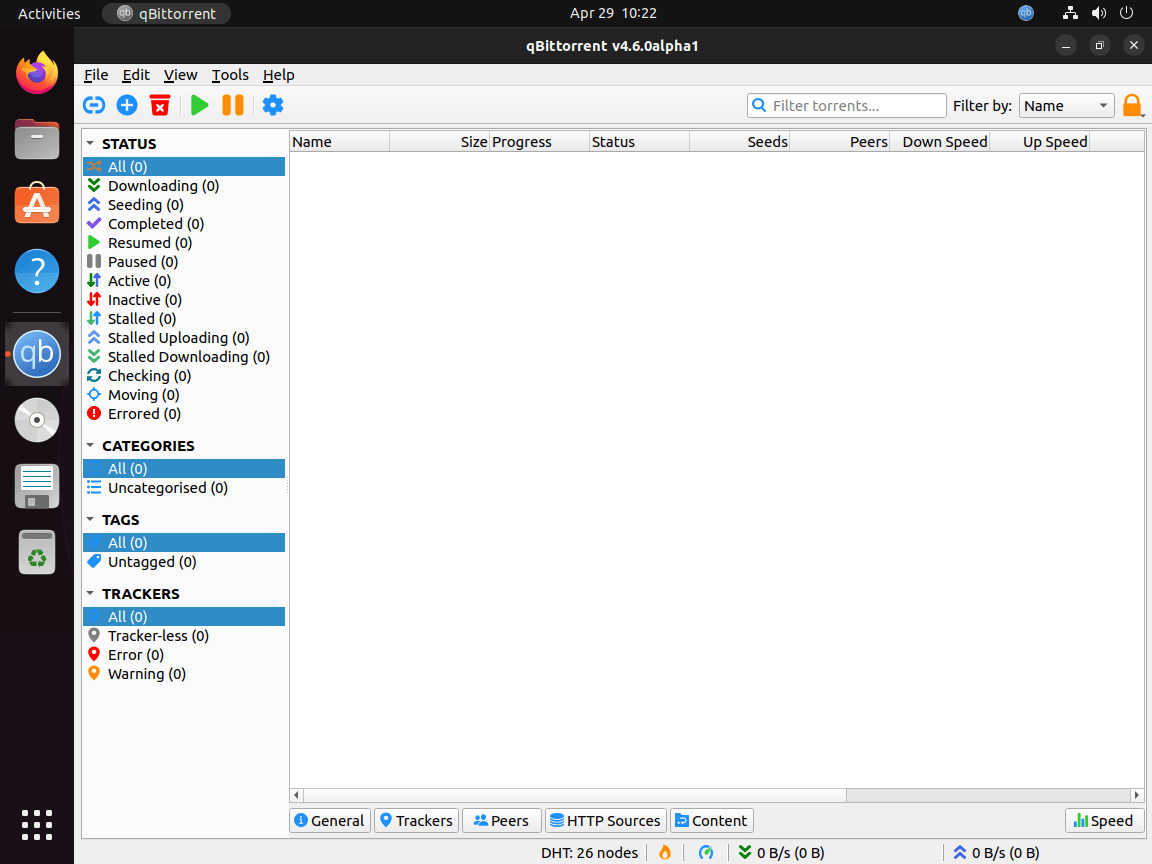
Once you agree to the legal notice, the main window of your newly installed qBittorrent software will appear, and it will be ready for use.
Install qBittorrent-nox Web-UI (Ubuntu Server) on Ubuntu
qBittorrent-nox allows you to install qBittorrent on a headless Ubuntu server or a remotely accessed desktop. With the WebUI interface, you can efficiently manage qBittorrent using your favorite browser.
Install qBittorrent-nox via APT command
To install qBittorrent-nox, run the following command:
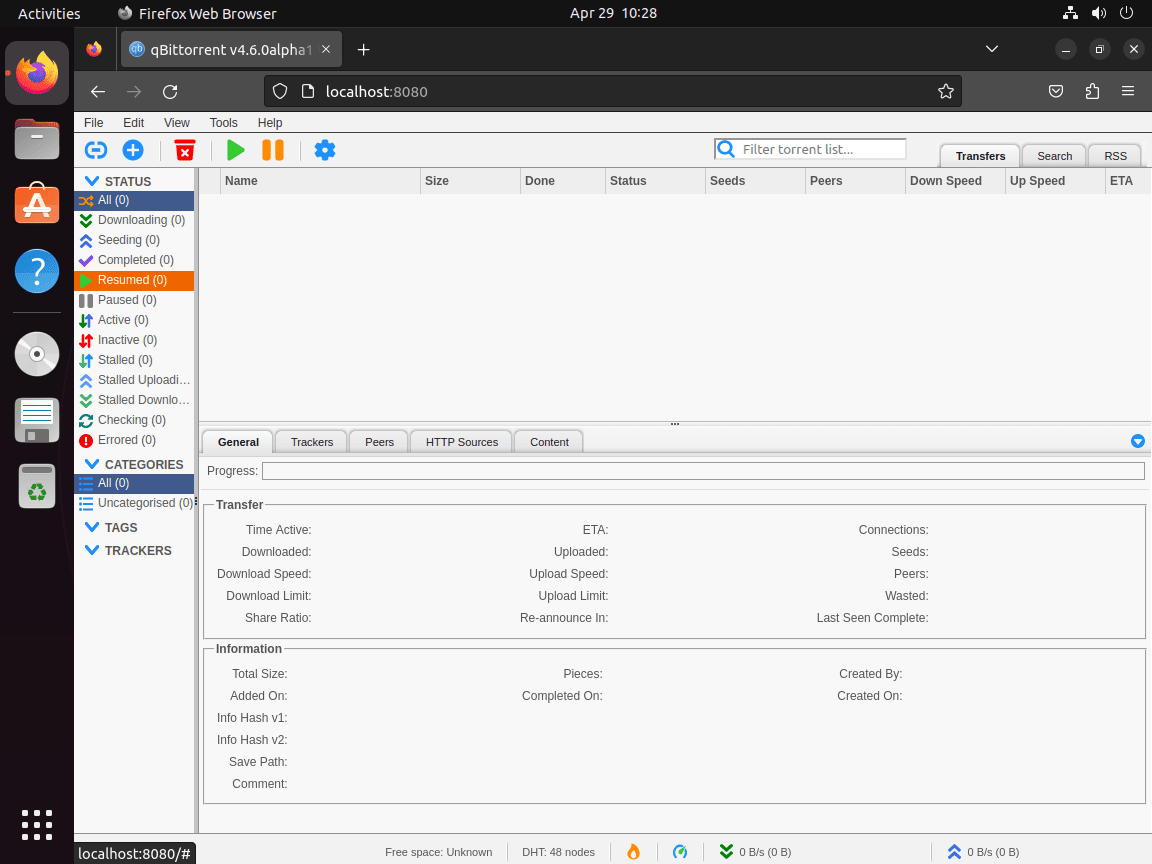
sudo apt install qbittorrent-noxqBittorrent-nox is designed for headless clients and is accessible via a Web interface at the default localhost location: http://localhost:8080. The Web UI access is secured by default. The default username is admin, and the default password is adminadmin.
Create a System User and Group for qbittorrent-nox
Instead of running qBittorrent-nox using the terminal command, you’ll create a systemd service unit that runs in the background and starts at system boot.
First, create a qbittorrent-nox user and group so the service can run as an unprivileged user:
sudo adduser --system --group qbittorrent-noxThe --system flag means you’re creating a system user instead of a regular user.
Example output:
Adding system user `qbittorrent-nox' (UID 129) ...
Adding new user `qbittorrent-nox' (UID 129) with group `qbittorrent-nox' ...
Creating home directory `/home/qbittorrent-nox' ...
Add Username to qBittorrent Group
Next, add your username to the qbittorrent-nox user group using the following command:
sudo adduser your-username qbittorrent-noxExample using my username:
sudo adduser joshua qbittorrent-noxCreate a Systemd Service File for qbittorrent-nox
Create a systemd service file for qbittorrent-nox:
sudo nano /etc/systemd/system/qbittorrent-nox.serviceCopy and paste the following lines into the file:
[Unit]
Description=qBittorrent Command Line Client
After=network.target

[Service]
Type=forking
User=qbittorrent-nox
Group=qbittorrent-nox
UMask=007
ExecStart=/usr/bin/qbittorrent-nox -d --webui-port=8080
Restart=on-failure

[Install]
WantedBy=multi-user.target
Save the file (CTRL+O), then exit (CTRL+X).
Reload the Systemd Daemon for qbittorrent-nox
Reload your systemd daemon for the changes to take effect:
sudo systemctl daemon-reloadStart and Enable qBittorrent-nox
Start qBittorrent-nox with the following command:
sudo systemctl start qbittorrent-noxTo have qBittorrent-nox start automatically on boot, use the following command:
sudo systemctl enable qbittorrent-noxBefore proceeding, check the status to ensure everything is working correctly:
systemctl status qbittorrent-noxAccess qBittorrent Web UI via Ubuntu
You can access qBittorrent through your local network’s browser using the Web UI. Type the server’s internal IP address followed by the port number (8080), for example, 192.168.55.156:8080. If hosted locally, use the localhost address 127.0.0.1:8080.
The default username is admin, and the default password is adminadmin.
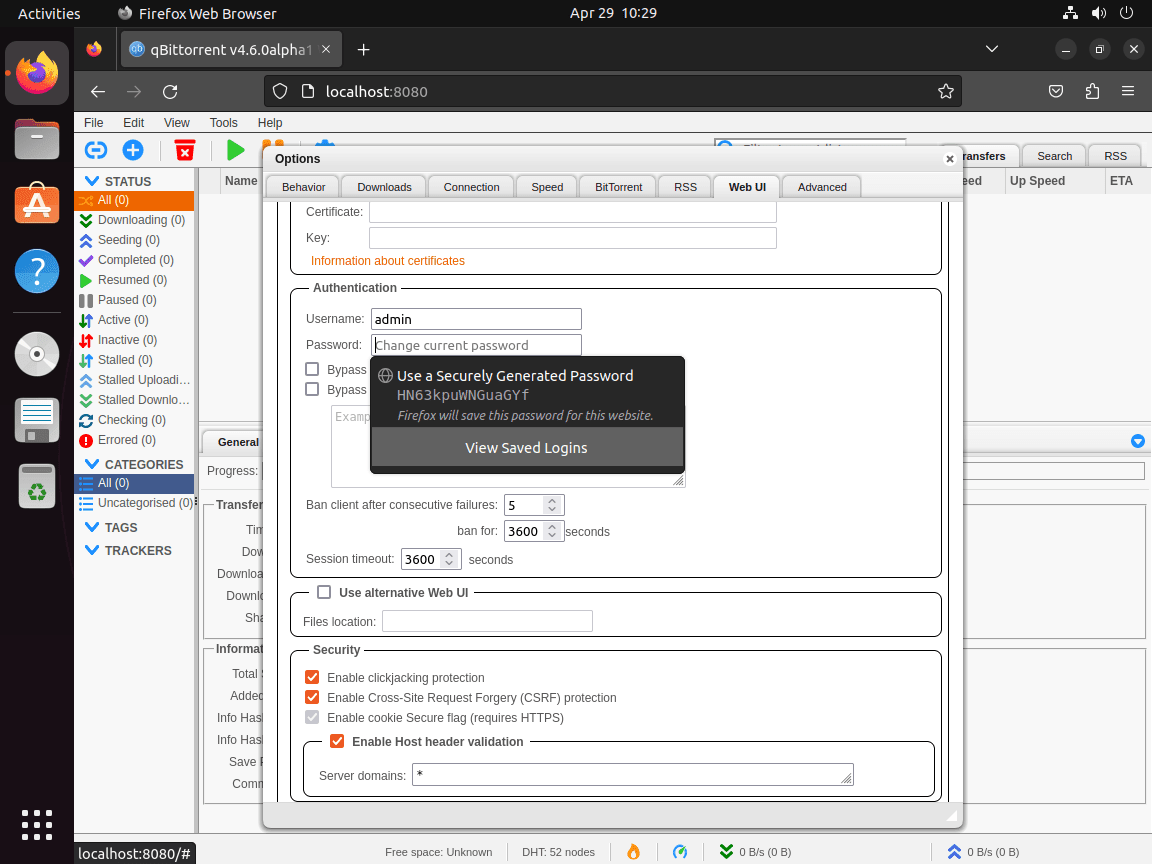
Before taking any further actions, altering the default username and password to safeguard your qBittorrent Web UI is essential. To update the login details, navigate through the following route:
Tools > Options > Web UI > AuthenticationAt this point, you can modify the username and password to your desired combination. Doing so will guarantee that your qBittorrent Web UI remains safe and can only be accessed by those with the proper authorization.
Additional qBittorrent Commands for Ubuntu
Update qBittorrent or qBittorrent-nox
While using the command line terminal might require more effort, it is often the most efficient way to keep your system up-to-date. To update qBittorrent or qBittorent-nox, run the following command:
sudo apt updateIf an update is available for qBittorrent or qBittorrent-nox, proceed with the upgrade by executing the command below:
sudo apt upgradeRemove qBittorrent or qBittorrent-nox
If you wish to uninstall qBittorrent, follow this simple process. First, remove the custom PPA if you installed it according to the previous tutorial.
To remove the PPA you imported, use the following commands:
Remove qBittorrent stable PPA:
sudo add-apt-repository --remove ppa:qbittorrent-team/qbittorrent-stable -yRemove qBittorrent unstable PPA:
sudo add-apt-repository --remove ppa:qbittorrent-team/qbittorrent-unstable -yNext, uninstall qBittorrent with the command below:
sudo apt remove qbittorrentFor users who have installed qBittorrent-nox, use the following command to remove it:
sudo apt remove qbittorrent-noxConclusion
There you have it! We’ve walked through the steps to install qBittorrent on your Ubuntu system, whether you’re using 24.04, 22.04, or 20.04 LTS. Now that it’s set up, you can enjoy a streamlined, feature-rich torrenting experience. Just remember to keep your software updated for the best performance and security. Happy torrenting, and here’s to a clutter-free download experience with qBittorrent!


great guide, was able to set up an remote web-ui qBittorrent server with this. Thanks! 🙂