
qBittorrent is a free, open-source BitTorrent client that combines a lightweight interface with advanced features like integrated search, RSS feed support, sequential downloading, and IP filtering. Unlike proprietary alternatives, it has no subscription fees or tracking. Common use cases include downloading Linux ISOs, subscribing to private tracker RSS feeds that automatically add torrents, and running qBittorrent-nox as a background service for around-the-clock seeding with remote web interface management.
This guide covers multiple installation methods for qBittorrent on Linux Mint, including the default Ubuntu repositories, the qBittorrent Team PPA for the latest releases, and Flatpak for sandboxed installations. You will learn how to install either the desktop client for graphical environments or qBittorrent-nox, the headless version controlled through a web interface. The setup includes systemd service configuration, password management, and firewall rules for remote access.
Linux Mint Version Compatibility
Linux Mint is based on Ubuntu, so qBittorrent packages designed for Ubuntu work on Mint. However, some repository tools expect Ubuntu codenames rather than Mint codenames. The table below shows the mapping between Linux Mint versions and their Ubuntu base, which becomes important when adding third-party repositories.
| Linux Mint Version | Mint Codenames | Ubuntu Base | Ubuntu Codename |
|---|---|---|---|
| Linux Mint 22.x | Wilma, Xia, Zara, Zena | Ubuntu 24.04 LTS | noble |
| Linux Mint 21.x | Vanessa, Vera, Victoria, Virginia | Ubuntu 22.04 LTS | jammy |
All installation methods in this guide work on both Linux Mint 21.x and 22.x unless otherwise noted. Version-specific differences are called out where they affect commands or expected behavior.
Choose Your qBittorrent Installation Method
Linux Mint offers several ways to install qBittorrent, each with different trade-offs between version freshness, update mechanisms, and system integration. Review the comparison table below to choose the method that best fits your needs.
| Method | Channel | Version | Best For |
|---|---|---|---|
| Default repositories | Ubuntu Universe | Distribution default (stable) | Most users who prefer simplicity and distro-tested packages |
| qBittorrent Team PPA | Launchpad PPA | Latest stable releases | Users who want newer features and bug fixes |
| Flatpak | Flathub | Latest stable (sandboxed) | Users who prefer application isolation and easy rollback |
For most users, the default repository method is recommended because it requires no additional configuration and receives security updates through standard system updates. The PPA method provides access to newer qBittorrent releases but requires maintaining an extra repository. Flatpak offers the newest version with sandboxing but uses more disk space due to runtime dependencies.
Install qBittorrent from Default Repositories
The simplest installation method uses Linux Mint’s default repositories, which include qBittorrent from the Ubuntu Universe repository. This approach requires no additional configuration and provides a stable, tested version that receives security updates automatically.
Update System Packages
Before installing any software, update your package index to ensure you install the latest available versions. Open a terminal from the applications menu and run the following commands.
sudo apt update
sudo apt upgrade
Install qBittorrent Desktop Client
Install the qBittorrent desktop client with the following command:
sudo apt install qbittorrentAfter installation completes, verify by checking the version:
qbittorrent --versionExpected output on Linux Mint 22.x:
qBittorrent v4.6.3
Expected output on Linux Mint 21.x:
qBittorrent v4.4.1
The version numbers differ between Mint 21.x and 22.x because each uses a different Ubuntu base. If you need a newer version than what the default repositories provide, use the PPA or Flatpak methods described later in this guide.
Install qBittorrent-nox for Headless Servers
For headless servers or systems where you prefer web-based management, install qBittorrent-nox instead. This version runs as a background service and provides a web interface for remote control.
sudo apt install qbittorrent-noxVerify the installation:
qbittorrent-nox --versionThe version output matches the desktop client for your Mint version. Skip ahead to the qBittorrent-nox service configuration section for setup instructions.
Install qBittorrent from the Official PPA
The qBittorrent Team maintains a Personal Package Archive (PPA) with the latest stable and development releases. This method provides newer versions than the default repositories while still integrating with APT for automatic updates.
Install Required Dependencies
First, ensure you have the software-properties-common package installed, which provides the add-apt-repository command needed to add PPAs:
sudo apt install software-properties-commonThis package is typically pre-installed on Linux Mint desktop editions, but the command confirms it is present.
Add the qBittorrent PPA
Import the qBittorrent Team PPA containing the latest software version. Choose between the stable PPA for production use or the unstable PPA for testing new features. The stable PPA is recommended for most users.
Option 1: Add the stable PPA (recommended):
sudo add-apt-repository ppa:qbittorrent-team/qbittorrent-stable -yOption 2: Add the unstable PPA (development builds):
sudo add-apt-repository ppa:qbittorrent-team/qbittorrent-unstable -yThe unstable PPA provides development snapshots with the newest features and bug fixes, but these builds skip the extended testing cycle of stable releases. Use the unstable PPA only when testing specific features or troubleshooting issues that have been fixed in newer versions.
The add-apt-repository command automatically updates the package index after adding the PPA. If you see any deprecation warnings about apt-key, these are informational and do not affect functionality.
Install qBittorrent from the PPA
With the PPA added, install either the desktop client or the headless version:
Desktop client:
sudo apt install qbittorrentHeadless server version:
sudo apt install qbittorrent-noxVerify the installation shows the newer PPA version:
qbittorrent --versionExpected output from the stable PPA on Linux Mint 22.x:
qBittorrent v4.6.7
Expected output from the stable PPA on Linux Mint 21.x:
qBittorrent v4.5.5
The PPA version is significantly newer than the default repository version for both Mint releases, providing access to the latest features and security fixes available for each Ubuntu base.
Install qBittorrent via Flatpak
Flatpak provides a sandboxed installation of qBittorrent that runs independently of your system’s package manager. Linux Mint includes Flatpak with Flathub enabled by default, making this method straightforward.
Install qBittorrent from Flathub
Install the qBittorrent Flatpak with the following command:
flatpak install flathub org.qbittorrent.qBittorrent -yThe first Flatpak installation may download shared runtimes, which increases the initial download size but benefits future Flatpak installations that share the same runtime.
Run the qBittorrent Flatpak
Open the Flatpak version from the applications menu (it appears alongside any APT-installed version) or start it from the terminal:
flatpak run org.qbittorrent.qBittorrentThe Flatpak version runs in a sandbox with limited access to your filesystem by default. If you need to access files outside your home directory, you may need to grant additional permissions through Flatseal or command-line overrides.
Launch qBittorrent Desktop Client
After installing qBittorrent via APT (default repos or PPA), launch the application from the terminal or graphical menu.
Launch from Terminal
Start qBittorrent from the command line:
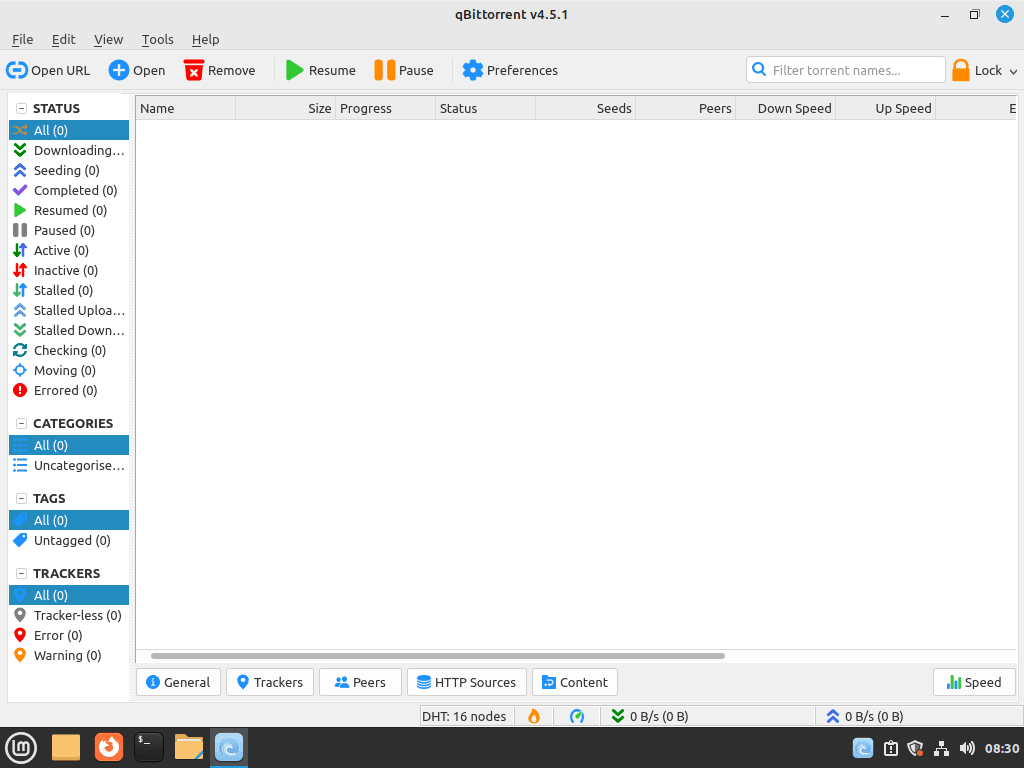
qbittorrentThis command opens the qBittorrent window and allows you to begin managing torrents.
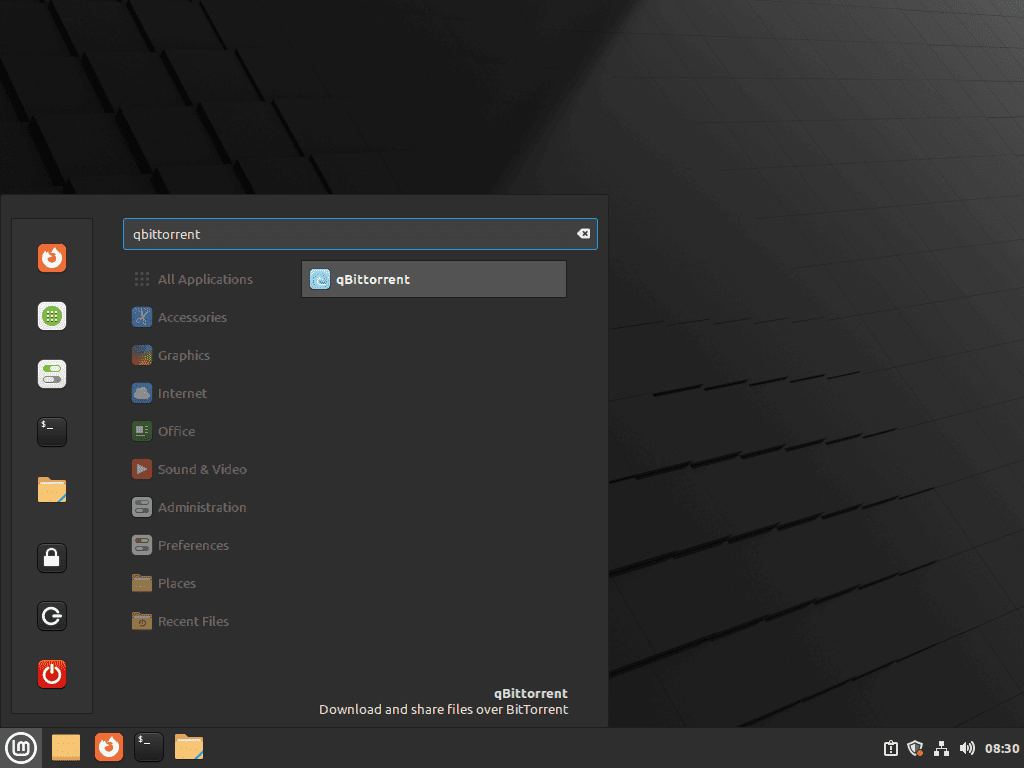
Launch from Applications Menu
To launch qBittorrent using the graphical menu, navigate to:
Menu > Internet > qBittorrent
On first launch, qBittorrent displays a legal notice explaining that users are responsible for ensuring their downloads comply with applicable laws. After accepting the notice, the main qBittorrent window opens and is ready for use.
Configure qBittorrent-nox as a System Service
qBittorrent-nox runs as a headless daemon, providing a web interface for remote torrent management. This section covers configuring the systemd service, accessing the web interface, and setting up authentication.
Choose the Service Account
The qBittorrent-nox package includes a templated systemd unit (qbittorrent-nox@.service) that runs under whatever username you supply after the @ symbol. You can run the service as your regular user account or create a dedicated system user for isolation.
To create a dedicated service account with its own home directory for configuration storage, run:
sudo adduser --system --group --home /var/lib/qbittorrent qbittorrentThe --system flag creates a locked-down user that cannot log in interactively, keeping the torrent service separate from your daily desktop profile. The explicit --home /var/lib/qbittorrent argument ensures the service has a writable configuration directory. Skip this step if you prefer to run the service as your regular user.
Enable and Start the Service
Enable the qBittorrent-nox service with the appropriate username. Replace USERNAME with either your regular username or the service account you created:
sudo systemctl enable --now qbittorrent-nox@USERNAMEFor example, if you created the qbittorrent service user:
sudo systemctl enable --now qbittorrent-nox@qbittorrentOr to use your current username automatically:
sudo systemctl enable --now qbittorrent-nox@$(whoami)Verify the service is running:
systemctl status qbittorrent-nox@qbittorrentExpected output when the service is running correctly:
● qbittorrent-nox@qbittorrent.service - qBittorrent-nox service for user qbittorrent
     Loaded: loaded (/usr/lib/systemd/system/qbittorrent-nox@.service; enabled; preset: enabled)
     Active: active (running) since Fri 2026-01-03 10:15:32 UTC; 5s ago
   Main PID: 12345 (qbittorrent-nox)
      Tasks: 8 (limit: 4567)
     Memory: 45.2M
        CPU: 892ms
     CGroup: /system.slice/system-qbittorrent\x2dnox.slice/qbittorrent-nox@qbittorrent.service
             └─12345 /usr/bin/qbittorrent-nox
Retrieve the Temporary Web UI Password
Starting with qBittorrent 4.6.1, the daemon generates a random temporary password on each start until you save permanent credentials. The web interface listens on port 8080 with the username admin. If you are using an older version (such as those in the default repositories or older PPA builds on Linux Mint 21.x), the password defaults to adminadmin instead.
Check the service logs to retrieve the temporary password:
sudo journalctl -u qbittorrent-nox@qbittorrent -n 50 | grep -i "temporary password"If you do not see the password line, restart the service while following the log stream:
sudo systemctl restart qbittorrent-nox@qbittorrent
sudo journalctl -fu qbittorrent-nox@qbittorrent
Expected output showing the temporary password:
******** Information ********
The WebUI administrator username is: admin
The WebUI administrator password was not set. A temporary password is provided for this session: VBGK9pUeT
You should set your own password in program preferences.
Copy the temporary password, then press Ctrl+C to exit the log stream.
The temporary password changes each time the service restarts without saved credentials. This security feature was introduced in qBittorrent 4.6.1 to eliminate the legacy default password, which was a known security risk.
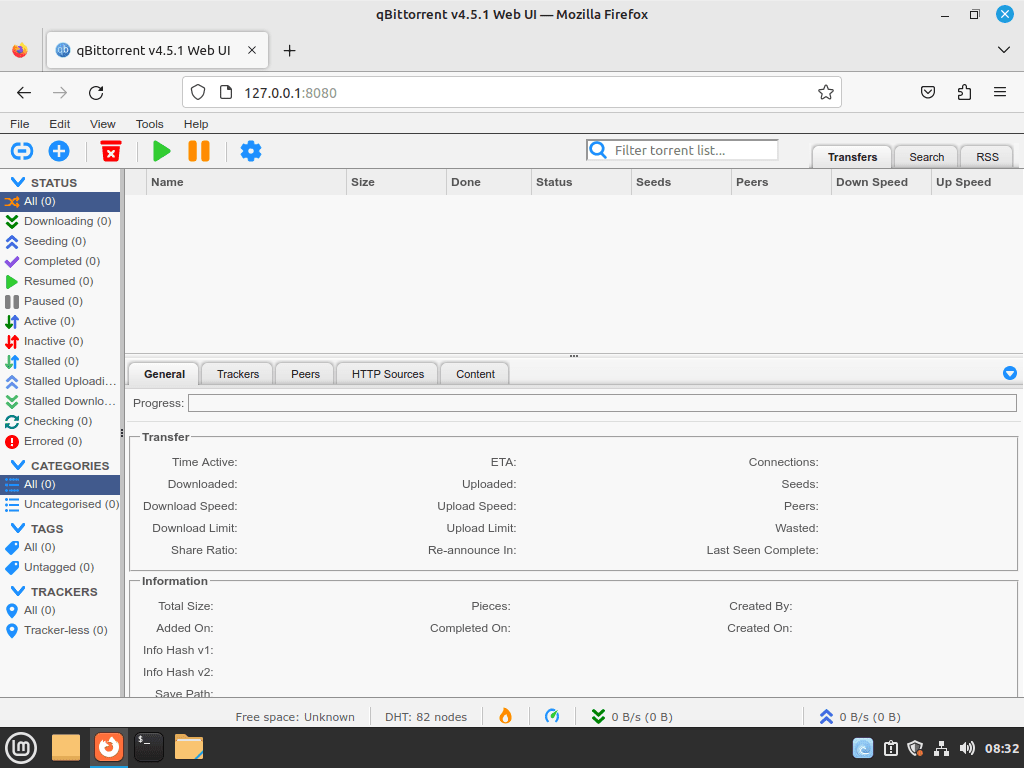
Access and Configure the Web Interface
Open a web browser and navigate to http://localhost:8080 (or http://YOUR-SERVER-IP:8080 for remote access). Log in with username admin and the temporary password from the service logs.
Immediately set permanent credentials by clicking the gear icon (Options) and navigating to Web UI → Authentication. Enter a new username and password, then click Save.
After saving your credentials, restart the service to ensure the new settings load cleanly:
sudo systemctl restart qbittorrent-nox@qbittorrentLog back in with your new credentials to confirm they work before closing the terminal.
Configure Firewall for Remote Access
If you need to access the web interface from other devices on your network, configure your firewall to allow traffic on port 8080. For systems using UFW (Uncomplicated Firewall):
sudo ufw allow 8080/tcpVerify the rule was added:
sudo ufw status numberedExample output:
Status: active

     To                         Action      From
     --                         ------      ----
[ 1] 22/tcp                     ALLOW IN    Anywhere
[ 2] 8080/tcp                   ALLOW IN    Anywhere
[ 3] 22/tcp (v6)                ALLOW IN    Anywhere (v6)
[ 4] 8080/tcp (v6)              ALLOW IN    Anywhere (v6)
Exposing the web interface to your network without authentication would be a security risk. Always set a strong password before enabling remote access. For access over the internet, consider using a VPN or SSH tunnel rather than exposing port 8080 directly.
Managing qBittorrent
Update qBittorrent
qBittorrent updates arrive through your configured installation method. For APT installations (default repos or PPA), updates install automatically during regular system updates:
sudo apt update
sudo apt upgrade
To update only qBittorrent without upgrading other packages:
sudo apt install --only-upgrade qbittorrentFor Flatpak installations, update using the standard Flatpak commands. See our guide on upgrading Flatpak on Linux Mint for additional options:
flatpak update org.qbittorrent.qBittorrentRemove qBittorrent
The removal process depends on your installation method. If you installed via APT and added the PPA, remove the PPA first to prevent dependency issues.
Remove the stable PPA (if added):
sudo add-apt-repository --remove ppa:qbittorrent-team/qbittorrent-stable -yFor the unstable PPA (if added):
sudo add-apt-repository --remove ppa:qbittorrent-team/qbittorrent-unstable -yUninstall the qBittorrent desktop client:
sudo apt remove qbittorrentUninstall qBittorrent-nox:
If you configured qBittorrent-nox as a service, stop and disable it first:
sudo systemctl disable --now qbittorrent-nox@qbittorrentThen remove the package:
sudo apt remove qbittorrent-noxClean up orphaned dependencies that were automatically installed with qBittorrent:
sudo apt autoremoveUninstall the Flatpak version:
flatpak uninstall org.qbittorrent.qBittorrentRemove User Configuration Data
The uninstall commands remove the application but leave your configuration, download history, and torrent data intact. To completely remove all qBittorrent user data, delete the configuration directories.
The following commands permanently delete your qBittorrent settings, RSS feeds, torrent history, and saved credentials. Export any important data (such as RSS feed URLs or IP filter lists) before proceeding.
Delete personal user configuration:
rm -rf ~/.config/qBittorrent ~/.local/share/qBittorrent ~/.cache/qBittorrentClear the dedicated service user data (if created):
sudo rm -rf /var/lib/qbittorrentRemove the service user account (optional):
sudo userdel qbittorrentTroubleshoot qBittorrent Issues
Service Fails to Start
If the qBittorrent-nox service fails to start, check the journal for error details:
sudo journalctl -xeu qbittorrent-nox@qbittorrentA common error occurs when the service account has no valid home directory:
qbittorrent-nox: Could not create required directory: /nonexistent/.config/qBittorrent
This happens when a system user was created without specifying a home directory. Fix it by recreating the user with a proper home path:
sudo userdel qbittorrent
sudo adduser --system --group --home /var/lib/qbittorrent qbittorrent
Then restart the service:
sudo systemctl restart qbittorrent-nox@qbittorrent
systemctl status qbittorrent-nox@qbittorrent
Port 8080 Already in Use
If another application occupies port 8080, the web interface will not be accessible. Identify the conflicting process:
sudo lsof -i :8080Example output showing a conflict:
COMMAND   PID USER   FD   TYPE DEVICE SIZE/OFF NODE NAME
java     1234 user   12u  IPv4  56789      0t0  TCP *:8080 (LISTEN)
Either stop the conflicting service or change the qBittorrent web UI port. To change the port, first stop the service, then edit the configuration file:
sudo systemctl stop qbittorrent-nox@qbittorrent
sudo nano /var/lib/qbittorrent/.config/qBittorrent/qBittorrent.conf
Add or modify the WebUI\Port setting under [Preferences]:
[Preferences]
WebUI\Port=9090
Save the file, restart the service, and update your firewall rule to match the new port.
Temporary Password Not Appearing in Logs
The temporary password prints only once when the service starts without saved credentials. If you missed it, restart the service while following the log stream in real time:
sudo systemctl restart qbittorrent-nox@qbittorrent && sudo journalctl -fu qbittorrent-nox@qbittorrentWatch for the password line, then press Ctrl+C to exit after copying it.
PPA Reports Unsupported Codename
If add-apt-repository fails with an error like “This codename isn’t currently supported,” the tool is detecting the Mint codename instead of the underlying Ubuntu codename. This can happen with certain system configurations.
First, verify your Ubuntu codename:
cat /etc/os-release | grep UBUNTU_CODENAMEExpected output for Mint 22.x: UBUNTU_CODENAME=noble
Expected output for Mint 21.x: UBUNTU_CODENAME=jammy
If the PPA still fails to add, you can manually configure the repository using the appropriate codename for your Mint version. This alternative approach is documented in the remove a PPA on Ubuntu guide (the process is identical on Linux Mint).
Conclusion
You now have qBittorrent installed on Linux Mint using either the default repositories for simplicity, the official PPA for the latest releases, or Flatpak for sandboxed installation. The key techniques covered include configuring the templated systemd service for headless operation, retrieving the temporary web UI password from journalctl, and setting permanent credentials through the web interface. For ongoing maintenance, standard package manager updates keep qBittorrent current, and the removal commands clean up both the application and any added repositories when needed.
Additional Resources
The following official resources provide additional documentation and community support:
- qBittorrent Official Website: Download options, feature documentation, and release announcements.
- qBittorrent GitHub Repository: Source code, issue tracking, and development updates.
- qBittorrent Wiki: Detailed documentation including configuration options and advanced features.
I have been struggling for over a week, trying to install it from the appimage without success!
I sailed through this in just a few minutes. Really excellent and clear, I couldn’t possibly go wrong!
This is a model of how it should be done.
Thank you so much.
Thank you for the feedback.
Thank Im just getting starting with Linux. This has been a great help thank you.
Hi Robert, appreciate the feedback.