This guide will demonstrate how to install PyCharm on Ubuntu 24.04, 22.04 or 20.04 LTS utilizing the command-line terminal with three different methods: APT PPA maintained by Jonas Groeger, Snapcraft, or Flatpak with the Flathub repository.
PyCharm stands as a beacon for developers seeking a powerful integrated development environment (IDE) for Python. Crafted by JetBrains, it integrates coding, debugging, and testing in a seamless, user-friendly interface. PyCharm is celebrated for its efficiency and the productivity boost it offers through features like code analysis, a graphical debugger, an integrated unit tester, and support for web development with Django. Whether you’re a novice dipping your toes into coding or a seasoned developer, PyCharm provides the tools to elevate your coding skills.
Key PyCharm Highlights:
- User-friendly Interface: PyCharm is designed to cater to developers of all skill levels with its intuitive and customizable interface.
- Rich Set of Features: It boasts advanced coding assistance, intelligent code refactoring, and on-the-fly error highlighting, making coding more efficient.
- Versatile Development Support: From Python to web development frameworks like Django and Flask, PyCharm supports a wide range of programming needs.
- Integrated Developer Tools: PyCharm integrates with version control systems, provides database tools, and supports scientific tools, enhancing productivity.
- Customizable and Extensible: Users can customize their workspace with themes, plugins, and editor preferences to fit their style.
- Smart Code Navigation: Effortlessly navigate through projects with smart search, go to class/function, and quick view definitions.
- Built-in Debugger and Test Runner: Simplifies the debugging process and supports test-driven development with a powerful graphical debugger and test runner.
- Remote Development Capabilities: Offers the ability to develop remotely on virtual machines, Docker containers, and cloud environments.
Now, let’s transition smoothly into the technical details of installing PyCharm, making your development workflow more efficient and streamlined.
Install PyCharm on Ubuntu via APT PPA
Update Ubuntu System Before PyCharm Installation
Before we begin, updating your Ubuntu system’s local package database is essential. This allows your system to gather the most recent information about the available packages and their versions from Ubuntu’s repositories.
The following command will accomplish this:
sudo apt updateWith the package database updated, we should now upgrade the system. This operation ensures all installed software packages on your system are updated to their latest versions:
sudo apt upgradeInstall Initial Packages For PyCharm PPA
Next, we install the necessary packages for our operation, which include dirmngr, ca-certificates, software-properties-common, apt-transport-https, curl, and lsb-release. These tools facilitate the addition and management of repositories, file transfers, and execution of various other tasks:
sudo apt install dirmngr ca-certificates software-properties-common apt-transport-https curl lsb-release -yImport JetBrains PPA by Jonas Groeger for PyCharm
At this point, we’re ready to add the JetBrains Personal Package Archive (PPA) to our system’s list of repositories. This allows APT to access PyCharm from the JetBrains’ PPA directly.
To ensure the authenticity of the packages from the JetBrains repository, we import the GPG key. GPG, short for GNU Privacy Guard, is an open standard tool used for secure communication. Importing the GPG key ensures that JetBrains genuinely provides the packages we’re getting from the repository:
curl -s https://s3.eu-central-1.amazonaws.com/jetbrains-ppa/0xA6E8698A.pub.asc | gpg --dearmor | sudo tee /usr/share/keyrings/jetbrains-ppa-archive-keyring.gpg > /dev/nullWith the GPG key imported, we’re set to add the JetBrains PPA to our system’s list of package sources:
echo "deb [signed-by=/usr/share/keyrings/jetbrains-ppa-archive-keyring.gpg] http://jetbrains-ppa.s3-website.eu-central-1.amazonaws.com any main" | sudo tee /etc/apt/sources.list.d/jetbrains-ppa.list > /dev/nullRefresh APT Packages Index for PyCharm on Ubuntu
Having added a new repository, we must update our APT package database once more to fetch the package information from the newly added JetBrains PPA:
sudo apt updateInstall PyCharm on Ubuntu via APT Command
With our system ready and all the prerequisites in place, we can now install PyCharm. There are three options from this particular PPA: PyCharm Community, Education, and Professional editions.
Most users opt for the Community edition as it’s free. However, while paid, the Education and Professional editions offer more features. Choose the edition that suits your needs and use the corresponding command below to install it:
sudo apt install pycharm-communitysudo apt install pycharm-educationsudo apt install pycharm-professionalWith that, you’ve successfully installed PyCharm on your Ubuntu system using the PPA APT method.
Next, alternative Snap or Flatpak methods may suit your preference better, which will be featured in two separate sections.
Install PyCharm on via Snap
The Snap package manager is a robust alternative for installing PyCharm IDE. It offers the convenience of providing the most recent versions of all three PyCharm editions: Community, Professional, and Educational.
Re-install Snapcraft (If Necessary)
For users who may have uninstalled Snapcraft previously, a reinstallation is required. This is accomplished with the following command:
sudo apt install snapd -yAfter successful reinstallation, it’s time to kickstart the snapd service and set it to start automatically whenever your system boots up:
sudo systemctl enable snapd --nowEnable Classic Snap Support
Some Snap packages utilize a classic’ mode, which grants the application more permissions on the host system. To support such packages, a symbolic link needs to be created using the following command:
sudo ln -s /var/lib/snapd/snap /snapInstall Snap Core Files
At this juncture, users who have re-installed Snapcraft or have already installed it need to update the core files to their latest versions. Use the command below to ensure everything is up-to-date:
sudo snap install coreInstall PyCharm on Ubuntu via Snap Command
With all preparations complete, it’s time to install PyCharm. Choose from the Community, Professional, or Educational editions based on your needs. The Community edition is free and generally suffices for most users. Here are the respective commands for each version:
sudo snap install pycharm-community --classicsudo snap install pycharm-professional --classicsudo snap install pycharm-educational --classicInstall PyCharm on Ubuntu via Flatpak and Flathub
Flatpak, a potent package manager, provides another avenue for installing PyCharm IDE. While not pre-installed by default due to its competition with Snaps, it’s widely adopted and arguably more mature in other Linux distributions.
Note: If your system does not already have Flatpak installed, please follow our comprehensive guide on “How to Install Flatpak on Ubuntu” to get the most recent supported version.
Enable Flathub for PyCharm
Our first action is to enable Flathub, a sizable app store with a collection of Flatpak applications. This action can be executed using the following command:
sudo flatpak remote-add --if-not-exists flathub https://flathub.org/repo/flathub.flatpakrepoWith this command, you’re essentially adding the Flathub repository to your Flatpak setup. If the Flathub repository is already present, the --if-not-exists option prevents the command from returning an error.
Install PyCharm on Ubuntu via Flatpak Command
Flathub currently supports the Community and Professional editions of PyCharm; select the option you wish to install with one of the following commands:
flatpak install flathub com.jetbrains.PyCharm-Community -yflatpak install flathub com.jetbrains.PyCharm-Professional -yLaunching PyCharm Post-Installation on Ubuntu via GUI or CLI
After successfully installing the PyCharm IDE, the next step involves executing the program. Depending on your preference or the specific circumstances of your system configuration, several methods exist to kickstart PyCharm.
Command-Line Interface (CLI) Method for PyCharm on Ubuntu
Perhaps the most direct route to launching PyCharm is through the terminal. Depending on how you’ve installed PyCharm, your command might differ slightly.
APT Launch Commands
To initiate the different versions of PyCharm that have been installed via the APT package manager, use these commands:
pycharm-communitypycharm-professionalpycharm-educationSnap Launch Commands
If you’ve installed PyCharm through the Snap package manager, you’ll want to use the following commands to launch:
snap run pycharm-communitysnap run pycharm-professionalsnap run pycharm-educationalFlatpak Launch Commands
For those who have installed PyCharm via Flatpak, use these commands:
flatpak run com.jetbrains.PyCharm-Communityflatpak run com.jetbrains.PyCharm-ProfessionalGUI Method for PyCharm on Ubuntu
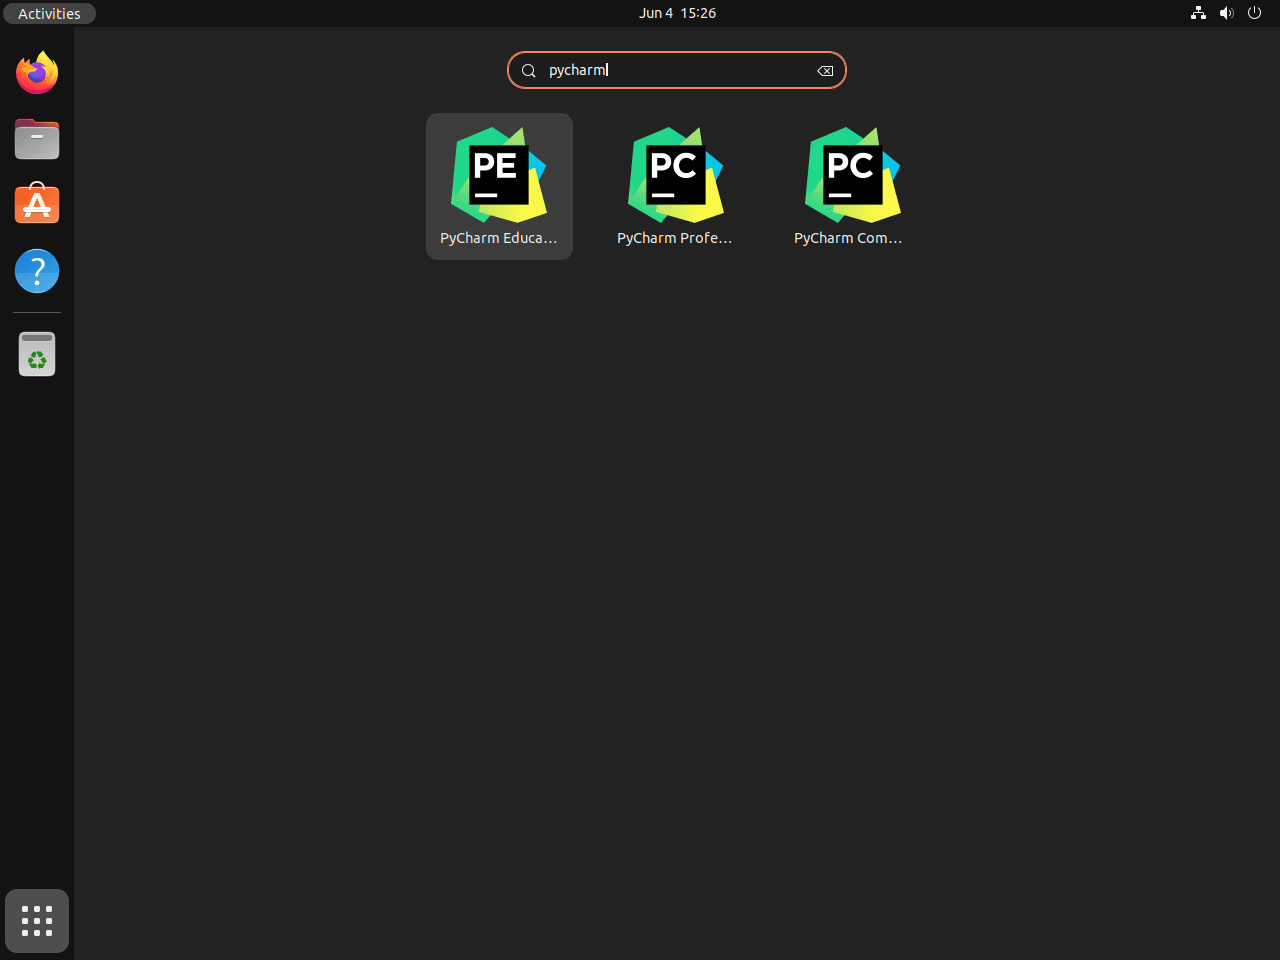
While the command-line interface can be a swift method to start PyCharm, it might not always be the most practical. If you prefer, you can also launch PyCharm using your system’s graphical user interface (GUI).
- Access the
Activitiesoverview of your desktop. - Proceed to
Show Applications. - Search for
PyCharm, and pick the specific version you’ve installed.
To sum up, regardless of the installation method used, launching PyCharm should be a straightforward process
Tips on Getting Started with PyCharm on Ubuntu
Once you’ve installed PyCharm Community on your Ubuntu Linux desktop and are ready to embark on your programming projects, these tips and tricks can enhance your experience with this versatile IDE. Below, we’ll explore some of these strategies, focusing on the nuances unique to Linux-based installations.
Familiarize Yourself with the User Interface with PyCharm
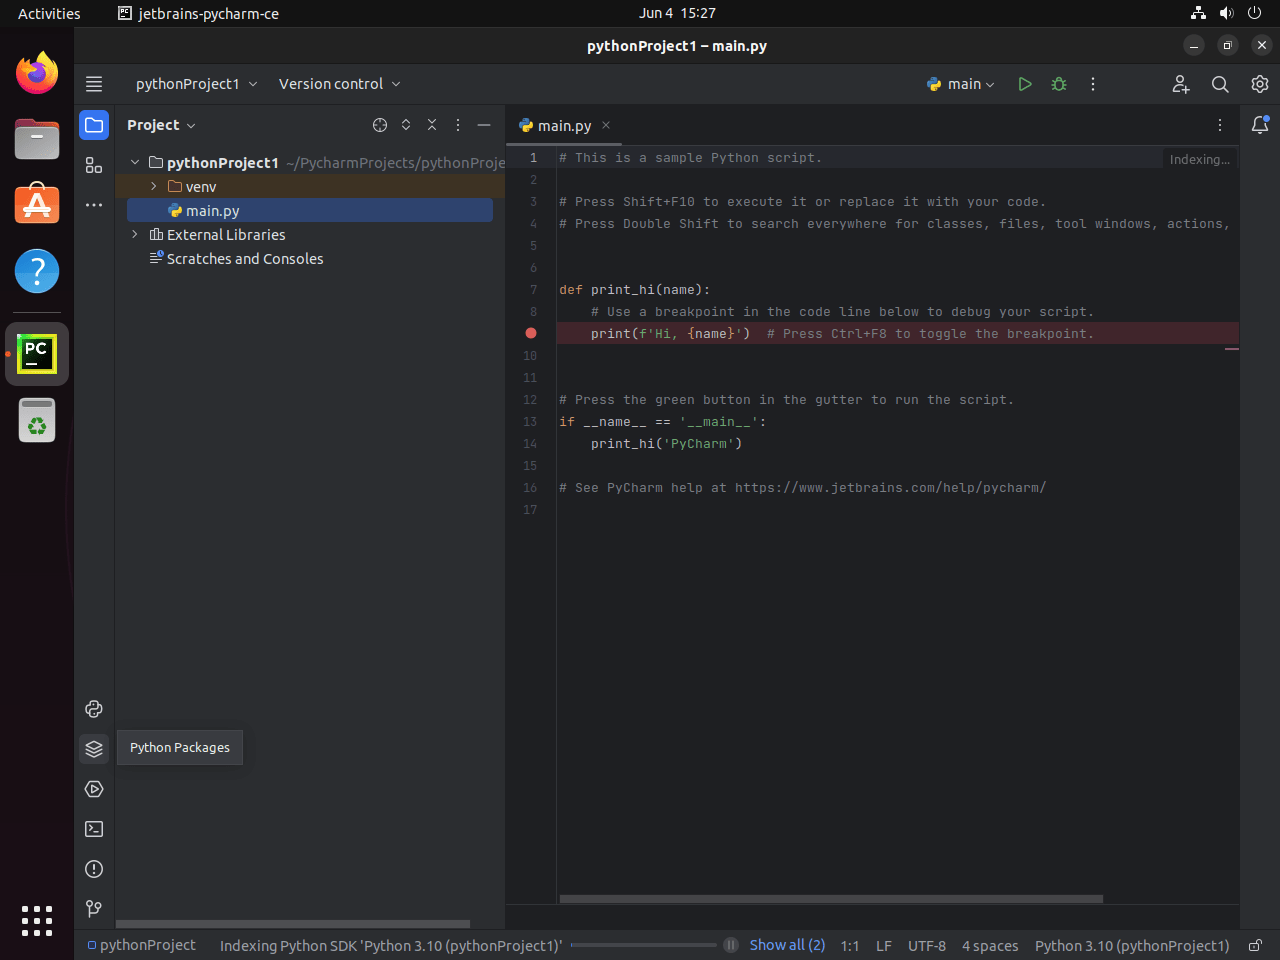
PyCharm’s user interface (UI) is intuitive yet packed with features. It’s helpful to familiarize yourself with the layout before diving into coding.
- Project Window: You’ll find the Project window on the left side of the PyCharm window. This pane presents the file structure of your current project, giving you easy access to all your files and directories.
- Code Editor: The central portion of the UI is the Code Editor. This is where you’ll write and modify your code.
- Navigation Bar: Located at the top of the PyCharm window, the Navigation Bar provides quick access to all your project files and PyCharm features.
- Status Bar: At the bottom of the UI is the Status Bar. It displays your project’s status and IDE, showing warnings and errors.
Harness the Power of Shortcuts with PyCharm
Keyboard shortcuts can drastically increase your productivity. PyCharm includes several useful shortcuts designed to speed up your workflow.
- Quick Search: Use the
Ctrl+Shift+Ashortcut to access the Search Everywhere function. This lets you quickly find files, actions, settings, and more within PyCharm. - Code Generation: With the
Alt+Insertshortcut, you can automatically generate code snippets, such as constructors and getters/setters. - Quick Documentation: Use
Ctrl+Qto display quick documentation for the class or method under the cursor.
Customize Your PyCharm Environment with PyCharm
One of the significant aspects of PyCharm Community is its flexibility. You can customize your IDE to fit your coding style.
- Themes: PyCharm has several built-in themes to switch between to fit your mood or work environment. Navigate to
File > Settings > Appearance & Behavior > Appearanceto change your theme. - Code Style: You can adjust the way PyCharm formats your code under
File > Settings > Editor > Code Style. This includes settings for tab size, indentation, and line wrapping. - Keymap: If you’re not comfortable with the default keyboard shortcuts, you can customize them under
File > Settings > Keymap.
Utilize PyCharm’s Coding Assistance with PyCharm
PyCharm Community offers intelligent coding assistance that goes beyond simple syntax highlighting.
- Autocomplete: PyCharm has a powerful autocomplete feature that predicts your next type. Start typing, and PyCharm will provide suggestions.
- Live Templates: Live Templates are predefined code snippets that you can insert into your code by typing a short abbreviation and pressing
Tab. - Refactoring Tools: PyCharm provides various tools to help you improve your code structure without changing its behavior.
Additional PyCharm Commands on Ubuntu
After successfully installing and using PyCharm on Ubuntu Linux, there might come a time when you need to update or even remove the IDE from your system. In this section, we delve into updating and uninstalling PyCharm.
Update PyCharm
Staying updated with the latest version of PyCharm is a good practice as it brings new features, improvements, and bug fixes. The update command will differ depending on the third-party package manager you chose for installing PyCharm.
APT Package Manager Update Method for PyCharm
In case you used APT for installation, type in the following commands into your terminal:
sudo apt update
sudo apt upgrade
These commands will check for updates for PyCharm and all other applications installed using APT.
Flatpak Package Manager Update Method for PyCharm
For Flatpak users, updating is straightforward. Run the following command:
sudo flatpak updateSnap Package Manager Update Method for PyCharm
For those who installed PyCharm through Snap, use this command to perform an update:
sudo snap refreshRemove PyCharm
There might be instances where you no longer need PyCharm on your system. In such cases, you can uninstall it using the corresponding commands for your installation method.
APT Package Manager Remove Method for PyCharm on Ubuntu
If you installed PyCharm using APT, you can uninstall it by entering the following commands in your terminal that match the version you installed:
sudo apt remove pycharm-communitysudo apt remove pycharm-professionalsudo apt remove pycharm-educationMoreover, if you do not plan on re-installing PyCharm or using the JetBrains PPA for other products, you can remove the repository and GPG key with these commands:
sudo rm /etc/apt/sources.list.d/jetbrains-ppa.list
sudo rm /usr/share/keyrings/jetbrains-ppa-archive-keyring.gpg
Flatpak Package Manager Remove Method for PyCharm
If you installed PyCharm via Flatpak, use the following commands to uninstall:
flatpak uninstall --delete-data com.jetbrains.PyCharm-Communityflatpak uninstall --delete-data com.jetbrains.PyCharm-ProfessionalSnap Package Manager Remove Method for PyCharm
If your installation method was Snap, you can use the following commands to remove PyCharm:
sudo snap remove pycharm-communitysudo snap remove pycharm-professionalsudo snap remove pycharm-educationalConclusion
In wrapping up, we’ve walked you through installing PyCharm on Ubuntu using three different methods, highlighting the flexibility and accessibility of setting up your development environment. Whether you opted for the APT PPA, Snapcraft, or Flatpak, you’re now equipped with a powerful IDE ready to tackle Python projects. Our final nod goes to exploring PyCharm’s rich features and customizations to supercharge your coding efficiency. Remember, the right tools not only make your job easier but also more enjoyable. So, dive into PyCharm, tweak it to your liking, and happy coding!


