

Plex Media Server organizes your movies, TV shows, music, and photos into a single library accessible from any device on your network or remotely over the internet. Stream high-quality video from your Debian server to a Roku or smart TV, share your family photo collection with relatives across the country, or access your entire music library from your phone while traveling. This guide walks through installing Plex Media Server on Debian using the official APT repository for automatic updates, setting up file permissions for your media directories, and optionally securing remote access with an Nginx reverse proxy and SSL certificates.
Update the Debian System Before Plex Installation
Start by updating your Debian system to ensure all existing packages are current before installing new software:
sudo apt update && sudo apt upgradeInstall Prerequisite Packages
Before adding the Plex repository, install the required packages for downloading files and verifying GPG signatures:
sudo apt install ca-certificates curl gnupg -yThese packages provide SSL certificate validation (ca-certificates), file downloading (curl), and GPG key handling (gnupg) needed to securely add and verify the Plex repository.
Import Plex APT Repository
Add the Plex repository to your Debian system to install Plex from the official source. This ensures you install and update the software directly from the official repository using the APT package manager.
First, open your terminal and import the Plex GPG key with the following command:
curl -fsSL https://downloads.plex.tv/plex-keys/PlexSign.key | sudo gpg --dearmor -o /usr/share/keyrings/plex.gpgThis command downloads the Plex GPG key, which is used to verify the authenticity of the packages from the repository.
After importing the key, add the Plex repository to your system using the modern DEB822 .sources format:
cat <<EOF | sudo tee /etc/apt/sources.list.d/plexmediaserver.sources
Types: deb
URIs: https://downloads.plex.tv/repo/deb
Suites: public
Components: main
Signed-By: /usr/share/keyrings/plex.gpg
EOF
This configuration tells APT to fetch Plex packages from the official repository and verify signatures using the GPG key you imported earlier.
Install Plex Media Server via APT
With the repository added, update your package index to include the Plex packages:
sudo apt updateVerify the repository is correctly configured by checking the package policy:
apt-cache policy plexmediaserverYou should see output confirming the package is available from the Plex repository:
plexmediaserver:
  Installed: (none)
  Candidate: 1.x.x.xxxxx-xxxxxxxxx
  Version table:
     1.x.x.xxxxx-xxxxxxxxx 500
        500 https://downloads.plex.tv/repo/deb public/main amd64 Packages
Once confirmed, install Plex Media Server:
sudo apt install plexmediaserverDuring installation, the Plex package may try to create its own
.listfile regardless of whether you used the DEB822.sourcesformat. If prompted with “Configuration file already exists. Replace with package maintainer’s version?”, type N (No) to keep your current configuration. The GPG-signed repository you configured above is already correct.
Verify Plex Media Server Installation
By default, the Plex Media service should start automatically. To verify this, use the following systemctl command to check the status:
systemctl status plexmediaserverYou should see output indicating the service is active:
* plexmediaserver.service - Plex Media Server
     Loaded: loaded (/lib/systemd/system/plexmediaserver.service; enabled; preset: enabled)
     Active: active (running) since Tue 2025-11-25 10:30:00 UTC; 1min ago
   Main PID: 12345 (Plex Media Serv)
      Tasks: 85 (limit: 4647)
     Memory: 120.5M
        CPU: 5.234s
     CGroup: /system.slice/plexmediaserver.service
If the service is not active, use the following command to start Plex Media Server:
sudo systemctl start plexmediaserverTo ensure Plex Media Server starts automatically on system boot, enable the service with this command:
sudo systemctl enable plexmediaserverYou should see confirmation that the service link was created:
Created symlink /etc/systemd/system/multi-user.target.wants/plexmediaserver.service → /lib/systemd/system/plexmediaserver.service.
If you need to restart the Plex Media Server service for any reason, use the following command:
sudo systemctl restart plexmediaserverConfigure UFW Firewall for Plex Media Server
This section is optional depending on your network setup. However, configuring basic UFW firewall rules is recommended if you plan to access Plex remotely or are new to Linux server security.
Securing your Plex Media Server is important when you plan to access it remotely or allow others to connect. UFW (Uncomplicated Firewall) on Debian provides a straightforward way to manage firewall rules.
Enable the UFW Firewall
First, check if UFW is installed on your system. If not, install it using the following command:
sudo apt install ufw -yImportant: If you are accessing your server remotely via SSH, you must allow SSH connections before enabling UFW. Enabling UFW without an SSH rule will lock you out of a remote server.
First, allow SSH connections to prevent lockout, then enable UFW:
sudo ufw allow ssh
sudo ufw enable
Verify UFW is active and SSH is allowed:
sudo ufw statusYou should see output confirming the firewall is running with SSH allowed:
Status: active

To                         Action      From
--                         ------      ----
22/tcp                     ALLOW       Anywhere
22/tcp (v6)                ALLOW       Anywhere (v6)
If you plan to access Plex remotely over the internet, ensure you enable authentication in Plex settings and use strong passwords. Opening port 32400 to the public internet without proper security measures exposes your media server to unauthorized access.
Add Plex Media Server Port Rules
Add the default Plex Media Server port (32400) to the UFW rules. You can customize the port later if you wish. If you change the Plex Media Server dashboard port, delete this rule and add a new one.
sudo ufw allow 32400Additional UFW Rules for Plex
Plex Media Server uses several additional ports for different services and connections. To allow them through the UFW firewall, use the following commands:
sudo ufw allow 1900/udp
sudo ufw allow 3005/tcp
sudo ufw allow 5353/udp
sudo ufw allow 8324/tcp
sudo ufw allow 32410:32414/udp
Here is a brief explanation of the ports and their purposes:
- 1900/udp: Used to discover Plex Media Server by clients over the network.
- 3005/tcp: Required for Plex Companion, a feature that allows you to control Plex playback from a mobile device.
- 5353/udp: Used for mDNS (Multicast Domain Name System) to help Plex discover devices on the local network.
- 8324/tcp: Required for the Plex DLNA server.
- 32410:32414/udp: Used for media streaming to clients.
Verify the Plex rules are active:
sudo ufw status numberedYou should see the Plex ports listed in the output:
Status: active

     To                         Action      From
     --                         ------      ----
[ 1] 32400                      ALLOW IN    Anywhere
[ 2] 1900/udp                   ALLOW IN    Anywhere
[ 3] 3005/tcp                   ALLOW IN    Anywhere
Adjust your UFW rules if you customize any of the ports mentioned above. Configuring the UFW firewall for your Plex Media Server can ensure a more secure and protected media hub experience on your Debian system if it faces public connections.
Configure SSH For Plex Media Server
This section is optional and only applies if you need to access a remote Debian server via SSH for the initial Plex setup.
If you have installed Plex Media Server on a remote headless server or another Debian system you cannot access locally, you will need to set up an SSH tunnel on your local computer for the initial setup. This allows your browser to connect to the Plex web interface through the secure tunnel. For SSH installation and configuration, see the guide on installing SSH on Debian.
Ensure SSH Server is Running on Your Debian Server
Before creating a tunnel, confirm SSH is installed and running on the remote Debian server where Plex is installed. On the remote server, run:
sudo apt install openssh-server -y
sudo systemctl enable ssh --now
Create the SSH Tunnel from Your Local Machine
On your local computer (not the remote server), create an SSH tunnel. Replace {username} with your server username and {server-ip-address} with the actual IP address of your server (for example, 192.168.50.1):
ssh {username}@{server-ip-address} -L 8888:localhost:32400This command forwards your local port 8888 to port 32400 on the remote server, allowing you to access the Plex WebUI through the tunnel. Keep this terminal window open while you configure Plex.
Verify the tunnel is active by checking the listening ports on your local machine:
ss -tln | grep 8888You should see port 8888 in the LISTEN state, confirming the tunnel is ready.
Access Plex Media Server via SSH Tunnel
Now you can access the Plex Media Server by opening the following address in your web browser:
http://localhost:8888/web
Or use the alternative address if the above one does not work:
https://localhost:8888/web/index.html#!/setup
The request will be forwarded to http://localhost:32400/web on the remote server through the SSH tunnel.
Access Plex Media Server Remotely
Once you have completed the initial setup, you can access your Plex Media Server using your remote server IP address:
http://{server-ip-address}:32400
Complete Initial Plex Setup Through the WebUI
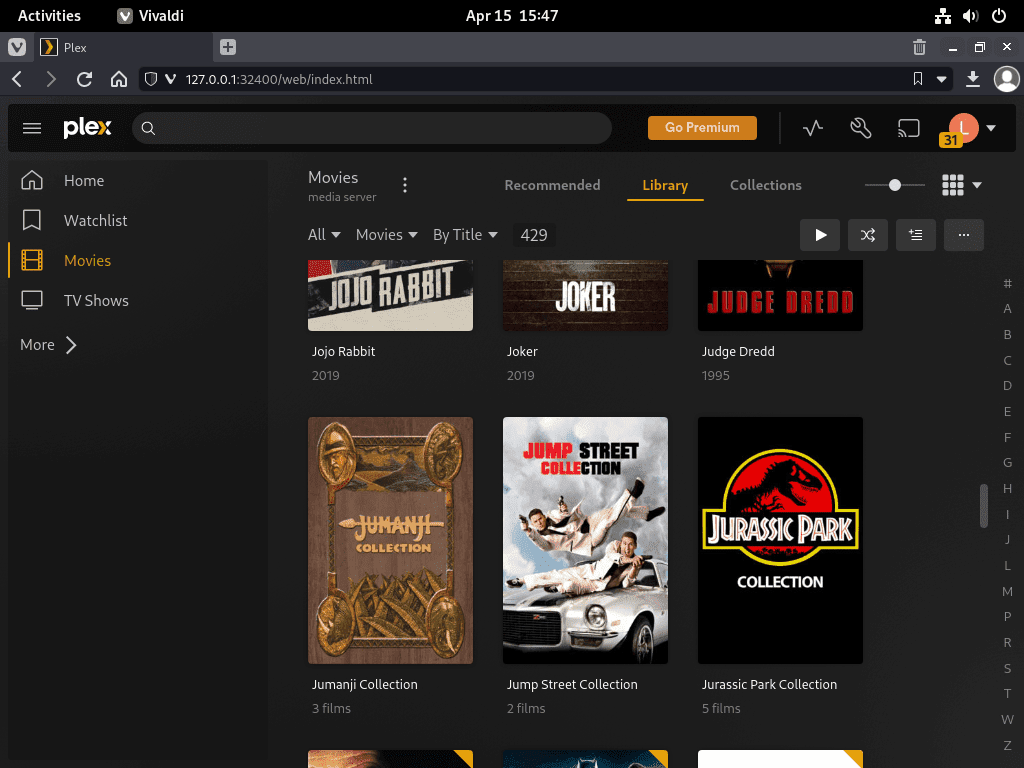
Now that Plex is installed on your system, you must configure and complete the setup through the WebUI. The WebUI enables you to manage your media library and customize your server settings. Once initial setup is complete, you can also manage your server through Plex mobile apps for iOS and Android or desktop applications. Follow the steps below to access and configure the Plex Media Server:
Access the Plex WebUI
To access the WebUI, open your preferred internet browser and navigate to one of the following addresses:
http://127.0.0.1:32400/web
or
http://localhost:32400/web
If neither address works, try the alternative setup URL:
http://localhost:32400/web/index.html#!/setup
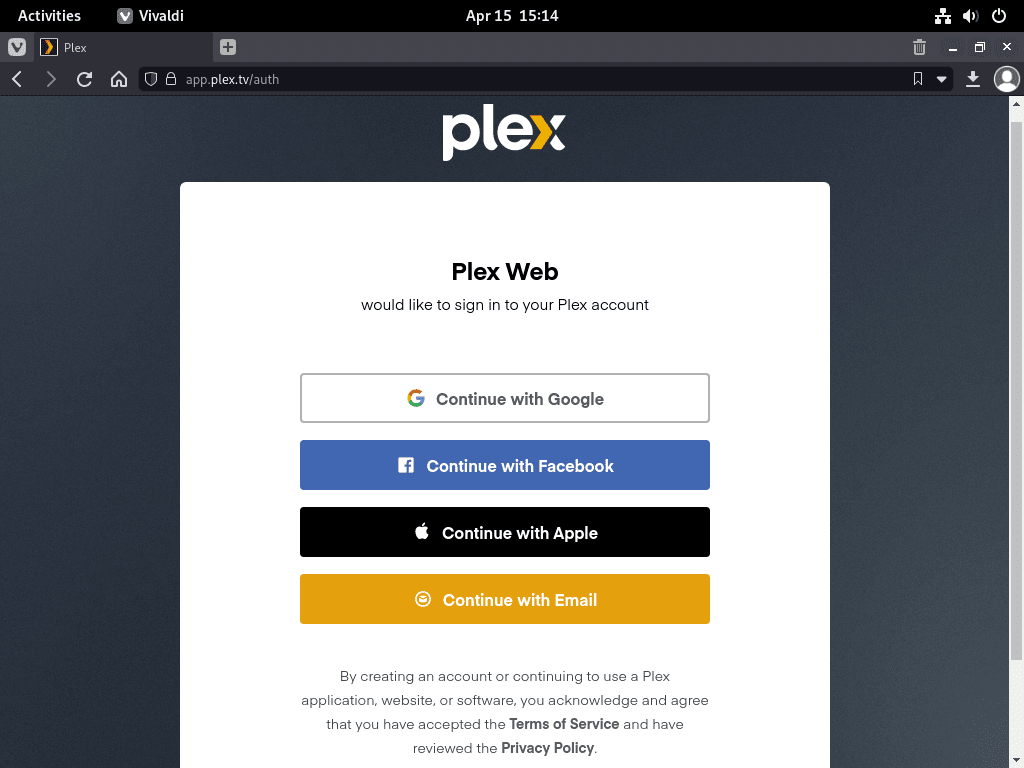
Now, you can log in using an existing social media account listed above or with your email to register a new account if you are new to Plex. Once logged in, you will begin the initial configuration setup.
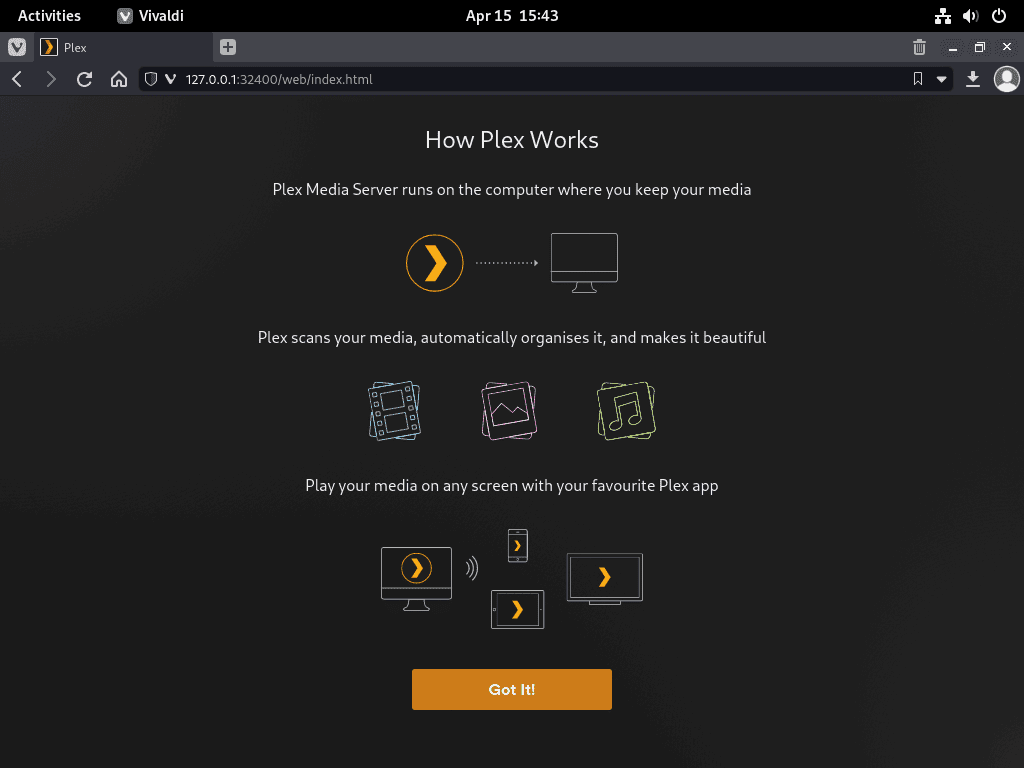
Review Plex Welcome Screen
The first configuration page briefly explains Plex and how it works. Firefox users may see a message prompting them to enable DRM. This choice is necessary; without it, Plex WebUI may not work correctly.
Click GOT IT! to proceed.
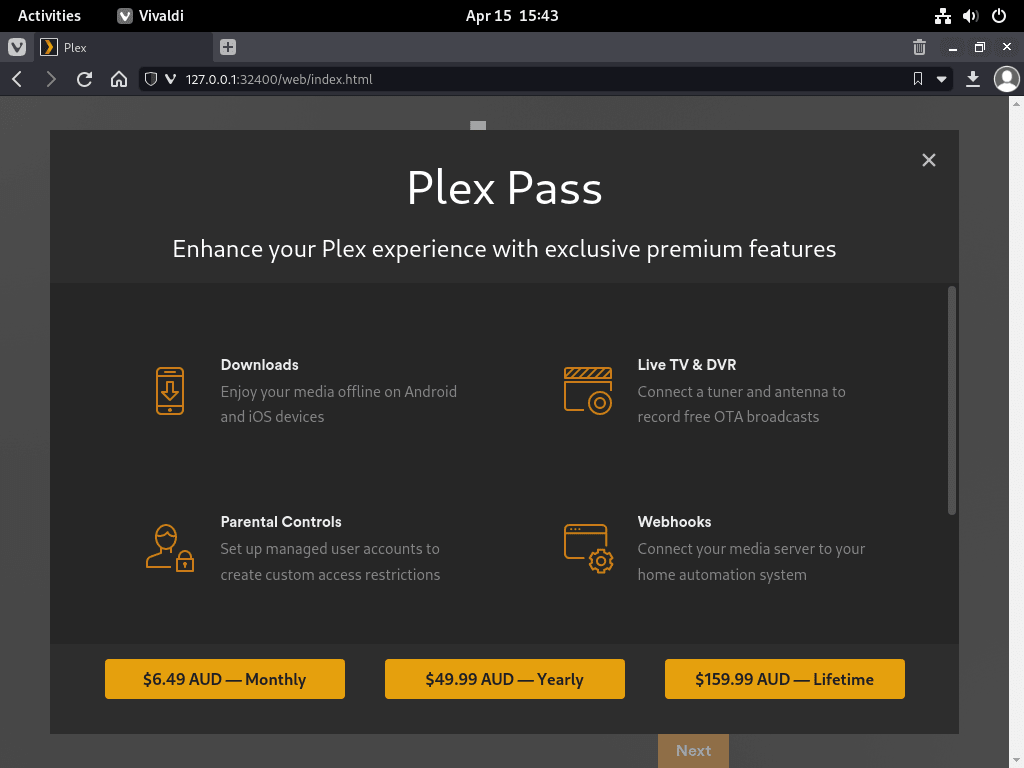
Choose Plex Pass Subscription (Optional)
After the welcome screen, you will be prompted to upgrade to Plex Pass, which is optional. Plex Pass offers benefits like HDR tone mapping, hardware transcoding, and access to beta builds.
If you want to skip this, click the X in the top right-hand corner. You can always set this up later.
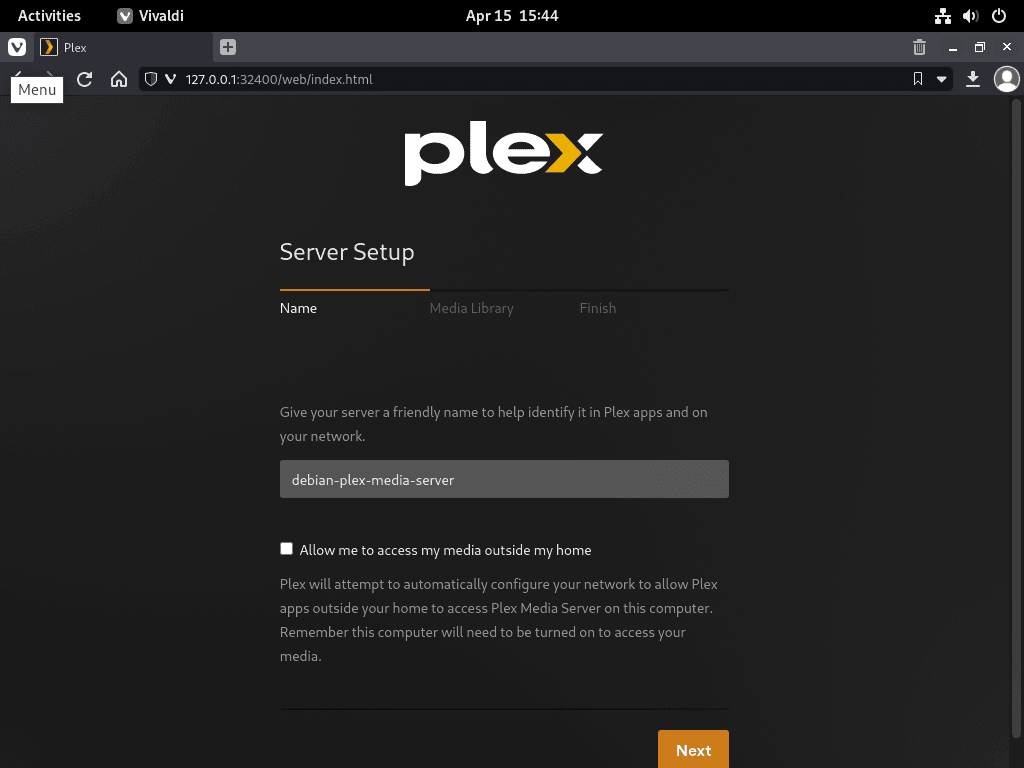
Configure Server Name and Remote Access
Configure your server name, which can be anything you desire. You also have the option to disable Allow me to access my media outside my home. By default, remote access is enabled; untick the feature if you only plan to use Plex on your local network.
Once configured, click the NEXT button.
Add Media Library Folders
The Media Library page gives you the option to pre-add your media directories. For best results, organize your media into separate folders by type: /media/yourfolder/movies, /media/yourfolder/tv, and /media/yourfolder/music. Plex uses folder structure and file names to match content with its online database.
If you have a media drive or folder ready, click the ADD LIBRARY button.
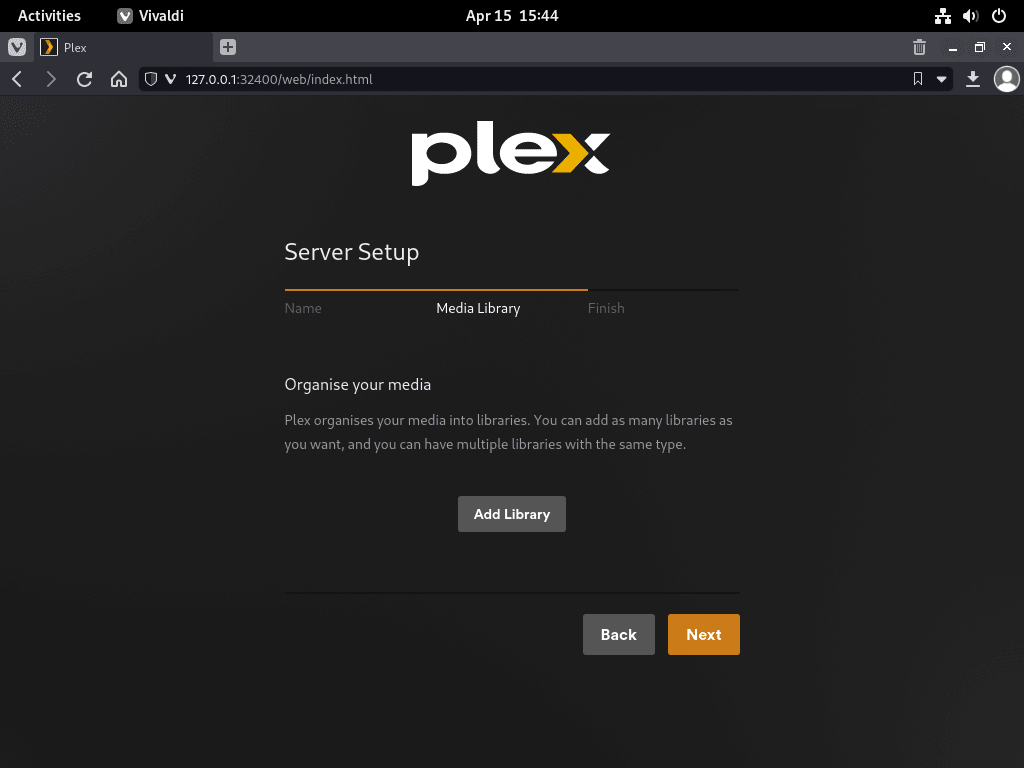
Now select the type of media you want your folders to be organized into, such as TV shows, movies, music, etc. Click the NEXT button to proceed to add folders.
Click the BROWSE FOR MEDIA FOLDER button and select the media directory. Once the folder is added, the Advanced options will appear, where you can further customize Plex to your liking.
When you are done, click ADD LIBRARY to continue to the Finish tab.
Complete the Initial Setup
Click the NEXT button to finish the initial setup, with or without adding a Media Library. The confirmation screen indicates your Plex Media Server is ready to use.
Click the DONE button to proceed to the Plex Dashboard.
Configure File Permissions for Media Access
If your media did not appear during the initial setup or Plex cannot find content on your internal or external drives, the issue is likely file permissions. Plex runs as a dedicated user account named plex, which requires read and execute permissions on your media directories.
Debian permissions can be set using chown or setfacl; both are effective. Below are some examples of how to apply these commands to ensure proper access.
Option 1: Set Permissions Using setfacl
The setfacl command provides Access Control Lists (ACLs), which offer more granular permission control than traditional ownership. ACLs let you grant the plex user read/execute access without changing file ownership, which is ideal for shared media directories accessed by multiple users or services.
To set permissions using setfacl, execute the following commands, replacing /media/yourfolder/ with the path to your media directory:
sudo setfacl -R -m u:plex:rx /media/yourfolder/
sudo setfacl -R -m u:plex:rx /media/yourfolder/tv
sudo setfacl -R -m u:plex:rx /media/yourfolder/movies
If the commands above are not working, you may need to reinstall the ACL package if it is missing from your system:
sudo apt install acl -yOption 2: Set Permissions Using chown
To set permissions using chown, execute the following commands, replacing /media/yourfolder/ with the path to your media directory:
sudo chown -R plex:plex /media/yourfolder/Or set permissions for individual files in the hard drive if other folders are present that you do not want Plex to access:
sudo chown -R plex:plex /media/yourfolder/tv
sudo chown -R plex:plex /media/yourfolder/movies
Backup Plex Database
Plex stores its database, metadata, and configuration in /var/lib/plexmediaserver. This directory contains your entire library structure, watch history, and custom artwork. Back up this directory regularly before major system changes or Plex updates:
sudo tar -czf plex-backup-$(date +%Y%m%d).tar.gz -C /var/lib plexmediaserverStore backups on a separate drive or remote location to prevent data loss if your system drive fails.
Set Up Nginx Reverse Proxy for Plex Media Server
This section is optional if you do not plan to use Plex through a reverse proxy setup.
Setting up a reverse proxy allows you to access Plex Media Server using a domain name with SSL encryption. This example uses Nginx on Debian as the reverse proxy server. You can also use Apache on Debian with similar configuration if you prefer. Alternatively, consider running Plex in a Docker container for easier management and isolation, or evaluate Jellyfin as an open-source alternative to Plex.
Install Nginx for Reverse Proxy
First, install Nginx with the following command:
sudo apt install nginx -yBy default, Nginx should be enabled. If it is not activated, use the following command:
sudo systemctl start nginxEnable Nginx to start automatically on boot:
sudo systemctl enable nginxVerify Nginx is running correctly:
systemctl status nginxYou should see the service active and running:
● nginx.service - A high performance web server and a reverse proxy server
     Loaded: loaded (/lib/systemd/system/nginx.service; enabled)
     Active: active (running) since Wed 2025-11-26 10:00:00 UTC
Create a Plex Nginx Server Block
Create a new server block as follows:
sudo nano /etc/nginx/conf.d/plex.confYou will need an active domain name and need to create a sub-domain. Once done, add the following to the server block file:
server {
      listen 80;
      server_name plex.example.com;

      location / {
          proxy_pass http://127.0.0.1:32400;
          proxy_set_header Host $host;
          proxy_set_header X-Real-IP $remote_addr;
          proxy_set_header X-Forwarded-For $proxy_add_x_forwarded_for;

          #upgrade to WebSocket protocol when requested
          proxy_set_header Upgrade $http_upgrade;
          proxy_set_header Connection "Upgrade";
      }
}
Save the file (CTRL+O), then exit (CTRL+X).
Test Nginx Configuration
Perform a dry run to ensure there are no errors in the Nginx configuration or your server block:
sudo nginx -tIf the configuration is valid, you will see:
nginx: the configuration file /etc/nginx/nginx.conf syntax is ok
nginx: configuration file /etc/nginx/nginx.conf test is successful
If you see syntax errors, review the server block file for typos or missing semicolons.
Reload Nginx for the change to take effect:
sudo systemctl reload nginxIf you have set up your domain and DNS records to point to your server IP, you can now access your Plex Media Server at plex.example.com.
Secure Nginx Reverse Proxy with Let’s Encrypt SSL Free Certificate
Running Nginx with HTTPS using an SSL certificate is recommended for security. Let’s Encrypt provides free, automated SSL certificates. For a detailed walkthrough, see the guide on securing Nginx with Let’s Encrypt on Debian.
First, install the certbot package as follows:
sudo apt install python3-certbot-nginx -yOnce installed, run the following command to start creating your certificate:
sudo certbot --nginx --agree-tos --redirect --hsts --staple-ocsp --email you@example.com -d plex.example.comThe flags configure automatic security features: --agree-tos accepts the terms of service, --redirect forces HTTP to HTTPS redirects, --hsts adds the Strict-Transport-Security header to prevent downgrade attacks, and --staple-ocsp enables OCSP stapling for faster certificate validation. Replace the email and domain (plex.example.com) with your actual subdomain configured in the Nginx server block.
Now your URL will be https://plex.example.com instead of http://plex.example.com. If you use the old HTTP URL, it will automatically redirect to HTTPS.
Set Up Nginx Automatic SSL Certificate Renewal
Modern Debian installations include a systemd timer that automatically renews certificates. Verify the timer is active:
sudo systemctl status certbot.timerIf the timer is active, no further configuration is needed. As a test, run a dry run to ensure renewal works correctly:
sudo certbot renew --dry-runIf the test succeeds, you will see:
Congratulations, all simulated renewals succeeded:
  /etc/letsencrypt/live/plex.example.com/fullchain.pem (success)
If the systemd timer is not available on your system, you can set up a cron job instead. Edit root’s crontab with
sudo crontab -eand add:0 0 * * * /usr/bin/certbot renew --quiet. This checks for certificate renewal at midnight daily.
Manage Plex Media Server
Update Plex Media Server
Keep your Plex Media Server current to ensure you have the latest features, bug fixes, and security patches.
To check for updates, run the following command:
sudo apt updateIf an update is available for Plex only, use the --only-upgrade flag to update just Plex without upgrading other packages:
sudo apt install --only-upgrade plexmediaserverAlternatively, update all packages at once including Plex Media Server:
sudo apt upgradeRemoving Plex Media Server
If you no longer wish to use Plex and want to remove it from your Debian system, follow these steps.
Uninstall Plex Media Server
Execute the following command to remove Plex Media Server from your system:
sudo apt remove plexmediaserver
sudo apt autoremove
The autoremove command removes any packages that were automatically installed as dependencies and are no longer needed.
Remove Plex APT Repository and GPG Key
To fully remove the Plex repository configuration and GPG key from your system:
sudo rm /etc/apt/sources.list.d/plexmediaserver.sources
sudo rm /usr/share/keyrings/plex.gpg
sudo apt update
The apt update refreshes the package cache so the removed repository no longer appears in APT listings. Verify the repository was removed:
apt-cache policy plexmediaserverThe output should confirm the package is no longer available:
plexmediaserver:
  Installed: (none)
  Candidate: (none)
  Version table:
Remove Plex Data Directory (Optional)
Warning: The following command permanently deletes all Plex data including media library metadata, user settings, watch history, and custom artwork. This action cannot be undone. Only proceed if you no longer need your Plex configuration.
To remove all Plex data and configuration files:
sudo rm -rf /var/lib/plexmediaserverDisable Nginx Reverse Proxy (If Applicable)
If you configured the Nginx reverse proxy, disable the service and remove the Plex server block:
sudo systemctl disable nginx --now
sudo rm /etc/nginx/conf.d/plex.conf
Troubleshooting Common Plex Issues
Plex Service Fails to Start
If Plex Media Server fails to start, check the service status and logs for errors:
sudo systemctl status plexmediaserver
sudo journalctl -xeu plexmediaserver
Look for error lines in the journalctl output. A startup failure related to port binding might look like:
plex[1234]: ERROR - Unable to bind socket
plex[1234]: Address already in use
A common cause is port 32400 already being in use by another process. Check which process is using the port:
sudo lsof -i :32400If another process is using port 32400, you will see output like:
COMMAND   PID USER   FD   TYPE DEVICE SIZE/OFF NODE NAME
nginx    1234 root    6u  IPv4  12345      0t0  TCP *:32400 (LISTEN)
Stop the conflicting service or configure Plex to use a different port in Settings > Network > Custom server access URLs.
Media Library Not Scanning
If Plex cannot find or scan your media files, verify the plex user has access to your media directories:
sudo -u plex ls -la /media/yourfolder/If permissions are correct, you will see your files listed:
drwxr-xr-x 4 plex plex 4096 Nov 25 10:30 .
drwxr-xr-x 3 root root 4096 Nov 24 08:15 ..
drwxr-xr-x 2 plex plex 4096 Nov 25 10:30 movies
drwxr-xr-x 2 plex plex 4096 Nov 25 10:30 tv
If you see “Permission denied”, apply the permission fixes from the Configure File Permissions for Media Access section above. For mounted drives, ensure the mount options allow the plex user to read files. Check your /etc/fstab entries include appropriate uid, gid, or umask options if using NTFS or FAT filesystems.
Cannot Access WebUI Remotely
If you can access Plex locally but not from other devices, verify the firewall allows the Plex port:
sudo ufw status | grep 32400You should see the port listed as allowed:
Status: active

To                         Action      From
--                         ------      ----
32400                      ALLOW       Anywhere
32400 (v6)                 ALLOW       Anywhere (v6)
If the rule is missing, add it with sudo ufw allow 32400. Also confirm remote access is enabled in Plex settings under Settings > Remote Access and that your router forwards port 32400 to your server’s local IP address.
Conclusion
You now have Plex Media Server running on Debian with the official APT repository configured for automatic updates. The key techniques covered include scoping GPG keys with the Signed-By field in DEB822 format, setting file permissions with setfacl or chown to grant the plex user media directory access, configuring UFW firewall rules for both local and remote streaming ports, and optionally securing remote access through an Nginx reverse proxy with Let’s Encrypt SSL certificates. From here, consider organizing your media into separate movie and TV show folders, enabling remote access through your Plex account, or exploring hardware transcoding with Plex Pass. For additional configuration options and troubleshooting, see the official Plex support documentation.
amazing tutorial, one thing to add – I was following along and found after adding folder permissions for plex, it still couldn’t find them – anything after home/user/ was not visible to it, so I ended up having to add that high level directory before it could see everything else, wondering what I missed in setting up permissions etc. to require this?
Thanks for the kind words and for flagging this, DB. Plex runs under the plex system user, so it needs execute permissions on every directory in the path, not just the final media folders. In your case, the plex user could read /home/user/media but not traverse /home or /home/user until you granted access higher up.
The safest approach is to give plex read/execute ACLs on the full tree with setfacl:
That way you avoid changing ownership while still letting Plex walk the directories. I will clarify this point in the permissions section of the guide, thanks again for the helpful note.
thanks !
Thank you worked perfectly except for acessing files on external drive.
But changing its mount location from `/media//ExtDrive` to `/mnt/ExtDrive` worked without any additional permission setting.
Thanks for sharing this, LP. Glad the guide worked for you. The /media directory is typically owned by root with restricted traverse permissions, which blocks the plex user from descending into mounted drives. The /mnt directory usually has more permissive defaults, so mounting there sidesteps the issue entirely.
For anyone who prefers keeping drives under /media, granting the plex user execute access on the parent directories resolves it:
Appreciate you documenting the workaround for others.
great, thank you so much
great tutorial, thank you!