
Install phpMyAdmin on Ubuntu with a LEMP stack when you want browser-based database administration on an Nginx server. This setup works well for MariaDB or MySQL administration, WordPress database checks, imports, user management, and routine query work without switching the server to Apache.
Ubuntu 26.04, 24.04, and 22.04 include a phpmyadmin package in the Universe repository, but this LEMP setup uses the upstream source archive so the Nginx server block, PHP-FPM socket, and future phpMyAdmin updates stay explicit.
Install phpMyAdmin on Ubuntu with a LEMP Stack
Compare Default LEMP and phpMyAdmin Package Versions on Ubuntu
Ubuntu release differences mainly affect PHP-FPM service names, MariaDB defaults, and the version available from the Ubuntu phpmyadmin package. This table helps you map the version-specific commands used later in the guide.
| Ubuntu Release | Default PHP | Default MariaDB | Ubuntu phpMyAdmin Package |
|---|---|---|---|
| Ubuntu 26.04 LTS | PHP 8.5.x | MariaDB 11.8.x | phpMyAdmin 5.2.3 (Universe) |
| Ubuntu 24.04 LTS | PHP 8.3.x | MariaDB 10.11.x | phpMyAdmin 5.2.1 (Universe) |
| Ubuntu 22.04 LTS | PHP 8.1.x | MariaDB 10.6.x | phpMyAdmin 5.1.1 (Universe) |
These steps cover Ubuntu 26.04 LTS, 24.04 LTS, and 22.04 LTS. The install flow is the same across all three releases, but the default PHP-FPM branch differs by release.
Update Ubuntu Before Installing phpMyAdmin and LEMP
Start by refreshing package metadata and applying pending upgrades so the LEMP packages install cleanly from current repositories:
sudo apt update && sudo apt upgradeThis guide uses
sudofor commands that need root privileges. If your account does not have sudo access yet, follow the steps to add a new user to sudoers on Ubuntu before continuing.
Install Nginx for the Ubuntu LEMP Stack
Install Nginx from Ubuntu’s default repository for a stable baseline. If you need newer Nginx features later, use our guide to install Nginx mainline on Ubuntu.
sudo apt install nginxUbuntu usually enables Nginx during installation, but verify the service before moving on:
systemctl is-active nginxactive
If Nginx is inactive, enable and start it in one command:
sudo systemctl enable nginx --nowInstall MariaDB for phpMyAdmin on Ubuntu
MariaDB is a common MySQL-compatible database server on Ubuntu and works well with phpMyAdmin. If you need a newer upstream MariaDB release than Ubuntu ships in its repositories, follow our guide to install MariaDB on Ubuntu.
sudo apt install mariadb-server mariadb-clientOnce installed, verify the MariaDB service is running:
systemctl is-active mariadbactive
Otherwise, if the service is inactive, enable and start MariaDB with this command:
sudo systemctl enable mariadb --nowSecure MariaDB with the Initial Hardening Script
After installation, run the security script to lock down your MariaDB instance. This script removes insecure defaults that could leave your database vulnerable.
Run the MariaDB hardening script:
sudo mariadb-secure-installationUbuntu 22.04 and 24.04 provide
mysql_secure_installationas a compatibility command, but Ubuntu 26.04 may only shipmariadb-secure-installation. Using the MariaDB command name works across the supported Ubuntu LTS releases.
The script walks through common hardening prompts. These responses are a safe default for most phpMyAdmin deployments:
- Switch to unix_socket authentication: Y (enables socket-based root authentication)
- Change the root password: Y (recommended if you want a password-based fallback in addition to socket authentication)
- Remove anonymous users: Y (prevents unauthenticated access)
- Disallow root login remotely: Y (restricts root to localhost only)
- Remove test database: Y (removes the insecure default test database)
- Reload privilege tables: Y (applies all changes immediately)
Once complete, MariaDB is hardened against common defaults such as anonymous access, remote root logins, and the test database.
Install PHP-FPM for phpMyAdmin on Ubuntu
PHP-FPM (FastCGI Process Manager) connects Nginx to PHP applications such as phpMyAdmin. Ubuntu ships different default PHP branches by release, so the PHP-FPM service and socket names vary. For alternate PHP branches, use our guide to install PHP on Ubuntu.
Install PHP-FPM, the modules required by phpMyAdmin, and the command-line tools used for the source download:
sudo apt install php-fpm php-mbstring php-bcmath php-xml php-mysql php-common php-gd php-cli php-curl php-zip curl ca-certificates opensslAfter installation, identify your PHP branch to determine the correct service name:
php -r 'echo PHP_MAJOR_VERSION . "." . PHP_MINOR_VERSION . PHP_EOL;'8.5
Use this branch value (for example, 8.5, 8.3, or 8.1) in the PHP-FPM service commands below.
Ubuntu 26.04 (PHP 8.5):
systemctl is-active php8.5-fpmUbuntu 24.04 (PHP 8.3):
systemctl is-active php8.3-fpmUbuntu 22.04 (PHP 8.1):
systemctl is-active php8.1-fpmactive
If the PHP-FPM service is not running, enable and start it with your installed version number:
sudo systemctl enable php8.3-fpm --nowReplace 8.3 with your actual PHP version (use 8.5 on Ubuntu 26.04 or 8.1 on Ubuntu 22.04).
Install phpMyAdmin from Source on Ubuntu
This section downloads phpMyAdmin from the upstream project and prepares the files, permissions, and database user needed for an Nginx-based Ubuntu deployment. If you prefer the Ubuntu package instead, sudo apt install phpmyadmin is available from Universe, but the package flow uses distro integration that may need extra Nginx adjustments.
Create a phpMyAdmin Database User on Ubuntu
You can sign in to phpMyAdmin with the MariaDB root account, but a dedicated account is safer for routine administration. Start by opening the MariaDB shell:
sudo mariadbCreate the phpMyAdmin account and grant global privileges without GRANT OPTION:
CREATE USER 'pmauser'@'localhost' IDENTIFIED BY 'your_secure_password';
GRANT ALL PRIVILEGES ON *.* TO 'pmauser'@'localhost';
FLUSH PRIVILEGES;
Replace
your_secure_passwordwith a strong password. Do not use the example password in production.
The global grant above creates a broad local administration account. If phpMyAdmin should manage only one application database, grant privileges on
database_name.*instead of*.*and keepGRANT OPTIONdisabled unless the account must delegate privileges.
Verify that MariaDB created the account before leaving the shell:
SELECT User, Host FROM mysql.user WHERE User='pmauser';+---------+-----------+ | User | Host | +---------+-----------+ | pmauser | localhost | +---------+-----------+
Exit the MariaDB shell when you are finished:
QUIT;Download phpMyAdmin Source on Ubuntu
These commands download the current phpMyAdmin release from the official downloads page. The phpMyAdmin version.txt endpoint now uses a multi-line format, so the command reads the first line for the version number and then downloads the Linux-friendly .tar.gz archive.
PMA_META="$(curl -fsSL https://www.phpmyadmin.net/home_page/version.txt)"
VERSION="$(printf '%s\n' "$PMA_META" | sed -n '1p')"
curl -fLO --progress-bar "https://files.phpmyadmin.net/phpMyAdmin/${VERSION}/phpMyAdmin-${VERSION}-all-languages.tar.gz"
Check that the version variable was populated and the archive downloaded successfully:
echo "$VERSION"
ls -lh "phpMyAdmin-${VERSION}-all-languages.tar.gz"
5.2.3 -rw-rw-r-- 1 user user 14M Feb 23 14:16 phpMyAdmin-5.2.3-all-languages.tar.gz
If you only want the English-language archive, replace the last line in the download block with this command:
curl -fLO --progress-bar "https://files.phpmyadmin.net/phpMyAdmin/${VERSION}/phpMyAdmin-${VERSION}-english.tar.gz"Extract the downloaded archive:
tar -xf "phpMyAdmin-${VERSION}-all-languages.tar.gz"
ls -d "phpMyAdmin-${VERSION}-all-languages"
phpMyAdmin-5.2.3-all-languages
Configure phpMyAdmin on Ubuntu
Move the extracted files to the web server directory. If you downloaded the English-only archive earlier, replace all-languages with english in the source directory name.
sudo mv "phpMyAdmin-${VERSION}-all-languages" /var/www/phpmyadminphpMyAdmin also needs a writable temporary directory for caching and uploads. Create it with the correct permissions:
sudo install -d -m 0755 /var/www/phpmyadmin/tmpNext, phpMyAdmin includes a sample configuration file. Copy it to create the active configuration:
sudo cp /var/www/phpmyadmin/config.sample.inc.php /var/www/phpmyadmin/config.inc.phpNow, open the configuration file with your preferred text editor:
sudo nano /var/www/phpmyadmin/config.inc.phpphpMyAdmin requires a Blowfish secret for cookie-based authentication. Locate the line that starts with $cfg['blowfish_secret']:
$cfg['blowfish_secret'] = ''; /* YOU MUST FILL IN THIS FOR COOKIE AUTH! */This field needs 32 random characters. You can generate a 32-character value with OpenSSL, which is already available on most Ubuntu installs:
openssl rand -hex 16Use the generated 32-character string as the Blowfish secret. Example output:
7d34d16efb0db7f39ea4d78518e0f5f7
Example of adding the cipher to the configuration file (Do not copy):
$cfg['blowfish_secret'] = '7d34d16efb0db7f39ea4d78518e0f5f7';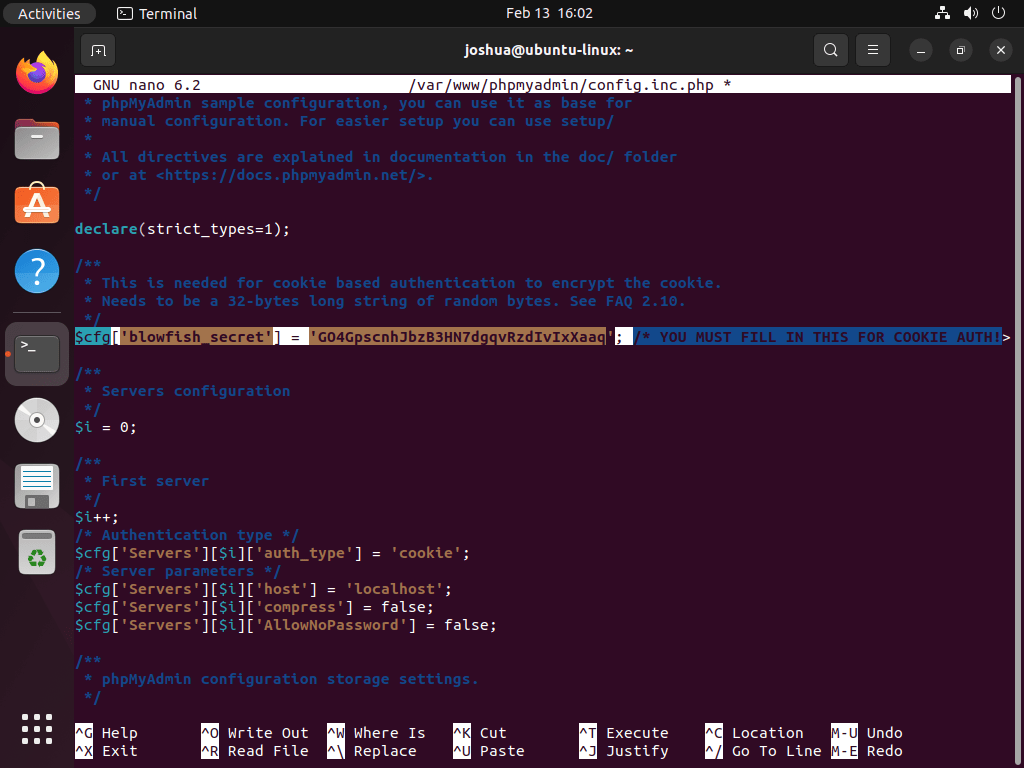
For most users, the default settings work well. However, if your MariaDB database runs on a separate server instead of localhost, update the host setting with that server’s IP address:
$cfg['Servers'][$i]['host'] = '192.168.55.101';Check the configuration file for syntax errors before continuing:
php -l /var/www/phpmyadmin/config.inc.phpNo syntax errors detected in /var/www/phpmyadmin/config.inc.php
Configure phpMyAdmin File Permissions on Ubuntu
Properly setting the directory owner to the www-data user (the default web server user on Ubuntu) ensures both compatibility and security.
The next commands apply recursive ownership and permission changes to
/var/www/phpmyadmin/. Double-check the path before running them so you do not change permissions on the wrong web directory.
First, set the directory ownership:
sudo chown -R www-data:www-data /var/www/phpmyadmin/Similarly, set the correct file permissions:
sudo find /var/www/phpmyadmin/ -type d -exec chmod 755 {} \;
sudo find /var/www/phpmyadmin/ -type f -exec chmod 644 {} \;
Verify the top-level directory and temporary directory are owned by www-data:
ls -ld /var/www/phpmyadmin /var/www/phpmyadmin/tmpdrwxr-xr-x 14 www-data www-data 4096 Feb 23 14:16 /var/www/phpmyadmin drwxr-xr-x 2 www-data www-data 4096 Feb 23 14:16 /var/www/phpmyadmin/tmp
Create an Nginx Server Block for phpMyAdmin on Ubuntu
Create a dedicated Nginx server block for phpMyAdmin and use a separate subdomain such as pma.example.com. This keeps the phpMyAdmin interface isolated from your main site and makes access controls easier to manage.
Create and open the Nginx server block file:
sudo nano /etc/nginx/sites-available/phpmyadmin.confThen, paste the following configuration, replacing pma.example.com with your actual domain:
server {
  listen 80;
  listen [::]:80;
  server_name pma.example.com;
  root /var/www/phpmyadmin/;
  index index.php index.html;

  access_log /var/log/nginx/phpmyadmin_access.log;
  error_log /var/log/nginx/phpmyadmin_error.log;

  location / {
    try_files $uri $uri/ /index.php$is_args$args;
  }

  location ~ ^/(doc|sql|setup)/ {
    deny all;
  }

  location ~ \.php$ {
    include snippets/fastcgi-php.conf;
    fastcgi_pass unix:/run/php/php-fpm.sock;
  }

  location ~ /\.ht {
    deny all;
  }
}
The example includes a few important notes:
- PHP-FPM socket path: The
fastcgi_passline uses Ubuntu’s/run/php/php-fpm.socksymlink, which follows the default PHP-FPM branch installed on the server. - Versioned sockets: If you intentionally run multiple PHP branches, replace the symlink with the branch-specific socket, such as
php8.5-fpm.sock,php8.3-fpm.sock, orphp8.1-fpm.sock. - Document root: The
/var/www/phpmyadmin/path matches the source install directory. Update this line if you chose a different location. - Server name: Replace
pma.example.comwith your actual subdomain.
If only a small number of static IP addresses need access, add an allowlist inside the server { } block before the first location section:
allow 203.0.113.10;
deny all;
This blocks unauthorized visitors with a 403 Forbidden response before phpMyAdmin loads. Save the file and exit the editor when you finish.
Use Nginx allowlists together with host-level firewall rules when the phpMyAdmin subdomain should be private. For server firewall setup, see our guide to configure UFW on Ubuntu.
Next, enable the server block by creating a symbolic link from sites-available to sites-enabled:
sudo ln -s /etc/nginx/sites-available/phpmyadmin.conf /etc/nginx/sites-enabled/Before restarting Nginx, always test the configuration to catch any syntax errors:
sudo nginx -tIf your configuration is error-free, you should receive the following output:
nginx: the configuration file /etc/nginx/nginx.conf syntax is ok
nginx: configuration file /etc/nginx/nginx.conf test is successful
Finally, restart Nginx to apply the changes:
sudo systemctl restart nginxAccess phpMyAdmin in a Web Browser on Ubuntu
Open a web browser and visit http://pma.example.com before the TLS step below, replacing the example domain with your own. If the Nginx server block is working, phpMyAdmin will load the login page shown below.
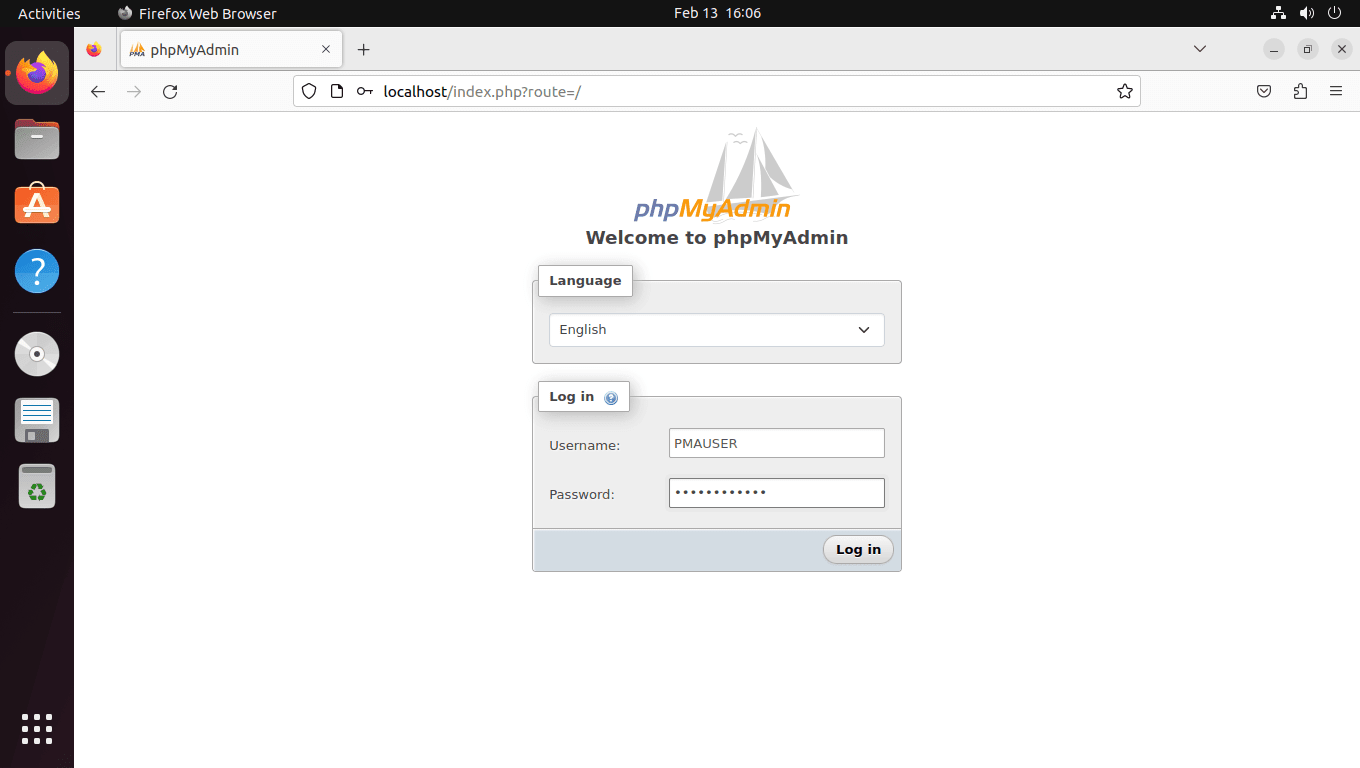
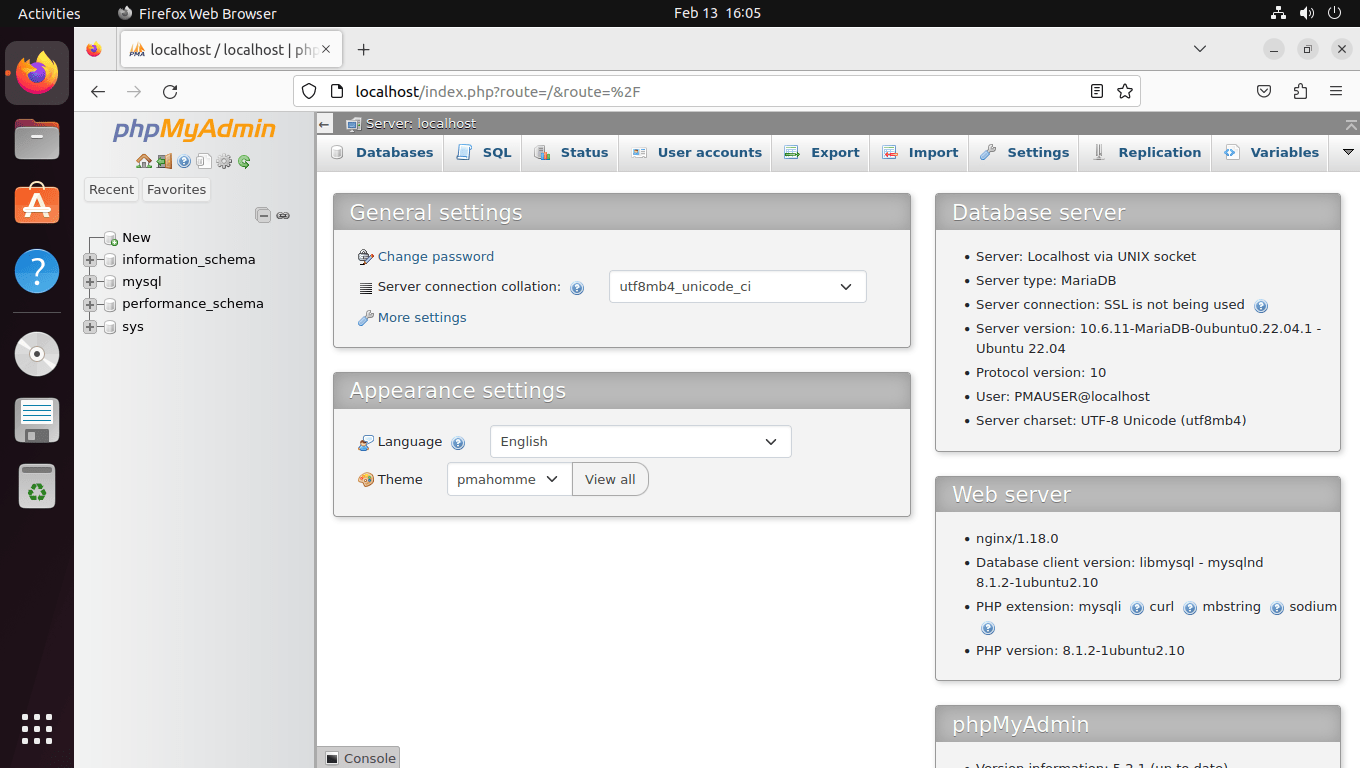
Next, enter your login credentials and proceed to the phpMyAdmin dashboard, which you can see an example of below.
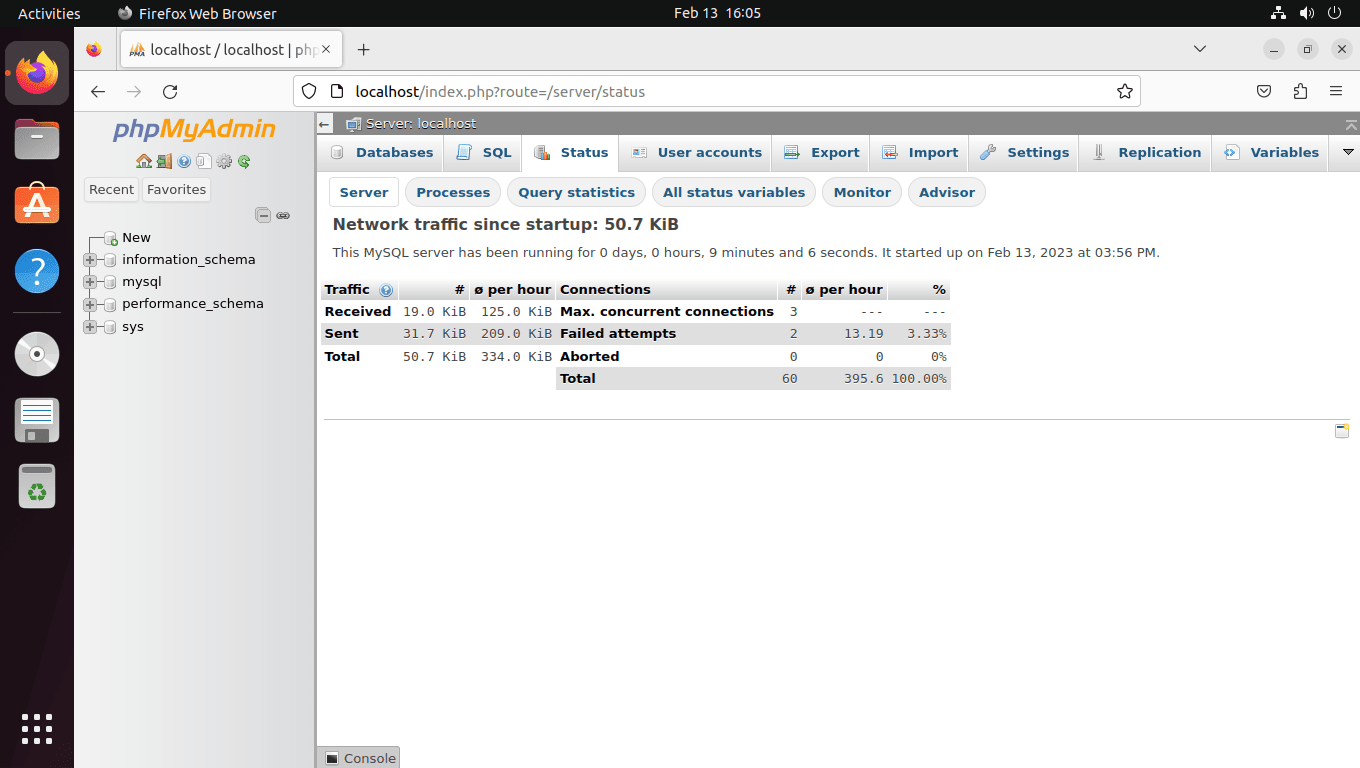
The Status page shows real-time server statistics and query performance metrics:
The Advisor page analyzes your MariaDB configuration and suggests performance improvements:
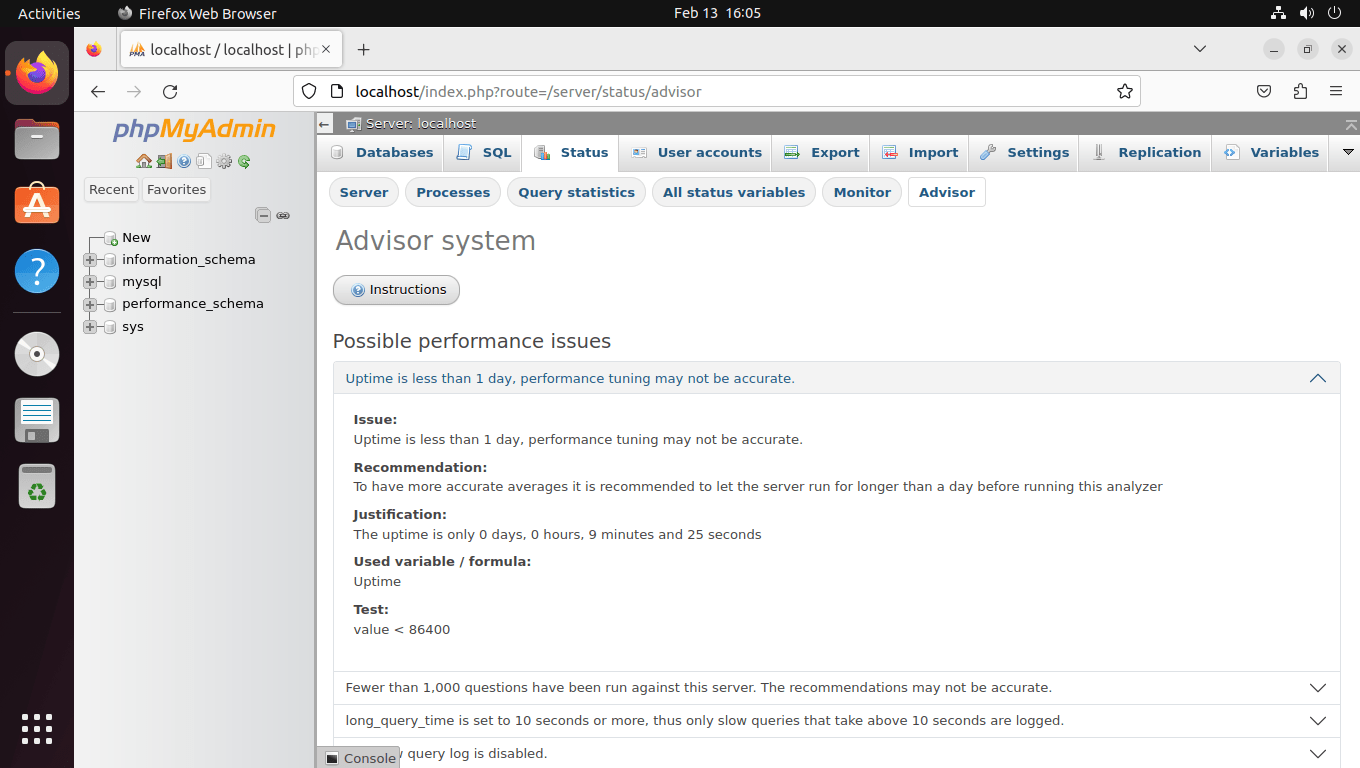
The Advisor page is most useful after the server has collected enough workload data. Let it run for at least 24 hours (72 hours is better) before acting on suggestions, and treat its recommendations as a starting point, not an automatic tuning checklist.
Secure phpMyAdmin on Ubuntu with HTTPS (Let’s Encrypt)
phpMyAdmin should not stay on plain HTTP. Use Let’s Encrypt with the Nginx plugin to install a free TLS certificate and redirect all traffic to HTTPS. For a broader TLS hardening walkthrough, see our guide to secure Nginx with Let’s Encrypt on Ubuntu.
Install Certbot and the Nginx plugin:
sudo apt install python3-certbot-nginxRequest the certificate and let Certbot update the Nginx server block automatically:
sudo certbot --nginx --agree-tos --redirect --email you@example.com -d pma.example.comCertbot may ask whether you want renewal notices and Electronic Frontier Foundation emails. After you answer, it configures the certificate, enables HTTPS redirects, and updates the Nginx server block for pma.example.com. Add stricter TLS options such as HSTS only after the certificate works and you are confident every subdomain that needs HTTPS is ready.
Let’s Encrypt certificates expire every 90 days, so verify the renewal workflow after the certificate is issued:
sudo certbot renew --dry-runCongratulations, all simulated renewals succeeded
If the dry run says No simulated renewals were attempted, the server does not have an issued certificate lineage yet. Recheck DNS for pma.example.com, rerun the issuance command, and then test renewal again.
Certbot automatically installs a systemd timer that handles certificate renewal. Verify this timer is active:
systemctl is-active certbot.timeractive
Certbot already installs and enables
certbot.timer. Avoid adding a separate cron job unless you intentionally disable the systemd timer first, because duplicate renewal jobs make troubleshooting harder.
Update Source-Installed phpMyAdmin on Ubuntu
A source install does not update through apt upgrade. Create a small updater command so future phpMyAdmin releases can be downloaded, staged, and swapped without repeating the whole install by hand.
Create the updater script:
sudo nano /usr/local/bin/update-phpmyadminPaste the following script:
#!/usr/bin/env bash
set -euo pipefail

if [[ "${EUID}" -ne 0 ]]; then
  echo "Run this updater with sudo." >&2
  exit 1
fi

INSTALL_DIR="/var/www/phpmyadmin"
TMP_DIR="$(mktemp -d)"
BACKUP_DIR=""
ROLLBACK_NEEDED=0

cleanup() {
  rm -rf "$TMP_DIR" "${INSTALL_DIR}.new"
  if [[ "$ROLLBACK_NEEDED" -eq 1 ]]; then
    rm -rf "$INSTALL_DIR"
    if [[ -d "$BACKUP_DIR" ]]; then
      mv "$BACKUP_DIR" "$INSTALL_DIR"
      echo "Update failed; restored ${INSTALL_DIR} from ${BACKUP_DIR}." >&2
    fi
  fi
}
trap cleanup EXIT

if [[ ! -f "${INSTALL_DIR}/config.inc.php" ]]; then
  echo "Missing ${INSTALL_DIR}/config.inc.php; install phpMyAdmin first." >&2
  exit 1
fi

PMA_META="$(curl -fsSL https://www.phpmyadmin.net/home_page/version.txt)"
VERSION="$(printf '%s\n' "$PMA_META" | sed -n '1p')"
if [[ ! "$VERSION" =~ ^[0-9]+[.][0-9]+[.][0-9]+$ ]]; then
  echo "Unexpected phpMyAdmin version value: ${VERSION:-empty}" >&2
  exit 1
fi

CURRENT_VERSION="$(find "$INSTALL_DIR" -maxdepth 1 -name 'RELEASE-DATE-*' -printf '%f\n' 2>/dev/null | sed -n 's/^RELEASE-DATE-//p' | sort -V | tail -n 1)"
if [[ "$CURRENT_VERSION" == "$VERSION" ]]; then
  echo "phpMyAdmin is already ${VERSION}."
  exit 0
fi

ARCHIVE="phpMyAdmin-${VERSION}-all-languages.tar.gz"
URL="https://files.phpmyadmin.net/phpMyAdmin/${VERSION}/${ARCHIVE}"

cd "$TMP_DIR"
curl -fLO --progress-bar "$URL"
tar -xf "$ARCHIVE"

rm -rf "${INSTALL_DIR}.new"
cp -a "phpMyAdmin-${VERSION}-all-languages" "${INSTALL_DIR}.new"
cp "${INSTALL_DIR}/config.inc.php" "${INSTALL_DIR}.new/config.inc.php"
install -d -m 0755 "${INSTALL_DIR}.new/tmp"
chown -R www-data:www-data "${INSTALL_DIR}.new"
find "${INSTALL_DIR}.new" -type d -exec chmod 755 {} \;
find "${INSTALL_DIR}.new" -type f -exec chmod 644 {} \;

php -l "${INSTALL_DIR}.new/config.inc.php"
nginx -t
BACKUP_DIR="${INSTALL_DIR}.backup.$(date +%Y%m%d%H%M%S)"
mv "$INSTALL_DIR" "$BACKUP_DIR"
mv "${INSTALL_DIR}.new" "$INSTALL_DIR"
ROLLBACK_NEEDED=1
nginx -t
systemctl reload nginx
ROLLBACK_NEEDED=0
echo "phpMyAdmin updated to ${VERSION}. Previous files: ${BACKUP_DIR}"
Make the script executable:
sudo chmod +x /usr/local/bin/update-phpmyadminRun the updater whenever you want to pull the current upstream release:
sudo update-phpmyadminThe updater keeps the previous application directory as
/var/www/phpmyadmin.backup.TIMESTAMP. After you confirm the web interface works, remove older backups manually to reclaim disk space.
Troubleshoot phpMyAdmin on Ubuntu (Nginx and PHP-FPM)
Fix phpMyAdmin 502 Bad Gateway Errors on Nginx
A 502 Bad Gateway error usually means Nginx cannot reach PHP-FPM. The most common causes are a stopped PHP-FPM service or a socket path that does not match the installed PHP branch.
connect() to unix:/run/php/php-fpm.sock failed (2: No such file or directory) while connecting to upstream
Check the PHP-FPM service that matches the PHP branch installed on the server:
PHP_BRANCH="$(php -r 'echo PHP_MAJOR_VERSION . "." . PHP_MINOR_VERSION . PHP_EOL;')"
systemctl is-active "php${PHP_BRANCH}-fpm"
If the service is inactive, start it and inspect the journal:
sudo systemctl start "php${PHP_BRANCH}-fpm"
sudo journalctl -xeu "php${PHP_BRANCH}-fpm"
Confirm the socket path exists and matches the Nginx fastcgi_pass line:
ls -la /run/php/drwxr-xr-x 2 www-data www-data 100 Feb 23 14:13 . lrwxrwxrwx 1 root root 30 Feb 23 14:13 php-fpm.sock -> /etc/alternatives/php-fpm.sock srw-rw---- 1 www-data www-data 0 Feb 23 14:13 php8.5-fpm.sock
Fix phpMyAdmin 403 Forbidden Errors on Ubuntu
A 403 Forbidden error is usually caused by incorrect file permissions or an IP allowlist rule blocking your current address.
403 Forbidden
nginx/1.24.0 (Ubuntu)
Reset the phpMyAdmin directory permissions first:
sudo chown -R www-data:www-data /var/www/phpmyadmin/
sudo find /var/www/phpmyadmin/ -type d -exec chmod 755 {} \;
sudo find /var/www/phpmyadmin/ -type f -exec chmod 644 {} \;
Then verify the top-level permissions and review any allow/deny rules in your Nginx server block:
ls -ld /var/www/phpmyadmin /var/www/phpmyadmin/tmp
sudo nginx -t
Fix Blank phpMyAdmin Pages and PHP Extension Errors
A blank page often points to a PHP fatal error, missing extension, or syntax issue in config.inc.php. Start with the Nginx error log:
sudo tail -50 /var/log/nginx/phpmyadmin_error.logPHP Fatal error: Uncaught Error: Call to undefined function mysqli_connect()
Verify the required PHP extensions are loaded:
php -m | grep -E "mbstring|xml|mysql|curl|gd|zip"curl gd libxml mbstring mysqli xml xmlreader xmlwriter zip
If you recently edited config.inc.php, run a syntax check as well:
php -l /var/www/phpmyadmin/config.inc.phpFix phpMyAdmin Login Failures with Correct Credentials
If phpMyAdmin rejects valid credentials, confirm the MariaDB user exists on localhost and has the expected privileges:
sudo mariadb -e "SELECT User, Host FROM mysql.user WHERE User='pmauser';"User Host pmauser localhost
If the user is missing or incorrect, recreate it:
sudo mariadb -e "DROP USER IF EXISTS 'pmauser'@'localhost';"
sudo mariadb -e "CREATE USER 'pmauser'@'localhost' IDENTIFIED BY 'your_password';"
sudo mariadb -e "GRANT ALL PRIVILEGES ON *.* TO 'pmauser'@'localhost';"
sudo mariadb -e "FLUSH PRIVILEGES;"
Remove phpMyAdmin and LEMP Components on Ubuntu
If you need to remove phpMyAdmin or the full LEMP stack later, use the sections below to clean up files, services, and optional certificate data.
Remove phpMyAdmin Files and Nginx Configuration
The next command permanently deletes the phpMyAdmin web files, updater command, and source-install backups. Back up any custom themes or modified configuration files first if you want to keep them.
Remove the phpMyAdmin files and Nginx server block:
sudo rm -rf /var/www/phpmyadmin/
sudo rm -rf /var/www/phpmyadmin.backup.*
sudo rm -f /usr/local/bin/update-phpmyadmin
sudo rm -f /etc/nginx/sites-enabled/phpmyadmin.conf
sudo rm -f /etc/nginx/sites-available/phpmyadmin.conf
sudo nginx -t && sudo systemctl reload nginx
Remove the dedicated MariaDB login if you created one for phpMyAdmin:
sudo mariadb -e "DROP USER IF EXISTS 'pmauser'@'localhost'; FLUSH PRIVILEGES;"Remove LEMP and Certbot Packages on Ubuntu
Package removal does not automatically delete MariaDB data under
/var/lib/mysql, but the optional data cleanup below does. Export critical databases first withmariadb-dump --all-databases > backup.sqlbefore deleting database files.
Remove PHP-FPM and the PHP extensions installed for phpMyAdmin:
sudo apt remove php-fpm php-mbstring php-bcmath php-xml php-mysql php-common php-gd php-cli php-curl php-zipRemove MariaDB, Nginx, and Certbot packages, then preview the dependency cleanup before running it:
sudo apt remove mariadb-server mariadb-client nginx python3-certbot-nginx certbot python3-certbot
sudo apt autoremove --dry-run
If the dry-run list does not include packages you still need, run the actual cleanup:
sudo apt autoremoveIf you also want to remove MariaDB data files or Let’s Encrypt certificates, those directories contain real data. Back up anything important before deleting
/var/lib/mysqlor/etc/letsencrypt.
sudo rm -rf /var/lib/mysql
sudo rm -rf /etc/letsencrypt
Confirm the key server packages are gone:
dpkg-query -W -f='${binary:Package}\t${Status}\n' mariadb-server nginx python3-certbot-nginx 2>/dev/null | grep 'install ok installed' || echo "server packages not installed"server packages not installed
Conclusion
phpMyAdmin is now installed on Ubuntu with a LEMP stack, including an Nginx server block, a dedicated MariaDB login, and HTTPS protection with Certbot. Keep the setup healthy by updating phpMyAdmin from the upstream project when new releases land, then rechecking file permissions and running sudo nginx -t before reloading Nginx.

Thanks Its Working