

OBS Studio (Open Broadcaster Software) captures, mixes, and encodes video and audio for streaming or local recording. Common use cases include streaming games to Twitch or YouTube, producing multi-source tutorial screencasts, and assembling scene-based video podcast layouts. By the end of this guide, you will install OBS Studio on Fedora using either the native DNF package or the official Flatpak build and verify that recording and streaming work as expected.
Upstream officially supports Flatpak builds on Linux, and recommends Flatpak for non-Ubuntu distributions. Fedora’s obs-studio package is community maintained in the Fedora repositories. Flatpak offers sandboxing, a faster release cadence, and consistent plugin/runtime behavior; the DNF package integrates natively with the system, shares host libraries, and suits users who prefer traditional package management.
Choose an Installation Method
Select one installation path that matches your update expectations and integration needs. Do not mix DNF and Flatpak instructions.
| Method | Channel | Stability | Best For | Notes |
|---|---|---|---|---|
| DNF (Fedora) | Fedora official repositories | Distro-tested | Fedora users who prefer native packages | Package exists in Fedora; integrates with system libraries |
| DNF (RPM Fusion) | RPM Fusion Free/Nonfree | Third-party | Users needing extras (e.g., some plugins/codecs) | May introduce dependency changes; review carefully to avoid downgrades |
| Flatpak (Official) | Flathub | Upstream rapid updates | Most users; sandboxing; consistent plugin/runtime behavior | Recommended by OBS upstream for non-Ubuntu distros |
Recommendation: Prefer the Flatpak build unless you specifically require native system-library integration. If you choose RPMs, favor the Fedora repository build first. Use RPM Fusion only when you need features not present in Fedora’s package, and preview transaction changes to avoid downgrades or replacements.
Install OBS Studio via DNF
Update Fedora System
Refresh packages first to minimize dependency conflicts:
sudo dnf upgrade --refreshInstall OBS Studio (DNF)
Next, install the community Fedora package:
sudo dnf install obs-studioThen, verify installation:
Tip: If you plan to use RPMs rather than Flatpak, prefer the Fedora repository build first. Only use RPM Fusion when you need features missing from Fedora’s package, and preview changes with
sudo dnf install --assumeno obs-studio.
obs --versionAt this point, the expected output (version varies) resembles:
OBS Studio - 32.0.2 (linux)
Version numbers change frequently; any current stable number indicates success. Focus on absence of errors rather than matching the example exactly.
Install Development Files (Optional)
Furthermore, plugin authors or those compiling modules can install headers and CMake config files. These allow building and linking third-party sources cleanly:
sudo dnf install obs-studio-develAfter installation, inspect a few installed paths (truncated example):
rpm -ql obs-studio-devel | head -n 10/usr/include/obs/obs.h /usr/include/obs/obs-module.h /usr/lib64/cmake/LibObs/LibObsConfig.cmake ...
Enable Virtual Camera Support (Optional)
To enable virtual camera support, the v4l2loopback kernel module (provided via RPM Fusion) is required. Enable RPM Fusion then install the module:
sudo dnf install https://download1.rpmfusion.org/free/fedora/rpmfusion-free-release-$(rpm -E %fedora).noarch.rpm
sudo dnf install https://download1.rpmfusion.org/nonfree/fedora/rpmfusion-nonfree-release-$(rpm -E %fedora).noarch.rpm
sudo dnf install kmod-v4l2loopback
After installation, verify the module is loaded (OBS can auto-load it on first virtual camera use):
lsmod | grep v4l2loopback || echo "Module not loaded yet"Expected output example (presence indicates success):
v4l2loopback 16384 0
If not loaded automatically you may manually load it:
sudo modprobe v4l2loopback exclusive_caps=1 card_label='OBS Virtual Camera'For more repository management details, see the RPM Fusion guide. If SELinux interferes with capture or encoding on Fedora, review SELinux guidance for Fedora and prefer fixing policy issues rather than disabling SELinux outright.
Note: Installing OBS from RPM Fusion can sometimes change dependencies compared to Fedora’s official packages. Review the DNF transaction carefully for downgrades or replacements (
sudo dnf install --assumeno obs-studioto preview), and prefer the Fedora build unless you specifically need RPM Fusion features.
Enable Hardware Encoding (Optional)
Hardware encoders reduce CPU load. Ensure the correct drivers are installed (NVIDIA proprietary driver for NVENC; Mesa VAAPI for Intel/AMD). After enabling RPM Fusion, NVENC libraries become available with the driver packages. If you plan to use NVENC, install the proprietary drivers: see the NVIDIA drivers guide for Fedora.
Install VAAPI utilities and drivers if missing, then confirm capabilities:
sudo dnf install libva-utils mesa-va-drivers
vainfo | grep -i h264 || echo "VAAPI not detected: check drivers/packages"
For reference, a healthy output includes lines similar to:
VAProfileH264High    : VAEntrypointVLD
VAProfileHEVCMain    : VAEntrypointVLD
After installing drivers, restart OBS and verify hardware encoders are detected. Open OBS, navigate to Settings → Output → Encoder dropdown. Successful detection shows options like H.264 (NVENC), H.264 (VAAPI), or FFmpeg VAAPI variants. If only software encoders (x264) appear, confirm driver installation completed and restart your system to ensure kernel modules loaded properly.
Install OBS Studio via Flatpak
The Flatpak build is upstream-supported and recommended. Fedora Workstation includes Flatpak by default; if you removed it or are running a minimal install, reinstall with sudo dnf install flatpak then enable Flathub below.
Enable Flathub Repository
To begin, enable Flathub to access Flatpak applications:
flatpak remote-add --if-not-exists flathub https://flathub.org/repo/flathub.flatpakrepoInstall OBS Studio (Flatpak)
Next, install the application:
flatpak install flathub com.obsproject.StudioThen, verify installation:
flatpak list | grep -i obsOBS Studio com.obsproject.Studio stable
Afterward, show Flatpak metadata for version confirmation:
flatpak info com.obsproject.Studio | grep -E "Version|Runtime"Version: 30.2.0 Runtime: org.kde.Platform/x86_64/6.8
Flathub Repository Access Issues
If you encounter an error indicating Flathub is disabled, you’ll see output similar to:
error: Unable to load summary from remote flathub: Can't fetch summary from disabled remote 'flathub'
In that case, enable the Flathub repository:
flatpak remote-modify --enable flathubAfter re-enabling, verify the repository is enabled:
flatpak remotesAt this point, you should see Flathub listed. Afterwards, retry the install if needed.
Troubleshoot Common Issues
Wayland Screen Capture Blank
Use the Screen Capture (PipeWire) source for Wayland sessions (do not use Xcomposite on Wayland). If the preview stays black, first verify PipeWire is running:
systemctl --user status pipewireExpected output shows active status:
● pipewire.service - PipeWire Multimedia Service
     Active: active (running)
If inactive or missing, ensure portal packages are installed:
sudo dnf install xdg-desktop-portal xdg-desktop-portal-gnomeThen restart the session and relaunch OBS.
If capture fails unexpectedly on Fedora, check for SELinux denials and suggested fixes:
journalctl -t setroubleshoot | tail -n 50 || echo "No recent SELinux alerts"
sealert -a /var/log/audit/audit.log || echo "sealert not available"
Missing Audio Sources
If OBS shows no audio devices in the mixer, verify PipeWire or PulseAudio sources are detected:
pactl list short sourcesHealthy output lists available audio sources:
0  alsa_input.pci-0000_00_1f.3.analog-stereo
1  alsa_output.pci-0000_00_1f.3.analog-stereo.monitor
If the list is empty or devices are missing, restart the audio session:
systemctl --user restart pipewire pipewire-pulseThen relaunch OBS and verify audio meters respond when you speak or play sound.
Virtual Camera Not Appearing
If the “Start Virtual Camera” button is missing from OBS Controls, verify the kernel module is loaded:
lsmod | grep v4l2loopbackIf the command returns no output, the module is not loaded. Load it manually:
sudo modprobe v4l2loopback exclusive_caps=1 card_label='OBS Virtual Camera'Then restart OBS and confirm “Start Virtual Camera” appears under Controls. If the module is still not loading, ensure kmod-v4l2loopback is installed (see virtual camera section above).
Flatpak File Access
If OBS cannot see expected folders, cautiously grant overrides:
flatpak override --user --filesystem=$HOME/Videos com.obsproject.StudioInspect permissions and remove overrides if unnecessary:
flatpak permission-show com.obsproject.Studio
flatpak override --user --reset com.obsproject.Studio
Launch OBS Studio
For everyday use, launch from the terminal or applications menu.
Launch from Terminal
obsAlternatively, use the Flatpak identifier:
flatpak run com.obsproject.StudioLaunch from Applications Menu
- First, click Activities (top left).
- Next, select Show Applications.
- Finally, search for and open OBS Studio.
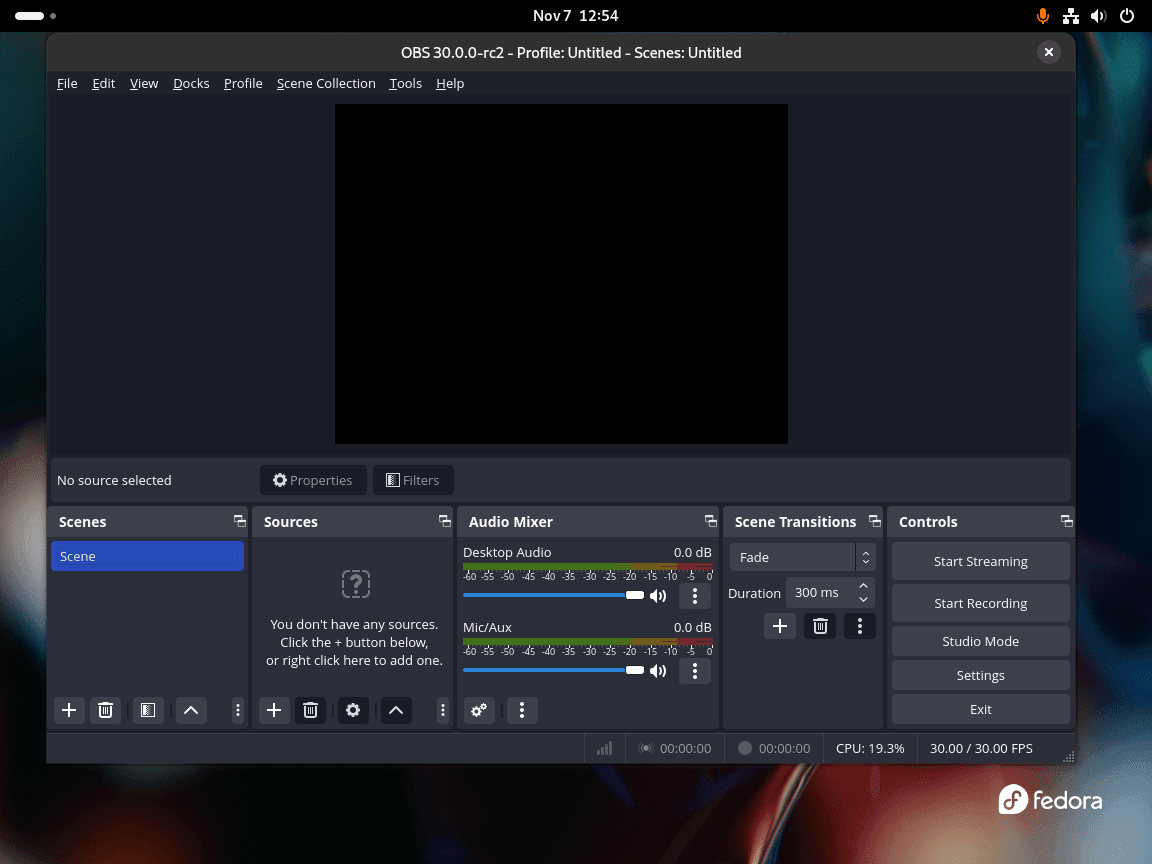
During the initial run, a configuration wizard can auto-tune settings; alternatively, skip and adjust manually. Scenes (left) group layouts while sources (center) add screen captures, cameras, and audio inputs.
First-Run Checklist (Quick Verification)
- Add a Scene and a Source: use Display Capture (on X11) or Screen Capture (PipeWire) on Wayland.
- Start a short recording and confirm a file is saved to your Output path.
- Check audio meters move for your microphone and desktop audio; adjust monitoring/output as needed.
Manage OBS Studio
Use the package manager matching your installation method to keep OBS Studio current.
Update via DNF
To stay current, update all system packages (includes OBS Studio):
sudo dnf upgrade --refreshAlternatively, update only OBS Studio:
sudo dnf upgrade obs-studioAfterward, verify the version:
obs --versionOBS Studio - 32.0.3 (linux)
Update via Flatpak
Likewise, update all Flatpak applications (includes OBS Studio):
flatpak updateAlternatively, update only OBS Studio:
flatpak update --app com.obsproject.StudioAfterward, verify Flatpak version info:
flatpak info com.obsproject.Studio | grep VersionTo uninstall OBS Studio, use the package manager matching your installation method.
Remove via DNF
sudo dnf remove obs-studioAfter removing the package, optionally clean residual dependencies:
sudo dnf autoremoveThen, verify removal (command should fail):
obs --version || echo "OBS removed"bash: obs: command not found OBS removed
Afterward, optionally remove user configuration:
These deletions permanently remove profiles, scene collections, custom docks, and cached data. Export scene collections and profiles first (Profile → Export; Scene Collection → Export). Recordings stored outside the default output directory (e.g., custom paths in Settings → Output) are not removed.
rm -rf ~/.config/obs-studio
rm -rf ~/.cache/obs-studio
Remove via Flatpak
flatpak remove --delete-data com.obsproject.StudioThen, verify removal:
flatpak info com.obsproject.Studio || echo "Flatpak removed"error: com.obsproject.Studio not installed Flatpak removed
By default, the --delete-data flag removes settings under ~/.var/app/com.obsproject.Studio/. Omit it to preserve configuration for future reinstallation.
Conclusion
In summary, you installed and verified OBS Studio on Fedora (DNF or Flatpak), enabled optional virtual camera and hardware encoders, and learned update and removal flows. Next, configure scenes, test audio levels, and install FFmpeg for video transcoding, VLC for media playback, or HandBrake for video compression to extend your recording and transcoding workflows.