
Nginx is a high-performance web server designed to handle thousands of concurrent connections with minimal resource consumption. Whether you need to serve static content, configure a reverse proxy for backend applications, or balance load across multiple servers, Nginx provides the flexibility and efficiency to handle it. By the end of this guide, you will have a fully configured Nginx installation with firewall rules, SSL certificate automation, and the knowledge to manage server blocks for hosting multiple domains.
Fedora includes Nginx in its default repositories, so installation requires only a single DNF command. This guide covers the complete setup process, from initial installation through firewall configuration, server block creation, and securing your site with free Let’s Encrypt certificates.
Update Fedora Before Nginx Installation
First, update your Fedora system to ensure all packages are current. This step prevents dependency conflicts during the Nginx installation:
sudo dnf upgrade --refreshInstall Nginx via DNF Command
Fedora’s default repository includes a recent Nginx version, which simplifies installation and ensures you receive security updates through the standard system upgrade process. Next, install Nginx with the following command:
sudo dnf install nginxConfirm Nginx Installation
Once the installation completes, verify that Nginx installed correctly by checking its version:
nginx -vThe output confirms a successful installation:
nginx version: nginx/1.28.0
Configure Firewall Rules for NGINX
Adjusting Firewall Settings for HTTP and HTTPS
Nginx requires specific ports to be open to handle web traffic. Fedora uses firewalld by default, and it does not automatically configure rules for web servers. For Nginx to serve content, you must add rules for HTTP (port 80) and HTTPS (port 443). For a comprehensive guide to firewalld, see how to install firewalld on Fedora.
First, add the HTTP service to allow incoming traffic on port 80:
sudo firewall-cmd --permanent --zone=public --add-service=httpNext, add the HTTPS service for SSL/TLS traffic on port 443:
sudo firewall-cmd --permanent --zone=public --add-service=httpsApplying Firewall Changes
After adding the services, reload firewalld to apply the new rules:
sudo firewall-cmd --reloadThen, verify that HTTP and HTTPS are now active by listing the enabled services:
sudo firewall-cmd --list-servicesThe output should include both http and https:
cockpit dhcpv6-client http https ssh
Verifying NGINX Service Status
With the firewall configured, verify that Nginx is running. Check the service status:
systemctl status nginxA running service displays output similar to:
● nginx.service - The nginx HTTP and reverse proxy server
     Loaded: loaded (/usr/lib/systemd/system/nginx.service; disabled; preset: disabled)
     Active: active (running) since Sun 2025-12-15 04:35:22 UTC; 5s ago
    Process: 1234 ExecStartPre=/usr/bin/rm -f /run/nginx.pid (code=exited, status=0/SUCCESS)
    Process: 1235 ExecStartPre=/usr/sbin/nginx -t (code=exited, status=0/SUCCESS)
   Main PID: 1236 (nginx)
      Tasks: 3 (limit: 4653)
     Memory: 2.8M
        CPU: 25ms
     CGroup: /system.slice/nginx.service
             ├─1236 "nginx: master process /usr/sbin/nginx"
             └─1237 "nginx: worker process"
Enabling and Starting NGINX Service
If Nginx shows as inactive, start the service and enable it to launch at boot with a single command:
sudo systemctl enable nginx --nowThe --now flag starts the service immediately while enable ensures it starts automatically after each reboot.
Testing NGINX Configuration
Next, confirm Nginx responds correctly by accessing the default landing page. First, find your server’s IP address:
curl -4 icanhazip.comIf curl is not installed, add it with:
sudo dnf install curlThe output displays your server’s public IP address in the format XXX.XXX.XXX.XXX.
Accessing the Default NGINX Page
Open a web browser and navigate to your server’s IP address:
http://your_server_ip
Alternatively, for local testing, use:
http://localhost
You should be greeted with the default NGINX welcome page, confirming that the web server is correctly installed and serving pages.
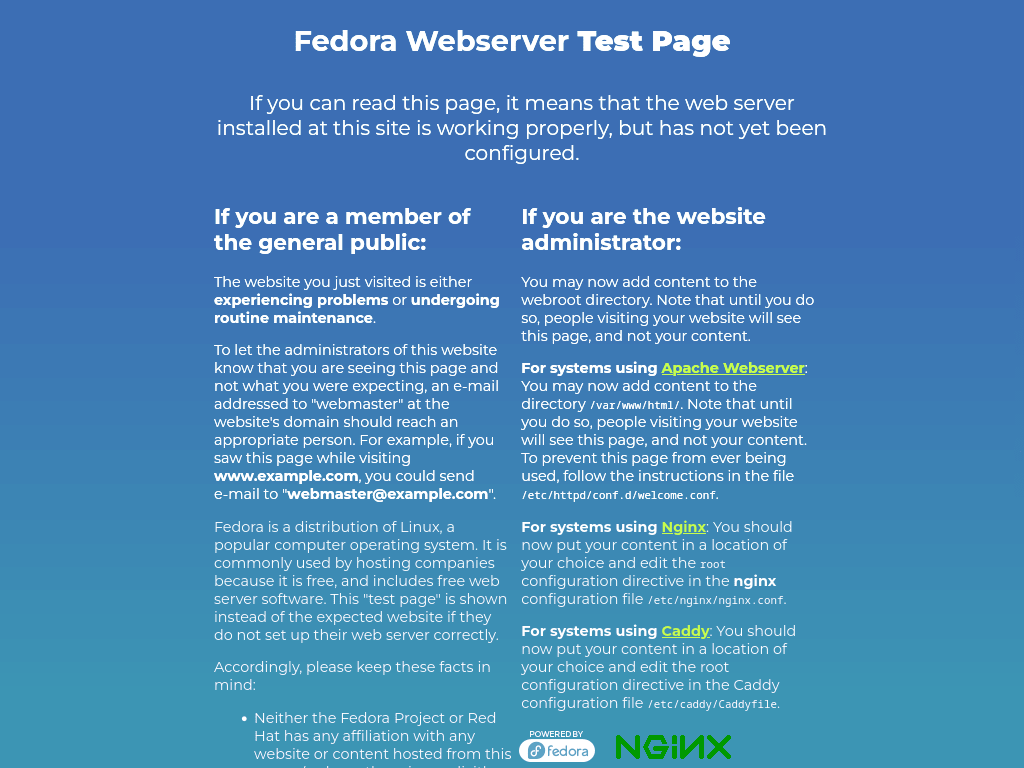
By accessing the NGINX test page, you validate NGINX’s successful setup and readiness for further configuration and deployment of web applications.
Configure Domain Directory Structure for NGINX
To host a domain such as “example.com,” create a dedicated directory structure within /var/www/. Replace “your_domain” with your actual domain name throughout this process.
Create Domain Directory
First, create the domain’s root directory. The -p flag creates any necessary parent directories:
sudo mkdir -p /var/www/your_domain/htmlSet Directory Ownership
Next, assign ownership to your user account so you can manage website files without sudo:
sudo chown -R $USER:$USER /var/www/your_domain/htmlConfigure Directory Permissions
Set directory permissions to 755, which grants full access to the owner and read/execute access to others:
sudo chmod -R 755 /var/www/your_domainFedora’s SELinux policy requires the correct context for Nginx to serve files from custom directories. First, install the SELinux management utilities if not already present:
sudo dnf install policycoreutils-python-utilsThen add the web content context to your domain directory:
sudo semanage fcontext -a -t httpd_sys_content_t "/var/www/your_domain(/.*)?"Apply the SELinux context:
sudo restorecon -Rv /var/www/your_domainFedora defaults to /usr/share/nginx/html for web content, but /var/www provides a more intuitive structure for managing multiple sites.
Create an HTML Test Page For the Nginx Test
Create the Test HTML Page
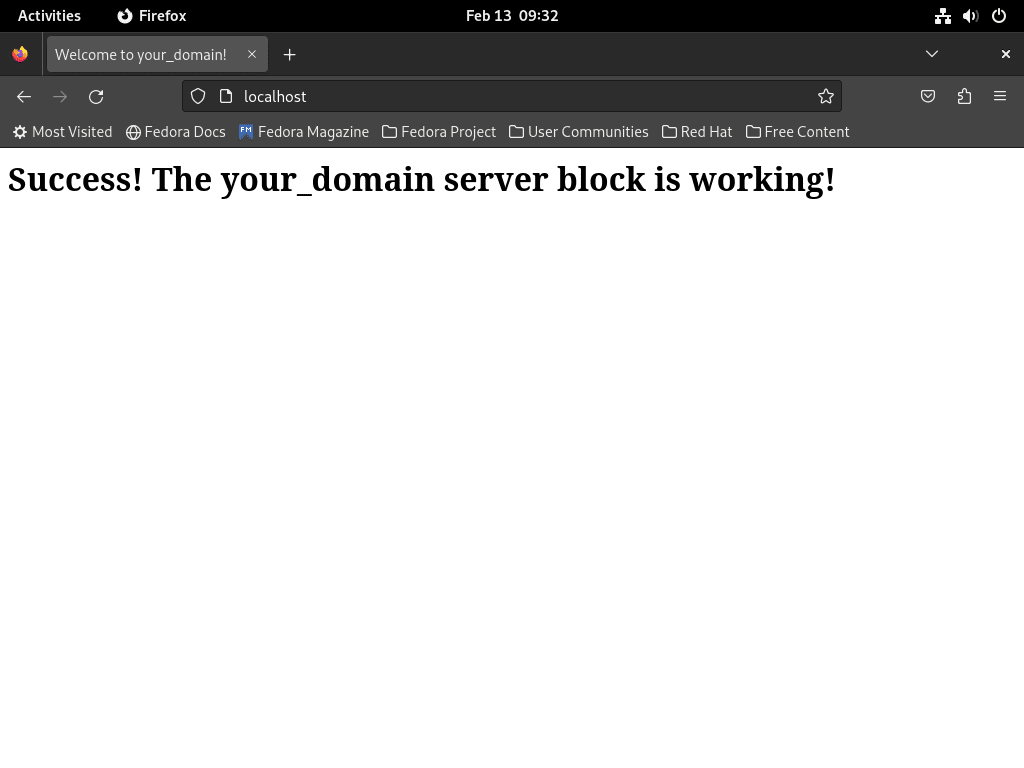
Create a test HTML page to verify your Nginx server block works correctly. Open a new file with nano:
nano /var/www/your_domain/html/index.htmlAdd the following HTML content, replacing your_domain with your actual domain:
<!DOCTYPE html>
<html>
<head>
    <title>Welcome to your_domain!</title>
</head>
<body>
    <h1>Success! The your_domain server block is working!</h1>
</body>
</html>
Save with CTRL+O and exit with CTRL+X. This test page helps confirm your server block configuration before adding production content.
Create Nginx Server Block
Creating Directory Structure for Server Blocks
Begin by establishing the directory structure necessary for NGINX server blocks. Execute the commands below to create the sites-available and sites-enabled directories, which will house your server block configurations:
sudo mkdir /etc/nginx/sites-available
sudo mkdir /etc/nginx/sites-enabled
Configuring the NGINX Main Configuration File
Next, modify the main NGINX configuration file to include your server blocks. Open the nginx.conf file with the following command:
sudo nano /etc/nginx/nginx.confWithin the file, comment out the line that includes the default server blocks and add a line to include server blocks from the sites-enabled directory:
user nginx;
worker_processes auto;
error_log /var/log/nginx/error.log notice;
pid /run/nginx.pid;

include /usr/share/nginx/modules/*.conf;

events {
    worker_connections 1024;
}

http {
    log_format  main  '$remote_addr - $remote_user [$time_local] "$request" '
                      '$status $body_bytes_sent "$http_referer" '
                      '"$http_user_agent" "$http_x_forwarded_for"';

    access_log  /var/log/nginx/access.log  main;

    sendfile            on;
    tcp_nopush          on;
    keepalive_timeout   65;
    types_hash_max_size 4096;

    include             /etc/nginx/mime.types;
    default_type        application/octet-stream;

    # Comment out or remove the default conf.d include:
    # include /etc/nginx/conf.d/*.conf;

    # Add this line to load server blocks from sites-enabled:
    include /etc/nginx/sites-enabled/*.conf;
}
Save your changes with CTRL+O and exit with CTRL+X.
Crafting Your Domain’s Server Block File
Now, create a server block configuration file for your domain. Replace your_domain with your actual domain name:
sudo nano /etc/nginx/sites-available/your_domain.confThen, insert the following configuration, adjusting the server_name and root directives to match your domain and document root:
server {

 listen 80;
 listen [::]:80;

 server_name your_domain www.your_domain;
 root /var/www/your_domain/html;

  index index.html index.htm;

 location / {
  try_files $uri $uri/ =404;
 }
}
After customizing the configuration, save the file (CTRL+O) and exit (CTRL+X).
Enable Nginx Server Block
Next, enable your domain’s server block by creating a symbolic link to the sites-enabled directory:
sudo ln -s /etc/nginx/sites-available/your_domain.conf /etc/nginx/sites-enabled/As a result, NGINX will include your server block configuration during the next reload.
Tweaking Hash Bucket Size in NGINX Configuration
Before finalizing, it’s crucial to adjust the server_names_hash_bucket_size to prevent potential configuration issues. Open the nginx.conf file again:
sudo nano /etc/nginx/nginx.confWithin this file, ensure the following line is uncommented or added:
server_names_hash_bucket_size 64;Testing NGINX Configuration
Before restarting Nginx, validate the configuration to catch syntax errors:
sudo nginx -tA valid configuration produces:
nginx: the configuration file /etc/nginx/nginx.conf syntax is ok
nginx: configuration file /etc/nginx/nginx.conf test is successful
Restarting NGINX to Apply Changes
If the configuration test is successful, proceed to restart NGINX to apply your changes:
sudo systemctl restart nginxVerifying Your Server Block
To confirm your server block is active, navigate to your domain in a web browser.
If the test page does not display as expected, check for any default server blocks in nginx.conf that may need removal.
Secure Nginx with Let’s Encrypt SSL
HTTPS encryption is essential for any production website. Let’s Encrypt provides free SSL certificates that you can automate through Certbot. For additional server protection, consider configuring fail2ban with firewalld on Fedora to protect against brute-force attacks.
Install Certbot for Nginx
Begin by installing the Certbot plugin for Nginx, which automates certificate acquisition and configuration:
sudo dnf install python3-certbot-nginxObtain and Install the SSL Certificate
With Certbot installed, you can now obtain your SSL certificate. Run the following command, replacing the email and domain with your information:
sudo certbot --nginx --agree-tos --redirect --hsts --staple-ocsp --email you@example.com -d www.example.comThis command obtains the certificate and modifies your NGINX configuration to enforce HTTPS by implementing 301 redirects, adding the Strict-Transport-Security header, and enabling OCSP Stapling, enhancing your server’s security posture.
Automate SSL Certificate Renewal
Let’s Encrypt certificates are valid for 90 days. Fedora’s certbot package includes a systemd timer that automatically handles renewals, eliminating the need for manual cron configuration. First, verify the timer is enabled:
systemctl list-timers | grep certbotWhen the timer is active, you should see output similar to:
Sun 2025-12-15 12:00:00 UTC 11h left n/a n/a certbot-renew.timer certbot-renew.service
Otherwise, enable and start the timer manually:
sudo systemctl enable --now certbot-renew.timerFinally, test the renewal process to ensure your configuration works correctly:
sudo certbot renew --dry-runA successful dry run confirms that automatic renewals will work when certificates approach expiration.
Manage Nginx
Manage Nginx Service
Systemctl provides several commands to control the Nginx service. For example, stop the service to take the web server offline:
sudo systemctl stop nginxConversely, start the service to bring Nginx back online:
sudo systemctl start nginxWhen configuration changes require a full process restart, use the restart command:
sudo systemctl restart nginxFor configuration changes that do not require a full restart, use reload to gracefully apply them:
sudo systemctl reload nginxAdditionally, enable Nginx to start automatically at boot:
sudo systemctl enable nginxAlternatively, disable automatic startup if you prefer to start Nginx manually:
sudo systemctl disable nginxAccessing NGINX Server Logs
Navigating to the Logs Directory
To begin, switch to the NGINX logs directory:
cd /var/log/nginx/Then, list the contents to view available log files:
lsWithin this directory, access.log and error.log are the primary files that store incoming server requests and error messages, respectively. Regularly inspecting these logs is crucial for identifying issues, optimizing performance, and maintaining server health.
Monitoring Logs in Real-Time
For live log monitoring, the tail command is particularly useful:
sudo tail -f /var/log/nginx/access.logAs a result, this command continuously outputs new log entries upon their recording, making it ideal for immediate troubleshooting.
Reviewing Recent Log Activity
Similarly, to review the most recent entries, display the last 30 lines of the access log:
sudo tail -f /var/log/nginx/access.log -n 30Advanced Log Filtering Techniques
For more advanced log analysis, grep can be used to filter logs. For instance, to find all entries related to a specific IP address, use:
grep 'IP_ADDRESS' /var/log/nginx/access.logReplace IP_ADDRESS with the actual IP address you’re investigating.
Likewise, to monitor error logs for specific dates, combine grep with a date string:
grep "$(date '+%Y/%m/%d')" /var/log/nginx/error.logAs a result, this filters entries from today’s date.
For a more sophisticated analysis, tools like awk can extract specific fields, such as response codes:
awk '{print $9}' /var/log/nginx/access.log | sort | uniq -c | sort -nConsequently, this sequence prints out the HTTP status codes from the access log, counts them, and sorts them to identify the most frequent codes.
Configuring NGINX Log Rotation
Customizing Log Rotation Settings
To tailor log rotation for NGINX, edit the configuration file in /etc/logrotate.d/:
sudo nano /etc/logrotate.d/nginxThis file specifies NGINX’s log archiving, compression, and rotation management. It defaults to sensible settings and allows customization to conform to particular logging policies or system requirements.
Understanding Logrotate Configuration Options
Here’s a breakdown of key directives in the logrotate configuration:
- Daily, Weekly, Monthly: Sets the log rotation interval. The default is daily, but it can be adjusted to weekly or monthly based on how frequently you want to archive logs.
- Rotate: Specifies the number of old log files to retain. The default is 14, meaning after 14 rotations, the oldest file is deleted.
- Compress: Enables compression of rotated log files to save space. By default, this is enabled.
- Delaycompress: Postpones compression to the next rotation cycle, usually paired with compress.
- Missingok: Allows logrotate to proceed without error if a log file is absent.
- Create: Sets permissions and ownership for new log files post-rotation, ensuring secure and proper access.
- Sharedscripts: Executes the postrotate script once after all logs rotate, which is efficient for reloading services.
Sample NGINX Logrotate Configuration
Fedora’s default logrotate configuration for Nginx is already well-configured:
/var/log/nginx/*.log {
    create 0640 nginx root
    daily
    rotate 10
    missingok
    notifempty
    compress
    delaycompress
    sharedscripts
    postrotate
        /bin/kill -USR1 `cat /run/nginx.pid 2>/dev/null` 2>/dev/null || true
    endscript
}
Best Practices and Considerations
- Default Settings: Unless there’s a compelling reason, using NGINX’s default settings is advisable.
- System Requirements: Adjust settings based on system usage, storage capacity, and specific application needs.
- Security Monitoring: If using tools like fail2ban, ensure log rotation settings do not interfere with log monitoring.
In summary, understanding and configuring these settings helps administrators ensure efficient, secure management of NGINX logs in compliance with their logging policies.
Updating NGINX
Backing Up the NGINX Configuration
Before initiating an update, safeguard your NGINX configuration:
sudo cp /etc/nginx/nginx.conf /etc/nginx/nginx.conf.bakExecuting this command duplicates the nginx.conf file, appending .bak to the filename. This backup serves as a safety net, allowing you to restore your original settings should the update process affect your custom configurations.
Archiving the Entire NGINX Directory
Alternatively, for a comprehensive backup, archive the entire NGINX directory:
sudo tar -czvf nginx_backup.tar.gz /etc/nginx/As a result, this command compiles all configuration files, modules, and related data into a gzipped tar archive, ensuring you have a complete snapshot of your current NGINX setup.
Executing the NGINX Update
Once your backup is complete, update NGINX by refreshing your Fedora repositories and applying the latest updates:
sudo dnf upgrade --refreshConsequently, this command checks for updates and, if available, prompts you to proceed with the upgrade process, ensuring NGINX runs the most recent version with all security patches and improvements.
Note: Always review the changes before applying updates, especially for a service as critical as NGINX, to avoid unexpected downtime or configuration issues.
Remove Nginx
If you no longer need Nginx, remove it along with any orphaned dependencies:
sudo dnf remove nginxNext, run autoremove to clean up packages that were installed as dependencies but are no longer required:
sudo dnf autoremoveVerify the package is removed:
rpm -q nginxThe output confirms removal:
package nginx is not installed
Website files in
/var/www/and custom server blocks in/etc/nginx/sites-available/are not removed by DNF. If you want a complete cleanup, manually delete these directories after backing up any content you wish to keep.
Conclusion
You now have a fully functional Nginx installation with firewall rules configured, server blocks ready for hosting multiple domains, and SSL certificate automation through Let’s Encrypt. For dynamic content, consider setting up Nginx with PHP-FPM on Fedora. Regular system upgrades keep Nginx secure, and the logging and rotation features help you monitor server health over time.

Formatting tips for your comment
You can use basic HTML to format your comment. Useful tags currently allowed:
<code>command</code>command<strong>bold</strong><em>italic</em><a href="URL">link</a><blockquote>quote</blockquote>