
Most self-hosted Fedora systems need a reverse proxy or static site server before the application layer matters, and Nginx still fits that job with a small footprint and straightforward syntax. You can install Nginx on Fedora from the default DNF repositories, then use the same package for static sites, reverse proxies, and the first layer of a PHP stack.
Current Fedora releases ship Nginx through the standard updates repository, and the Fedora 43 package currently resolves to nginx-1.28.2-1.fc43.x86_64. That package can take you from a basic install to firewalld rules, a Fedora-native server block under /etc/nginx/conf.d/, and Let’s Encrypt certificates without switching to third-party repositories.
Install Nginx on Fedora
Update Fedora and install the Nginx package
Refresh package metadata first so Fedora pulls the current Nginx build and any dependency updates cleanly.
sudo dnf upgrade --refreshThese commands use
sudofor tasks that need root privileges. If your account does not have sudo access yet, run them as root or follow the guide on add a user to sudoers on Fedora.
Install Nginx on Fedora with sudo dnf install nginx.
sudo dnf install nginxConfirm the package version before you move on.
rpm -q nginxnginx-1.28.2-1.fc43.x86_64
Enable and verify the Nginx service on Fedora
Fedora installs the package without starting the service, so enable it once and start it immediately with the same command.
sudo systemctl enable --now nginxCheck both the boot-time state and the live service state.
systemctl is-enabled nginx
systemctl is-active nginx
enabled active
For a quick local response check, request the default page headers from the same Fedora host.
curl -I http://127.0.0.1Relevant output includes:
HTTP/1.1 200 OK
Server: nginx/1.28.2
Content-Type: text/html
Content-Length: 8484
Open the default Nginx page in a browser
If you are working on the Fedora host directly, open http://localhost. From another machine, browse to the server hostname or the Fedora IP address that resolves to this system.
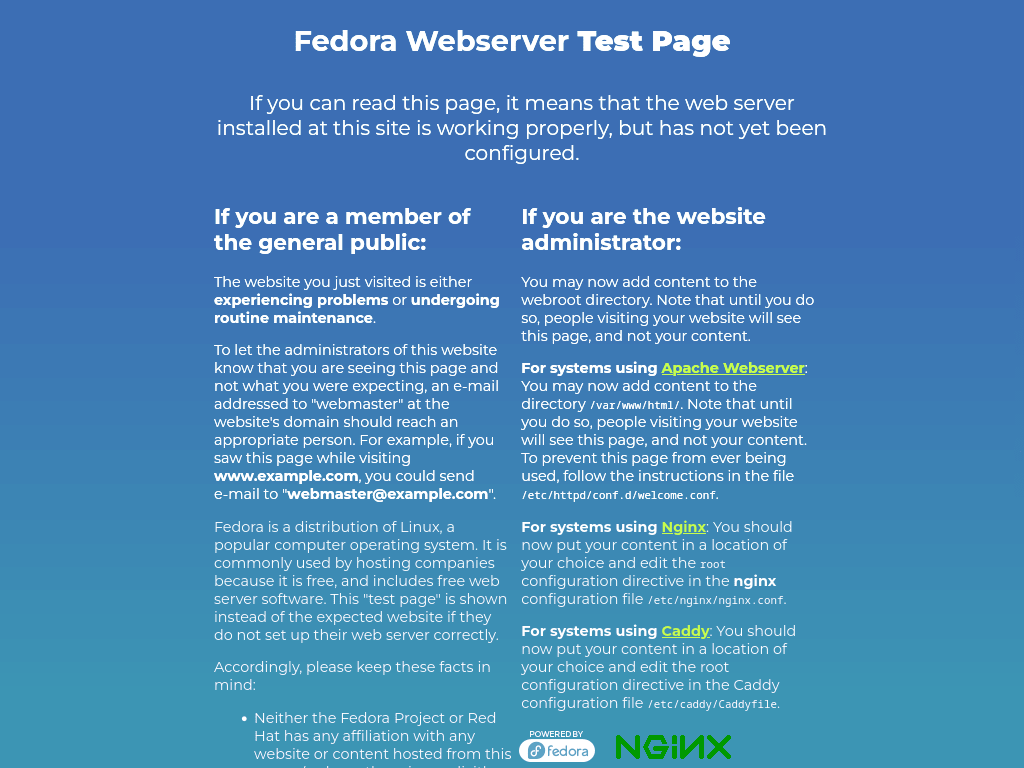
The packaged welcome page proves Nginx is listening. After you add a domain-based server block, a bare IP address can still show this default page until you change the default listener as well.
Configure Firewall Rules for Nginx on Fedora
Allow HTTP and HTTPS through firewalld
Fedora Workstation and Server usually have firewalld active already, but trimmed installs may need the service enabled first. If you do not have firewalld running yet, follow the guide on install firewalld on Fedora before opening web traffic.
Add the HTTP and HTTPS service rules, then reload firewalld so the permanent changes become active.
sudo firewall-cmd --permanent --add-service=http
sudo firewall-cmd --permanent --add-service=https
sudo firewall-cmd --reload
Verify the web firewall rules on Fedora
Query each rule directly so you know both services are active in the current zone.
firewall-cmd --query-service=http
firewall-cmd --query-service=https
yes yes
Configure a Server Block for Nginx on Fedora
Fedora’s packaged Nginx config already loads extra site definitions from /etc/nginx/conf.d/*.conf, so you do not need a Debian-style sites-available and sites-enabled layout. The steps below keep the default Fedora structure and add one domain-specific server block on top of it.
Create the site directory and set the SELinux context
Create the document root first. The -p flag makes any missing parent directories.
sudo mkdir -p /var/www/your_domain/htmlGive your regular user ownership of the custom web root so you can edit site files without switching back to root every time. The $USER variable expands to the account running the command.
sudo chown -R $USER:$USER /var/www/your_domainSet the directory permissions so Nginx can read the files while you retain write access through your own account.
sudo chmod -R 755 /var/www/your_domainFedora’s SELinux policy blocks custom web roots until the directory carries the web-content label. Install the management tools if semanage is not available, then add the correct label and apply it.
sudo dnf install policycoreutils-python-utilsAdd the SELinux label to the custom site directory.
sudo semanage fcontext -a -t httpd_sys_content_t "/var/www/your_domain(/.*)?"Apply the label to the existing files and directories.
sudo restorecon -Rv /var/www/your_domainVerify the final SELinux context before you continue.
ls -Zd /var/www/your_domain/htmlsystem_u:object_r:httpd_sys_content_t:s0 /var/www/your_domain/html
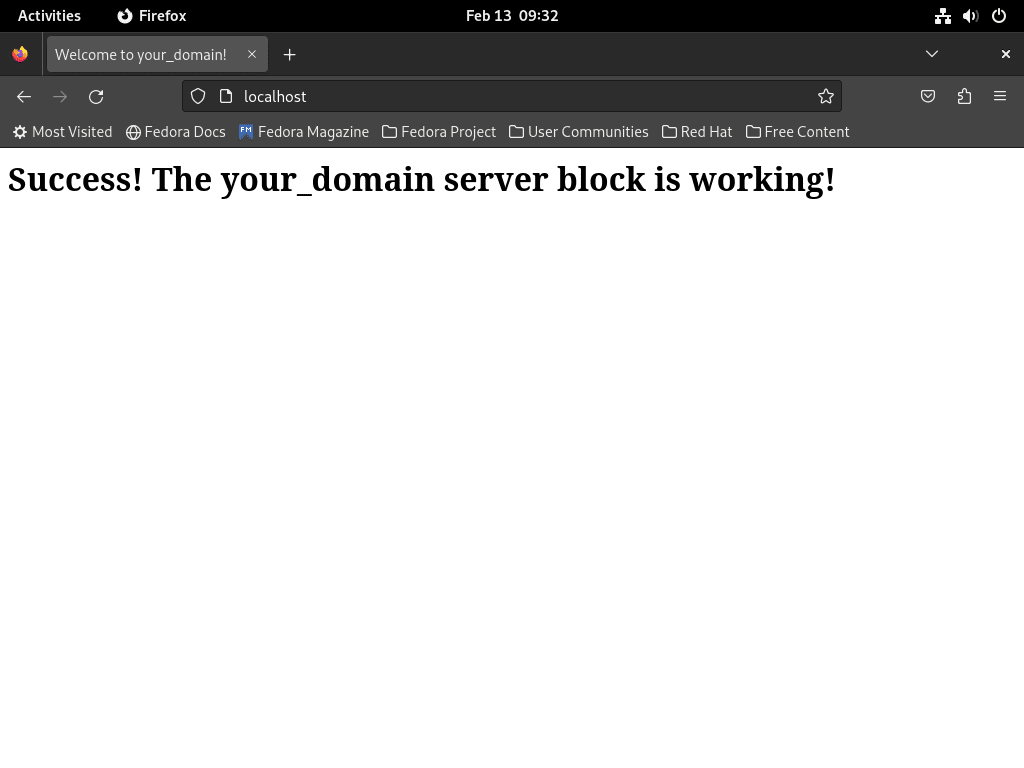
Create a test page for the Fedora Nginx site
Because you own this document root now, you can create a quick test page without sudo.
nano /var/www/your_domain/html/index.htmlAdd the following HTML, replacing your_domain with your real domain name.
<!DOCTYPE html>
<html>
<head>
    <title>Welcome to your_domain!</title>
</head>
<body>
    <h1>Success! The your_domain server block is working!</h1>
</body>
</html>
Save the file, then close the editor. This page gives you an easy domain-based check before you move on to real application content.
Create the Fedora Nginx server block
Fedora already reads extra site definitions from /etc/nginx/conf.d/, so place the domain config there and leave the packaged /etc/nginx/nginx.conf include path alone.
sudo nano /etc/nginx/conf.d/your_domain.confUse a server block that points to the custom document root and matches the domain you plan to browse.
server {

    listen 80;
    listen [::]:80;

    server_name your_domain www.your_domain;
    root /var/www/your_domain/html;

    index index.html index.htm;

    location / {
        try_files $uri $uri/ =404;
    }
}
Save the file, then close the editor. If you plan to serve only one hostname, drop the unused alias from server_name now instead of carrying it into production.
Test and reload the Fedora Nginx configuration
Check the syntax before you reload Nginx so a typo does not take the service down.
sudo nginx -tExpected output:
nginx: the configuration file /etc/nginx/nginx.conf syntax is ok
nginx: configuration file /etc/nginx/nginx.conf test is successful
Reload Nginx only after the syntax test succeeds.
sudo systemctl reload nginxVerify the domain-based Nginx site
Browse to http://your_domain after DNS points to the Fedora host. That request should match the new server_name and serve the custom page from /var/www/your_domain/html.
If the domain still lands on the packaged Fedora page, the request is still hitting the default server rooted at /usr/share/nginx/html. That usually means DNS is pointing somewhere else, the server_name does not match the hostname you used, or the custom file in /etc/nginx/conf.d/ did not load cleanly.
Secure Nginx with Let’s Encrypt on Fedora
Once the domain-based site is loading over HTTP, add TLS. Certbot’s Nginx plugin can request the certificate, write the redirect rules, and tie renewal into Fedora’s systemd timer. For extra brute-force protection around web and SSH services, you can also install Fail2Ban with firewalld on Fedora.
Install Certbot for Nginx on Fedora
Install the Certbot core package and the Nginx plugin from Fedora’s repositories.
sudo dnf install python3-certbot-nginxRequest the certificate and redirect HTTP to HTTPS
Run Certbot against the server block that already answers for your public domain. Replace the sample email and domain with your own values.
sudo certbot --nginx --agree-tos --redirect --hsts --staple-ocsp --email you@example.com -d example.com -d www.example.comThe --redirect flag writes the HTTP-to-HTTPS redirect for you, while --hsts and --staple-ocsp add stricter browser and TLS behavior to the generated config.
Check the automatic renewal path on Fedora
Fedora’s Certbot packages install the certbot-renew.timer unit and leave it enabled by default, but the timer can stay inactive until you start it once. Confirm the installed units first.
systemctl list-unit-files "certbot*"Relevant output includes:
UNIT FILE             STATE   PRESET
certbot-renew.service static  -
certbot-renew.timer   enabled enabled
If the timer is inactive, start it once and then verify both its enabled and active state.
sudo systemctl start certbot-renew.timer
systemctl is-enabled certbot-renew.timer
systemctl is-active certbot-renew.timer
enabled active
After the first certificate is in place, run a dry run to confirm renewal and reload hooks work cleanly.
sudo certbot renew --dry-runA successful dry run ends with a confirmation that the simulated renewals succeeded.
Troubleshoot Nginx on Fedora
Most early Nginx problems on Fedora come from the default server block still answering first, a syntax error in the custom config, or SELinux blocking a new document root.
Fix the Fedora default page still showing instead of your site
If your domain still shows the packaged Nginx page, confirm that the custom config exists in Fedora’s active include path and that the domain matches the server_name line inside it.
grep -R "server_name" /etc/nginx/conf.d
sudo nginx -t
Direct IP requests can still hit the default server rooted at /usr/share/nginx/html. Use the hostname from your server_name directive when you test the custom site.
Fix 403 Forbidden for a custom Nginx site on Fedora
A 403 response usually means the content path has the wrong SELinux label or the directory permissions no longer let Nginx traverse the path.
ls -Zd /var/www/your_domain/html
sudo restorecon -Rv /var/www/your_domain
Relevant output includes the httpd_sys_content_t label on the document root.
system_u:object_r:httpd_sys_content_t:s0 /var/www/your_domain/html
If the label is still wrong after restorecon, rerun the semanage fcontext command from the setup section and make sure the parent directories keep execute permission for other users.
Manage Nginx on Fedora
Manage the Nginx service on Fedora
Use these systemctl commands when you need to stop, start, reload, or change the boot-time behavior of the Nginx service.
sudo systemctl stop nginxStart the service again when you want Nginx back online:
sudo systemctl start nginxWhen configuration changes require a full process restart, use the restart command:
sudo systemctl restart nginxReload the service when you want Nginx to pick up config changes without dropping the main process:
sudo systemctl reload nginxEnable Nginx at boot if this host should start serving traffic automatically after a reboot:
sudo systemctl enable nginxDisable that autostart behavior if you only want to run Nginx manually:
sudo systemctl disable nginxReview Nginx logs on Fedora
Navigate to the Nginx logs directory
To begin, switch to the Nginx logs directory:
cd /var/log/nginx/Then, list the contents to view available log files:
lsWithin this directory, access.log and error.log are the primary files that store incoming server requests and error messages, respectively. Regularly inspecting these logs is crucial for identifying issues, optimizing performance, and maintaining server health.
Monitor Nginx logs in real time
Follow the access log live while you test requests against the server:
sudo tail -f /var/log/nginx/access.logThis keeps new requests visible as they arrive, which is useful while you test rewrites, server blocks, or upstream proxy changes.
Review recent Nginx log activity
Print the last 30 lines when you want a quick snapshot instead of a live stream:
sudo tail -n 30 /var/log/nginx/access.logUse advanced Nginx log filters
For more advanced filtering, the grep command in Linux is a quick way to isolate the lines you care about. To find entries tied to one IP address, use:
grep 'IP_ADDRESS' /var/log/nginx/access.logReplace IP_ADDRESS with the actual IP address you’re investigating.
To isolate today’s error log entries, match the current date string:
grep "$(date '+%Y/%m/%d')" /var/log/nginx/error.logThis limits the results to lines that match today’s date.
If you want a quick status-code summary, extract the ninth access-log field and count the results:
awk '{print $9}' /var/log/nginx/access.log | sort | uniq -c | sort -nThis gives you a quick count of the response codes appearing most often.
Review Nginx log rotation on Fedora
Customize Nginx log rotation settings on Fedora
If you need to review or change Fedora’s Nginx log rotation policy, open the logrotate file first:
sudo nano /etc/logrotate.d/nginxFedora ships sensible defaults here, so most servers only need changes when retention, compression, or compliance requirements differ from the stock setup.
Understand Nginx logrotate options on Fedora
Here’s a breakdown of key directives in the logrotate configuration:
- Daily, Weekly, Monthly: Sets the log rotation interval. The default is daily, but it can be adjusted to weekly or monthly based on how frequently you want to archive logs.
- Rotate: Specifies the number of old log files to retain. The default is 14, meaning after 14 rotations, the oldest file is deleted.
- Compress: Enables compression of rotated log files to save space. By default, this is enabled.
- Delaycompress: Postpones compression to the next rotation cycle, usually paired with compress.
- Missingok: Allows logrotate to proceed without error if a log file is absent.
- Create: Sets permissions and ownership for new log files post-rotation, ensuring secure and proper access.
- Sharedscripts: Executes the postrotate script once after all logs rotate, which is efficient for reloading services.
Review the sample Nginx logrotate configuration on Fedora
Fedora’s default logrotate configuration for Nginx is already well-configured:
/var/log/nginx/*.log {
    create 0640 nginx root
    daily
    rotate 10
    missingok
    notifempty
    compress
    delaycompress
    sharedscripts
    postrotate
        /bin/kill -USR1 `cat /run/nginx.pid 2>/dev/null` 2>/dev/null || true
    endscript
}
Follow Nginx log rotation best practices on Fedora
- Default Settings: Unless there’s a compelling reason, using Nginx’s default settings is advisable.
- System Requirements: Adjust settings based on system usage, storage capacity, and specific application needs.
- Security Monitoring: If using tools like fail2ban, ensure log rotation settings do not interfere with log monitoring.
Fedora’s defaults are usually enough. Change them only when your retention or monitoring requirements differ from the packaged configuration.
Update Nginx on Fedora
Back up the Nginx configuration on Fedora
Back up the main Nginx config before a major package update or a risky config change.
sudo cp /etc/nginx/nginx.conf /etc/nginx/nginx.conf.bakThis gives you a quick rollback copy of the primary config file.
Archive the full Nginx configuration on Fedora
If you want a fuller backup before a major change, archive the whole Nginx directory:
sudo tar -czvf nginx_backup.tar.gz /etc/nginx/That archive preserves the main config, included files, and related Nginx settings in one backup.
Run the Nginx update on Fedora
Once your backup is ready, refresh Fedora’s package metadata and install the latest packaged Nginx updates:
sudo dnf upgrade --refreshdnf refreshes the enabled repositories and installs the current Nginx build Fedora publishes.
Review the package changes before confirming the upgrade on production hosts.
Remove Nginx from Fedora
If you no longer need Nginx, remove it along with any orphaned dependencies:
sudo dnf remove nginxNext, run autoremove to clean up packages that were installed as dependencies but are no longer required:
sudo dnf autoremoveVerify the package is removed:
rpm -q nginxThe output confirms removal:
package nginx is not installed
Website files in
/var/www/, custom server blocks in/etc/nginx/conf.d/, and any certificates under/etc/letsencrypt/are not removed by DNF. Delete those paths only after backing up any content or certificates you still need.
Nginx on Fedora FAQ
No. Fedora’s packaged Nginx config already loads extra site definitions from /etc/nginx/conf.d/*.conf, so custom server blocks normally live there. Use a sites-available and sites-enabled layout only if you build and maintain that structure yourself.
The request is still matching Fedora’s default server rooted at /usr/share/nginx/html, or the hostname does not match the server_name line in your file under /etc/nginx/conf.d/. Test with the real domain instead of the bare IP address, and rerun sudo nginx -t before reloading the service.
A 403 response usually means the custom web root is missing the httpd_sys_content_t SELinux label or the directory permissions no longer let Nginx read the files. Check the label with ls -Zd /var/www/your_domain/html and reapply it with sudo restorecon -Rv /var/www/your_domain if needed.
Conclusion
Nginx is running on Fedora with firewalld rules in place, a domain-based server block under /etc/nginx/conf.d/, and a clear path to HTTPS through Certbot. If this host will serve PHP, the next step is to configure Nginx for PHP-FPM on Fedora. For proxy or hardening work, create a reverse proxy in Nginx or configure security headers in Nginx next.

Formatting tips for your comment
You can use basic HTML to format your comment. Useful tags currently allowed in published comments:
<code>command</code>command<strong>bold</strong><em>italic</em><blockquote>quote</blockquote>