
Nextcloud Desktop keeps local folders synchronized with a self-hosted or provider-managed Nextcloud account, so the same files stay available across your Ubuntu workstation, laptop, and server account. To install Nextcloud Desktop on Ubuntu 26.04 (resolute), 24.04 (noble), or 22.04 (jammy), choose between Ubuntu’s repository package, the Nextcloud Launchpad PPA, Nextcloud’s official AppImage, or the Flathub package verified for Nextcloud GmbH.
This page installs the desktop sync client, not the Nextcloud server. If you searched for “Nextcloud client Ubuntu,” “nextcloud-desktop package,” or “Nextcloud AppImage install Ubuntu,” those are all client-side paths for connecting to an existing server account.
Install Nextcloud Desktop on Ubuntu
Ubuntu already includes the nextcloud-desktop package in the Universe repository, but the version differs by release. Ubuntu 26.04 currently ships a 4.0.x build, while Ubuntu 24.04 and 22.04 stay on older 3.x builds unless you use the PPA, AppImage, or Flatpak route.
| Method | Source | Update Path | Best Fit |
|---|---|---|---|
| Ubuntu repository | Ubuntu Universe package | apt upgrade | Ubuntu 26.04 users who want the simplest native package, or 24.04/22.04 users who prefer distro-stable builds |
| Nextcloud Launchpad PPA | Nextcloud development team PPA | apt upgrade | Ubuntu 24.04 and 22.04 users who want a newer native package after confirming the PPA candidate appears |
| Official AppImage | Nextcloud’s Linux AppImage download | update-nextcloud | x86_64 users who want the upstream-provided Linux package without adding repositories |
| Flatpak from Flathub | Flathub package verified for Nextcloud GmbH | flatpak update | Users who prefer Flathub-managed updates and accept the permissions a sync client needs |
The Ubuntu repository and AppImage paths avoid third-party APT sources. Use the PPA mainly when the Ubuntu 24.04 or 22.04 repository version is too old for your sync setup and you still want a native package instead of AppImage or Flatpak.
Check the Ubuntu repository candidate before you decide whether you need another method:
apt-cache policy nextcloud-desktopCurrent Ubuntu package metadata shows these default candidates:
| Ubuntu Release | Repository Candidate | Package Source |
|---|---|---|
| 26.04 (resolute) | 4.0.6-1 | resolute/universe |
| 24.04 (noble) | 3.11.0-1.1build4 | noble/universe |
| 22.04 (jammy) | 3.4.2-1ubuntu1 | jammy/universe |
The
nextcloud-desktop,nautilus-nextcloud,dolphin-nextcloud, andcaja-nextcloudpackages come from Ubuntu’s Universe component. Standard desktop installs usually have Universe enabled; minimal or customized systems can enable it with the guide to enable Universe and Multiverse on Ubuntu.
Install Nextcloud Desktop from Ubuntu Repository
Use Ubuntu’s repository package when you want the lowest-maintenance native package path and do not need a newer upstream build on Ubuntu 24.04 or 22.04.
Update your package index and installed packages first:
sudo apt update && sudo apt upgradeThese commands use
sudofor tasks that need root privileges. If your user is not in the sudoers file yet, run the commands as root or follow the guide on how to add and manage sudo users on Ubuntu.
Install the base sync client:
sudo apt install nextcloud-desktopVerify that APT installed the package:
dpkg-query -W -f='${db:Status-Abbrev} ${binary:Package}\n' nextcloud-desktopA successful install returns:
ii nextcloud-desktop
For file manager overlay icons that show sync status, install the matching integration package for your desktop environment. The default Ubuntu GNOME desktop uses Nautilus:
sudo apt install nautilus-nextcloudKubuntu users can use dolphin-nextcloud, and Ubuntu MATE users can use caja-nextcloud. These integration packages depend on nextcloud-desktop, so they install the client too when it is not already present.
Install Nextcloud Desktop via PPA
The Nextcloud Launchpad PPA publishes native package builds for Ubuntu 26.04, 24.04, and 22.04. Use it only after the candidate check below shows the PPA source on your system. It is most useful on Ubuntu 24.04 and 22.04, where the default repository still carries older 3.x clients.
The PPA description notes that Ubuntu 24.04 and 22.04 need patched or backported Qt and KDE Framework libraries for newer client builds. If you prefer to avoid those backports, use Ubuntu’s repository package, the official AppImage, or Flatpak instead.
Install the repository helper package, add the stable PPA, and refresh APT metadata:
sudo apt update
sudo apt install software-properties-common
sudo add-apt-repository ppa:nextcloud-devs/client -y
sudo apt update
Confirm the candidate now comes from the Nextcloud PPA before installing:
apt-cache policy nextcloud-desktopRelevant output should include a ppa.launchpadcontent.net/nextcloud-devs/client source line for your Ubuntu codename. On Ubuntu 24.04, the source line looks like this:
500 https://ppa.launchpadcontent.net/nextcloud-devs/client/ubuntu noble/main amd64 Packages
Install the client after the PPA candidate appears:
sudo apt install nextcloud-desktopInstall a file manager integration package if you want overlay icons. On default Ubuntu GNOME, use:
sudo apt install nautilus-nextcloudAn alpha PPA also exists for development builds, but keep it off everyday systems unless you are deliberately testing pre-release packages.
Install Official Nextcloud AppImage on Ubuntu
Nextcloud’s download page says the Linux package provided directly by Nextcloud is the AppImage. This is the cleanest option when you want the upstream-provided file and do not want to add an APT source or Flatpak remote.
The current AppImage download targets x86_64 systems. Check your architecture before using this method:
uname -mContinue with the AppImage method when the output is:
x86_64
If the command returns aarch64 or another architecture, use the Ubuntu repository or Flathub method instead.
The AppImage needs the older FUSE 2 compatibility library. Ubuntu 26.04 and 24.04 use libfuse2t64, while Ubuntu 22.04 uses libfuse2:
sudo apt update
. /etc/os-release
if [ "$VERSION_ID" = "22.04" ]; then
  sudo apt install wget libfuse2
else
  sudo apt install wget libfuse2t64
fi
Create a short updater command named update-nextcloud for the AppImage. The script stores temporary downloads under your user cache, refuses non-x86_64 systems, replaces the active AppImage only after a non-empty download is ready, and leaves your package-manager methods untouched. The wget examples guide covers more download options, and the chmod command guide explains the execute bit used in the script.
Create the helper directory and make it available in the current terminal:
mkdir -p "$HOME/.local/bin"
export PATH="$HOME/.local/bin:$PATH"
Write the updater script:
cat > "$HOME/.local/bin/update-nextcloud" <<'EOF'
#!/usr/bin/env bash
set -euo pipefail

url="https://download.nextcloud.com/desktop/releases/Linux/latest"
app_dir="$HOME/Applications"
cache_dir="${XDG_CACHE_HOME:-$HOME/.cache}/nextcloud-appimage"
target="$app_dir/Nextcloud.AppImage"
download="$cache_dir/Nextcloud.AppImage.download"

if [ "$(uname -m)" != "x86_64" ]; then
  echo "This AppImage download is for x86_64 systems."
  exit 1
fi

if ! command -v wget >/dev/null 2>&1; then
  echo "Missing wget. Install it with: sudo apt install wget"
  exit 1
fi

mkdir -p "$app_dir" "$cache_dir"
trap 'rm -f "$download"' EXIT

echo "Downloading Nextcloud AppImage..."
wget -q -O "$download" "$url"

if [ ! -s "$download" ]; then
  echo "Download failed or produced an empty file."
  exit 1
fi

chmod +x "$download"

if [ -f "$target" ] && cmp -s "$download" "$target"; then
  echo "Nextcloud AppImage is already current at $target"
  exit 0
fi

mv "$download" "$target"
echo "Nextcloud AppImage is ready at $target"
EOF
Make the helper executable:
chmod +x "$HOME/.local/bin/update-nextcloud"Confirm the helper is ready:
test -x "$HOME/.local/bin/update-nextcloud" && echo "update-nextcloud is ready"The check returns:
update-nextcloud is ready
The export command above makes update-nextcloud available in the current terminal. On default Ubuntu accounts, a new login adds ~/.local/bin automatically once that directory exists.
Run the helper to download or update the AppImage:
update-nextcloudVerify the file is executable:
test -x "$HOME/Applications/Nextcloud.AppImage" && echo "Nextcloud AppImage is executable"The check returns:
Nextcloud AppImage is executable
Launch the AppImage from a graphical desktop session:
"$HOME/Applications/Nextcloud.AppImage"The AppImage does not receive APT or Flatpak updates. To update later, run
update-nextcloudagain; it downloads to the cache first and replaces the active AppImage only after the new file is ready.
Install Nextcloud Desktop via Flatpak
Flatpak installs the Flathub package verified for Nextcloud GmbH and updates it independently from Ubuntu’s APT packages. Flathub currently labels the app as potentially unsafe because a desktop sync client needs broad file and network access, so choose this method when Flathub-managed updates matter more than native package integration.
Flatpak is not pre-installed on Ubuntu. If you have not set it up yet, follow the guide to install Flatpak on Ubuntu before continuing.
Add Flathub if the remote is not already configured:
sudo flatpak remote-add --if-not-exists flathub https://dl.flathub.org/repo/flathub.flatpakrepoVerify the remote appears at system scope:
flatpak remotes --columns=name,options | grep '^flathub'The expected remote line is:
flathub system
Install Nextcloud Desktop from Flathub:
sudo flatpak install flathub com.nextcloud.desktopclient.nextcloud -yVerify the installed Flatpak reference:
flatpak info --show-ref com.nextcloud.desktopclient.nextcloudA system-scope Flathub install returns the stable application ref:
app/com.nextcloud.desktopclient.nextcloud/x86_64/stable
Launch Nextcloud Desktop on Ubuntu
Launch Nextcloud Desktop from a normal graphical Ubuntu session. A terminal in an SSH or TTY-only session can install the package, but it cannot display the desktop client window.
For Ubuntu repository or PPA installations, use:
nextcloudFor the AppImage method, use the path where you saved the file:
"$HOME/Applications/Nextcloud.AppImage"For Flatpak installations, use:
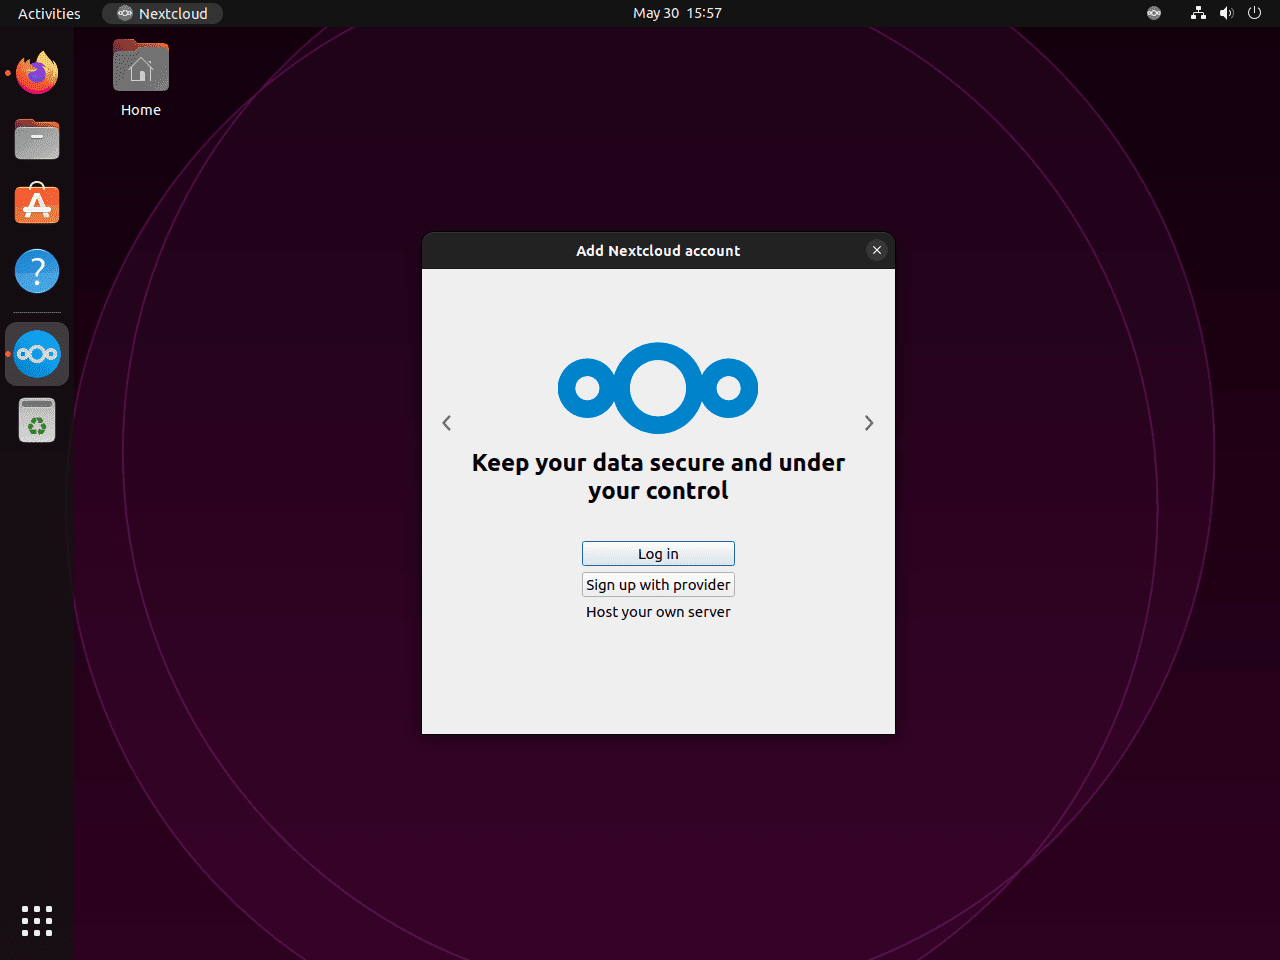
flatpak run com.nextcloud.desktopclient.nextcloudRepository, PPA, and Flatpak installs also appear in your desktop application menu. Search for “Nextcloud” in Activities and open the desktop client:
Connect to Your Nextcloud Server
On first launch, Nextcloud Desktop asks for your server URL. Enter the URL for your self-hosted or provider-managed account, authenticate in the browser window, then choose which folders to synchronize and where to store them locally.
The official Nextcloud desktop client manual covers selective sync, conflict handling, automatic updates, and advanced client settings after the first connection is complete.
Manage Nextcloud Desktop on Ubuntu
Update Nextcloud Desktop
For Ubuntu repository or PPA installations, upgrade only the Nextcloud package with:
sudo apt install --only-upgrade nextcloud-desktopFor AppImage installations, run the helper created in the AppImage section. The moving latest URL redirects to the current Linux AppImage filename:
update-nextcloudFor Flatpak installations, update the app from Flathub:
sudo flatpak update com.nextcloud.desktopclient.nextcloud -ySwitch Between Installation Methods
Remove the current package method before installing another one so you do not end up with multiple Nextcloud launchers. Your synchronized files stay in the local folder you selected during setup, but the new package may ask you to sign in again.
Remove Nextcloud Desktop from Ubuntu
For Ubuntu repository or PPA installations, remove the client and any file manager integration package you installed:
sudo apt remove nextcloud-desktop nautilus-nextcloud dolphin-nextcloud caja-nextcloudVerify the base package is no longer installed:
dpkg-query -W -f='${db:Status-Abbrev} ${binary:Package}\n' nextcloud-desktop 2>/dev/null | grep '^ii' || echo "nextcloud-desktop not installed"The expected result after removal is:
nextcloud-desktop not installed
If you used the PPA method, remove the source after uninstalling the package:
sudo add-apt-repository --remove ppa:nextcloud-devs/client -y
sudo apt update
For more source-management options, use the guide to remove a PPA from Ubuntu.
For AppImage installations, delete the downloaded executable, helper command, and article-created cache directory:
rm -f "$HOME/Applications/Nextcloud.AppImage" "$HOME/Applications/Nextcloud.AppImage.download" "$HOME/.local/bin/update-nextcloud"
rm -rf "${XDG_CACHE_HOME:-$HOME/.cache}/nextcloud-appimage"
For Flatpak installations, remove the app and then clean unused runtimes:
sudo flatpak remove com.nextcloud.desktopclient.nextcloud -y
sudo flatpak uninstall --unused -y
Verify the Flatpak app ID is gone:
sudo flatpak list --app --columns=application | grep -Fx com.nextcloud.desktopclient.nextcloud || echo "NOT_INSTALLED"NOT_INSTALLED
Flatpak may leave per-user settings under your home directory. Check for that directory before deleting it:
test -d "$HOME/.var/app/com.nextcloud.desktopclient.nextcloud" && echo "Flatpak settings remain"If the check prints a result and you want to reset only the Flatpak app settings, remove that sandbox directory after confirming your synced folders are safe:
rm -rf "$HOME/.var/app/com.nextcloud.desktopclient.nextcloud"Package removal does not delete synchronized folders. Before deleting local Nextcloud folders manually, confirm whether they contain files that have not synced to the server yet.
Troubleshoot Nextcloud Desktop on Ubuntu
PPA Candidate Still Shows the Ubuntu Package
If apt-cache policy nextcloud-desktop still shows only archive.ubuntu.com after adding the PPA, APT did not fetch the PPA metadata successfully.
Err: https://ppa.launchpadcontent.net/nextcloud-devs/client/ubuntu noble InRelease
  Could not connect to ppa.launchpadcontent.net:443
Retry the metadata refresh first:
sudo apt update
apt-cache policy nextcloud-desktop
If the PPA remains unreachable, use the Ubuntu repository, official AppImage, or Flatpak method instead of forcing an older cached PPA state.
AppImage Does Not Start
If the AppImage fails immediately, confirm that the FUSE compatibility package from the AppImage section is installed for your Ubuntu release. Ubuntu 26.04 and 24.04 need libfuse2t64; Ubuntu 22.04 needs libfuse2.
dpkg -l libfuse2t64 libfuse2 2>/dev/null | grep '^ii'Install the missing package with the release-aware command from the AppImage method, then launch the AppImage again from a graphical session.
Nextcloud Desktop Does Not Sync Files
If files stop syncing, open the Nextcloud tray icon and review the activity or log window. Common causes include an expired login token, network interruption, a missing local sync folder, or a conflict that needs manual resolution.
Nextcloud Desktop Shows Server Replied 403
A 403 response means the server refused the request. Check that the server URL points to the correct Nextcloud instance, confirm your account is still enabled, then review any reverse proxy, WebDAV, two-factor, or app-password rules on the server side.
Conclusion
Nextcloud Desktop is ready on Ubuntu with the package source that matches your update preference: Ubuntu’s repository, the Launchpad PPA, Nextcloud’s AppImage, or Flathub. After the client syncs reliably, self-hosting your own backend with containers is a natural next step; start with the guide to install Docker on Ubuntu.

Formatting tips for your comment
You can use basic HTML to format your comment. Useful tags currently allowed in published comments:
<code>command</code>command<strong>bold</strong><em>italic</em><a href="https://example.com">link</a><blockquote>quote</blockquote>