
MakeMKV converts DVDs and Blu-ray discs into MKV files while preserving video tracks, audio streams, subtitles, and chapter information. You can install MakeMKV on Ubuntu through a community PPA, Flathub, or Snapcraft, then use it to back up a personal disc collection, feed a media server like Plex on Ubuntu or Jellyfin on Ubuntu, or archive aging discs before they degrade. Use MakeMKV only for discs you own or are otherwise allowed to copy, especially when copy protection is involved.
Install MakeMKV on Ubuntu
Ubuntu 26.04 LTS, 24.04 LTS, and 22.04 LTS currently have working MakeMKV PPA packages. Flatpak and Snap use store-backed packages, so those methods are not tied to one Ubuntu release.
| Method | Source | Channel | Updates | Best Fit |
|---|---|---|---|---|
| APT PPA | MakeMKV beta PPA | Community PPA packages | APT-managed updates | Direct optical-drive access |
| Flatpak | Flathub | Community Flatpak package | flatpak update | Flathub-based desktops |
| Snap | Snapcraft | Strict-confined community snap | Background snap refreshes | Snap-based desktops |
Most Ubuntu desktop users should choose the APT PPA method because it installs normal system binaries, exposes both makemkv and makemkvcon directly in /usr/bin, and avoids extra packaging layers around optical-drive access. The PPA is still a third-party source, so use Flatpak or Snap instead if you prefer store-managed packages and are comfortable with their confinement model.
If you came here looking for the official Linux download, MakeMKV publishes upstream Linux source archives on the MakeMKV for Linux forum page. PPA, Flatpak, and Snap are easier to maintain on Ubuntu because each method has a package-manager install, update, and removal workflow.
Method 1: Install MakeMKV via APT PPA on Ubuntu
Update Ubuntu System Packages
Refresh your package index and apply any pending upgrades before adding new software:
sudo apt update && sudo apt upgradeThese commands use
sudofor tasks that need root privileges. If your user is not in the sudoers file yet, run the commands as root or follow the guide on how to add and manage sudo users on Ubuntu.
Add the MakeMKV PPA
A PPA (Personal Package Archive) is a third-party repository hosted on Launchpad that provides packages not included in Ubuntu’s default repositories. Import the MakeMKV beta PPA to access the latest packages:
sudo add-apt-repository ppa:heyarje/makemkv-beta -yRefresh the package cache so APT picks up packages from the new repository:
sudo apt updateConfirm APT sees both PPA packages before installing them:
apt-cache policy makemkv-bin makemkv-ossRelevant output on Ubuntu 26.04:
makemkv-bin:
  Installed: (none)
  Candidate: 1.18.3-1~resolute
  Version table:
     1.18.3-1~resolute 500
        500 https://ppa.launchpadcontent.net/heyarje/makemkv-beta/ubuntu resolute/main amd64 Packages
makemkv-oss:
  Installed: (none)
  Candidate: 1.18.3-1~resolute
  Version table:
     1.18.3-1~resolute 500
        500 https://ppa.launchpadcontent.net/heyarje/makemkv-beta/ubuntu resolute/main amd64 Packages
Install the MakeMKV Packages
MakeMKV ships as two packages: makemkv-oss contains the open-source GUI and library components, while makemkv-bin contains the proprietary binary components. Install both packages together:
sudo apt install makemkv-oss makemkv-binConfirm both user-facing commands are now available:
command -v makemkv makemkvconExpected output:
/usr/bin/makemkv
/usr/bin/makemkvcon
Register the MakeMKV Beta Key
MakeMKV’s DVD functionality works without a registration key, but Blu-ray processing requires either a purchased key or an active beta key when the beta program provides one. The free beta key changes periodically, and the application can stop working when the posted key expires.
Check the official MakeMKV beta key forum thread before copying any key from tutorials or comments. If the official thread shows an expired date and no replacement key, wait for MakeMKV to post an update or use a purchased key. After launching MakeMKV, open Help > Register and paste the active key.
Method 2: Install MakeMKV via Flatpak on Ubuntu
Flatpak is not pre-installed on Ubuntu. If you have not set it up yet, install it with
sudo apt install flatpakand restart your session before continuing. For detailed setup including the Flathub repository, follow our Flatpak installation guide for Ubuntu.
With Flatpak and Flathub configured, install the community MakeMKV package from Flathub:
sudo flatpak install flathub com.makemkv.MakeMKV -yVerify the installation:
flatpak list --app --columns=application,version,branch,origin | grep '^com.makemkv.MakeMKV'Relevant fields should show the app ID, version, branch, and origin:
com.makemkv.MakeMKV 1.18.3 stable flathub
The current Flathub manifest already grants MakeMKV device access for optical drives, plus access to your Videos folder and ~/.MakeMKV. Because those permissions are broad, treat this method as a Flathub packaging choice rather than stronger isolation. If MakeMKV cannot detect a drive after a Flatpak install, start with the host device and group checks in the troubleshooting section instead of adding a redundant device override.
Method 3: Install MakeMKV via Snap on Ubuntu
Ubuntu includes Snap by default on standard installs. If the snap command is missing on a minimal or customized system, install snapd first:
sudo apt update && sudo apt install snapdInstall the strict-confined community snap from Snapcraft:
sudo snap install makemkvVerify the installation:
snap list makemkv | awk 'NR==1 {print $1, $2, $4} /^makemkv/ {print $1, $2, $4}'Relevant fields should show the installed version and tracking channel:
Name Version Tracking
makemkv 1.18.3 latest/stable
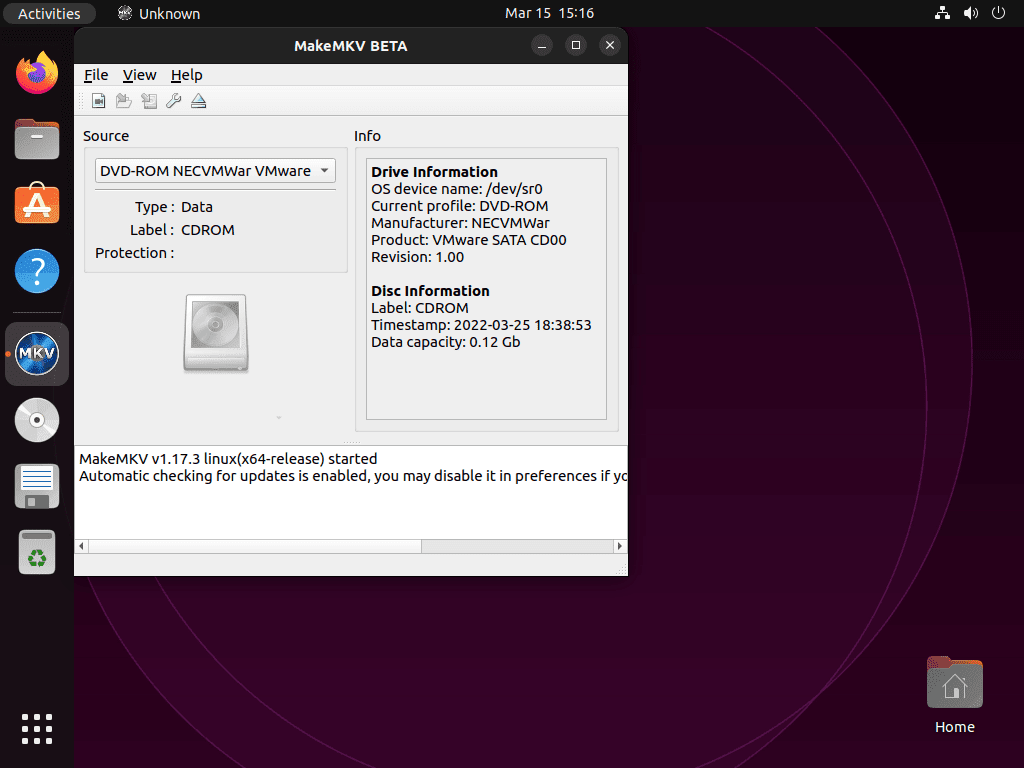
Launch MakeMKV on Ubuntu
MakeMKV Terminal Launch Commands
The terminal command depends on how MakeMKV was installed. For APT installations:
makemkvFor Flatpak installations:
flatpak run com.makemkv.MakeMKVFor Snap installations:
snap run makemkvUse makemkvcon from the Terminal
The APT PPA packages install makemkvcon, MakeMKV’s command-line companion, as a normal shell command. The Snap package also exposes makemkvcon as a command alias. Use it when you want to scan a disc or rip titles from a terminal session:
makemkvcon info disc:0To convert every title from the first detected disc into MKV files, create a writable output directory and pass it as the final argument:
mkdir -p ~/Videos/MakeMKV
makemkvcon mkv disc:0 all ~/Videos/MakeMKV
For deeper automation, MakeMKV documents options such as robot mode, progress output, direct I/O control, and streaming in the official makemkvcon usage reference.
Launch MakeMKV from Ubuntu Desktop
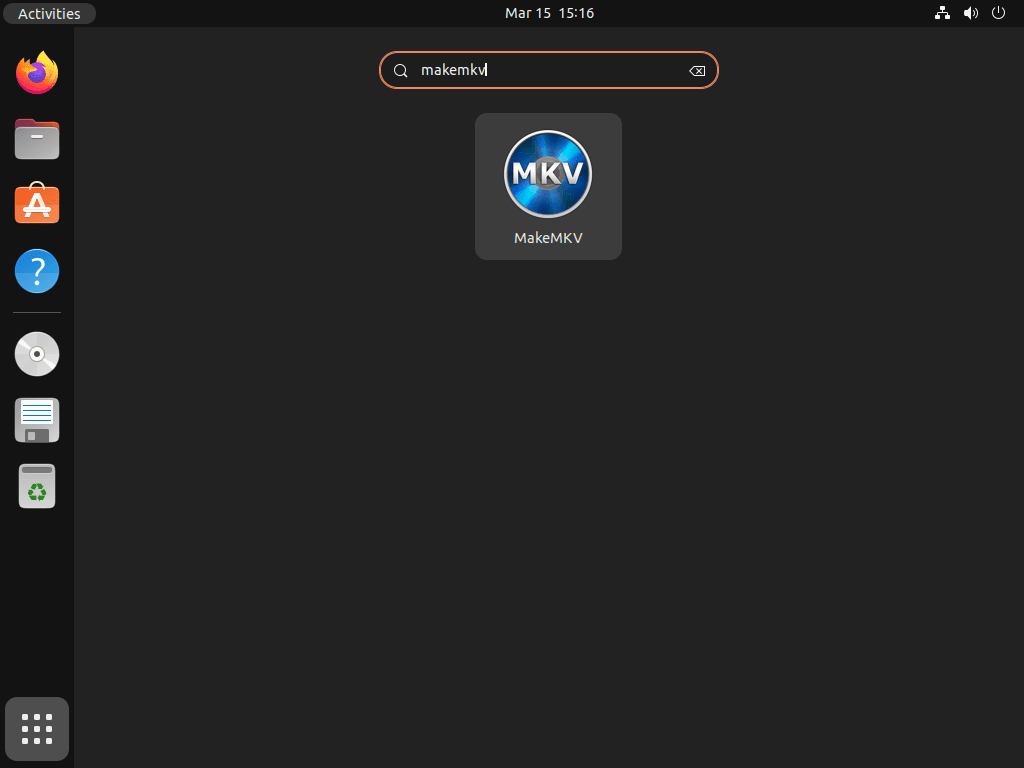
All three methods register a desktop entry. Open the Activities overview, type MakeMKV in the search bar, and click the icon to launch the application.
Manage MakeMKV on Ubuntu
Update MakeMKV on Ubuntu
For APT installations, MakeMKV updates arrive through your regular system upgrade:
sudo apt update && sudo apt upgradeWhen a new PPA build is available, APT lists makemkv-bin and makemkv-oss with the rest of your upgrade set.
For Flatpak installations:
sudo flatpak update com.makemkv.MakeMKVSnap installations update automatically in the background. To trigger a manual refresh:
sudo snap refresh makemkvRemove MakeMKV from Ubuntu
For APT installations, remove both MakeMKV packages:
sudo apt remove makemkv-oss makemkv-binVerify neither package remains installed:
dpkg-query -W -f='${db:Status-Abbrev} ${binary:Package}\n' makemkv-bin makemkv-oss 2>/dev/null | grep '^ii' || echo "MakeMKV packages are not installed"MakeMKV packages are not installed
Remove the PPA repository so APT stops checking it for updates:
sudo add-apt-repository --remove ppa:heyarje/makemkv-beta -y
sudo apt update
Confirm the removed PPA is no longer a package source:
apt-cache policy makemkv-bin | grep 'ppa.launchpadcontent.net/heyarje/makemkv-beta' || echo "MakeMKV PPA is not active"MakeMKV PPA is not active
For Flatpak installations, remove the application package first:
sudo flatpak remove com.makemkv.MakeMKV -yConfirm the Flatpak app is gone:
flatpak list --app --columns=application | grep -Fx com.makemkv.MakeMKV || echo "MakeMKV Flatpak is not installed"MakeMKV Flatpak is not installed
The following command permanently deletes Flatpak-stored MakeMKV data including settings and cached files. Skip this step if you plan to reinstall later.
rm -rf ~/.var/app/com.makemkv.MakeMKVFor Snap installations:
sudo snap remove makemkvConfirm the snap is no longer installed:
snap list makemkv 2>/dev/null || echo "MakeMKV Snap is not installed"MakeMKV Snap is not installed
Remove MakeMKV Configuration Files
MakeMKV stores settings and your registration key in a hidden directory under your home folder. Remove it only after confirming you no longer need the configuration:
The following command permanently deletes your MakeMKV settings, including your registration key and conversion preferences. If you plan to reinstall later, keep this directory intact.
rm -rf ~/.MakeMKVTroubleshoot MakeMKV on Ubuntu
MakeMKV Optical Drive Not Detected
If MakeMKV does not detect your DVD or Blu-ray drive, the issue is usually a missing group membership. Optical devices on Ubuntu are owned by the cdrom group, and your user account must belong to it. Check the device permissions first:
stat -c '%A %U %G %t:%T %n' /dev/sr0brw-rw---- root cdrom b:0 /dev/sr0
The third field should be root, and the fourth field should be cdrom. If your user is not already in the cdrom group, add it:
sudo usermod -aG cdrom $USERThe $USER variable automatically resolves to your current username. Log out and log back in for the group change to take effect, then confirm membership:
groupsThe output should now include cdrom in your list of groups.
Check MakeMKV Flatpak Device Permissions
The Flathub package currently grants device access by default. Verify the metadata before adding custom overrides, because a broad override can make troubleshooting harder to reason about later:
flatpak remote-info --show-metadata flathub com.makemkv.MakeMKV | grep -E 'devices=|filesystems='devices=all; filesystems=xdg-videos;xdg-config/kdeglobals:ro;~/.MakeMKV:create;
If that output is present and the drive still does not appear, restart MakeMKV, recheck the cdrom group membership, and confirm the drive appears as a host device such as /dev/sr0.
MakeMKV Beta Key Expired or Missing
If MakeMKV displays a registration error, limited functionality warning, or refuses to process Blu-ray discs, your beta key has likely expired. Check the official beta key thread for an active key; if the thread only lists an expired date, wait for an update or use a purchased key. Enter an active key via Help > Register in the application menu. DVD ripping works without a key.
Conclusion
After you install MakeMKV on Ubuntu, the PPA method gives the most direct desktop and command-line workflow, while Flatpak and Snap remain useful for readers who prefer those package ecosystems. To play your ripped files, install VLC media player on Ubuntu. For re-encoding to smaller file sizes or device-specific formats, HandBrake on Ubuntu pairs well with MakeMKV in a rip-then-encode workflow. For upstream release notes and project information, visit the MakeMKV official website.

After the installation, you’ll need a registration key to use MakeMKV. The current beta key can be found in this forum post.
https://forum.makemkv.com/forum/viewtopic.php?t=1053
I spent a whole day on this guide but it doesn’t work for me with LinuxMInt 22.1 -> they changed something with the lib-folders …
Interesting: installing (and register) MakeMKV from the repository and VLC as Flatpak adding “MakeMKV plugin for VLC” seams to work. Maybe you can give us a hint which way is finally the best for other UBUNTU (or Debian) based distributions? Thank you!
Thanks for sharing your experience, gilbert. Linux Mint sometimes structures library paths differently than Ubuntu, which can cause issues with Ubuntu PPAs. Your solution using Flatpak is actually the safest approach for Linux Mint users because Flatpak bundles all dependencies and avoids system library conflicts entirely.
For Ubuntu-based distributions like Linux Mint, Flatpak is generally the best choice for third-party applications. The PPA method works reliably on Ubuntu itself, but Mint’s customizations can introduce compatibility issues. Snap is another option that works well across distributions, though Flatpak typically has better desktop integration on Mint.
The combination you found (repository MakeMKV plus Flatpak VLC with the plugin) works because the core MakeMKV libraries installed system-wide, while VLC’s Flatpak runtime provides its own isolated plugin environment. If you encounter any issues with that setup, try installing MakeMKV via Flatpak as well for complete isolation.