
Google Chrome is not in Linux Mint’s default repositories because it is proprietary software. To download and install Google Chrome on Linux Mint, you add Google’s official APT repository or grab the Flatpak from Flathub. Both methods work on Linux Mint 22 and 21 without version-specific steps. Chrome ships DevTools for front-end debugging and syncs bookmarks, passwords, and history across devices through your Google account.
Two installation paths cover different preferences: adding Google’s APT repository gives you all four Chrome builds (Stable, Beta, Unstable, Canary) with automatic updates, while Flatpak provides a sandboxed install with no repository setup at all. For a privacy-focused alternative without Google telemetry, see the guide on installing Chromium Browser on Linux Mint.
Choose Your Google Chrome Installation Method on Linux Mint
Google distributes Chrome through an official APT repository that works on all Ubuntu-based Linux Mint releases without version-specific configuration. You import the GPG key, create a DEB822 sources file, and APT handles the rest. Flatpak is the alternative if you prefer sandboxed apps with zero repository setup.
| Method | Steps | Best For |
|---|---|---|
| APT Repository (Recommended) | 6 commands | Full control over GPG keys and repository configuration; all four Chrome builds available |
| Flatpak | 1 command | Users who prefer sandboxed apps with no repository configuration |
The APT repository method is recommended because it provides all four Chrome builds with automatic updates through your regular system maintenance. Choose Flatpak if you prefer sandboxed apps with zero repository setup.
Understand Google Chrome Build Channels
Before installing, consider which Chrome build best fits your needs. Google maintains four parallel release channels, each serving different purposes:
| Build | Release Cycle | Stability | Best For |
|---|---|---|---|
| Stable | Every 4 weeks | Thoroughly tested | Daily browsing, work, and general use |
| Beta | 4-6 weeks ahead | Minor issues possible | Previewing upcoming features before public release |
| Unstable (Dev) | Weekly | May have bugs | Web developers testing with latest web platform features |
| Canary | Daily (nightly) | Expect instability | Testing bleeding-edge features; not for primary use |
For most users, the Stable channel provides the best balance of features and reliability. If you develop websites or want early access to new features, consider installing Beta alongside Stable. Each build uses separate configuration directories, so you can run multiple versions simultaneously without conflicts.
Method 1: Install Google Chrome with APT Repository on Linux Mint
You import the GPG key, write a DEB822 sources file, and APT handles updates from there. The same repository serves Microsoft Edge on Linux Mint and other Chromium-based browsers through similar steps.
Update System Packages
Start by refreshing package metadata and applying any pending upgrades:
sudo apt update && sudo apt upgradeUpgrading is optional but makes sure your system has current TLS certificates and curl before downloading external keys.
This guide uses
sudofor commands that need root privileges. If your account is not in the sudoers file yet, see how to create and add users to sudoers on Linux Mint.
Import Google Chrome GPG Key
Download Google’s package signing key and convert it to the binary format APT expects:
curl -fsSL https://dl.google.com/linux/linux_signing_key.pub | sudo gpg --dearmor -o /usr/share/keyrings/google-chrome.gpggpg --dearmor converts the ASCII-armored key to binary format. The resulting file in /usr/share/keyrings/ stays valid for all future Chrome updates without reimport.
Add Google Chrome Repository
Create the repository configuration using the DEB822 .sources format:
cat <<EOF | sudo tee /etc/apt/sources.list.d/google-chrome.sources
Types: deb
URIs: https://dl.google.com/linux/chrome/deb/
Suites: stable
Components: main
Signed-By: /usr/share/keyrings/google-chrome.gpg
EOF
After adding the repository, refresh the package index to make the new packages available:
sudo apt updateInstall Google Chrome
With the repository configured, install your preferred Chrome build. For most users, the Stable build is recommended:
sudo apt install google-chrome-stable -yIf you need other builds, install them using the corresponding package names:
Beta (preview upcoming features, roughly 4-6 weeks ahead of Stable):
sudo apt install google-chrome-beta -yUnstable (Dev) (early development builds for testing new features):
sudo apt install google-chrome-unstable -yCanary (nightly builds with cutting-edge features):
sudo apt install google-chrome-canary -yBeta, Unstable, and Canary builds are not recommended for production systems or primary computers. Use them only for testing new features in non-critical environments. The Stable build receives thorough testing before release and is suitable for daily use.
Remove Duplicate Google Chrome Repository Files
Google’s Chrome installer creates legacy .list repository files on first install, even though you already configured a .sources file. These duplicates cause “Target Packages is configured multiple times” warnings, and each Chrome build you install creates its own file (google-chrome.list, google-chrome-beta.list, google-chrome-unstable.list). Remove them:
sudo rm -f /etc/apt/sources.list.d/google-chrome*.list
sudo apt update
The -f flag prevents errors if no .list files exist. Once removed, the files do not reappear during Chrome updates because Google’s installer creates them only on first install. A reinstallation would recreate them.
Verify Google Chrome Installation
Confirm the installation succeeded by checking the installed version:
google-chrome-stable --versionGoogle Chrome 145.0.7632.116
Method 2: Install Google Chrome with Flatpak on Linux Mint
Flatpak runs Chrome in a sandbox and skips repository configuration entirely. Linux Mint ships with Flatpak and Flathub pre-configured, so a single command handles everything:
sudo flatpak install flathub com.google.Chrome -yThe sudo prefix installs Chrome system-wide so all user accounts on the machine can access it. Flatpak pulls the runtime dependencies automatically on first install.
A Dev build is also available on Flathub for testing upcoming features:
sudo flatpak install flathub com.google.ChromeDev -yFlatpak Chrome runs inside a sandbox, which means it cannot access files outside
~/by default and may not integrate with some system-level features like native file managers or password managers. The APT method provides tighter desktop integration if that matters for your workflow.
Verify Google Chrome Flatpak Installation
Check the installed Flatpak version:
flatpak run com.google.Chrome --versionGoogle Chrome 145.0.7632.116
Launch Google Chrome on Linux Mint
Chrome appears in the applications menu immediately after installation regardless of the method you used.
Launch Google Chrome from Terminal
Open a terminal from the applications menu and launch Chrome with the command matching your installed build:
google-chrome-stableFor other versions, use the corresponding command:
google-chrome-beta
google-chrome-unstable
google-chrome-canary
Launch Google Chrome from Applications Menu
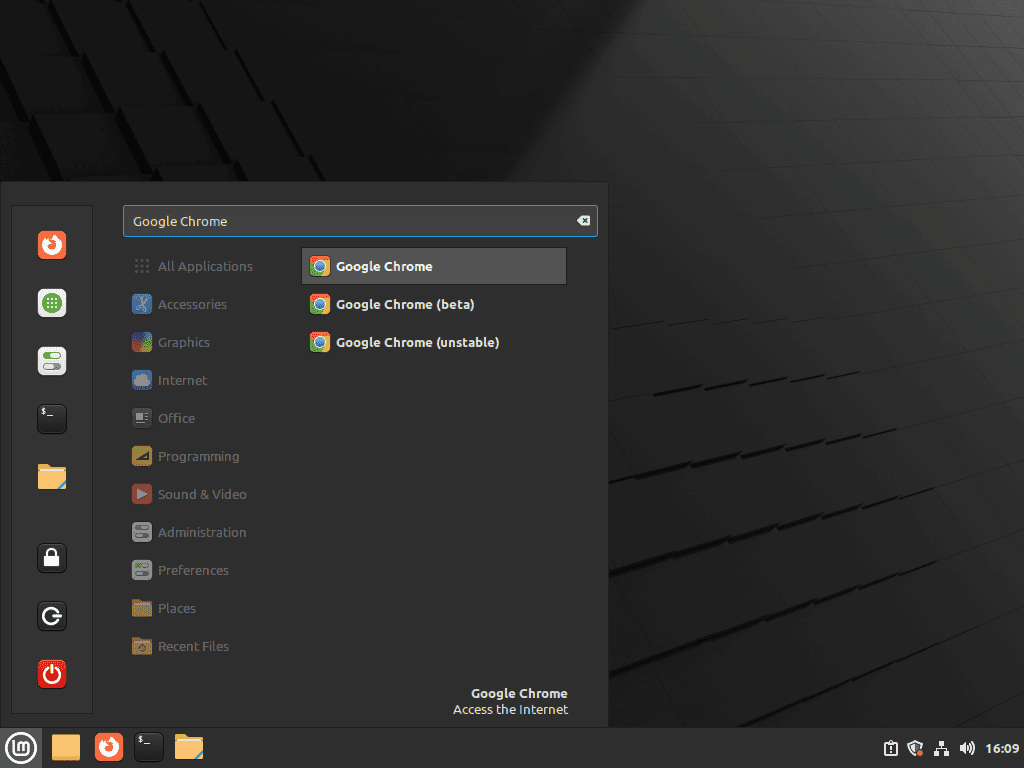
In Linux Mint, Chrome appears under the Internet category in the applications menu:
Menu > Internet > Google Chrome
On first launch, Chrome asks to become the default browser and requests permission to send usage statistics. Decline both if you want to keep Firefox as default and minimize data sent to Google.
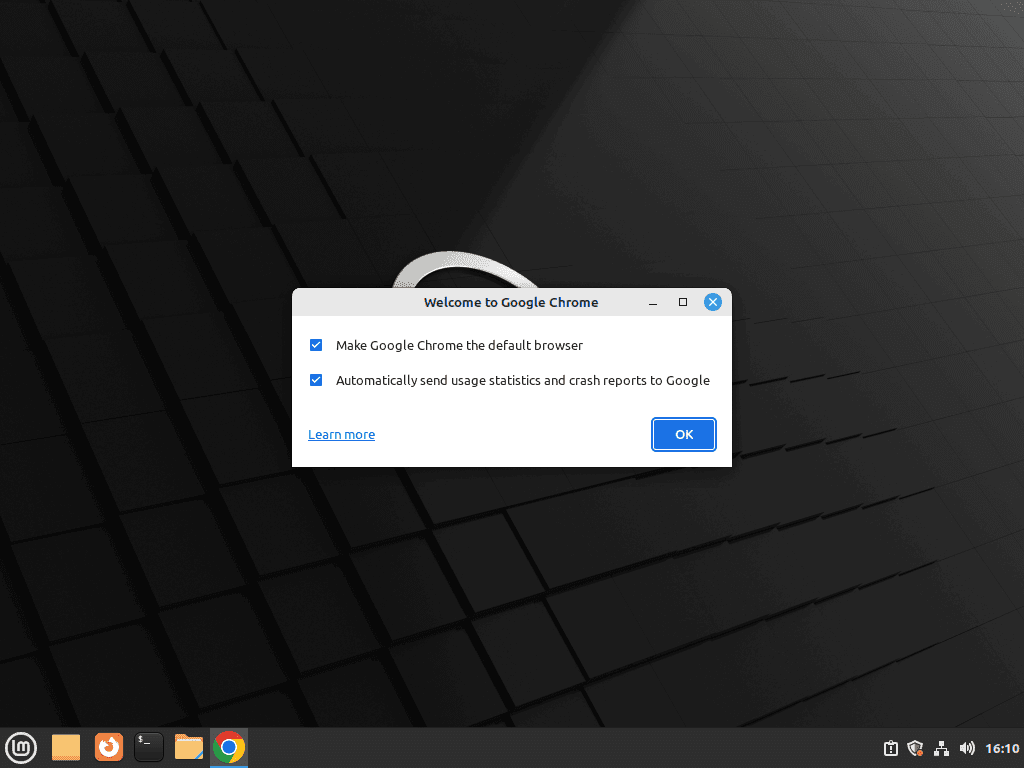
Chrome works fully without a Google account. Signing in unlocks cross-device sync for bookmarks, passwords, and history, but it is entirely optional.
Manage Google Chrome on Linux Mint
Update Google Chrome on Linux Mint
Google Chrome updates automatically through the APT package manager when you run system updates. A full system upgrade picks up any pending Chrome release:
sudo apt update && sudo apt upgradeTo update only Chrome without affecting other packages:
sudo apt update
sudo apt install --only-upgrade google-chrome-stable
This targeted approach is useful when you need the latest Chrome version immediately but want to delay other system updates.
Flatpak installs update separately from APT. For broader Flatpak maintenance, see how to upgrade Flatpak on Linux Mint:
sudo flatpak update com.google.ChromeUninstall Google Chrome
Remove the Chrome package and its configuration files with --purge:
sudo apt remove google-chrome-stable --purge
sudo apt autoremove
autoremove cleans up any dependencies that were pulled in only for Chrome and are no longer needed.
Flatpak installs use a separate removal command:
sudo flatpak uninstall com.google.Chrome
sudo flatpak uninstall --unused
The --unused flag removes runtimes that no other Flatpak application needs.
If you installed multiple APT versions, remove each one separately using the corresponding package name:
sudo apt remove google-chrome-beta --purge
sudo apt remove google-chrome-unstable --purge
sudo apt remove google-chrome-canary --purge
sudo apt autoremove
Remove Google Chrome Repository
After uninstalling Chrome, remove the repository configuration to stop receiving update notifications for a package you no longer use:
sudo rm /etc/apt/sources.list.d/google-chrome.sources
sudo rm /usr/share/keyrings/google-chrome.gpg
Finally, refresh your package index to apply the repository changes:
sudo apt updateRemove Google Chrome User Data (Optional)
After uninstalling Chrome, you can optionally remove your personal data to complete the cleanup.
The commands below permanently delete your Google Chrome user data including bookmarks, saved passwords, browsing history, cookies, extensions, and settings. Export any data you want to keep before proceeding. This action cannot be undone.
APT installs store data in ~/.config/ and ~/.cache/:
rm -rf ~/.config/google-chrome/
rm -rf ~/.cache/google-chrome/
Flatpak installs store data in a separate sandbox directory:
rm -rf ~/.var/app/com.google.Chrome/If you installed Beta, Unstable, or Canary versions, they use separate directories that also need removal:
rm -rf ~/.config/google-chrome-beta/
rm -rf ~/.config/google-chrome-unstable/
rm -rf ~/.config/google-chrome-canary/
rm -rf ~/.cache/google-chrome-beta/
rm -rf ~/.cache/google-chrome-unstable/
rm -rf ~/.cache/google-chrome-canary/Troubleshoot Google Chrome Issues on Linux Mint
Fix Google Chrome Duplicate Repository Warnings
When installing multiple Chrome versions (stable, beta, unstable, canary), each installation package may create its own legacy repository file. This causes duplicate source warnings when running apt update:
W: Target Packages (main/binary-amd64/Packages) is configured multiple times in /etc/apt/sources.list.d/google-chrome-beta.list:3 and /etc/apt/sources.list.d/google-chrome-unstable.list:3
Google’s installer creates legacy .list files on first install regardless of existing .sources files. Since both files point to the same repository, APT sees duplicate entries.
Check which repository files exist in the sources directory:
ls -la /etc/apt/sources.list.d/google-chrome*Example output showing duplicate .list files alongside the .sources file:
-rw-r--r-- 1 root root  189 Jul 10 10:00 google-chrome-beta.list
-rw-r--r-- 1 root root  189 Jul 10 10:00 google-chrome-unstable.list
-rw-r--r-- 1 root root  189 Jul 10 10:00 google-chrome.list
-rw-r--r-- 1 root root  250 Jul 10 10:00 google-chrome.sources
To fix this issue, remove the duplicate legacy .list files and keep only your .sources file:
sudo rm /etc/apt/sources.list.d/google-chrome*.listRefresh the package index to confirm the warnings are gone:
sudo apt updateThe
.listfiles do not reappear during routine Chrome updates. They are only recreated if you reinstall the Chrome package. If you see duplicate warnings after a reinstall, remove the.listfiles again with the same command.
Restore Missing Google Chrome Repository Configuration
If you accidentally deleted your repository configuration and Chrome no longer receives updates, recreate it using the APT repository steps described in Method 1.
Verify whether your repository is working correctly:
apt-cache policy google-chrome-stableIf the output shows a candidate version from dl.google.com, your repository is configured correctly:
google-chrome-stable:
  Installed: 145.0.7632.116-1
  Candidate: 145.0.7632.116-1
  Version table:
 *** 145.0.7632.116-1 500
        500 http://dl.google.com/linux/chrome/deb stable/main amd64 Packages
        100 /var/lib/dpkg/status
If instead the output shows “N: Unable to locate package,” your repository configuration is missing or incorrect. Follow the installation steps again to restore it.
Frequently Asked Questions About Google Chrome on Linux Mint
No. Google Chrome is proprietary software and is not included in Linux Mint’s or Ubuntu’s default repositories. You must add Google’s official APT repository or install the Flatpak from Flathub.
Chromium is the open-source project that Chrome is built on. Chrome adds proprietary components including automatic updates, certain media codecs (AAC, H.264), the integrated PDF viewer, and Google account sync. Chromium lacks these but avoids Google telemetry.
Google’s installer creates a legacy .list file during first install. If you already configured a .sources file, both point to the same repository, causing duplicate source warnings. Remove the .list files with sudo rm -f /etc/apt/sources.list.d/google-chrome*.list to fix it.
Yes. Google Chrome works identically on Linux Mint Cinnamon, MATE, and Xfce editions. The installation steps are the same regardless of your desktop environment since Chrome does not depend on edition-specific packages.
Yes. Google Chrome for Linux is 64-bit (amd64) only. There is no 32-bit build. Both installation methods in this guide (APT repository and Flatpak) deliver the 64-bit version automatically.
Conclusion
Chrome is installed and receiving automatic updates. The APT repository method gives you all four builds with full desktop integration; Flatpak trades that for a sandboxed environment. If Google telemetry is a concern, Chromium Browser on Linux Mint strips the proprietary bits, and LibreWolf on Linux Mint hardens defaults further. For a secondary Chromium-based browser with a different feature set, see Microsoft Edge on Linux Mint.

I followed the stable extrepo guide for my Mint Cinnamon system; Chrome works alright, but shortly after, I got a warning: “E:Conflicting values set for option Signed-By regarding source http://dl.google.com/linux/chrome/deb/ stable: /var/lib/extrepo/keys/google_chrome.asc != , E:The list of sources could not be read.” Update Manager advises not to update, install or reboot. any idea how I fix this?
Thanks for reporting this, Hanzo85. The “Conflicting values set for option Signed-By” error happens when Google’s installer creates a legacy
.listfile that conflicts with extrepo’s.sourcesfile. Run these commands to fix it:This removes the legacy file while keeping extrepo’s properly configured source. The guide has been updated with this cleanup step. If the error reappears after a Chrome update, simply repeat the command above.
Thanks for responding. The error seems to have been resolved after inputting those two lines.