Servers that accept untrusted uploads, mail attachments, or shared files need a way to catch malware before it reaches users on other systems. ClamAV fills that role on Ubuntu with a command-line scanner, automatic signature updates through freshclam, and the optional clamd daemon for repeated or higher-volume scans.
You can install ClamAV on Ubuntu 26.04, 24.04, and 22.04 directly from APT, without a PPA or manual download. The same package path also covers virus database updates, service checks, cron-based scans, safe quarantine handling, and removal. For broader server hardening, pair file scanning with UFW firewall on Ubuntu and chkrootkit on Ubuntu.
Update Ubuntu Packages Before Installing ClamAV
Refresh APT metadata before installing ClamAV so Ubuntu can select the current security-pocket package and dependencies.
Refresh and Upgrade Ubuntu Packages
Open a terminal and refresh the package list, then install available updates:
sudo apt update && sudo apt upgradeEnter your password when prompted. If APT reports a held package or interrupted upgrade, resolve that first so the ClamAV packages do not install into a half-updated system.
These commands use
sudofor package and service management. If your account cannot run sudo yet, follow the guide on how to add a user to sudoers on Ubuntu before continuing.
Reboot if Required
Kernel updates require a reboot before continuing. Check if one is needed:
[ -f /var/run/reboot-required ] && echo "Restart required"If prompted, reboot before proceeding:
sudo rebootInstall ClamAV Antivirus on Ubuntu With APT
Ubuntu ships the ClamAV scanner, signature updater, daemon service, and daemon client in its default repositories. The core ClamAV packages come from Ubuntu’s main component; the optional ClamTK desktop frontend comes from universe.
Ubuntu 26.04, 24.04, and 22.04 currently select the same ClamAV 1.4.x package family from the security pocket by default. ClamTK is still available on all three releases, but minimal systems may need the Ubuntu Universe repository enabled before installing the GUI package.
Check if ClamAV Is Already Installed
If ClamAV was previously installed on this system, a version check confirms it before you proceed:
clamscan --versionIf the command returns a version number, ClamAV is already present and you can move on to the database update section. If the shell reports command not found, install the packages below.
Install ClamAV Scanner and Daemon Packages
Install the scanner and daemon packages:
sudo apt install clamav clamav-daemonThis command installs the standalone scanner, the FreshClam updater, the daemon service, and the clamdscan client used to send scans to the daemon.
clamav: Providesclamscan, the standalone scanner that loads signatures each time it runs.clamav-daemon: Provides the persistentclamdservice for faster repeated scans and server integrations. Definition updates are handled separately byclamav-freshclam.
Verify the ClamAV Installation
Confirm that the scanner binary is available:
clamscan --versionRelevant output includes the engine version. The database revision and timestamp change whenever signatures update:
ClamAV 1.4.4/27985/Tue Apr 28 14:25:02 2026
The command can also print only the engine version if the signature database has not finished downloading yet.
Install ClamTK for a Simple GUI (Optional)
ClamTK provides a graphical frontend for ClamAV. Install it only on desktop systems where a local graphical session is available; server and minimal installs can stay with the terminal tools.
Install the ClamTK Package
Install the ClamTK graphical frontend. If APT cannot locate the package, enable Universe first and rerun the command.
sudo apt install clamtkLaunch ClamTK from the Menu or Terminal
After installation, open ClamTK from the desktop menu or start it from a terminal:
- Terminal: Run
clamtk. - Applications menu: Search for ClamTk and open the launcher.
clamtk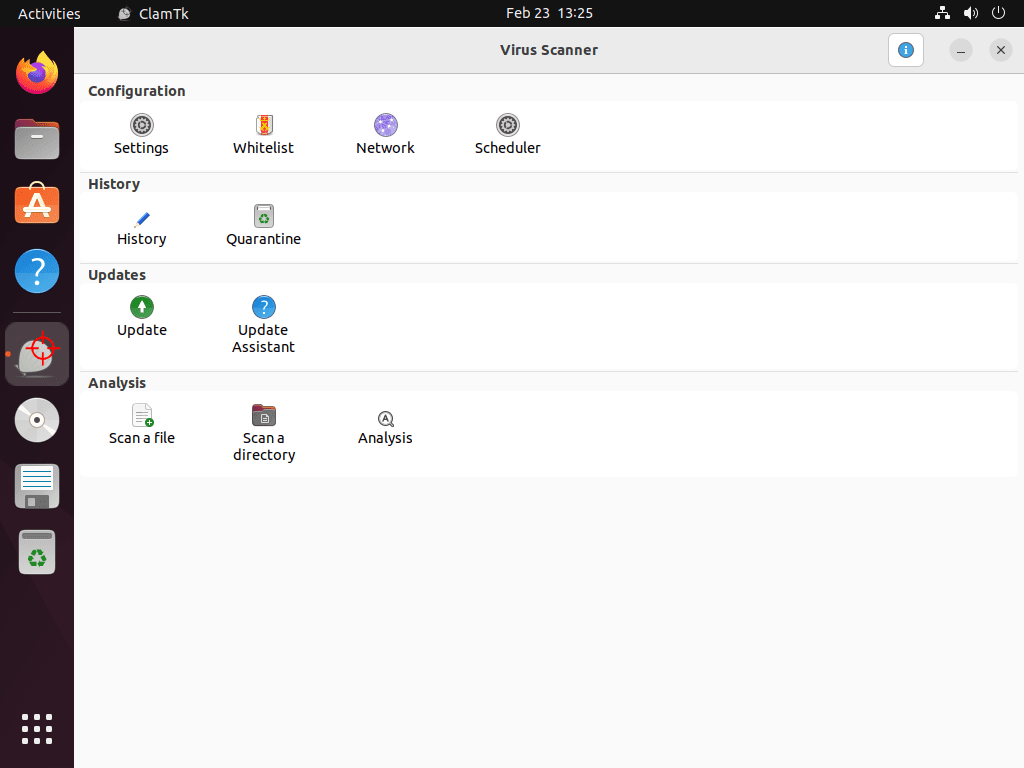
Update the ClamAV Virus Database on Ubuntu
ClamAV needs signature databases in /var/lib/clamav before the daemon can scan. Fresh installs often start clamav-freshclam first, then clamav-daemon becomes usable after the initial main.cvd, daily.cvd, and bytecode.cvd downloads finish.
Stop the clamav-freshclam Service
The clamav-freshclam service runs automatic updates in the background. Stop it before a manual update so freshclam does not hit a database lock:
sudo systemctl stop clamav-freshclamUpdate Virus Definitions with freshclam
Run freshclam once to download or update the official signature databases:
sudo freshclamRelevant status phrases when definitions are current:
daily.cvd database is up-to-date
main.cvd database is up-to-date
bytecode.cvd database is up-to-date
On a first run, the command downloads roughly 100 MB of database files. If a fresh install reports only daily.cvd at first, wait for FreshClam to finish downloading main.cvd and bytecode.cvd before starting the daemon.
Enable FreshClam and the ClamAV Daemon
Enable the updater and daemon after the signature database exists. This keeps FreshClam running at boot and starts clamd for clamdscan workflows:
sudo systemctl enable --now clamav-freshclam clamav-daemonVerify both services are enabled and active:
systemctl is-enabled clamav-freshclam clamav-daemon
systemctl is-active clamav-freshclam clamav-daemon
enabled enabled active active
Verify Updated ClamAV Definitions
Confirm the updated definitions by listing the database filenames:
ls -1 /var/lib/clamav/Relevant output includes the three database files and freshclam.dat:
bytecode.cvd daily.cvd freshclam.dat main.cvd
If a database file is missing, let FreshClam finish its initial download before relying on clamdscan.
Check FreshClam’s Automatic Update Schedule
FreshClam checks for updates 24 times per day by default on Ubuntu. Confirm the packaged setting with:
grep '^Checks' /etc/clamav/freshclam.confChecks 24
Disable the updater only for a specific maintenance reason, because stale signatures reduce detection value:
sudo systemctl disable --now clamav-freshclamRun ClamAV Virus Scans from the Terminal
ClamAV provides several scanning modes through its command-line interface. The commands below cover file scanning, directory scanning, logging, and controlled handling of infected files.
Choose Between clamscan and clamdscan
Use clamscan for occasional one-time scans. It loads the signature database for each run, so it is simple but slower on repeated jobs. Use clamdscan when clamav-daemon is running and you need faster repeated scans through the local clamd service.
clamdscan --versionIf clamdscan cannot connect to /var/run/clamav/clamd.ctl, update the database first, then start clamav-daemon as shown above.
Scan a Single File for Malware
Scan a specific file for threats:
clamscan /path/to/fileThis command checks the specified file for viruses and malware. Replace /path/to/file with the file’s actual path.
Recursively Scan a Directory Tree
To scan an entire directory, including all subdirectories, use the -r option for recursive scanning:
clamscan -r /path/to/directoryThe -r option enables recursive scanning, ensuring that all files within the directory and its subdirectories are checked for threats. Replace /path/to/directory with the actual directory path.
Log ClamAV Scan Results to Files
To document scan results for later review or troubleshooting, ClamAV allows you to output the results into a log file. This is particularly useful for long scans or when managing multiple systems.
Log a Single-File Scan
Save scan results for a specific file to a log:
clamscan /path/to/file --log=/path/to/logfile- Replace
/path/to/filewith the full path to the file you want to scan. - Replace
/path/to/logfilewith the full path where you want the log file to be saved.
Example:
clamscan /home/user/documents/sample.txt --log=/home/user/logs/clamav.logThis scans sample.txt and saves the results to clamav.log in the /home/user/logs/ directory.
Log a Directory Scan
To save the results of scanning a directory (including subdirectories) to a log file:
clamscan -r /path/to/directory --log=/path/to/logfile- The
-roption enables recursive scanning, ensuring all files in the directory and its subdirectories are scanned. - The
--logoption specifies the log file path.
Example:
clamscan -r /home/user/downloads --log=/home/user/logs/downloads_scan.logThis scans the /home/user/downloads directory recursively and saves the results to downloads_scan.log.
Review the Contents of a ClamAV Log
After the scan completes, review the log file contents:
cat /home/user/logs/downloads_scan.logThe log shows each scanned file, any detections, and the summary statistics from the scan run.
Delete Confirmed Infected Files with --remove
The --remove option deletes files ClamAV identifies as infected. Use it only after you understand the target path and can tolerate permanent deletion:
clamscan /path/to/file --removeFor automated scans, prefer quarantine with
--movefirst. False positives are easier to recover from quarantine than from deletion.
View All Available ClamAV Command Options
View all available ClamAV scanning options and flags:
clamscan --helpThe help output lists every flag, including archive handling, performance limits, and output formatting options.
Understand ClamAV Scan Output
After running scans, ClamAV provides detailed output that helps you interpret results and decide on appropriate actions. Understanding these messages prevents confusion and unnecessary alarm over false positives.
Interpret Common ClamAV Scan Messages
ClamAV scan output typically includes four main status indicators:
- FOUND: ClamAV detected malware or a suspicious file matching virus definitions. The output shows the file path and the specific threat signature identified.
- OK: The file passed inspection and contains no known threats. This is the normal result for clean files.
- Empty file: The file contains no data. ClamAV skips empty files during scanning but reports them in the summary.
- Symbolic link: ClamAV reports symbolic links separately and skips them unless you enable following with options like
--follow-dir-symlinksor--follow-file-symlinks.
Decide When to Investigate Scan Results
Not every “FOUND” result requires immediate action. ClamAV occasionally flags legitimate files as threats (false positives), particularly compressed installers, cryptographic tools, or password-protected archives. Before deleting flagged files, verify the threat by checking the signature name against ClamAV’s database or submitting suspicious files to VirusTotal for multi-engine analysis. Preserve quarantined files for 30 days in case you need to restore false positives after investigation.
Read the ClamAV Scan Summary
At the end of each scan, ClamAV displays summary statistics showing total files scanned, infected count, data processed, and scan duration. These metrics help you track scanning efficiency and identify performance bottlenecks on large filesystems. Comparing scan times across sessions reveals whether recent file additions or virus definition updates impact performance.
Limit ClamAV CPU Usage During Scans
Why Lower ClamAV’s CPU Priority
ClamAV scans can be resource-intensive, especially on systems with limited hardware. Lowering scan priority helps other tasks stay responsive while ClamAV works in the background.
Lower ClamAV Priority with the nice Command
The nice command starts ClamAV with a lower scheduling priority. By default, processes run with a priority level of zero (normal priority). The following command sets ClamAV to priority 15, which reduces CPU contention:
sudo nice -n 15 clamscan --bell -i -r /home-n 15sets the priority to 15, reducing resource usage.--bellsounds a bell when an infected file is found.-idisplays only infected files in the output.-r /homeperforms a recursive scan of the/homedirectory.
This runs ClamAV with lower priority so other workloads keep more CPU time. Monitor real-time resource consumption with htop on Ubuntu to verify the priority change.
Schedule Automatic ClamAV Scans with Cron
Plan Automated ClamAV Scans with Cron
Use a user cron job for your own home directory, or a root-managed cron job for server paths such as /srv/uploads. Do not mix the two: a normal user cannot write logs under /var/log/clamav or scan every protected system path without elevated privileges.
Create a Home Directory Scan Script
Create a user-owned script for scanning your home directory and saving logs under $HOME/clamav-logs:
nano "$HOME/clamscan-home.sh"Add the following script:
#!/usr/bin/env bash
set -euo pipefail
LOG_DIR="$HOME/clamav-logs"
mkdir -p "$LOG_DIR"
nice -n 15 clamscan -r "$HOME" --infected --log="$LOG_DIR/scan-$(date +%F).log"Save and exit, then make the script executable with chmod:
chmod 0755 "$HOME/clamscan-home.sh"Run it once before scheduling so you know the scan and log path work:
"$HOME/clamscan-home.sh"
ls -lh "$HOME/clamav-logs"total 4.0K -rw-r----- 1 user user 378 Apr 29 11:58 scan-2026-04-29.log
Schedule the ClamAV Cron Job
Open your user crontab:
crontab -eAdd the following line to run the scan daily at 3:00 a.m.:
0 3 * * * $HOME/clamscan-home.shThe cron daemon picks up changes automatically. Because the dated log filename lives inside the script, the crontab line does not need escaped percent signs.
Verify the Cron Schedule
List your crontab to confirm the schedule:
crontab -lThe listing should show the scheduled scan:
0 3 * * * $HOME/clamscan-home.sh
For a system-wide server scan, create a root-owned script under /usr/local/sbin and schedule it from /etc/cron.d/ instead. That keeps privileged scans and /var/log/clamav logs under root control rather than relying on a user crontab.
Apply ClamAV Security Best Practices
ClamAV works best when scans are scheduled realistically, detections are reviewed before deletion, and logs stay manageable.
Tune ClamAV Scan Schedules for Ubuntu Servers
Tailor your scan schedule based on system usage and risk level. General-purpose servers or workstations benefit from daily scans during off-peak hours (3:00 a.m. works well). High-traffic servers handling file uploads or email should scan critical directories every 6-12 hours, while development or testing environments with controlled file sources can scan weekly. Use the nice command to prevent scans from impacting system performance.
Handle Infected Files Safely
When ClamAV detects infected files, avoid using the --remove option automatically. Instead, log scan results and review infected files manually to prevent false positives from deleting legitimate files. For confirmed threats, either move infected files to a quarantine directory with --move=/path/to/quarantine or use --remove selectively on high-risk directories. Create system snapshots with Timeshift on Ubuntu before enabling automated removal in cron jobs.
sudo clamscan -r /srv/uploads --move=/srv/quarantineThis command recursively scans /srv/uploads and relocates infected files into /srv/quarantine, keeping them isolated until you finish reviewing the results.
Monitor and Rotate ClamAV Logs
Maintain organized scan logs using the --log option with dated filenames like /var/log/clamav/scan-$(date +%Y%m%d).log. Review logs weekly for patterns indicating recurring threats or compromised file sources. Implement log rotation to prevent disk space issues, keeping 30-60 days of scan history. Consider setting up email alerts for detected threats using mail utilities in your cron scripts.
Integrate ClamAV with Other Server Security Tools
For Ubuntu servers exposed to external networks, secure remote access with SSH on Ubuntu by implementing key-based authentication, disabling root login, and changing default ports. Combine SSH hardening with Fail2ban monitoring to automatically block repeated authentication failures. ClamAV then covers file scanning while the network and authentication layers reduce exposure.
Build a Layered Ubuntu Security Stack with ClamAV
ClamAV works best as part of a layered security approach. Combine it with these tools for defense in depth:
- Firewall: Block suspicious traffic with UFW on Ubuntu or Ubuntu’s built-in firewall.
- Rootkit detection: Run chkrootkit on Ubuntu alongside ClamAV’s malware scanning.
- Brute-force protection: Deploy Fail2ban on Ubuntu to block repeated authentication failures.
- Port auditing: Identify exposed services with Nmap on Ubuntu.
- Automatic updates: Keep all security tools patched through unattended upgrades on Ubuntu.
- Access control: Restrict application capabilities with AppArmor on Ubuntu.
For servers handling email, configure ClamAV with mail transfer agents like Postfix to scan attachments automatically.
Troubleshoot Common ClamAV Issues
Despite ClamAV’s reliability, users occasionally encounter configuration challenges or operational issues. The following solutions address the most frequently reported problems.
Run a 60-Second ClamAV Health Check
Start with these quick checks. They show whether services run, databases exist, and disk and memory resources are adequate.
# Service state
systemctl is-enabled clamav-freshclam clamav-daemon
systemctl is-active clamav-freshclam clamav-daemon
# Virus database files present?
ls -1 /var/lib/clamav/
# Engine + definitions version
clamscan --version
# Disk + memory sanity
df -h /var/lib/clamav
free -hRelevant healthy output includes active services and the expected database filenames:
enabled enabled active active $ ls -1 /var/lib/clamav/ bytecode.cvd daily.cvd freshclam.dat main.cvd
If a service shows “failed” or disk space is almost full (less than 1-2 GB free), fix that before anything else.
Fix freshclam Database Update Failures
If freshclam fails to update virus definitions, check network access, disk space, and the updater service before changing mirrors. Ubuntu’s packaged /etc/clamav/freshclam.conf already includes db.local.clamav.net and database.clamav.net, so appending duplicate mirror lines is usually unnecessary.
Typical error output when mirrors or connectivity fail:
$ sudo freshclam
ERROR: Download failed (28) ERROR: database.clamav.net:80 is down.
ERROR: Update failed for database: daily
ERROR: Database update process failed: HTTP GET failed (28)
Check updater status:
systemctl status clamav-freshclam --no-pagerRestart and enable the updater if it is inactive:
sudo systemctl enable --now clamav-freshclamRequest a verbose manual update:
sudo freshclam -vCheck disk space for the database directory:
df -h /var/lib/clamavRelevant status phrases from a successful update include:
daily.cvd database is up-to-date
main.cvd database is up-to-date
Confirm the packaged mirrors before editing freshclam.conf:
grep '^DatabaseMirror' /etc/clamav/freshclam.confDatabaseMirror db.local.clamav.net DatabaseMirror database.clamav.net
If those lines are present and downloads still fail, wait a few minutes and retry. Mirror outages and CDN rate limits can be temporary.
Resolve Permission Denied Errors During Scans
When ClamAV reports Permission denied for protected files or directories, either scan only paths your user can read or run a targeted administrative scan with sudo:
sudo clamscan -r /pathAvoid adding broad permissions just to make routine scans quieter. If you are scanning user files from a user cron job, keep the target under $HOME and log to a user-owned directory.
Relevant output without sudo can include protected paths:
$ clamscan -r /etc
/etc/ssl/private: Permission denied
/etc/shadow: Permission denied
----------- SCAN SUMMARY -----------
Infected files: 0
Use sudo only when you intentionally need protected system files included:
sudo clamscan -r /etcThe permission warnings should disappear for files root can read.
Only scan system directories with sudo on trusted machines; avoid scanning untrusted external drives as root.
Reduce ClamAV Memory Usage
On systems with limited RAM, ClamAV scans may consume significant memory, especially when scanning large files or archives. Limit memory usage by adding --max-filesize=100M and --max-scansize=200M to skip files exceeding these thresholds. Additionally, disable archive scanning with --scan-archive=no if your workflow does not require extracting compressed files. For persistent memory issues, use clamscan instead of clamdscan, as the daemon caches definitions in memory while the command-line scanner loads them on demand.
Resource-friendly scan example (adds logging and skips huge files):
sudo clamscan -r /home \
	--max-filesize=100M --max-scansize=200M \
	--scan-archive=no \
	--log=/var/log/clamav/scan-$(date +%F).log
Sample warnings you may see (normal):
WARNING: Skipping file /home/user/Videos/big.iso: Size limit reached
WARNING: Skipping file /home/user/Archives/backup.tar.gz: Archive scanning disabled
If the system starts swapping (very slow), scan fewer directories at a time or reduce limits further (for example, 50M).
Speed Up Scans on Large Filesystems
Scanning millions of files takes considerable time. Improve performance by excluding unnecessary directories with --exclude-dir patterns (e.g., --exclude-dir="^/proc" --exclude-dir="^/sys") to skip system pseudo-filesystems that do not contain executable threats. Schedule scans during off-peak hours and use the nice command to lower CPU priority, preventing interference with production workloads.
Performance-tuned example (low priority + common excludes):
sudo nice -n 15 clamscan -r / \
	--exclude-dir="^/proc" --exclude-dir="^/sys" \
	--exclude-dir="^/run"  --exclude-dir="^/dev" \
	--exclude-dir="^/snap" --exclude-dir="^/var/cache" \
	--log=/var/log/clamav/scan-$(date +%F).log
Example summary after a large scan:
----------- SCAN SUMMARY -----------
Scanned directories: 15234
Scanned files: 987654
Infected files: 0
Data scanned: 12.34 GB
Time: 01:42:17
Recover When the ClamAV Service Fails to Start
If systemctl status clamav-daemon shows startup failures, check /var/log/clamav/clamav.log for specific error messages. Common causes include missing or corrupted virus definitions (re-run sudo freshclam), configuration syntax errors in /etc/clamav/clamd.conf, or insufficient disk space in /var/lib/clamav/. Additionally, verify that the clamav user has read access to definition files with ls -la /var/lib/clamav/.
Diagnose quickly with status + last log lines:
systemctl status clamav-daemon --no-pager -l
sudo tail -n 40 /var/log/clamav/clamav.log
Example failure (missing definitions):
clamd[12345]: ERROR: Can't open file /var/lib/clamav/daily.cld: No such file or directory
systemd[1]: clamav-daemon.service: Main process exited, status=1/FAILURE
Fix sequence:
sudo systemctl stop clamav-daemon
sudo freshclam
sudo systemctl start clamav-daemon
If you edited
clamd.conf, compare it with the packaged default to rule out syntax errors.
Handle False Positive Detections
When ClamAV incorrectly flags legitimate software as malware, verify the file’s authenticity by checking its SHA-256 hash against official sources. If confirmed as a false positive, report it with ClamAV’s false-positive form and include detailed file information. For temporary local exclusions, use --exclude=REGEX for file paths or --exclude-dir=REGEX for directories, then remove the exclusion after the signature issue is resolved.
Safe test example (EICAR): create a harmless file ClamAV should detect:
cat > /tmp/eicar.txt <<'EOF'
X5O!P%@AP[4\PZX54(P^)7CC)7}$EICAR-STANDARD-ANTIVIRUS-TEST-FILE!$H+H*
EOF
clamscan /tmp/eicar.txt
Expected detection:
/tmp/eicar.txt: Eicar-Test-Signature FOUND
----------- SCAN SUMMARY -----------
Scanned files: 1
Infected files: 1
Quarantine instead of deletion while reviewing:
sudo mkdir -p /srv/quarantine
sudo clamscan /tmp/eicar.txt --move=/srv/quarantine -i
sudo sha256sum /srv/quarantine/eicar.txt
Prefer
--moveover--removein automated scans to avoid losing legitimate files to false positives.
Remove ClamAV from Ubuntu
Disable ClamAV Services Before Removal
Stop and disable the updater, daemon, and socket before removing packages:
sudo systemctl disable --now clamav-daemon clamav-daemon.socket clamav-freshclamIncluding clamav-daemon.socket prevents socket activation from immediately restarting the daemon during cleanup.
Uninstall ClamAV Packages
Remove the scanner, daemon, updater, and daemon client first:
sudo apt remove clamav clamav-base clamav-daemon clamav-freshclam clamdscanIf you installed the optional ClamTK interface, remove it separately:
sudo apt remove clamtkUse --purge when you also want package configuration removed:
sudo apt remove --purge clamav clamav-base clamav-daemon clamav-freshclam clamdscanUse the same purge option for ClamTK if it was installed:
sudo apt remove --purge clamtkAPT may list leftover libraries as automatically removable. Review the package list before confirming, especially on reused servers that already had unrelated autoremovable packages:
sudo apt autoremove --purgeRemove Residual Virus Definitions (Optional)
Package removal can leave downloaded virus definitions under /var/lib/clamav. Delete them only if no remaining ClamAV-compatible service on the machine still uses that database directory.
This command permanently deletes
/var/lib/clamav. Verify the path before running it; FreshClam will download a new database if you reinstall ClamAV later.
sudo rm -rf /var/lib/clamavVerify ClamAV Removal
Use package-manager state as the primary proof that ClamAV packages are no longer installed:
dpkg-query -W -f='${db:Status-Abbrev} ${binary:Package}\n' clamav clamav-base clamav-daemon clamav-freshclam clamdscan clamtk 2>/dev/null | grep '^ii'A clean removal returns no installed-package lines. If you also want a command-path check in the same shell, clear Bash’s command cache first:
hash -r
clamscan --version
bash: clamscan: command not found
Conclusion: ClamAV Antivirus on Ubuntu
ClamAV is ready on Ubuntu with FreshClam updating signatures, clamscan available for one-time scans, and clamdscan available when the daemon is running. Production servers pair it well with Fail2ban on Ubuntu and unattended upgrades on Ubuntu; the ClamAV documentation covers advanced daemon configuration and custom signatures.

Thumps up!!!!
Thanks!
I have managed to install clamav 1.5.1 on ubuntu 24..04 but is was a lot of work.
And I have not (yet) got clamd working.
Is there a ppa from which I can simply update things?
This article is very much helpful in installing clamav.
Thanks Ahmad.