
A raw dd write can destroy the wrong disk in one mistyped device path, which is why balenaEtcher remains a useful Fedora desktop tool for USB and SD card images. The current way to install balenaEtcher on Fedora is the official upstream RPM, then let the app handle target selection and post-write validation from a graphical session.
Fedora’s default repositories do not currently offer a balena-etcher package, and Flathub does not list a current Etcher app ref. Balena publishes Linux RPMs for x86_64 systems through the balenaEtcher GitHub releases page, so the RPM path is the practical Fedora method.
Install balenaEtcher on Fedora
Choose the balenaEtcher Fedora Install Path
Use the package-source comparison to separate the working RPM path from common searches that no longer produce an installable Fedora result.
| Source | Status on Fedora | Best fit | Update behavior |
|---|---|---|---|
| Official RPM from GitHub | Available for x86_64 | Recommended Fedora path | Manual replacement with a newer RPM, or the updater helper in the update section |
| Fedora repositories | No current balena-etcher package | Not an install method | No DNF repository updates are available |
| Flathub or Flatpak | No current io.balena.etcher app ref | Do not use old Flatpak commands | No Flatpak update path exists until a real app record returns |
Update Fedora Before Installing balenaEtcher
Refresh Fedora first so DNF has current dependency metadata before it handles the local RPM.
sudo dnf upgrade --refreshThese commands use
sudofor system changes. If your account cannot run sudo yet, follow the guide to add a user to sudoers on Fedora before continuing.
Install Download Tools for balenaEtcher
The download workflow uses curl to fetch GitHub release metadata and jq to select the correct RPM and checksum asset. Fedora Workstation usually has curl already, but installing both tools keeps minimal or customized systems covered. The Linux curl command guide explains the download flags if you want the deeper command behavior.
sudo dnf install curl jqConfirm Fedora Uses x86_64
Balena currently publishes Linux RPM downloads for x86_64. Check your architecture before downloading the package.
ARCH=$(uname -m)
printf 'Architecture: %s\n' "$ARCH"
if [ "$ARCH" != "x86_64" ]; then
  echo "balenaEtcher publishes Linux RPM downloads for x86_64 systems only."
  exit 1
fi
A supported Fedora system returns:
Architecture: x86_64
Download the Latest balenaEtcher RPM on Fedora
Resolve the latest non-prerelease GitHub release and select the matching x86_64 RPM plus its Linux checksum file. Run the download, verification, and install blocks in the same terminal session so the variables stay available.
RELEASE_JSON=$(curl -fsSL https://api.github.com/repos/balena-io/etcher/releases/latest)
RELEASE_TAG=$(printf '%s\n' "$RELEASE_JSON" | jq -r '.tag_name // empty')
RPM_URL=$(printf '%s\n' "$RELEASE_JSON" | jq -r '[.assets[].browser_download_url | select(test("balena-etcher-[0-9.]+-1\\.x86_64\\.rpm$"))][0] // empty')
SUMS_URL=$(printf '%s\n' "$RELEASE_JSON" | jq -r '[.assets[].browser_download_url | select(test("SHA256SUMS\\.Linux\\.x64\\.txt$"))][0] // empty')

if [ -z "$RELEASE_TAG" ] || [ -z "$RPM_URL" ] || [ -z "$SUMS_URL" ]; then
  echo "Could not find the current balenaEtcher x86_64 RPM and checksum file."
  exit 1
fi

RPM_FILE=${RPM_URL##*/}
printf 'Release: %s\nRPM: %s\n' "$RELEASE_TAG" "$RPM_FILE"
Relevant output includes the current release tag and RPM filename. The exact version changes as GitHub publishes newer releases.
Release: v2.x.x
RPM: balena-etcher-2.x.x-1.x86_64.rpm
Download the RPM and checksum file, then verify the RPM against the upstream SHA256 checksum. The final rpm -K check confirms the package digests are present, even though the RPM itself is not signed.
curl -fL --progress-bar -o "$RPM_FILE" "$RPM_URL"
curl -fsSLo SHA256SUMS.Linux.x64.txt "$SUMS_URL"
grep " $RPM_FILE$" SHA256SUMS.Linux.x64.txt | sha256sum -c -
rpm -K "$RPM_FILE"
Relevant output should include the checksum OK line and the RPM digest result:
balena-etcher-2.x.x-1.x86_64.rpm: OK
balena-etcher-2.x.x-1.x86_64.rpm: digests OK
Install the balenaEtcher RPM with DNF on Fedora
Install the verified local RPM with DNF. The ./ prefix matters because it tells DNF to use the file in your current directory instead of searching enabled repositories.
sudo dnf install "./$RPM_FILE"Relevant output includes the local @commandline source and the expected OpenPGP warning:
Installing:
 balena-etcher x86_64 0:2.x.x-1 @commandline

Warning: skipped OpenPGP checks for 1 package from repository: @commandline
Complete!
The warning appears because DNF installed a local RPM rather than a package from a configured repository with an imported RPM signing key. For this workflow, the SHA256 checksum and RPM digest checks are the integrity checks you control before installation.
Verify the balenaEtcher Install on Fedora
Check the installed RPM, terminal launcher, and desktop entry before opening the graphical application.
rpm -q balena-etcher
command -v balena-etcher
grep -E '^(Name|Exec)=' /usr/share/applications/balena-etcher.desktop
Expected output follows this shape:
balena-etcher-2.x.x-1.x86_64
/usr/bin/balena-etcher
Name=balenaEtcher
Exec=balena-etcher %U
Launch balenaEtcher on Fedora
balenaEtcher is a graphical app. Install it from the terminal, then launch it from an active desktop session where Fedora can show the app window and any authorization prompt needed for removable-drive writes.
Launch balenaEtcher from Fedora Activities
- Open Activities.
- Search for balenaEtcher.
- Select the balenaEtcher entry to open the flashing interface.
Launch balenaEtcher from a Terminal on Fedora
If you are already inside the desktop session, the same launcher works from a terminal.
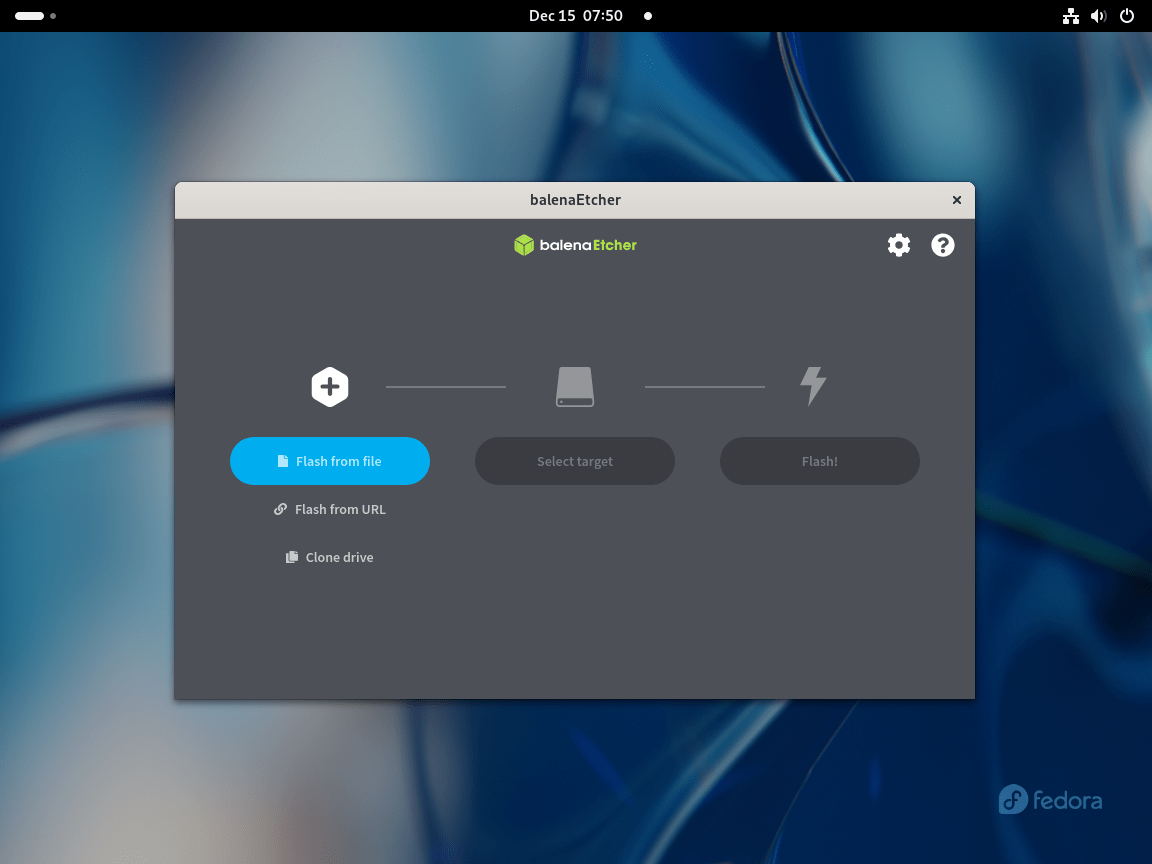
balena-etcherThe window opens with the usual three-step flow: choose an image, select the target drive, and start the write.
Flash Images Safely with balenaEtcher on Fedora
Etcher itself is straightforward. Most mistakes happen before the write starts: a damaged image, the wrong target drive, or Windows installer media that needs more than a direct image write.
Confirm the Target Drive Before Flashing
Check removable drives in a terminal before you click Flash. Matching both size and transport makes it much harder to overwrite the wrong disk.
lsblk -o NAME,SIZE,TYPE,MODEL,TRAN --nodepsExample output showing a USB stick as sdb:
NAME   SIZE TYPE MODEL          TRAN
zram0    8G disk
nvme0n1 477G disk
sdb   14.9G disk USB Flash Disk usb
Stop immediately if the size does not match the device you intend to erase. If the USB stick is mounted, close file manager windows that are using it before you start the flash.
Compare balenaEtcher and Fedora Media Writer
Both tools write installer media, but they fit different desktop workflows.
| Task | balenaEtcher | Fedora Media Writer |
|---|---|---|
| Write an ISO or IMG you already downloaded | Strong fit | Limited outside Fedora images |
| Download Fedora editions and write them in one app | No built-in Fedora downloader | Best fit |
| Flash Raspberry Pi or other SD card images | Strong fit | Fedora-focused |
| Use the same writer across many Linux images | Strong fit | Narrower scope |
Use Fedora Media Writer when your goal is specifically Fedora installation media. Use balenaEtcher when you already have an image file and want one writer for several Linux or embedded-device workflows.
Use Another Tool for Windows Installer USBs
balenaEtcher writes images byte-for-byte, which works well for most Linux ISOs and appliance images. Windows installer ISOs usually need extra boot-media handling, so Etcher is not the default Fedora tool for that job.
Troubleshoot balenaEtcher on Fedora
Most Fedora issues fall into a few buckets: the expected local-RPM warning, a stale or damaged download, a removable drive that Fedora cannot see, or a graphical-session problem on a trimmed desktop.
DNF Warns About Skipped OpenPGP Checks
A local RPM install can print this warning even when the transaction finishes:
Warning: skipped OpenPGP checks for 1 package from repository: @commandline
That line means the package did not come from a configured DNF repository with an RPM signing key. Return to the checksum step and confirm both sha256sum -c and rpm -K succeeded before you install the RPM.
balena-etcher Command Not Found
If the terminal cannot find balena-etcher, first check whether the RPM is installed.
rpm -q balena-etcher || echo "balena-etcher is not installed"When the package is missing, rerun the install command from the directory that contains the downloaded RPM. When the package is installed but the command still does not resolve, refresh the shell command cache and check the installed launcher path:
hash -r
command -v balena-etcher
rpm -qf /usr/bin/balena-etcher
balenaEtcher Does Not See the USB Drive
Check whether Fedora can see the removable device before blaming Etcher.
lsblk -o NAME,SIZE,TYPE,MODEL,TRAN --nodepsIf the drive is missing from lsblk, try another USB port, adapter, or cable, then recheck. If the drive appears in lsblk but not in Etcher, close and reopen the app inside your desktop session so Fedora can show the authorization prompt. Do not add your account to a broad raw-disk group as a quick fix unless you understand the security risk.
balenaEtcher Does Not Launch on Fedora
Start the app from a terminal inside the desktop session so you can read any error output directly.
balena-etcherOn a standard Fedora Workstation install, XWayland and a Polkit agent are already present. On trimmed desktops or custom window managers, missing session components are more likely. If you never see an authorization prompt when Etcher needs elevated access, install the Polkit agent for your desktop environment and sign out and back in. If XWayland was removed, reinstall it with Fedora’s package:
sudo dnf install xorg-x11-server-XwaylandFlash Verification Fails or the Writer Stops
Write or verification failures usually point to a bad image download, a failing USB drive, or an unstable cable or port. Recheck the image checksum from the image publisher, try another drive, and inspect the target device before assuming the media is unusable:
sudo fdisk -l /dev/sdXReplace /dev/sdX with the actual device from lsblk. Do not run formatting or partitioning commands against that path until you are certain it is the removable target.
Update or Remove balenaEtcher on Fedora
Update balenaEtcher with a New RPM
balenaEtcher does not add a Fedora repository, so normal dnf upgrade runs cannot pull future Etcher releases. To update manually, repeat the latest-release download and checksum steps, then install the newer RPM over the existing package:
sudo dnf install "./$RPM_FILE"DNF treats the newer local RPM as an upgrade when balena-etcher is already installed.
Create a balenaEtcher Update Command on Fedora
The updater script checks your installed version, queries the latest GitHub release, downloads the current RPM and checksum file into a temporary directory, verifies the checksum, and then updates the package with DNF only when a newer release exists.
sudo tee /usr/local/bin/update-balenaetcher > /dev/null <<'SCRIPT_EOF'
#!/usr/bin/env bash
set -euo pipefail

API_URL="https://api.github.com/repos/balena-io/etcher/releases/latest"
WORK_DIR=$(mktemp -d "${TMPDIR:-/tmp}/balena-etcher-update.XXXXXX")
trap 'rm -rf "$WORK_DIR"' EXIT

if [ "$(id -u)" -eq 0 ]; then
  echo "Run this script as a regular user. It uses sudo only for the DNF install step."
  exit 1
fi

for cmd in curl jq grep sha256sum dnf sudo rpm mktemp; do
  if ! command -v "$cmd" >/dev/null 2>&1; then
    echo "Error: required command not found: $cmd"
    echo "Install the missing package with DNF, then rerun the script."
    exit 1
  fi
done

if rpm -q balena-etcher >/dev/null 2>&1; then
  CURRENT_VERSION=$(rpm -q --queryformat '%{VERSION}\n' balena-etcher)
else
  CURRENT_VERSION="none"
fi

RELEASE_JSON=$(curl -fsSL "$API_URL")
LATEST_TAG=$(printf '%s\n' "$RELEASE_JSON" | jq -r '.tag_name // empty')
RPM_URL=$(printf '%s\n' "$RELEASE_JSON" | jq -r '[.assets[].browser_download_url | select(test("balena-etcher-[0-9.]+-1\\.x86_64\\.rpm$"))][0] // empty')
SUMS_URL=$(printf '%s\n' "$RELEASE_JSON" | jq -r '[.assets[].browser_download_url | select(test("SHA256SUMS\\.Linux\\.x64\\.txt$"))][0] // empty')

if [ -z "$LATEST_TAG" ]; then
  echo "Error: could not detect the latest balenaEtcher release tag."
  exit 1
fi
if [ -z "$RPM_URL" ]; then
  echo "Error: could not find the x86_64 RPM asset."
  exit 1
fi
if [ -z "$SUMS_URL" ]; then
  echo "Error: could not find the SHA256 checksum file."
  exit 1
fi

LATEST_VERSION=${LATEST_TAG#v}
echo "Current installed version: $CURRENT_VERSION"
echo "Latest available version: $LATEST_VERSION"

if [ "$CURRENT_VERSION" = "$LATEST_VERSION" ]; then
  echo "balenaEtcher is already up to date."
  exit 0
fi

printf 'Continue with the balenaEtcher download and install? [y/N] '
read -r REPLY
case "$REPLY" in
y | Y | yes | YES) ;;
*)
  echo "Canceled."
  exit 0
  ;;
esac

cd "$WORK_DIR"
RPM_FILE=${RPM_URL##*/}

curl -fL --progress-bar -o "$RPM_FILE" "$RPM_URL"
curl -fsSLo SHA256SUMS.Linux.x64.txt "$SUMS_URL"
CHECKSUM_LINE=$(grep " $RPM_FILE$" SHA256SUMS.Linux.x64.txt || true)
if [ -z "$CHECKSUM_LINE" ]; then
  echo "Error: checksum entry for $RPM_FILE was not found."
  exit 1
fi
printf '%s\n' "$CHECKSUM_LINE" | sha256sum -c -

sudo dnf install -y "$WORK_DIR/$RPM_FILE"
NEW_VERSION=$(rpm -q --queryformat '%{VERSION}\n' balena-etcher)
echo "Installed version after update: $NEW_VERSION"
echo "Update complete. Temporary files will be removed automatically when the script exits."
SCRIPT_EOF
sudo chmod +x /usr/local/bin/update-balenaetcher
Confirm Fedora can find the helper:
command -v update-balenaetcher/usr/local/bin/update-balenaetcher
Run the helper manually when you want to check for a newer release:
update-balenaetcherWhen the installed version already matches the latest GitHub release, the helper exits before downloading anything:
Current installed version: 2.x.x
Latest available version: 2.x.x
balenaEtcher is already up to date.
Run the updater manually rather than from cron or an unattended timer. GitHub API limits, changed release assets, or DNF prompts should be visible while you are at the terminal.
Remove balenaEtcher from Fedora
Remove the RPM first. If you created the update helper, remove that local helper file too.
sudo dnf remove balena-etcher
sudo rm -f /usr/local/bin/update-balenaetcher
Verify the package and command are gone:
if rpm -q balena-etcher >/dev/null 2>&1; then
  echo "balena-etcher is still installed"
else
  echo "balena-etcher is not installed"
fi
hash -r
command -v balena-etcher || echo "balena-etcher not found"
balena-etcher is not installed balena-etcher not found
Find balenaEtcher User Data Before Deleting It
Package removal does not delete per-user settings. Search your account first instead of deleting guessed paths.
find "$HOME/.config" "$HOME/.cache" "$HOME/.local/share" -maxdepth 1 -iname '*balena*' 2>/dev/nullThe next command permanently deletes balenaEtcher settings and cache data for your user account. Skip it if you want to keep preferences for a future reinstall.
for path in "$HOME/.config/balenaEtcher" "$HOME/.cache/balenaEtcher"; do
  if [ -e "$path" ]; then
    rm -rf "$path"
  fi
done
Conclusion
balenaEtcher is ready on Fedora as a checksum-verified local RPM, with DNF handling install and removal while the update helper covers future GitHub releases. Fedora Media Writer remains the cleanest path for Fedora-only ISOs, and installing VirtualBox on Fedora is useful when you want to test an image before writing it. For package-manager details, keep DNF5 install examples on Fedora nearby.

Formatting tips for your comment
You can use basic HTML to format your comment. Useful tags currently allowed in published comments:
<code>command</code>command<strong>bold</strong><em>italic</em><blockquote>quote</blockquote>