This guide will demonstrate how to install Arduino on Ubuntu 24.04, 22.04, or 20.04 LTS Linux releases utilizing the command-line terminal with the APT Package Manager, Snap, or Flatpak with Flathub.
Arduino stands as a cornerstone in the realm of electronics and programming, offering an open-source platform that empowers creators, hobbyists, and professionals alike. Its versatility and user-friendly nature have made it a go-to for developing interactive projects that can sense and control the physical world. With a rich hardware and software ecosystem, Arduino simplifies the journey from idea to implementation.
Below are key highlights that underline the significance of Arduino in the technological landscape:
- Simplicity and Accessibility: Designed with beginners in mind, Arduino makes it straightforward to start with electronics and coding.
- Open-Source Software and Hardware: Encourages modification, sharing, and community contributions, fostering innovation.
- Wide Range of Compatible Boards: From the Uno to more advanced models, there’s an Arduino board for every project.
- Extensive Libraries and Examples: A vast collection of resources that simplify coding for various sensors and modules.
- Cross-Platform: The Arduino IDE is compatible with Windows, macOS, and Linux, ensuring accessibility for all users.
- Large and Active Community: Offers extensive support, tutorials, and shared projects, making it easier to learn and troubleshoot.
- Affordability: Arduino boards are relatively inexpensive, making technology more accessible to schools, hobbyists, and prototype developers.
- Versatility: Suitable for projects ranging from simple hobby creations to complex scientific instruments.
Transitioning seamlessly into the technical how-to, this guide is tailored to enhance your Arduino experience on Ubuntu Linux.
Install Arduino on Ubuntu via APT
Installing the Arduino IDE on your Ubuntu system involves a two-step process. This guide will explain each step in detail to ensure a smooth and trouble-free installation.
Update Your Ubuntu System Before Arduino Installation
Before diving into the installation process, ensuring that your Ubuntu system is up-to-date is prudent. This step is vital because outdated system packages may lead to software conflicts or performance issues. The command to update your Ubuntu system is:
sudo apt update && sudo apt upgradeWhen you execute this command, you are doing two things. The sudo apt update command updates the package lists for upgrades for packages that need upgrading, as well as new package lists for packages that just came out. The sudo apt upgrade command then upgrades the actual packages.
Install Arduino on Ubuntu via APT Command
The Arduino IDE can be installed directly from the official Ubuntu repository using the APT method. The repository often carries a stable software version, ensuring a balance between new features and reliability. However, it might not be the absolute latest version available. If you need the most recent version of Arduino IDE, consider using the Flatpak or Snapcraft method, which we’ll explore later.
The command to install Arduino IDE using APT is:
sudo apt install arduinoUpon executing this command, the APT utility will resolve all dependencies and install the Arduino IDE onto your system.
Install Arduino on Ubuntu via Snap
Snap is an alternative installation method that provides a user-friendly way to deploy applications. In this section, we’ll guide you through installing the Arduino IDE using Snap.
Ensuring Snap’s Availability on Your System
Canonical, the company behind Ubuntu, developed Snap as a software deployment and package management system. Your Ubuntu installation should include Snap by default unless you have manually removed it.
If you have previously removed Snap from your system or it is not installed for some reason, you can reinstall it with the following command:
sudo apt install snapd -yThis command reinstalls the Snap Daemon (snapd), which is the background service that manages and maintains your snaps.
Enable Classic Snap Support for Arduino on Ubuntu
Packages that use the ‘classic’ confinement gain access to your system’s resources like traditionally packaged applications. To ensure maximum compatibility and smooth functioning of these packages, we recommend creating a symbolic link (symlink) to enable classic snap support. You can achieve this by running the following command:
sudo ln -s /var/lib/snapd/snap /snapInstall Core Snap Package on Ubuntu for Arduino
Before installing the Arduino IDE, it’s prudent to install the ‘core’ snap. The core snap provides the foundational libraries and services every snap depends on. Installing it can help prevent potential conflicts and issues. The command to install the core snap is:
sudo snap install coreInstall Arduino on Ubuntu via Snap Command
With the necessary prerequisites sorted, you can install the Arduino IDE with the following command:
sudo snap install arduinoJust like the previous installation methods, sudo gives you administrative privileges, snap calls the Snap package handler, install is the command to install a package, and ‘arduino’ is the package we want to install.
Install Arduino on Ubuntu via Flatpak and Flathub
Flatpak is another potent universal package management system for Linux, much like Snap. It offers the benefit of isolating applications from the rest of your system. Each Flatpak app runs in its own environment, reducing potential conflicts and improving security. This section will delve into installing the Arduino IDE via Flatpak and Flathub.
Note: If your system lacks Flatpak, it must be installed first. For step-by-step instructions on how to install the most recent supported version of Flatpak on Ubuntu, please refer to our guide on installing Flatpak.
Activating the Flathub Repository for Arduino on Ubuntu
The first necessary action before installing the Arduino IDE via Flatpak is enabling the Flathub repository. Flathub is a central hub for hosting Flatpak applications. It serves as a store from which you can access and install many applications.
To activate the Flathub repository, the following command should be entered in your terminal:
sudo flatpak remote-add --if-not-exists flathub https://flathub.org/repo/flathub.flatpakrepoThis command integrates the Flathub repository into your Flatpak configuration. This integration gives you the advantage of having a wide range of applications, including the Arduino IDE.
Install Arduino on Ubuntu via Flatpak Command
With the Flathub repository now activated, the next step is installing the Arduino IDE. To accomplish this, the flatpak install command is used. Below is the specific command to install Arduino IDE:
Install Arduino IDE Stable on Ubuntu
flatpak install flathub cc.arduino.arduinoide -yInstall Arduino IDE Beta on Ubuntu
flatpak install flathub cc.arduino.IDE2 -yThis command installs the Arduino IDE from the Flathub repository, granting you access to the latest version of the application.
Launch Arduino on Ubuntu via GUI or CLI
Now that you have installed the Arduino IDE on your system, you might want to learn how to launch it. Whether you prefer the command-line interface (CLI) or a graphical user interface (GUI), we have instructions for you. Here is how to launch the Arduino IDE from both environments.
CLI Methods for Arduino on Ubuntu
Launching applications from the terminal can often be quicker and provide additional information that might be helpful for troubleshooting. Here are the methods for launching the Arduino IDE depending on how you installed it.
APT CLI Method for Arduino on Ubuntu
If you installed the Arduino IDE using the APT method, you could launch it with this simple command:
arduinoSnap CLI Method for Arduino on Ubuntu
For those who chose the Snap installation method, the following command will initiate the Arduino IDE:
snap run arduinoFlatpak CLI Methods for Arduino on Ubuntu
If you’ve installed Arduino IDE via Flatpak, the commands will vary depending on the version you installed. Here they are:
For Arduino v1.x, use this command:
flatpak run cc.arduino.arduinoideFor Arduino v2.x, use this command:
flatpak run cc.arduino.IDE2GUI Method for Arduino on Ubuntu
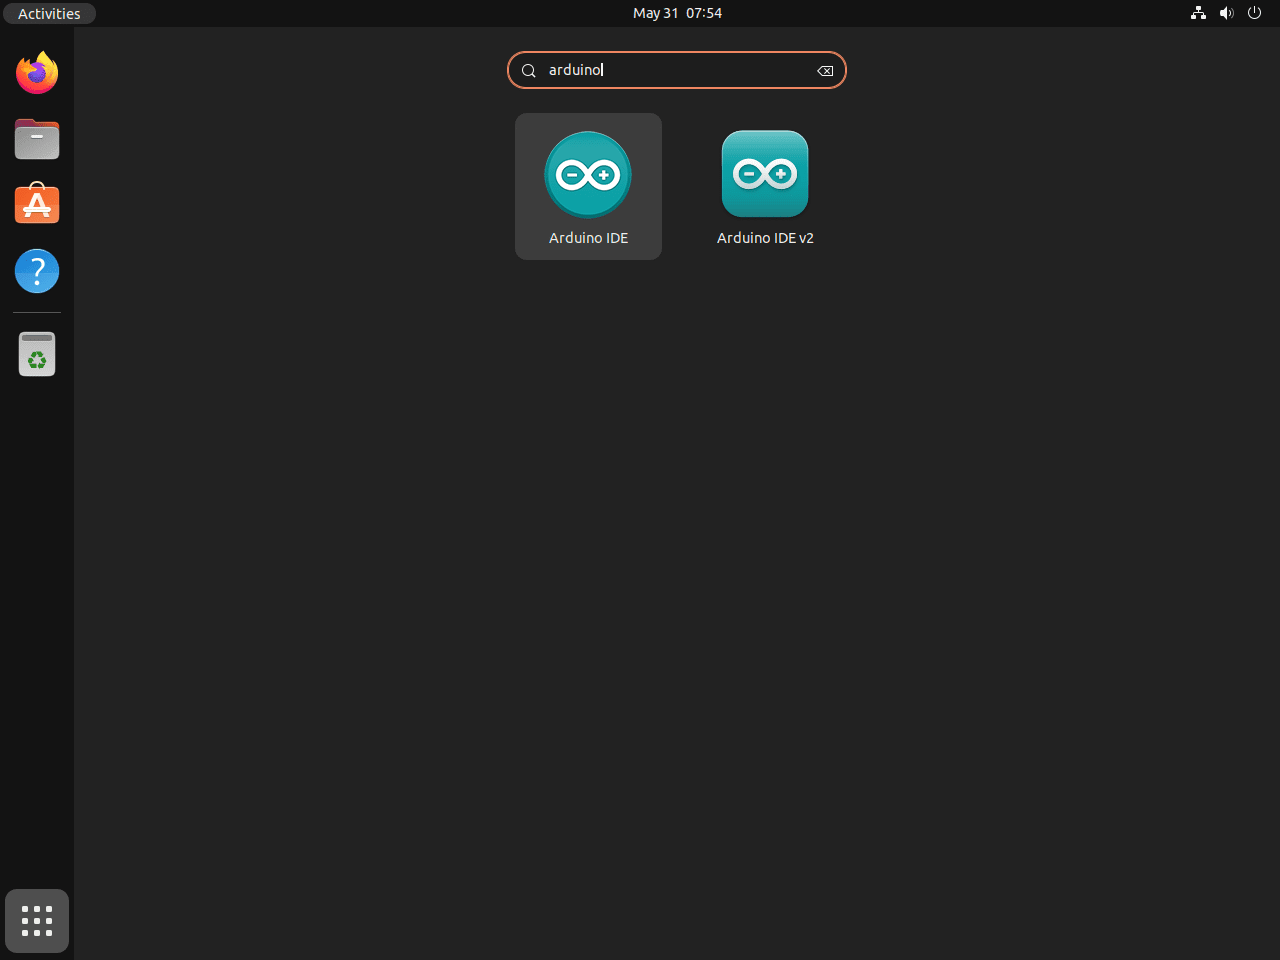
The Arduino IDE can be located and launched through the Ubuntu GUI for users who prefer graphical interfaces. Here’s the path you need to follow:
- From the desktop, navigate to the Activities menu in the top-left corner.
- Click on Show Applications at the bottom of the sidebar.
- Scroll or search for Arduino IDE in the applications list.
With these methods in your arsenal, you can launch the Arduino IDE in the way that suits you best.
First-Time Tips with Arduino on Ubuntu
Working with the Arduino IDE on Ubuntu Linux can be a highly efficient and rewarding experience, especially when familiar with a handful of tips and tricks. In this section, we’ll guide you through some insights to optimize your usage of Arduino IDE 1.x and 2.x versions on Linux. These strategies will focus on customization, performance improvement, and general guidance that can make your work with Arduino more enjoyable and productive.
General Tips for Arduino with Ubuntu
Here are some general tips applicable to both 1.x and 2.x versions of Arduino IDE:
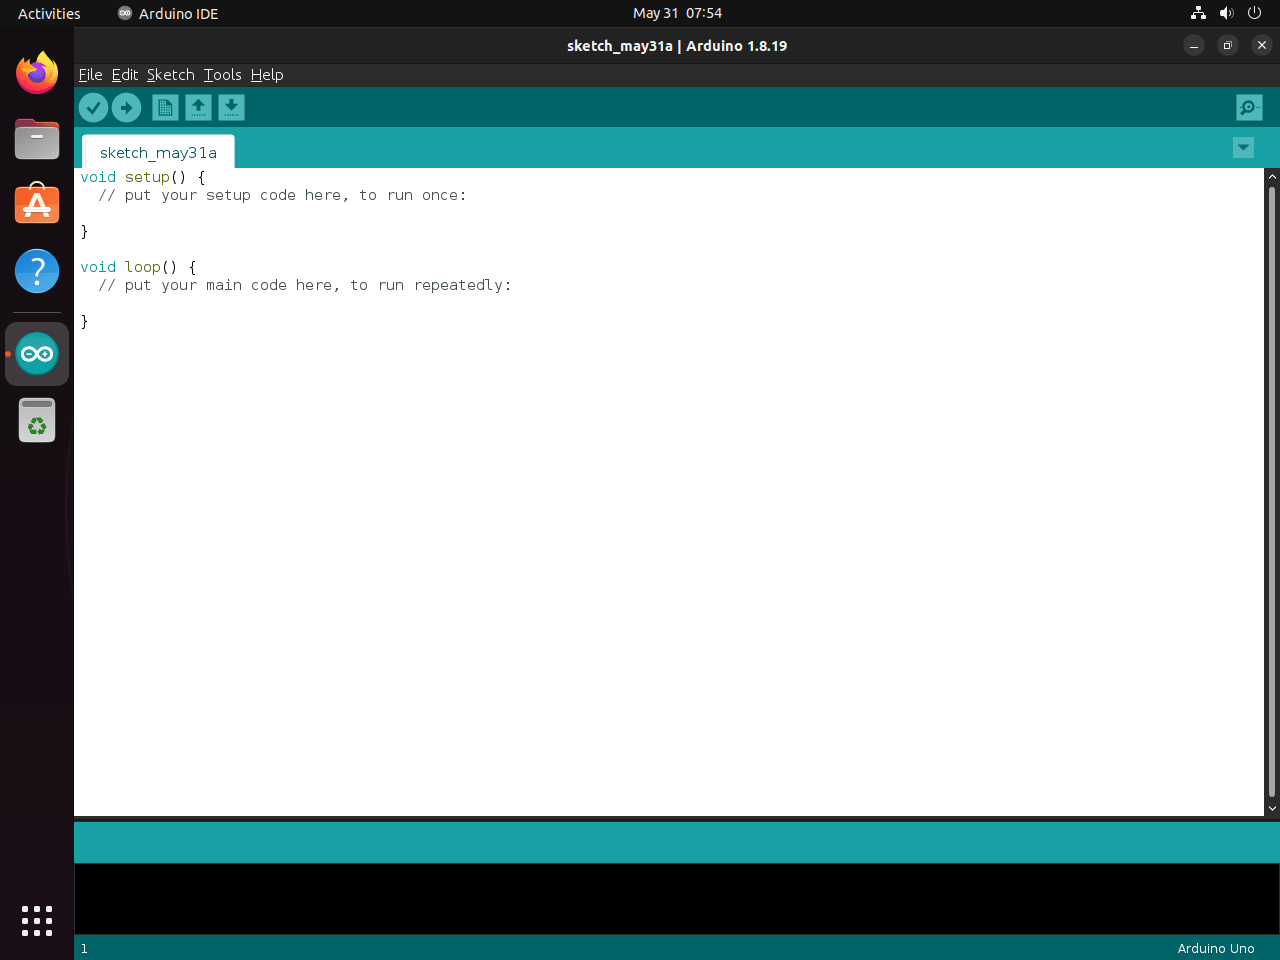
- Understanding the IDE Environment: Familiarize yourself with the Arduino IDE environment. The top section has menus for file operations, editing code, navigating sketches, and tools for uploading code to the Arduino board.
- Using Comments: It’s always a good practice to comment your code. This will not only help others understand your code but also help you keep track of what each section of code is doing.
- Indentation: Keep your code clean and readable with proper indentation. The Arduino IDE has an auto-format tool under the Tools menu which can help you with this.
- Learning Shortcuts: Utilize keyboard shortcuts to speed up your workflow. For instance, Ctrl + R verifies your code, and Ctrl + U uploads the code to your Arduino board.
Arduino IDE 1.x Specific Tips with Ubuntu
Here are some tips specific to the 1.x versions of the Arduino IDE:
- Changing IDE Theme: If you want to customize the look and feel of your IDE, you can modify the theme.txt file located in the Arduino IDE’s theme directory (usually found under /usr/share/arduino/lib/theme). Remember to make a backup of the original file before modifying it.
- Serial Monitor: The Arduino IDE has a serial monitor (found under the Tools menu). This feature allows you to interact with your Arduino board in real-time, which can be handy for debugging.
Arduino IDE 2.x Specific Tips with Ubuntu
The following are some tips tailored for the 2.x versions of the Arduino IDE:
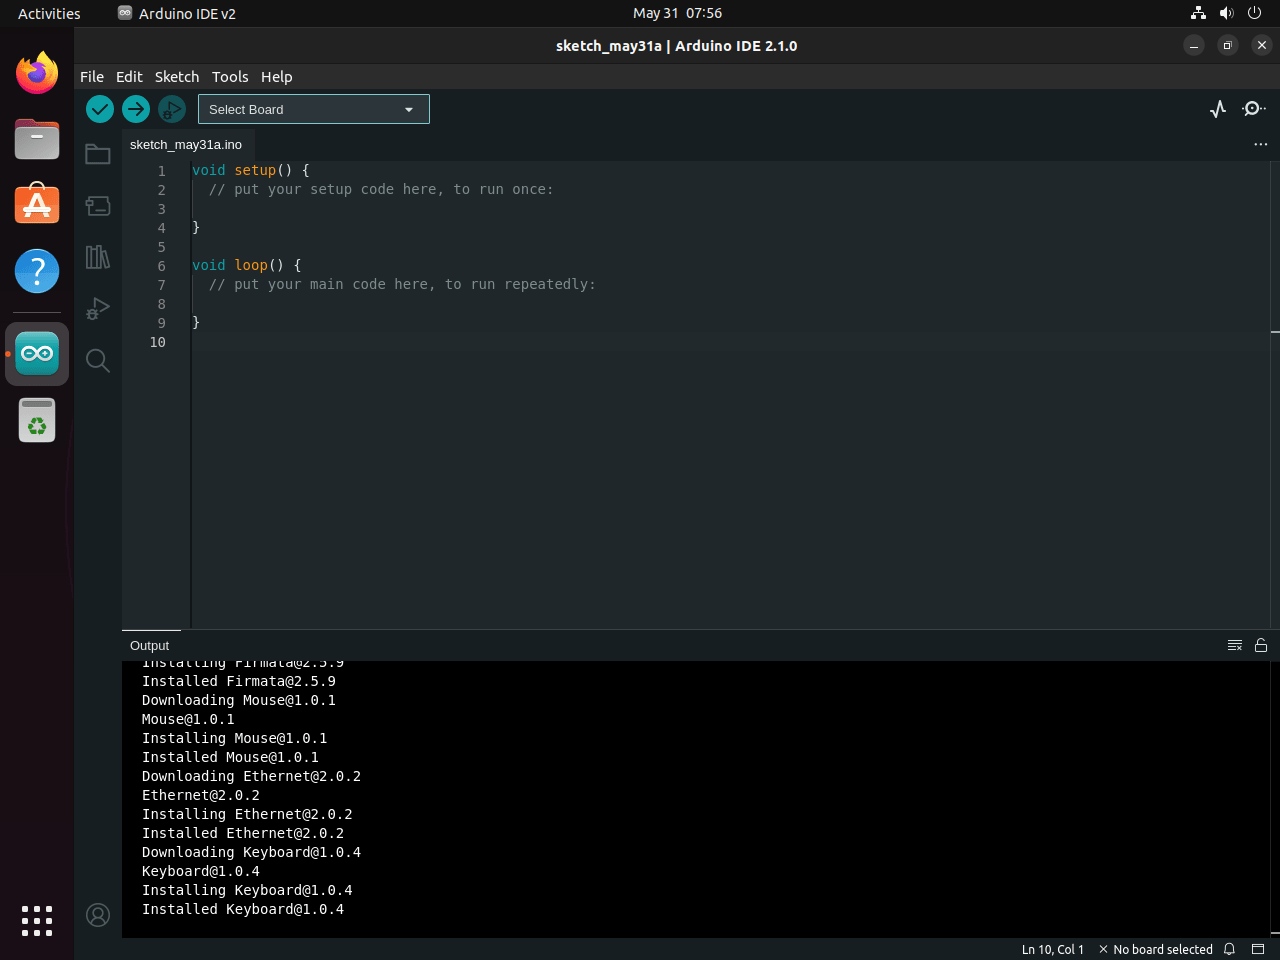
- Board and Library Manager: The 2.x version has built-in board and library managers. They provide a more streamlined experience for adding new Arduino boards and installing libraries directly from the IDE.
- Autosave Feature: The 2.x version has an autosave feature. You can enable it from File > Preferences to ensure you never lose your work.
- Live Debugger: One of the major additions in 2.x versions is the live debugger, which can be used for more advanced debugging of your sketches.
These tips should help you get off to a great start with the Arduino IDE on Ubuntu Linux. Remember, the best way to learn is by doing. Don’t be afraid to explore and experiment within the Arduino IDE environment – there’s always more to discover!
Managing Arduino on Ubuntu
Managing the Arduino IDE on your Ubuntu Linux system is critical to the development lifecycle. In this section, we will dive into how to update your Arduino IDE and, when necessary, uninstall it from your system.
Update Arduino
Keeping the Arduino IDE up-to-date gives you access to the latest features, bug fixes, and security patches. It is a good practice to check for updates periodically, even if automatic updates are enabled.
Each package management system provides its command to update installed packages. Here are the commands for the three common package managers:
APT Update Command for Arduino
Use the following command in your terminal:
sudo apt updateSnap Update Command for Arduino
Execute this command in your terminal:
sudo snap refreshFlatpak Update Command for Arduino
Run the following command:
flatpak updateRemove Arduino
At some point, you might need to uninstall the Arduino IDE from your system. The commands for this operation differ based on how the Arduino IDE was installed.
APT Remove Command for Arduino
If you used the APT package manager for installation, use this command to remove the Arduino IDE:
sudo apt remove arduinoSnap Remove Command for Arduino
For the removal of a Snapcraft-installed Arduino IDE, use this command:
sudo snap remove arduinoFlatpak Remove Command for Arduino
For uninstalling the Flatpak version of Arduino, different commands are used for the stable and beta versions.
To remove the stable version:
flatpak uninstall --delete-data cc.arduino.arduinoide -yTo remove the beta version:
flatpak uninstall --delete-data cc.arduino.IDE2 -yConclusion
Alright, let’s tie it all together. We’ve explored three paths to installing Arduino on Ubuntu: the trusty APT, the versatile Flatpak, and the ever-convenient Snap. It’s all about picking the lane that suits your workflow best. Whether you’re sticking with the straightforwardness of APT, craving the cutting-edge versions from Flatpak, or going for the snap of Snap’s simplicity, you’re now equipped to dive into your electronics projects. Just a final nudge—keep your system updated, and don’t shy away from experimenting with different installation methods to find what best fuels your creative ventures. Here’s to bringing your ideas to life, one circuit at a time!


