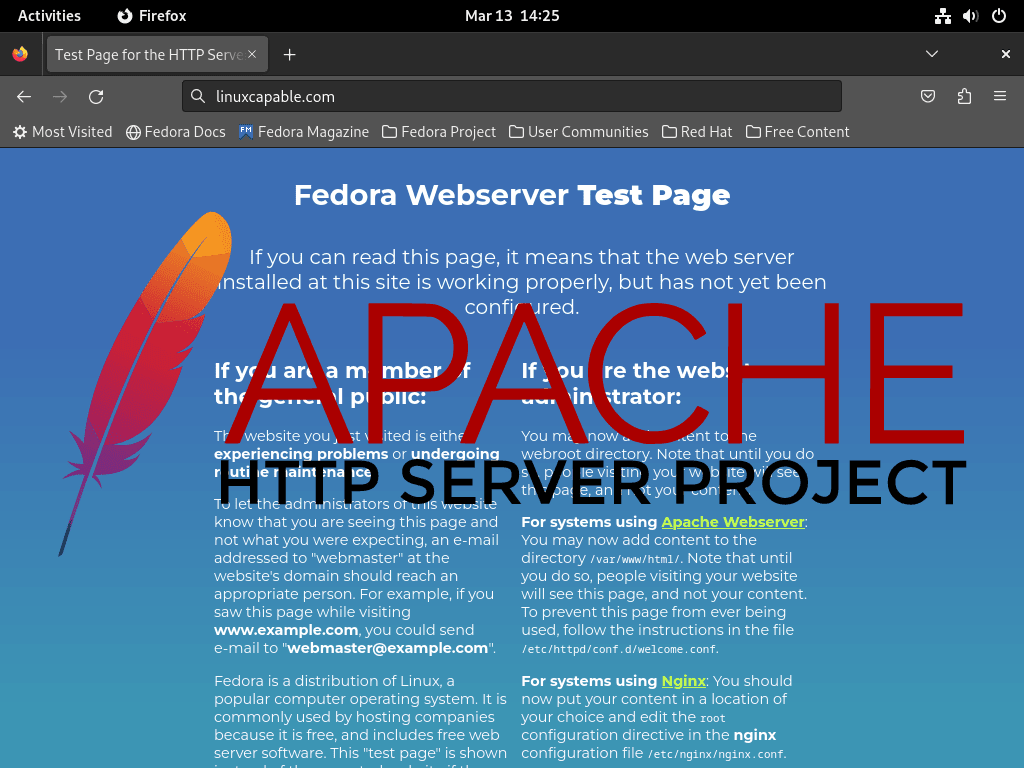
In this guide, we’ll walk you through how to install Apache on Fedora Linux. Apache, officially known as Apache HTTP Server, stands as one of the most widely-used web server software worldwide. Renowned for its versatility and robustness, it serves as a cornerstone for hosting websites and web applications. Whether you’re setting up a personal blog or a complex corporate web infrastructure, Apache’s rich feature set makes it an ideal choice.
Key Features of Apache HTTP Server:
- Flexibility: Customizable with modules to extend functionality.
- Cross-Platform Compatibility: Runs on various operating systems, including Linux, Windows, and MacOS.
- Security: Strong focus on secure and reliable operations.
- Efficiency: Excellent handling of concurrent requests, optimizing server performance.
- Support for Multiple Programming Languages: Works seamlessly with languages like PHP, Python, and Perl.
- Active Community Support: Benefits from a vast community of users and developers.
As a backbone for many of the internet’s websites, Apache balances power and simplicity, making it accessible for beginners yet powerful enough for advanced users. The installation process on Fedora Linux is straightforward, and we’re here to guide you through each step. With Apache, you’ll unlock the potential to host and manage websites with ease, enjoying the rich functionality that has made it a preferred choice for millions of users globally.
Install Apache on Fedora Linux via DNF
Step 1: Update Fedora Packages Before Apache Installation
To begin, updating your Fedora system ensures that it runs the latest software, which is essential for compatibility and security.
Open your terminal and run the command:
sudo dnf upgrade --refreshThis command combines the use of sudo for administrative rights with dnf upgrade to update all packages. The --refresh option ensures you’re getting the latest information from your repositories. It’s important to let this process complete before moving to the next step to maintain system integrity and smooth functioning.
Step 2: Install Apache (HTTPD) via DNF Command
With your system up to date, installing Apache, also known as HTTPD, is straightforward. Fedora utilizes the DNF package manager for such tasks.
In your terminal, run:
sudo dnf install httpdThis command fetches and installs Apache on your Fedora system. DNF handles dependencies and configurations, simplifying the installation. The process is usually quick, leaving Apache ready for use upon completion.
Step 3: Enable Apache (HTTPD) on Fedora
Once Apache is installed, the next step is to start and enable the service to ensure it runs on boot. If not automatically activated, use these commands:
sudo systemctl start httpd
sudo systemctl enable httpd
sudo systemctl start httpd begins the Apache service, and sudo systemctl enable httpd sets it to launch at boot. This two-step approach ensures Apache is active and persistently available.
Alternatively, you can combine these steps:
sudo systemctl enable httpd --nowThe --now flag with sudo systemctl enable httpd starts Apache immediately and configures it to launch at boot, streamlining the process.
Step 4: Verify Apache (HTTPD) Service Status
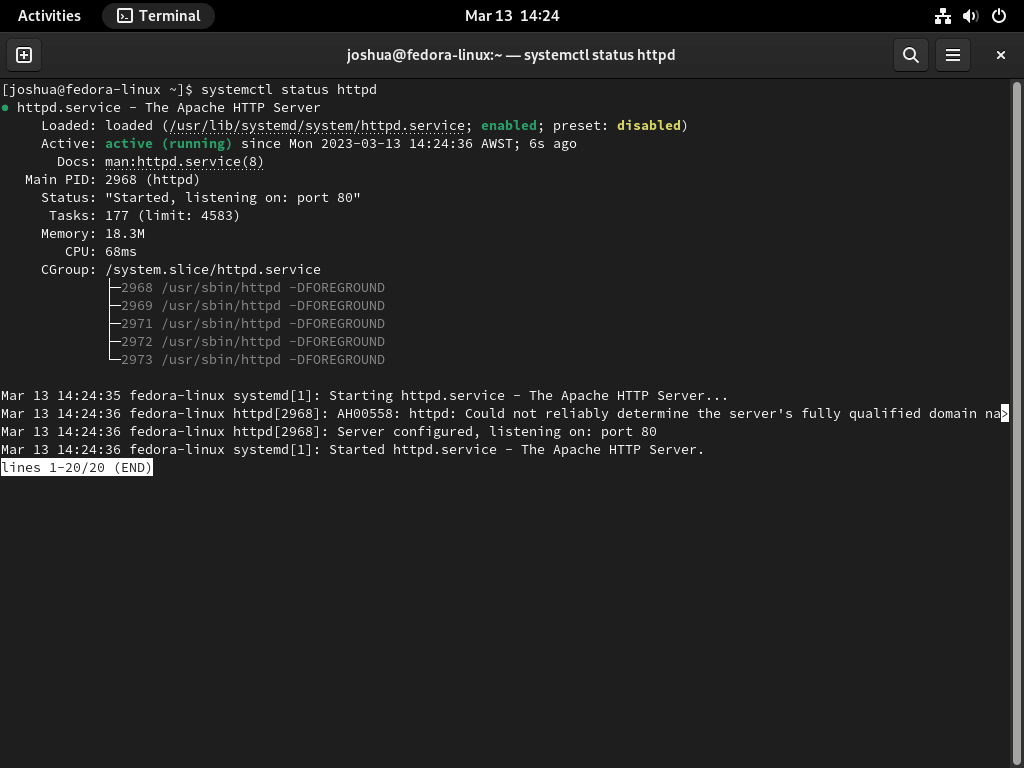
Finally, verify Apache’s status:
systemctl status httpdThis command provides Apache’s operational status. The output includes the service’s current state and any error messages, essential for troubleshooting. Regularly checking this can help maintain a stable and functional Apache setup on your Fedora system.
Configure Firewalld Rules for Apache on Fedora Linux
Opening Ports for HTTP and HTTPS
After installing Apache (HTTPD) on Fedora, it’s essential to configure Firewalld to allow traffic on ports 80 (HTTP) and 443 (HTTPS). These steps are vital for the security and accessibility of your web application.
Opening Port 80 (HTTP):
Execute the following command to open port 80, which is used for HTTP traffic:
sudo firewall-cmd --permanent --add-port=80/tcpThis command configures Firewalld to allow incoming TCP traffic on port 80, commonly used for unencrypted web traffic.
Opening Port 443 (HTTPS):
To allow secure, encrypted traffic, open port 443 with this command:
sudo firewall-cmd --permanent --add-port=443/tcpPort 443 is used for HTTPS traffic, providing encrypted communication between clients and the server.
Applying the Firewall Changes:
After setting the rules, apply them by reloading Firewalld:
sudo firewall-cmd --reloadReloading the firewall ensures that all changes are active and effective immediately.
Security Considerations
Understanding the security implications of these changes is crucial. Opening only necessary ports minimizes potential vulnerabilities, safeguarding your application from unauthorized access and threats.
Verifying Apache Accessibility
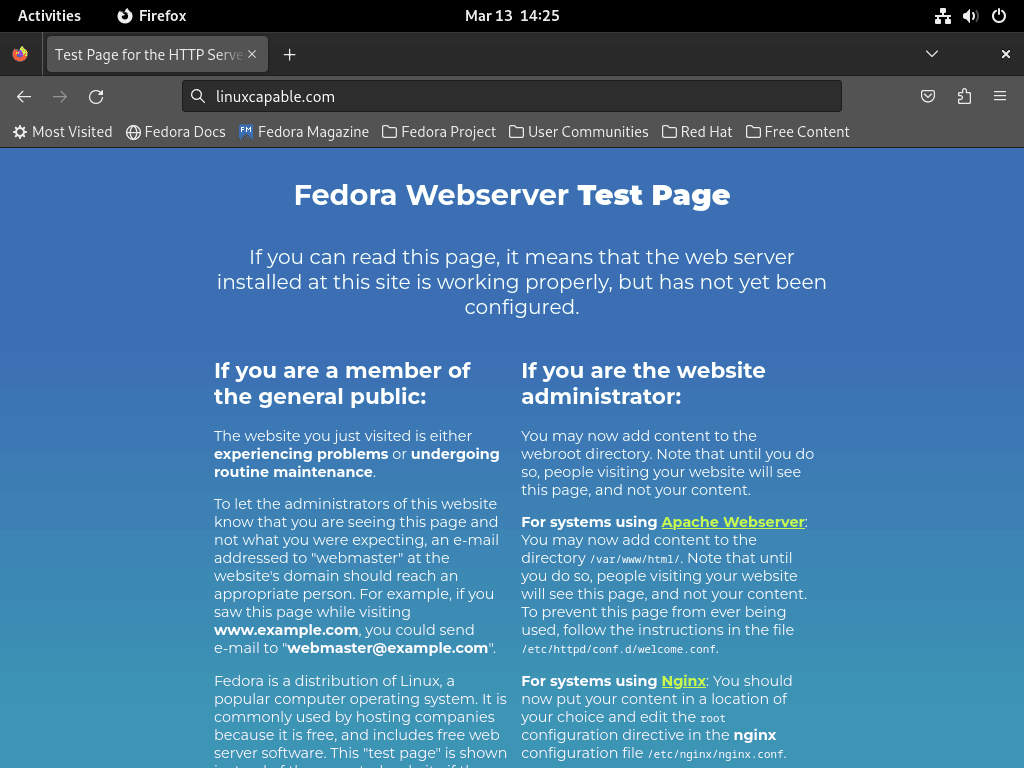
To confirm successful configuration, access the Apache (HTTPD) landing page:
- Open your web browser.
- Navigate to
http://localhostorhttp://<your_server_ip>.
If configured correctly, the Apache default page should appear, confirming the server’s operational status.
Troubleshooting Access Issues
If you can’t access the landing page, consider these steps:
- Review the firewall rules for accuracy.
- Check the Apache service status.
- Examine server configurations for errors.
Addressing these aspects will help you identify and resolve any issues hindering access to Apache on Fedora.
Create a Virtual Host on Apache with Fedora Linux
Creating and Configuring Directories for Your Virtual Host
Start by creating a directory for your virtual host on Fedora Linux. This directory will act as the root for your website’s files. For a domain like “example.com”, use the following command:
sudo mkdir /var/www/example.comReplace “example.com” with your actual domain name. This directory will hold all website files, including HTML, images, and scripts. For organizational and security purposes, it’s advisable to create separate directories for different virtual hosts.
Set the directory’s ownership and permissions so that Apache can access it:
sudo chown -R apache:apache /var/www/example.com
sudo chmod -R 755 /var/www/example.com
The first command changes the directory ownership to the Apache user and group. The second sets the necessary permissions.
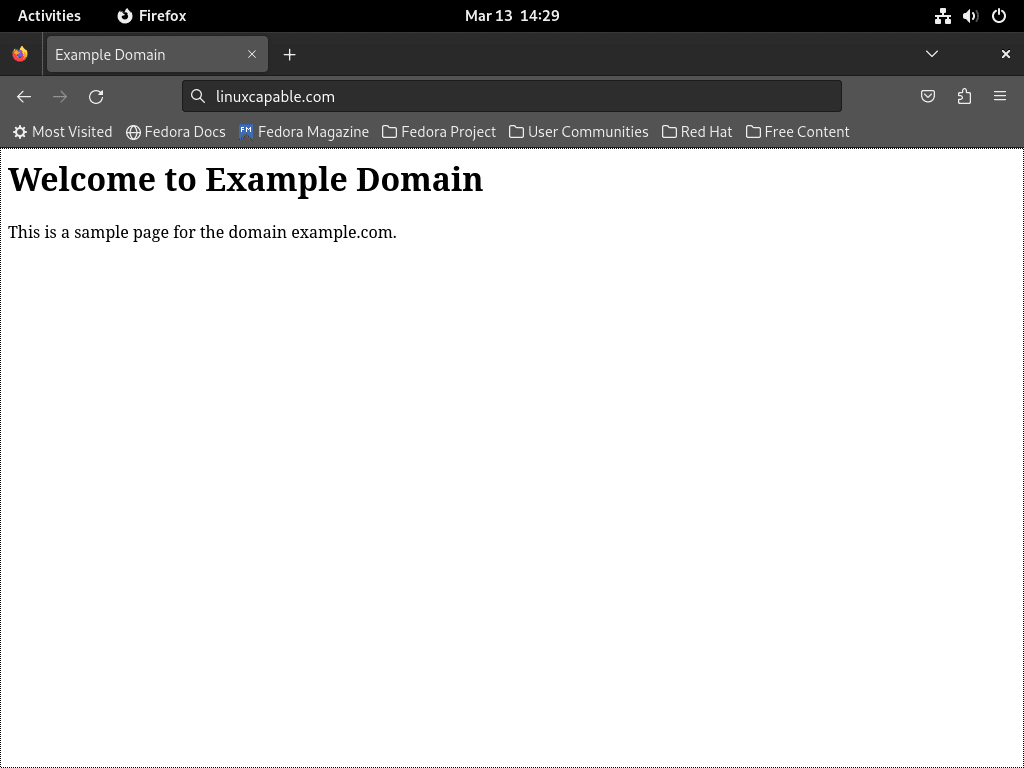
Create an index.html file in this directory. This file is the first page visitors see. Use a text editor like nano to create this file:
sudo nano /var/www/example.com/index.htmlInside the editor, you can add the following HTML structure:
<html>
  <head>
    <title>Example Domain</title>
  </head>
  <body>
    <h1>Welcome to Example Domain</h1>
    <p>This is a sample page for the domain example.com.</p>
  </body>
</html>
Customize this HTML to fit your site’s needs. Save and exit the editor using Ctrl + X, followed by Y and Enter.
Creating Virtual Host
Setting Up Directories for Apache
First, create the sites-available and sites-enabled directories:
sudo mkdir /etc/httpd/sites-available /etc/httpd/sites-enabledThese directories help organize virtual host configurations. Now, edit the Apache configuration file:
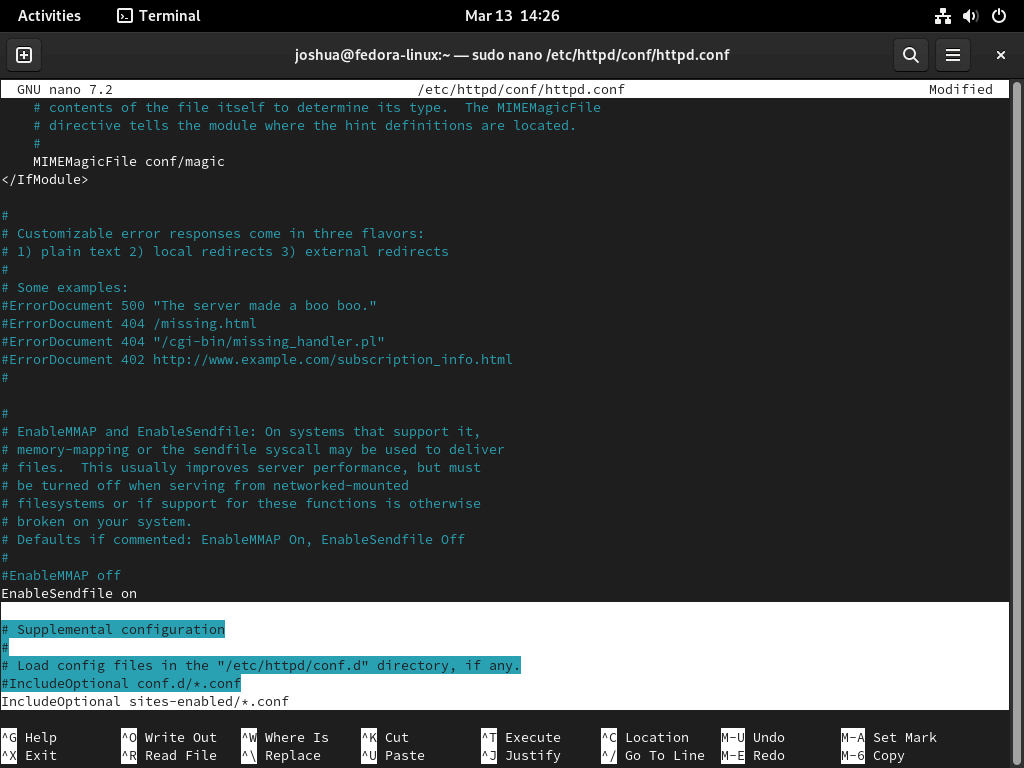
sudo nano /etc/httpd/conf/httpd.confAt the end of the file, add:
#IncludeOptional conf.d/*.conf
IncludeOptional sites-enabled/*.conf
Save and exit with Ctrl + O and Ctrl + X.
Configuring Your Virtual Host
Create a configuration file for your domain:
sudo nano /etc/httpd/sites-available/example.com.confIn the file, add the following configuration, adjusting the ServerName, ServerAlias, and DocumentRoot as needed:
<VirtualHost *:80>
    ServerAdmin webmaster@localhost
    ServerName example_domain
    ServerAlias www.example_domain
    DocumentRoot /var/www/example.com/
</VirtualHost>
Modifying Access Permissions
Modify Apache’s access permissions to allow public access. Edit the main configuration file:
sudo nano /etc/httpd/conf/httpd.confAdd these lines at the end:
<Directory /var/www/example.com/>
Options Indexes FollowSymLinks
AllowOverride None
Require all granted
</Directory>
Save and exit with Ctrl + O and Ctrl + X.
Enabling Virtual Host
Create a symbolic link to enable the virtual host:
sudo ln -s /etc/httpd/sites-available/example.com.conf /etc/httpd/sites-enabled/Restart Apache to apply the changes:
sudo systemctl restart httpdAfter restarting Apache, visit http://example_domain in your web browser. If you haven’t registered a domain, use the server’s IP address. You should see the landing page you created earlier.
Manage Apache (HTTPD) Service on Fedora Linux
Apache Server Logs
Apache server logs are crucial for monitoring and troubleshooting. By default, they are located in /var/log/httpd/. The standard filenames are access.log for access logs and error.log for error logs. However, you can customize these filenames in the virtual host configuration file.
Customizing Log Filenames
To change the log filenames, edit the virtual host configuration file. Here’s an example for custom log names:
<VirtualHost *:80>
    ServerName www.example.com
    DocumentRoot /var/www/example.com

    # Change access log to custom-access.log
    CustomLog /var/log/httpd/custom-access.log combined

    # Change error log to custom-error.log
    ErrorLog /var/log/httpd/custom-error.log
</VirtualHost>
This configuration sets custom-access.log and custom-error.log as the new filenames for access and error logs, respectively. Remember to provide the correct file path when configuring custom log names.
Apache Commands for Service Management
Managing the Apache service involves a set of commands that allow you to control its operation:
Stopping Apache:
To stop the Apache server, use:
sudo systemctl stop httpdThis command halts the Apache service until it is started again.
Starting Apache:
To start the Apache server, use:
sudo systemctl start httpdThis command activates the Apache service, making it ready to serve web content.
Restarting Apache:
To restart the Apache server, use:
sudo systemctl restart httpdRestarting is useful for applying configuration changes or recovering from non-critical errors.
Reloading Apache:
To reload the Apache server, use:
sudo systemctl reload httpdReloading applies configuration changes without disrupting the running service.
Disabling Apache on Boot:
To prevent Apache from starting automatically on boot, use:
sudo systemctl disable httpdThis command removes Apache from the list of services that start on system boot.
Enabling Apache on Boot:
To set Apache to start automatically on boot, use:
sudo systemctl enable httpdThis ensures that Apache starts whenever the system boots up, providing consistent web service availability.
Secure Apache with Let’s Encrypt SSL Free Certificate on Fedora Linux
Install Certbot for SSL/TLS Certificate Automation
Begin by installing Certbot, a tool for automating the acquisition and renewal of SSL/TLS certificates, ensuring HTTPS encryption for your website. To install Certbot, execute:
sudo dnf install certbot python3-certbot-apacheGenerate SSL/TLS Certificate for Your Domain
After installation, generate an SSL/TLS certificate for your domain with this command:
sudo certbot --apache -d example.comReplace “example.com” with your actual domain name.
Alternative Command for Generating SSL Certificate
For a comprehensive SSL setup, use the following command:
sudo certbot --dry-run --apache --agree-tos --redirect --hsts --staple-ocsp --email you@example.com -d www.example.com--dry-run: Tests the certificate generation without altering the system.--apache: Indicates the certificate is for an Apache server.--agree-tos: Agrees to Let’s Encrypt’s terms of service.--redirect: Redirects HTTP traffic to HTTPS.--hsts: Enables HTTP Strict Transport Security, ensuring only secure HTTPS connections.--staple-ocsp: Activates OCSP stapling for verifying the SSL certificate.--email: Your email address associated with the certificate.-d: The domain name for the certificate, here “www.example.com”.
Configuring Apache to Use the SSL Certificate
To configure Apache, open the SSL configuration file:
sudo nano /etc/httpd/conf.d/ssl.confIn this file, add the following lines, replacing “example.com” with your domain:
SSLEngine on
SSLCertificateFile /etc/letsencrypt/live/example.com/cert.pem
SSLCertificateKeyFile /etc/letsencrypt/live/example.com/privkey.pem
SSLCertificateChainFile /etc/letsencrypt/live/example.com/chain.pem
Verifying and Renewing the SSL Certificate
Post-installation, your website will transition from “HTTP://www.example.com” to “HTTPS://www.example.com,” ensuring encrypted and secure communication.
Setting Up Automatic Certificate Renewal
To keep the SSL certificate updated, set up a cron job for Certbot renewal. First, test the renewal process:
sudo systemctl restart httpd This test ensures the renewal script functions correctly before scheduling it as a cron job.
sudo certbot renew --dry-runSSL Certificate Renewal and Management
Verifying SSL Certificate Status
Before automating the renewal process, it’s crucial to understand the current status of your SSL certificates. To check the status, including the expiration dates of all certificates managed by Certbot, use this command:
sudo certbot certificatesThis command provides a list of all SSL certificates handled by Certbot, along with their respective expiration dates. This information is essential to confirm that your certificates are active and to understand when they will require renewal.
Automating SSL Certificate Renewal
To ensure uninterrupted HTTPS service, SSL certificates must be renewed periodically. Automating this process is vital for maintaining a secure website.
Installing Cronie for Cron Jobs
If Cronie, the cron job manager, is not installed on your Fedora system, install it using:
sudo crontab -eCronie allows you to schedule tasks like the Certbot renewal script to run at specified times and intervals.
Editing Cron Job Configuration
After installing Cronie, schedule the SSL certificate renewal by editing the cron job configuration:
sudo dnf install cronieThis command opens the crontab editor, where you can add scheduled tasks.
Scheduling the Renewal Job
Within the crontab editor, add the following line to schedule the renewal command to run twice daily:
0 6,18 * * * certbot renew --quietThis cron job is set to run the certbot renew command at 6:00 AM and 6:00 PM every day. The --quiet option ensures that Certbot runs silently, without generating unnecessary output.
Understanding Certbot’s Renewal Process
Certbot intelligently manages the renewal process. It only attempts to renew certificates that are within 30 days of expiration. If a certificate does not need renewal, Certbot will not perform any action. This efficiency ensures your server is not burdened with unnecessary processes and that your SSL certificates are always up to date.
Setting up this automated renewal process is a best practice for maintaining continuous HTTPS encryption, ensuring your website remains secure and trusted by users and search engines alike.
Additional Commands & Tips
Secure Directories and Files on Apache
Ensuring the security of your server involves setting appropriate permissions for files and directories. Overly permissive settings can expose your server to risks.
Setting Secure Permissions
For directories and files under /var/www/example.com/, use these commands:
sudo find /var/www/example.com/ -type d -exec chmod 755 "{}" \;
sudo find /var/www/example.com/ -type f -exec chmod 644 "{}" \;
These commands set directories to 755 (read, write, execute for the owner, and read and execute for others) and files to 644 (read and write for the owner, read for others), which are standard secure permissions.
Special Permissions for Specific Applications
Note that some applications, like phpBB, may require 777 permissions on certain folders. Always adjust permissions based on application requirements.
Comprehensive Security Approach
Remember, setting permissions is just one aspect of security. Implementing SSL certificates and proper firewall configurations are crucial for robust server protection.
Update Apache (HTTPD) on Fedora
Keeping Apache up to date is crucial for security and performance.
Updating Apache
To update Apache, along with other system packages, use:
sudo dnf update --refreshThis command refreshes the package database and updates all installed packages, including Apache.
Pre-Update Precautions
Always back up your system or create images before performing updates to safeguard against any potential issues.
Remove (Uninstall) Apache From Fedora
In scenarios where Apache needs to be removed from the system, follow these steps:
Disabling and Stopping Apache
First, disable and stop the Apache service:
sudo systemctl disable httpd --nowThis command stops the Apache service and prevents it from starting automatically at boot.
Uninstalling Apache
To remove Apache from your system, execute:
sudo dnf remove httpdThis command uninstalls the Apache package.
Cleaning Up Leftover Files
After uninstallation, remove any residual files in the Apache configuration directory:
sudo rm -R /etc/httpd/This step ensures that all Apache-related files are completely removed from your system.
Conclusion and Final Thoughts
Wrapping up, setting up Apache on Fedora Linux might initially seem like a steep hill to climb, especially if you’re new to this. But, as we’ve seen throughout this guide, breaking it down into manageable steps can lead to a secure and efficient web server in no time. The key lies in paying attention to security essentials, like setting correct file permissions and implementing SSL/TLS encryption with Let’s Encrypt. It’s also vital to keep a handle on Apache’s management – knowing how to update, configure logs, and, if necessary, remove the software, forms the backbone of a smooth operation. Remember, the journey doesn’t end here. Continuous learning and adaptation are your best allies in confidently maintaining your Apache server on Fedora. Keep exploring, and you’ll find managing your web server less of a challenge and more of an enjoyable part of your

