
Keeping Android tooling current matters on Ubuntu because emulator fixes, Gradle support, and IDE updates move faster than many ordinary desktop packages. If you want to install Android Studio on Ubuntu, the strongest choices right now are Flathub for the newest packaged build, the Maarten Fonville PPA for an APT-managed path, or Snap if you already rely on Snap and do not mind its stable channel trailing upstream.
Ubuntu 26.04, 24.04, and 22.04 all need an external package source for Android Studio. The IDE is not currently available in Ubuntu’s default repositories on those releases, and it still needs an active graphical session even though every method below installs from a terminal. Google also publishes an official Linux tar.gz on the Android Studio download page, but the packaged methods here are easier to update and remove on Ubuntu.
Install Android Studio on Ubuntu
Before choosing a package source, confirm the machine fits Android Studio’s Linux requirements. Use an x86_64/amd64 desktop system for the packaged methods below; Google’s current Linux requirements list 64-bit Linux with glibc 2.31 or later, at least 8 GB of RAM for the IDE, and more memory plus CPU virtualization when you use the Android Emulator. Ubuntu 22.04, 24.04, and 26.04 meet the glibc requirement, but ARM-based Linux machines are not currently supported by Google’s Linux build.
Refresh Ubuntu’s package metadata before you add a repository or install a large developer tool:
sudo apt updateThese commands use
sudofor system-wide changes. If your account does not have sudo access yet, follow this guide to add a new user to sudoers on Ubuntu before continuing.
Do not confuse Android Studio with Ubuntu’s separate android-sdk, adb, and fastboot packages. Those Universe packages provide command-line Android tools, not the Android Studio IDE. Use Android Studio’s setup wizard and SDK Manager after first launch unless you intentionally need distro-packaged CLI-only tooling.
Three maintained installation paths are worth considering on Ubuntu:
| Method | Source | Channel | Updates | Best Fit |
|---|---|---|---|---|
| Flatpak | Flathub | Flathub stable, currently the newest packaged build in this guide | Managed with flatpak update | Users who want one current package across Ubuntu 26.04, 24.04, and 22.04 |
| PPA (APT) | Launchpad PPA | APT metapackage, currently behind Flathub | Managed with apt | Users who want APT-managed updates and native menu integration |
| Snap | Snapcraft | Snap latest/stable, currently behind the other packaged paths | Automatic via Snap | Users who already prefer Snap and want the simplest desktop install |
Start with Flatpak when freshness matters most, use the PPA when APT integration matters more, and keep Snap for systems where Snap is already your preferred desktop package format.
Install Android Studio from Flathub
Flathub currently carries the newest packaged Android Studio build in this guide, but the Flathub listing is a community package rather than Google’s official Linux archive.
Ubuntu does not ship Flatpak by default. If
flatpakis not installed yet, follow this guide to install Flatpak on Ubuntu and add the Flathub remote first.
sudo flatpak install flathub com.google.AndroidStudio -yAndroid Studio needs broad access to your home directory, devices, and the network for SDK downloads, emulators, and hardware debugging, so the Flatpak sandbox is looser than a lightweight desktop utility. The advantage is that you still get one current package path across every Ubuntu release in scope.
Verify the installed Flatpak with:
flatpak info com.google.AndroidStudioRelevant output includes:
Android Open Source Project - IDE for Android app development

          ID: com.google.AndroidStudio
         Ref: app/com.google.AndroidStudio/x86_64/stable
        Arch: x86_64
      Branch: stable
     Version: 2025.3.4.7
      Origin: flathub
Installation: system
Install Android Studio from the PPA
The Maarten Fonville PPA gives you an APT-managed package that currently resolves on Ubuntu 26.04, 24.04, and 22.04. Its android-studio metapackage currently resolves to 2025.2.3.9 across those releases, newer than the Snap stable channel but behind the current Flathub build. It is still a third-party repository rather than an Ubuntu default package.
Minimal Ubuntu images can be missing add-apt-repository. If that command is not available on your system, install the helper first:
sudo apt install software-properties-common -yAdd the PPA:
sudo add-apt-repository ppa:maarten-fonville/android-studio -yRelevant output includes:
Get:17 https://ppa.launchpadcontent.net/maarten-fonville/android-studio/ubuntu resolute InRelease [20.3 kB]
Get:18 https://ppa.launchpadcontent.net/maarten-fonville/android-studio/ubuntu resolute/main amd64 Packages [884 B]
Get:19 https://ppa.launchpadcontent.net/maarten-fonville/android-studio/ubuntu resolute/main Translation-en [292 B]
Install the package:
sudo apt install android-studio -yAfter installation, verify the package status:
apt-cache policy android-studioRelevant output includes:
android-studio:
  Installed: 2025.2.3.9~resolute+0
  Candidate: 2025.2.3.9~resolute+0
  Version table:
 *** 2025.2.3.9~resolute+0 500
        500 https://ppa.launchpadcontent.net/maarten-fonville/android-studio/ubuntu resolute/main amd64 Packages
        100 /var/lib/dpkg/status
This package downloads Google’s official Linux tar.gz into /opt during installation and verifies the archive checksum before unpacking it. It adds a desktop launcher and an /opt/android-studio symlink, but it does not place android-studio on your PATH.
After installation, verify the launcher path instead of expecting a shell command:
ls -d /opt/android-studio /usr/share/applications/android-studio.desktopRelevant output includes:
/opt/android-studio
/usr/share/applications/android-studio.desktop
Install Android Studio from Snap
Snap is the quickest path on a standard Ubuntu desktop because Snap is already available there, but the stable channel currently trails the Flathub and PPA builds. The package is also maintained by the Snapcrafters community rather than by Google.
sudo snap install android-studio --classicThe --classic flag gives Android Studio the broad filesystem and toolchain access it needs for SDK management, emulators, and device debugging.
Verify the installed Snap with:
snap list android-studioRelevant output includes:
Name            Version                Rev  Tracking       Publisher      Notes
android-studio  2025.1.3.7-wallpapers  209  latest/stable  snapcrafters*  classic
Android Studio bundles its own JDK, so you do not need Java just to open the IDE. If you also need a system JDK for command-line Gradle builds or other Android tooling, follow these guides to install OpenJDK 21 on Ubuntu and set the Java environment path on Ubuntu.
Launch Android Studio on Ubuntu
Launch Android Studio from the Terminal
The launch command depends on the method you installed. Flatpak uses the app ID, the PPA build lives under /opt/android-studio, and the Snap command is safest through snap run because it does not depend on your shell already seeing /snap/bin.
# Flatpak
flatpak run com.google.AndroidStudio

# PPA
/opt/android-studio/bin/studio.sh

# Snap
snap run android-studio
Launch Android Studio from the Applications Menu
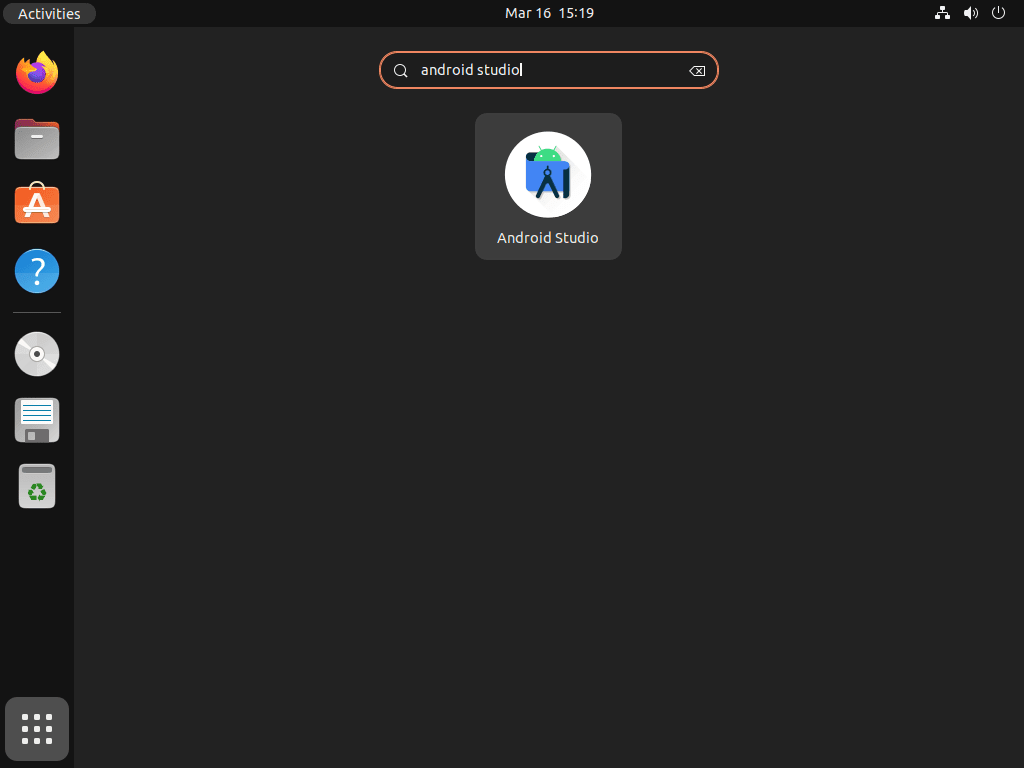
If you prefer the desktop launcher, open Activities, search for Android Studio, and start it from the application results.
- Open the Activities overview from your Ubuntu desktop.
- Type Android Studio into the search field.
- Select the Android Studio icon to start the IDE.
Complete the Android Studio Setup Wizard
The first launch walks through Android SDK licenses, UI theme choices, and the initial SDK component download. Expect that first setup to pull down additional SDK and emulator content, so give it a stable network connection and enough free disk space for the Android toolchains you plan to install.
Accept the SDK license agreements when prompted. Once the wizard finishes, Android Studio opens at the welcome screen where you can create a new project or import an existing one. Google’s Build your first Android app codelab is a good next step if you want a current starter project after the IDE opens.
Update Android Studio on Ubuntu
Each package format uses its own update path. Snap can refresh automatically, while Flatpak and APT are usually updated when you run them explicitly or through your normal desktop update workflow.
Update the Android Studio Flatpak
Use this command when you want to pull the latest Flathub build immediately:
sudo flatpak update com.google.AndroidStudio -yUpdate the Android Studio PPA Build
The metapackage upgrade path stays simple even though the PPA uses a versioned package behind the scenes:
sudo apt update && sudo apt install --only-upgrade android-studioUpdate the Android Studio Snap
Snap refreshes automatically, but this command forces an immediate check:
sudo snap refresh android-studioTroubleshoot Android Studio on Ubuntu
Check KVM Acceleration for the Android Studio Emulator
If the Android Emulator starts slowly or refuses to boot accelerated images, install the KVM checker and confirm that hardware acceleration is available:
sudo apt install cpu-checker -y
sudo kvm-ok
Relevant output includes:
INFO: /dev/kvm exists
KVM acceleration can be used
If the command reports that KVM acceleration cannot be used, enable VT-x or AMD-V in your firmware settings, or enable nested virtualization if Ubuntu is running inside another hypervisor. Then install the current Ubuntu KVM support packages:
sudo apt install qemu-system-x86 libvirt-daemon-system libvirt-clients bridge-utils -yAdd your user to the KVM group, and add the libvirt group only on Ubuntu releases where that group exists. Then sign out and back in before starting the emulator again:
sudo usermod -aG kvm "$USER"
if getent group libvirt >/dev/null; then
    sudo usermod -aG libvirt "$USER"
fi
Raise Gradle Memory Limits in Android Studio
Large Android projects can exhaust the default Gradle heap. If builds are failing with memory errors, add a higher JVM heap limit to the project’s gradle.properties file:
org.gradle.jvmargs=-Xmx4096mStart with 4096 MB, then increase it only if your project still runs out of memory during sync or build tasks.
Remove Android Studio from Ubuntu
Use the removal path that matches the package format you installed. Package removal gets rid of the application itself, while the last section helps you clean up optional SDK and IDE data in your home directory.
Remove the Android Studio Flatpak
For the system-scope Flatpak method used above, remove the app with:
sudo flatpak remove com.google.AndroidStudio -yVerify the Flatpak is gone with:
flatpak list --system --app --columns=application | grep -Fx com.google.AndroidStudio || echo "Android Studio system Flatpak not installed"Relevant output includes:
Android Studio system Flatpak not installed
Remove the Android Studio PPA Build
Review APT’s removal list before confirming. On a clean Android Studio PPA install, this removes the metapackage and its automatically installed versioned dependency:
sudo apt remove --autoremove android-studioVerify the package is no longer installed:
dpkg-query -W -f='${db:Status-Abbrev} ${binary:Package}\n' 'android-studio*' 2>/dev/null | grep '^ii' || echo "No installed Android Studio PPA packages found"Relevant output includes:
No installed Android Studio PPA packages found
sudo add-apt-repository --remove ppa:maarten-fonville/android-studio -y
sudo rm -f /etc/apt/trusted.gpg.d/maarten-fonville-ubuntu-android-studio.gpg /etc/apt/trusted.gpg.d/maarten-fonville-ubuntu-android-studio.gpg~
sudo apt update
Ubuntu 22.04 can leave the helper-generated trust files after add-apt-repository --remove; the exact rm -f command above removes only the Android Studio PPA trust files when they exist. After removing the source, confirm APT no longer sees the Android Studio PPA:
apt-cache policy android-studio 2>/dev/null | grep -F "ppa.launchpadcontent.net/maarten-fonville/android-studio" || echo "Android Studio PPA source not active"Relevant output includes:
Android Studio PPA source not active
Remove the Android Studio Snap
Remove the Snap package without keeping a Snap recovery snapshot:
sudo snap remove --purge android-studioVerify the Snap is gone with:
snap list android-studio 2>/dev/null || echo "android-studio snap not installed"Relevant output includes:
android-studio snap not installed
Review KVM Group Membership
If you added your user to KVM or libvirt groups only for the Android Emulator and no longer use local virtualization tools, remove that group access separately. Skip this step if other virtual machines, emulators, or development tools still need KVM or libvirt access.
if id -nG "$USER" | tr ' ' '\n' | grep -qx kvm; then
    sudo gpasswd -d "$USER" kvm
fi
if getent group libvirt >/dev/null && id -nG "$USER" | tr ' ' '\n' | grep -qx libvirt; then
    sudo gpasswd -d "$USER" libvirt
fi
Sign out and back in before checking your group membership again.
Find Android Studio User Data Before Deleting It
These directories can include downloaded SDK platforms, emulator images, and local IDE settings. Back up anything you still need before deleting them.
Because Android Studio creates most of its profile and SDK directories only after first launch, check what actually exists in your account before removing anything:
find "$HOME" -maxdepth 4 \( -path "$HOME/.android" -o -path "$HOME/Android" -o -path "$HOME/.config/Google/AndroidStudio*" -o -path "$HOME/.cache/Google/AndroidStudio*" -o -path "$HOME/.local/share/Google/AndroidStudio*" -o -path "$HOME/.var/app/com.google.AndroidStudio" -o -path "$HOME/snap/android-studio" \) -printRelevant output can include:
/home/your-user/.android
/home/your-user/Android
/home/your-user/.config/Google/AndroidStudio2025.2
/home/your-user/.cache/Google/AndroidStudio2025.2
/home/your-user/.local/share/Google/AndroidStudio2025.2
/home/your-user/.var/app/com.google.AndroidStudio
/home/your-user/snap/android-studio
If the command prints nothing, there is no remaining Android Studio data in these common locations for that account. Delete only the paths it lists, for example:
rm -rf "$HOME/.android" "$HOME/Android"
rm -rf "$HOME"/.config/Google/AndroidStudio* "$HOME"/.cache/Google/AndroidStudio* "$HOME"/.local/share/Google/AndroidStudio*
rm -rf "$HOME/.var/app/com.google.AndroidStudio" "$HOME/snap/android-studio"
Conclusion
Android Studio on Ubuntu is ready once the package source matches your update workflow: Flatpak for the newest packaged build, the PPA for APT integration, or Snap when its slower stable channel is acceptable. After the IDE opens, use the setup wizard to download SDK components, then check KVM acceleration if the emulator feels slow. If you also need a system JDK outside the IDE, install OpenJDK 21 on Ubuntu and set the Java environment path on Ubuntu before you build from the terminal.

Formatting tips for your comment
You can use basic HTML to format your comment. Useful tags currently allowed in published comments:
<code>command</code>command<strong>bold</strong><em>italic</em><a href="https://example.com">link</a><blockquote>quote</blockquote>