This guide will demonstrate how to utilize the command-line terminal to build NGINX from source on Ubuntu 24.04, 22.04, or 20.04 LTS.
Building NGINX from source on Ubuntu offers a tailored approach to configuring your web server, ensuring optimal performance and compatibility with your specific environment. Unlike binary installations, compiling NGINX from source provides the flexibility to enable or disable specific modules, integrate third-party modules, and apply custom patches. This process allows for a deeper understanding of the server’s inner workings and facilitates a more secure and efficient configuration tailored to your unique requirements.
Key Highlights of Building Nginx:
- Custom Configuration: Tailor NGINX to meet your exact needs by enabling only the modules you require.
- Enhanced Performance: Optimize NGINX for your hardware and workload, potentially improving response times and resource usage.
- Advanced Features: Access cutting-edge features and modules that may not be available in pre-compiled packages.
- Security: Apply specific patches and compile with security-hardened options for a more secure deployment.
- Learning Opportunity: Gain in-depth knowledge of NGINX’s architecture and configuration options.
- Control: Maintain full control over the server’s setup, including directory paths and configuration files.
- Up-to-Date: Build the latest version of NGINX, accessing new features and bug fixes ahead of package releases.
- Community Support: Leverage the extensive knowledge and resources of the open-source community for troubleshooting and enhancements.
With these advantages in mind, building NGINX from a source is a powerful approach for those seeking maximum control and efficiency from their web server.
Let’s dive into the detailed steps to build NGINX from source on Ubuntu.
Install Initial Packages for NGINX Source on Ubuntu
Update Ubuntu Before Building NGINX
To kick off the NGINX source installation on Ubuntu, start by updating and upgrading your system. This step ensures that all your system’s packages are current, minimizing potential compatibility issues.
Execute the following command in your terminal to update and upgrade your system:
sudo apt update && sudo apt upgradeInstalling Dependencies for NGINX Compilation
With your system up to date, the next step involves installing the necessary dependencies for NGINX compilation. These packages, such as compilers and libraries, are crucial for building NGINX from source.
To install the required dependencies, run the following command:
sudo apt install build-essential libpcre3-dev libssl-dev zlib1g-dev libgd-devThe command installs several crucial packages, each serving a specific role in the NGINX compilation process:
build-essential: Includes the GCC compiler and related tools, indispensable for compiling software from source.libpcre3-dev: Provides libraries necessary for Perl 5 Compatible Regular Expression support, crucial for URL rewriting and other NGINX functionalities.libssl-dev: Offers libraries for SSL/TLS support, ensuring secure data transmission, a key aspect of modern web services.zlib1g-dev: Essential for compression functionalities, this package helps improve NGINX’s performance and speed.libgd-dev: Supports image processing capabilities, enabling NGINX to perform image manipulations directly.
Download NGINX Source Code on Ubuntu
Selecting the NGINX Version
After installing the required dependencies, proceed to download the NGINX source code. Visit the NGINX website to select the version that suits your needs. You can choose from the mainline, stable, or any specific version you prefer. Mainline versions are updated regularly with the latest features and improvements, while stable versions focus on well-tested stability for production environments.
Downloading the Source Code
To download the selected version of NGINX, use the wget command. This command allows you to download files from the internet directly to your server. For example, to download the mainline version 1.23.3, use the following command:
wget http://nginx.org/download/nginx-x.x.x.tar.gzReplace the version number with the latest or preferred version you wish to install. Always ensure to check the NGINX website for the newest versions to take advantage of the latest features and security updates. Remember, mainline versions may update every few months, so it’s crucial to stay informed about the latest releases to maintain a secure and efficient server environment.
Extract NGINX Source Code on Ubuntu
Unpacking the NGINX Tarball
Once you’ve downloaded the NGINX source code, the next step is to extract the files from the tarball. This process involves decompressing the tar.gz file to access the NGINX source code contained within. Use the tar command with the appropriate flags to extract the content.
Here’s how you do it, taking our example version, NGINX 1.23.3:
tar -xzvf nginx-1.23.3.tar.gzThis command breaks down as follows:
x: Extract the files.z: Uncompress the archive using gzip.v: Verbose mode to show the extraction process.f: Specify the filename of the archive.
Changing to the NGINX Directory
After extracting the files, you need to change into the directory where the NGINX source has been unpacked. This step is crucial for beginning the compilation process.
Use the cd command to move into the extracted NGINX directory:
cd nginx-1.23.3Configure Build Options for NGINX on Ubuntu
Setting Up Configuration Options
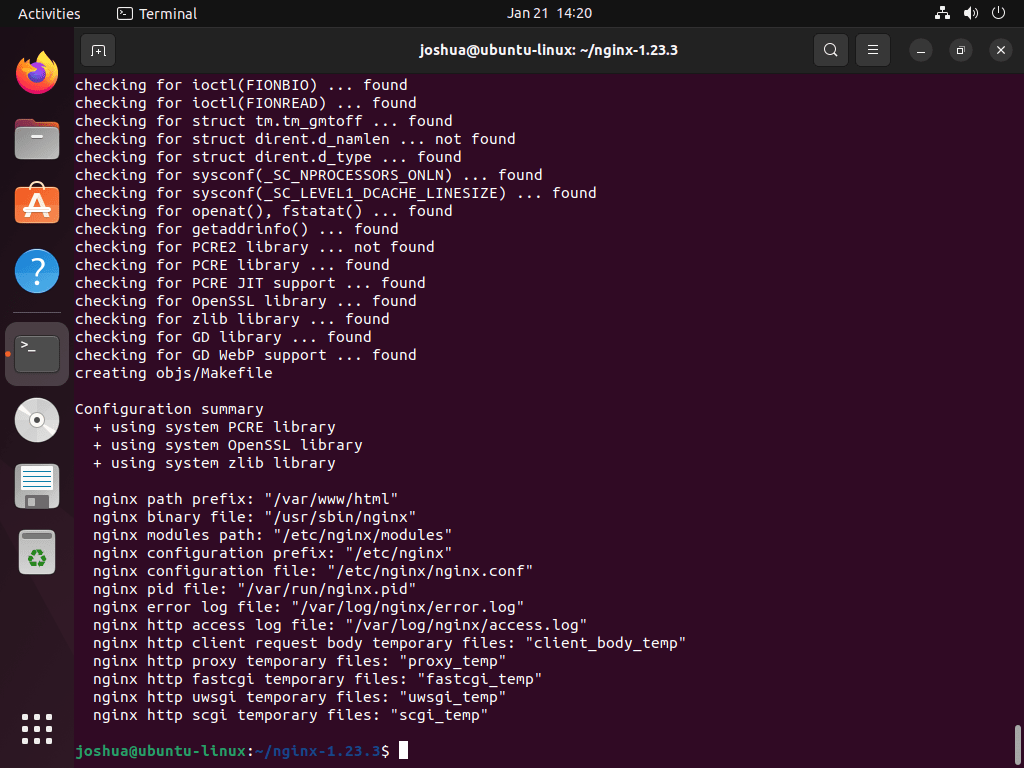
When preparing to build NGINX from source, configuring your build options tailors the installation to your specific needs. Utilize the ./configure command to set paths and enable various modules. Here’s a command that incorporates common configuration options and paths:
./configure --prefix=/var/www/html --sbin-path=/usr/sbin/nginx --conf-path=/etc/nginx/nginx.conf --http-log-path=/var/log/nginx/access.log --error-log-path=/var/log/nginx/error.log --with-pcre --lock-path=/var/lock/nginx.lock --pid-path=/var/run/nginx.pid --with-http_ssl_module --with-http_image_filter_module=dynamic --modules-path=/etc/nginx/modules --with-http_v2_module --with-stream=dynamic --with-http_addition_module --with-http_mp4_moduleThis command sets various paths for NGINX files and includes modules that enhance NGINX’s functionality, like SSL support and HTTP/2 processing.
Customizing Your NGINX Build
When customizing your NGINX build, the ./configure script is a powerful tool that allows for extensive customization. Here’s how you can tailor your NGINX installation to meet specific requirements:
Example Configurations
To enable HTTP/2 support and integrate the PCRE library, which is crucial for processing regular expressions in NGINX, use the following configuration:
./configure --with-http_v2_module --with-pcreIf you need to define the installation directory for NGINX, you can set it using the --prefix option. For instance, to install NGINX in the /usr/local/nginx directory, the command would be:
./configure --prefix=/usr/local/nginxFor incorporating additional modules such as ngx_cache_purge, the --add-module option comes into play. To include this module, the configuration would look like this:
./configure --add-module=/path/to/ngx_cache_purgeIncluding extra libraries like libxslt or libssl is straightforward with the --with-XXX-module option. To include these libraries, the respective commands would be:
./configure --with-libxslt-module
./configure --with-openssl=/path/to/openssl
To activate modules such as SSL and the real IP module, the configuration commands would be:
./configure --with-http_ssl_module
./configure --with-http_realip_module
These configurations demonstrate just a few ways you can use the ./configure script to customize your NGINX build.
For a comprehensive list of all available options, you can run ./configure --help. This command provides detailed information on all the flags and options you can use to optimize your NGINX installation.
Begin Final Process to Compile NGINX on Ubuntu
Compiling NGINX
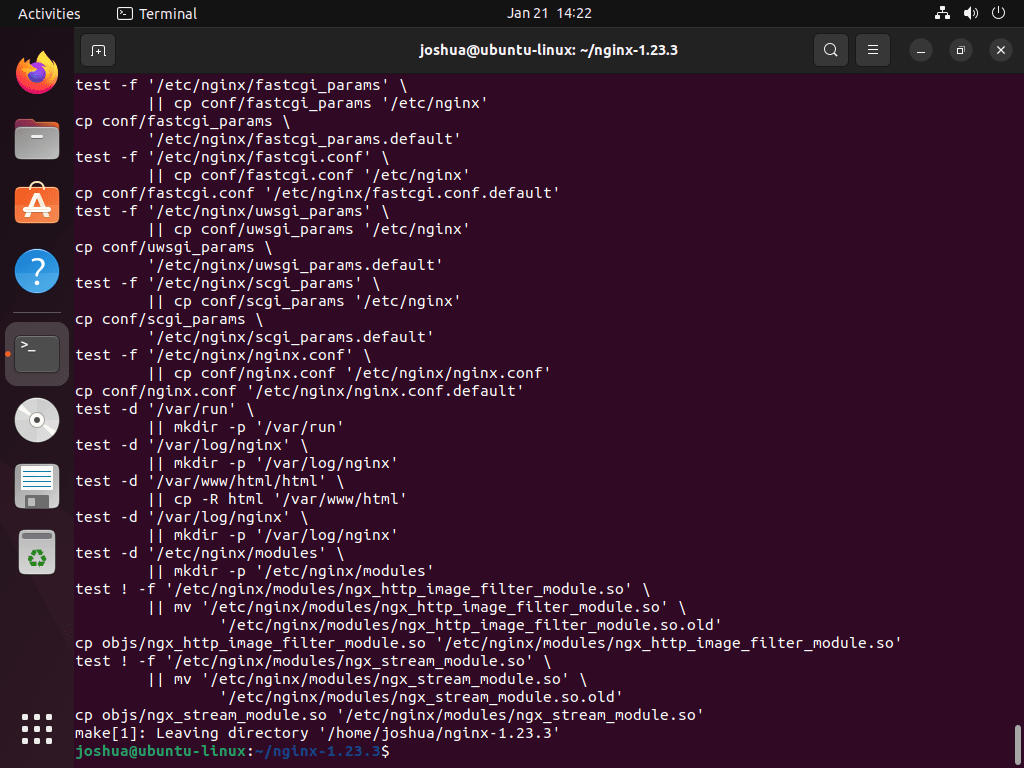
Once you have set the configuration options for NGINX, initiate the compilation process with the make command. This command compiles the NGINX source code based on the parameters defined in the ./configure script. The compilation process results in the creation of the NGINX binary executable, typically found in the objs directory.
makeInstalling NGINX
After compiling NGINX, proceed with the installation using sudo make install. This command installs the NGINX binary, configuration files, and additional necessary files to the specified prefix path. If you haven’t defined a different location during configuration, NGINX installs to /usr/local/nginx/ by default.
sudo make installFollowing the installation, you will find NGINX in the sbin directory within the designated prefix path, ready for further configuration and use.
Create NGINX SystemD Service on Ubuntu
After you have successfully built and installed NGINX from source, the next step is to manage NGINX as a service using systemd. This will allow you to start, stop, and restart NGINX just like any other service on Ubuntu.
Creating a SystemD Service File for NGINX
To set up a systemd service for NGINX, begin by creating a new service file:
sudo nano /etc/systemd/system/nginx.serviceIn this file, input the following details, ensuring that you replace /path/to/nginx with the actual path to your NGINX binary if it is not located at /usr/sbin/nginx:
[Unit]
Description=The NGINX HTTP and reverse proxy server
After=syslog.target network-online.target remote-fs.target nss-lookup.target
Wants=network-online.target

[Service]
Type=forking
PIDFile=/var/run/nginx.pid
ExecStartPre=/usr/sbin/nginx -t
ExecStart=/usr/sbin/nginx
ExecReload=/usr/sbin/nginx -s reload
ExecStop=/bin/kill -s QUIT $MAINPID
PrivateTmp=true

[Install]
WantedBy=multi-user.target
This configuration sets up NGINX as a service, defining how it should start, stop, and reload, and ensures it launches after the network is online.
Reloading SystemD to Recognize the New Service
After defining the service, update systemd to recognize your new NGINX service:
sudo systemctl daemon-reloadStarting and Enabling NGINX Service
With the systemd service in place, start the NGINX service:
sudo systemctl start nginxTo ensure NGINX starts automatically on boot, enable the service:
sudo systemctl enable nginxVerify NGINX Installation on Ubuntu
Testing NGINX Functionality
After installing NGINX, it’s crucial to verify that it’s operating correctly. You can do this by accessing the NGINX welcome page through a web browser. Use your server’s local host address or its IP address to navigate to the NGINX test page.
Open your web browser and enter the following URL to access the NGINX welcome page using the localhost:
http://localhostUsing IP Address for Verification
If accessing the localhost doesn’t display the NGINX welcome page, you can use your server’s IP address instead. Replace 192.128.1.1 with your actual server IP address:
http://192.128.1.1When you access these URLs, you should see the default NGINX welcome page, indicating that NGINX is installed and running properly on your Ubuntu server. If the page doesn’t appear, ensure that NGINX is running and that there are no firewall rules blocking access to the service.
Additional Tips for Building NGINX on Ubuntu
Compiling NGINX with Additional Modules
Enhance NGINX’s capabilities by including extra modules during the compilation process. For instance, if you want to add the NGINX HTTP push module, utilize the --add-module flag during the configuration step. Follow these commands to compile NGINX with the HTTP push module:
./configure --add-module=/path/to/nginx-http-push-module
make
sudo make install
Replace /path/to/nginx-http-push-module with the actual path to the module you wish to include.
Managing NGINX with Systemctl Commands
On Ubuntu, managing the NGINX service is straightforward with systemctl commands. Here’s how to control the NGINX service using the terminal:
Start NGINX:
sudo systemctl start nginxStop NGINX:
sudo systemctl stop nginxRestart NGINX:
sudo systemctl restart nginxReload NGINX:
sudo systemctl reload nginxNGINX Status Check
sudo systemctl status nginxEnable NGINX on System-Boot
sudo systemctl enable nginxDisable NGINX on System-Boot:
sudo systemctl disable nginxConclusion
We’ve walked through the steps to build NGINX from source on Ubuntu 20.04 or 22.04, covering everything from initial package installation to final service management. This guide aimed to empower you with the flexibility to customize NGINX with additional modules and control it effortlessly using systemctl commands. Remember, keeping your NGINX installation updated and fine-tuned is crucial for maintaining optimal performance and security. So, dive in, experiment with the configurations, and make the most out of your NGINX server on Ubuntu. Happy hosting!


