Unity Desktop Environment offers a sleek and user-friendly interface for Ubuntu users, ensuring a streamlined and enjoyable user experience. If you aim to install Ubuntu Unity Desktop on Ubuntu 22.04 Jammy Jellyfish or its older stable release of Ubuntu 20.04 Focal Fossa, understanding its features and benefits is crucial.
Key Features of Unity Desktop Environment:
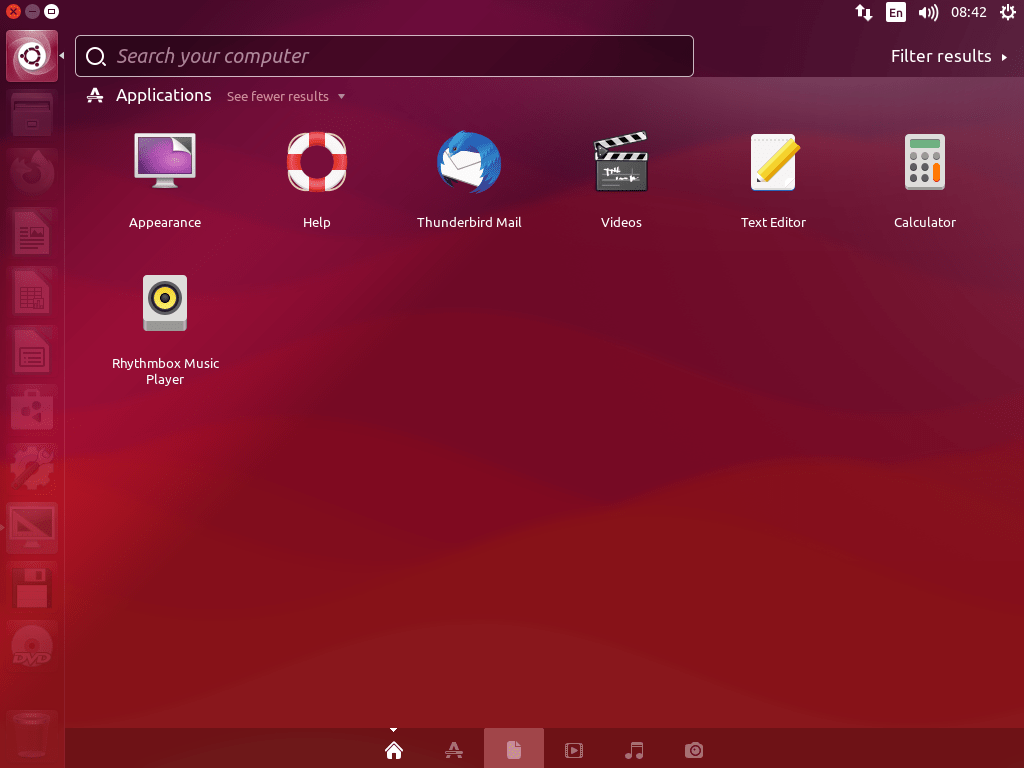
- Dash Search: Unity’s Dash search functionality allows swift access to files and applications, enhancing navigation efficiency.
- Unity Launcher Integration: The Unity Launcher is a fundamental tool within the environment, facilitating the seamless launching and switching of applications.
- Multiple Workspace Support: Unity supports multiple workspaces, allowing users to organize and transition between tasks effortlessly.
- Plugin and Extension Support: With support for various plugins and extensions, Unity allows for extensive customization, enabling users to craft a desktop experience that best suits their needs.
Unity stands out as a prime choice for users seeking a desktop environment that is visually compelling and intuitively designed. Its combination of Dash search, Unity Launcher, multiple workspaces, and extensive customization options make it a favorite among Ubuntu enthusiasts. The subsequent sections of this guide will walk you through the process to install Ubuntu Unity Desktop on Ubuntu 22.04 Jammy Jellyfish or Ubuntu 20.04 Focal Fossa efficiently and effectively.
Install Unity Desktop on Ubuntu 22.04 or 20.04 via APT
Step 1: Update Ubuntu Before Unity DE Installation
Before installing the Unity desktop environment, update your Ubuntu operating system to have all existing packages up-to-date.
sudo apt update && sudo apt upgradeStep 2: Install Unity Desktop on Ubuntu 22.04 or 20.04
When installing the Unity desktop environment, you can choose minimal, standard, or complete options. Each option offers different advantages based on your specific needs and preferences. The minimal installation provides only the essentials to run Unity, suiting users desiring a lightweight, fast desktop environment. The standard installation includes commonly used applications and features, serving the needs of most users. The complete installation encompasses all features and applications, ideal for users seeking a fully-featured desktop environment.
For users of Ubuntu 22.04 LTS, ensure installation of the specified package to log in to Unity successfully.
sudo apt install dbus-x11Option 1: Install Unity DE Minimal on Ubuntu
The first installation option is minimal installation. Run the following command to install.
sudo apt install ubuntu-unity-desktop --no-install-recommendsThe minimal installation option for the Unity desktop environment ideally suits testing purposes or individuals with older hardware. This option includes only the essential components needed to run the environment, requiring an 80-100MB download and an additional 280-300MB of space for installation.
Option 2: Install Unity DE Standard on Ubuntu
Next, you can install the standard installation of Unity desktop environment with the following command.
sudo apt install ubuntu-unity-desktopThe most commonly recommended option for the average desktop user is the standard Unity desktop environment installation, offering a balanced mix of features and performance. The installation package requires a download of approximately 250-300MB and occupies 1600-1700MB of space.
Option 3: Install Unity DE Complete on Ubuntu
The last option is to install the whole experience of the Unity desktop environment with the following command.
sudo apt install ubuntu-unity-desktop --install-suggestsInstalling the complete Unity desktop environment gives you access to all features and applications, but it may burden older systems with unnecessary bloat. Newer methods won’t necessarily benefit either, as the installation includes potentially unneeded applications like Firebird and jackd2. Consider installing these applications separately. This installation package demands a substantial 3GB download and requires an extra 16GB of space. Opt for the standard installation for a balanced blend of features and performance without specific installation needs.
Select Desktop Environment for Unity DE on Ubuntu
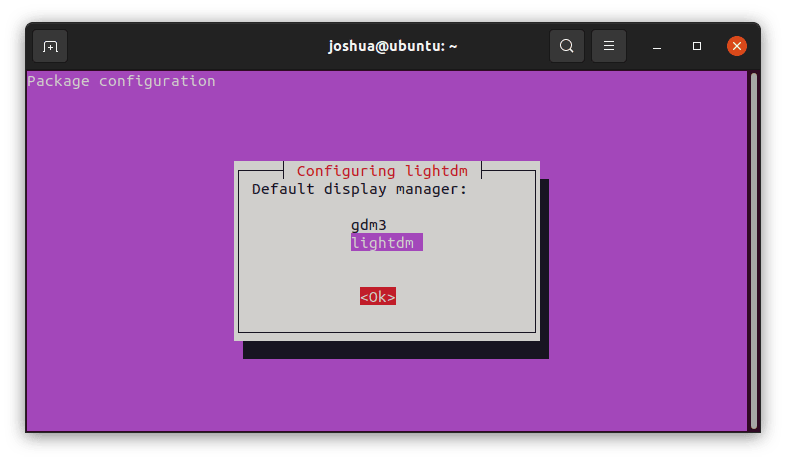
Next, you will encounter a prompt window asking about the display manager during installation. The display manager, or lightdm, manages a Linux system’s graphical login screen and user sessions. The prompt will ask you to choose between using lightdm or another display manager, such as gdm or sddm.
The default option is lightdm for the Unity desktop environment; select this option.

Once complete, you must reboot your system for the new changes to take effect.
rebootLog in to Unity DE on Ubuntu 22.04 or 20.04
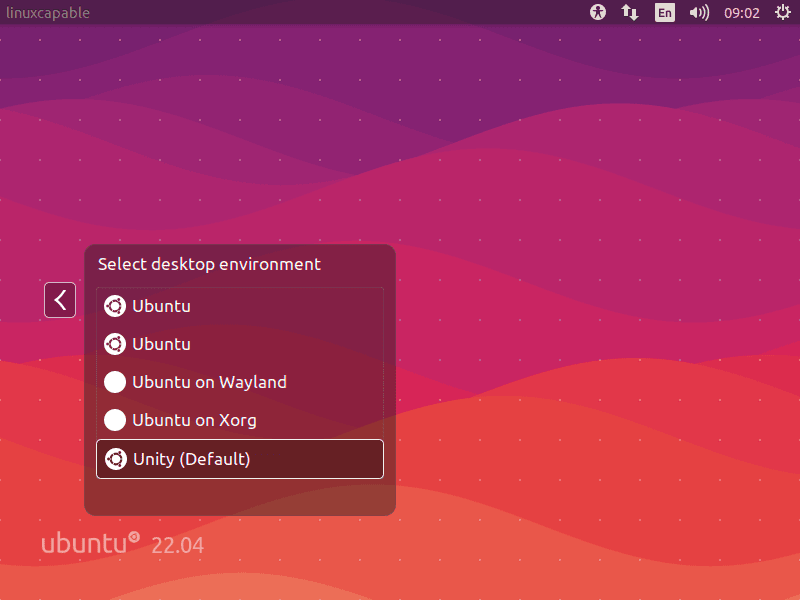
After restarting your desktop, you will arrive at your login screen. Select the Unity session as the default option in the top right-hand corner and log in.
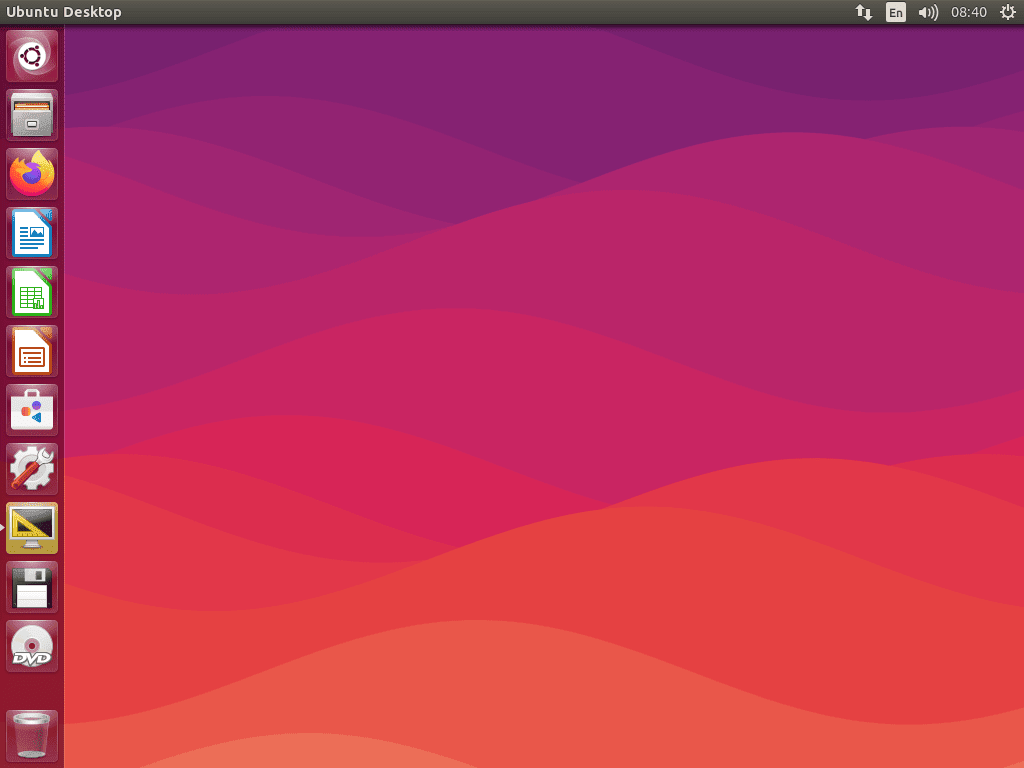
Upon logging in, you’ll notice several changes to the user interface, including alterations in color and background. You can customize these features further through the Appearance menu. You’ll also observe modifications in the layout, launcher, and other unique Unity features.
First-Time Tips with Unity DE on Ubuntu 22.04 or 20.04
Having successfully installed Unity Desktop Environment on Ubuntu, follow these initial tips to start using the software:
General Tips for Unity on Ubuntu
- Understanding Unity’s Interface: Familiarize yourself with the Unity Launcher, Dash, Panel, and HUD to navigate and manage your desktop efficiently. These components are integral to the Unity experience, facilitating quick access to applications and system functions.
- Learning Keyboard Shortcuts: Unity supports a plethora of keyboard shortcuts. Memorizing key combinations can greatly expedite navigation and multitasking. For instance,
Super + Numberlaunches or switches to the application pinned to the launcher at the corresponding position. - Configuring Workspaces: Unity utilizes workspaces to organize open applications. Activate and manage these virtual desktops for a clutter-free and productive environment.
Unity Customization Tips on Ubuntu
- Adjusting Launcher Behavior: Modify the Unity Launcher’s auto-hide settings, icon size, and more to suit your preferences. Access these options via
System Settings > Appearance > Behavior. - Using CompizConfig Settings Manager (CCSM): Unlock advanced customization features with CCSM. Exercise caution while using CCSM, as improper configurations might destabilize the Unity interface.
Other Unity Useful Tips on Ubuntu
- Searching Efficiently with Dash: Leverage Unity’s Dash for efficient application launching and file searching. Learn to use filters and lenses to refine your search results.
- Managing Applications with the Unity Launcher: Pin frequently used applications to the Unity Launcher for quick access. You can also rearrange and organize these pinned items as needed.
Managing Ubuntu DE on Ubuntu 22.04 or 20.04
Switching Default Display Managers
To switch back to using GDM and GNOME in the future, open a terminal and run the command to reconfigure the default display manager after switching from Unity and LightDM.
sudo dpkg-reconfigure gdmRemove Unity Desktop Environment From Ubuntu 22.04 or 20.04
Specific scenarios may arise where you must remove Ubuntu Unity from your system. This could be due to your interest in experimenting with different desktop environments or a simple desire to revert to an older configuration you were comfortable with. The instructions below will guide you through the process of deleting Ubuntu Unity:
Start by opening a terminal, where you will input and execute the following command:
sudo apt autoremove '^unity' --purgeExecuting this command will not only remove Ubuntu Unity but also purge all associated files from your system, effectively restoring your desktop environment to the state it was in previously.
After removing Ubuntu Unity, it might be imperative to reinstall the GNOME Desktop Environment. The uninstallation procedure for Ubuntu Unity might inadvertently remove some packages crucial for the GNOME environment to function correctly.
To facilitate the reinstallation of GNOME, you would need to update your system’s package list and then proceed to install the ubuntu-gnome-desktop package with the command below:
sudo apt install --reinstall ubuntu-gnome-desktop
sudo systemctl enable gdm3 --now
After completing the above steps, we recommend rebooting the system to implement all changes successfully. To reboot your system, use the following command:
rebootEnsure you follow each step closely for a smooth transition to your preferred desktop environment.
Conclusion
In conclusion, installing the Unity desktop environment on Ubuntu is relatively straightforward. First, open a terminal and use the command line to update the package manager. Then, use the appropriate command to install Unity and any necessary dependencies. Afterward, you can configure the default display manager to use Unity and reboot your system to complete the installation. With Unity installed, you will now have access to the familiar and user-friendly interface and the many features and tools it offers.


