MySQL 8.0 marks a significant update in the world of database management, offering a suite of new features and improvements. This guide will demonstrate how to install MySQL 8.0 on Ubuntu 22.04 or 20.04, providing a straightforward approach for both beginners and experienced users. MySQL 8.0’s enhancements not only boost performance but also introduce new functionalities that are essential for modern database applications.
Key Features of MySQL 8.0 include:
- Enhanced Group Replication: Provides high availability and fault tolerance.
- Atomic DDL Statements: Ensures greater reliability during data definition language operations.
- Window Functions and Common Table Expressions: For advanced SQL query capabilities.
- Improved JSON Support: Offers more efficient JSON document storage.
- InnoDB Cluster: Facilitates high availability and scalability.
- Role-Based Access Control (RBAC): Enhances security through granular control over user permissions.
With these features, MySQL 8.0 is poised to handle the demanding needs of contemporary database management systems. The installation process on Ubuntu is streamlined, ensuring you can leverage these capabilities quickly and efficiently. Let’s delve into the steps to get MySQL 8.0 up and running on your Ubuntu system.
Install MySQL 8.0 on Ubuntu 22.04 or 20.04 via APT
Step 1: Refresh Ubuntu PAckages Before MySQL 8.0 Installation
Before diving into the installation process, updating your system is always a good practice. This process ensures all existing packages are up to date, minimizing the chance of conflicts during the MySQL 8.0 installation.
Run the following commands to update and upgrade your system:
sudo apt update
sudo apt upgrade
Step 2: Choosing the MySQL 8.0 APT Installation Method on Ubuntu 22.04 or 20.04
There are two ways to install MySQL 8.0 on your Ubuntu system. You can either leverage the Ubuntu’s default repository or import the MySQL’s official APT repository.
Method 1: Installing MySQL 8.0 with Ubuntu’s Repository
This is the recommended option if you are looking for a method that prioritizes system stability. Installing MySQL from Ubuntu’s default repository ensures a stable, thoroughly tested version of MySQL 8.0.
To install MySQL with this method, execute the following command:
sudo apt install mysql-serverMethod 2: Install MySQL 8.0 with MySQL Community Server
This method suits those who want the most recent stable version of MySQL 8.0 directly from MySQL’s repository. This approach can offer quick improvements, especially beneficial depending on your system requirements.
Installing Required Packages for MySQL on Ubuntu:
Before proceeding with this method, you must install a few necessary packages. These packages are typically present in most Ubuntu systems.
However, to be on the safe side, run the following command to ensure they’re installed:
sudo apt install dirmngr ca-certificates software-properties-common apt-transport-https curl lsb-release -yImporting the MySQL 8.0 Community Server Repository:
To install MySQL from its official repository, import its GPG key and repository into your system. Here’s how you do it:
Import the GPG key:
curl -fsSL http://repo.mysql.com/RPM-GPG-KEY-mysql-2022 | sudo gpg --dearmor | sudo tee /usr/share/keyrings/mysql.gpg > /dev/nullThen, import the MySQL 8.0 repository:
echo "deb [arch=$(dpkg --print-architecture) signed-by=/usr/share/keyrings/mysql.gpg] http://repo.mysql.com/apt/ubuntu $(lsb_release -cs) mysql-8.0" | sudo tee -a /etc/apt/sources.list.d/mysql.listIf you’re a developer or have a specific requirement, you can optionally import the MySQL source repository:
echo "deb-src [arch=$(dpkg --print-architecture) signed-by=/usr/share/keyrings/mysql.gpg] http://repo.mysql.com/apt/ubuntu $(lsb_release -cs) mysql-8.0" | sudo tee -a /etc/apt/sources.list.d/mysql.list Developers can also import the MySQL tools repository as follows:
echo "deb [arch=$(dpkg --print-architecture) signed-by=/usr/share/keyrings/mysql.gpg] http://repo.mysql.com/apt/ubuntu $(lsb_release -cs) mysql-tools" | sudo tee -a /etc/apt/sources.list.d/mysql.list
echo "deb-src [arch=$(dpkg --print-architecture) signed-by=/usr/share/keyrings/mysql.gpg] http://repo.mysql.com/apt/ubuntu $(lsb_release -cs) mysql-tools" | sudo tee -a /etc/apt/sources.list.d/mysql.list
After adding the repositories, you can verify the changes by executing this command:
grep mysql /etc/apt/sources.list.d/mysql.listExample output:
joshua@ubuntu-linux:~$ grep mysql /etc/apt/sources.list.d/mysql.list
deb [arch=amd64 signed-by=/usr/share/keyrings/mysql.gpg] http://repo.mysql.com/apt/ubuntu jammy mysql-8.0
deb-src [arch=amd64 signed-by=/usr/share/keyrings/mysql.gpg] http://repo.mysql.com/apt/ubuntu jammy mysql-8.0
deb [arch=amd64 signed-by=/usr/share/keyrings/mysql.gpg] http://repo.mysql.com/apt/ubuntu jammy mysql-tools
deb-src [arch=amd64 signed-by=/usr/share/keyrings/mysql.gpg] http://repo.mysql.com/apt/ubuntu jammy mysql-tools
Updating APT Cache after Importing MySQL 8.0:
Now that you’ve successfully imported the MySQL APT repository, it’s time to refresh the Advanced Package Tool (APT) cache to recognize the newly added repository.
Run the following command to update the APT cache:
sudo apt updateInstall MySQL 8.0 Community Edition Server via APT Command:
With all the prerequisites, we are now ready to install MySQL 8.0 Community Edition Server. Run the following command to start the installation:
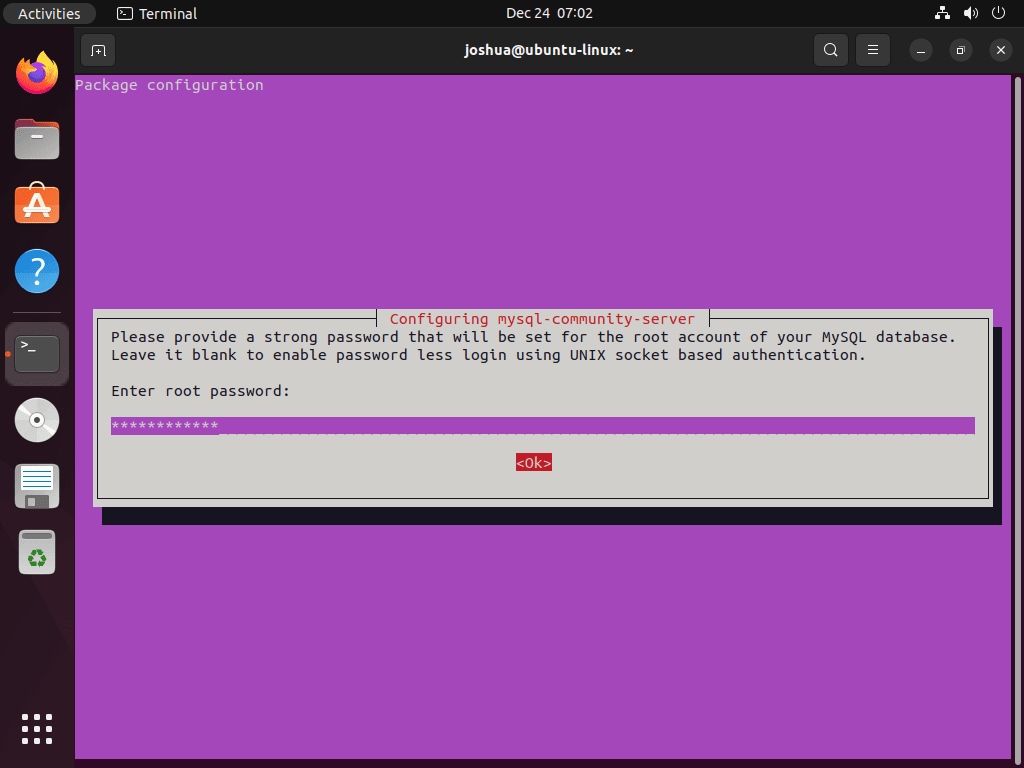
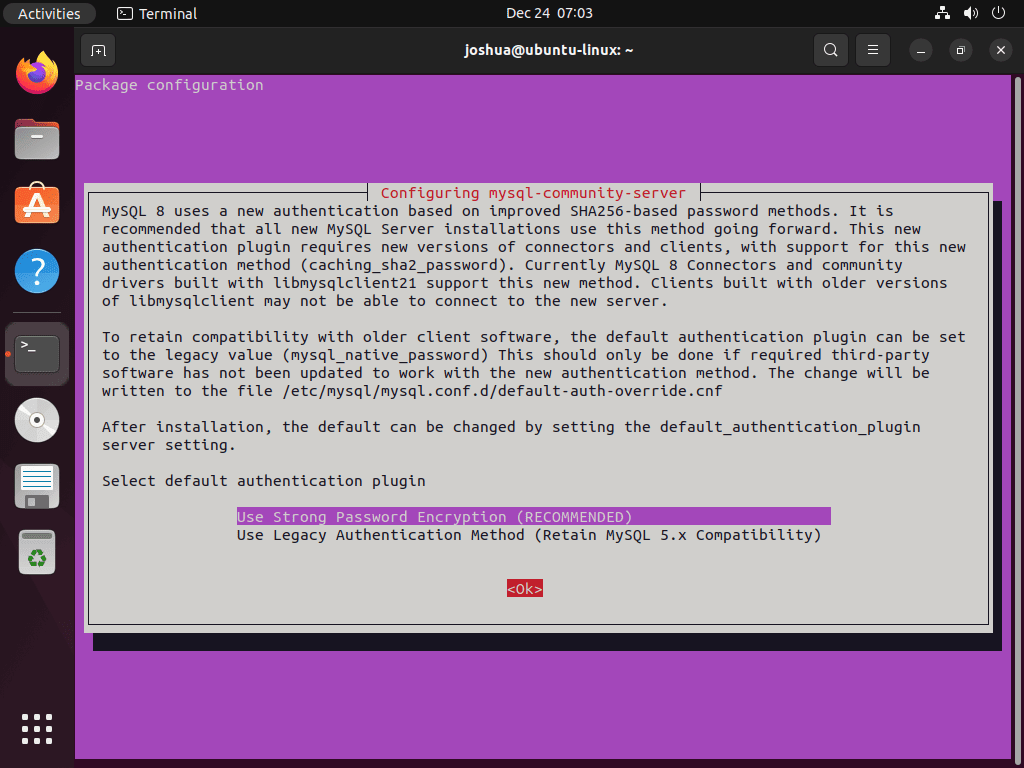
sudo apt install mysql-community-serverDuring installation, you’ll be prompted to set a password for the MySQL root user. Please ensure this password is secure and note it for future reference. After confirming the password, you’ll be asked to select the default authentication plugin. If in doubt, opt for the “Use Strong Password Encryption” recommended by MySQL.
To confirm the installation, check the installed MySQL version with the following command:
apt policy mysql-community-server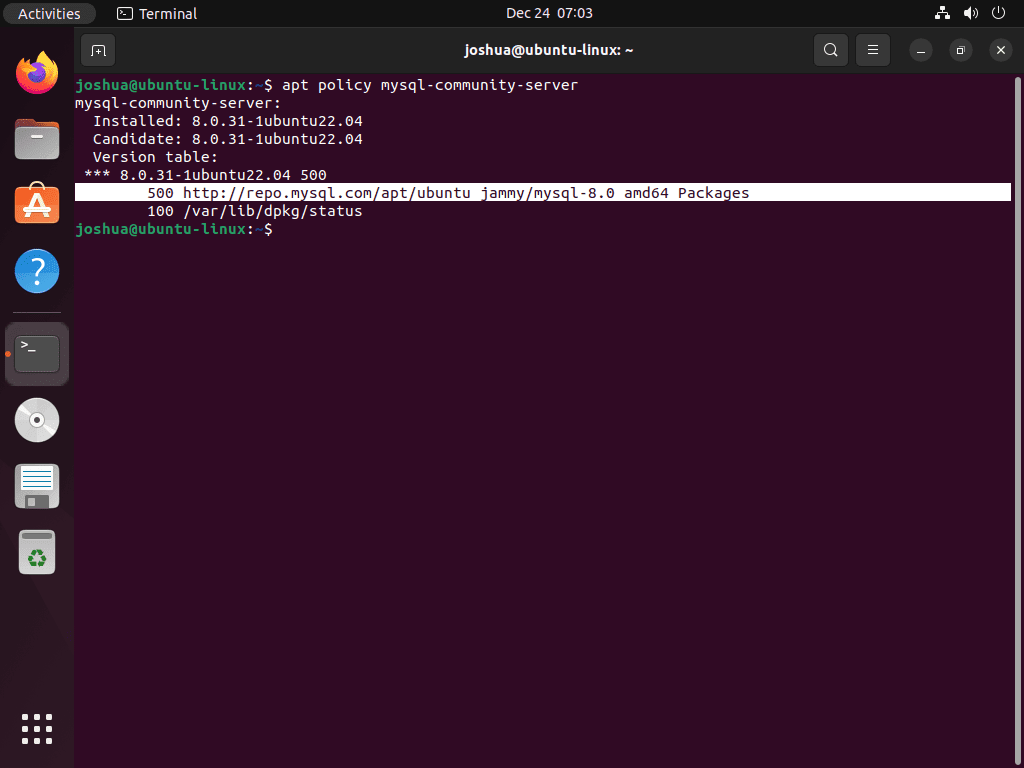
Service Commands for MySQL 8.0 on Ubuntu 22.04 or 20.04
With the MySQL 8.0 Community Edition Server installed, the system automatically activates the MySQL service and sets it to auto-start upon system boot. Understanding some basic service management commands is essential for the efficient operation of your database server.
After installation, one of the first tasks is to confirm that your MySQL service is running as expected. Using the systemctl command, specifically tailored for interacting with systemd services, you can view the current status of your MySQL service. Issue the following command:
systemctl status mysql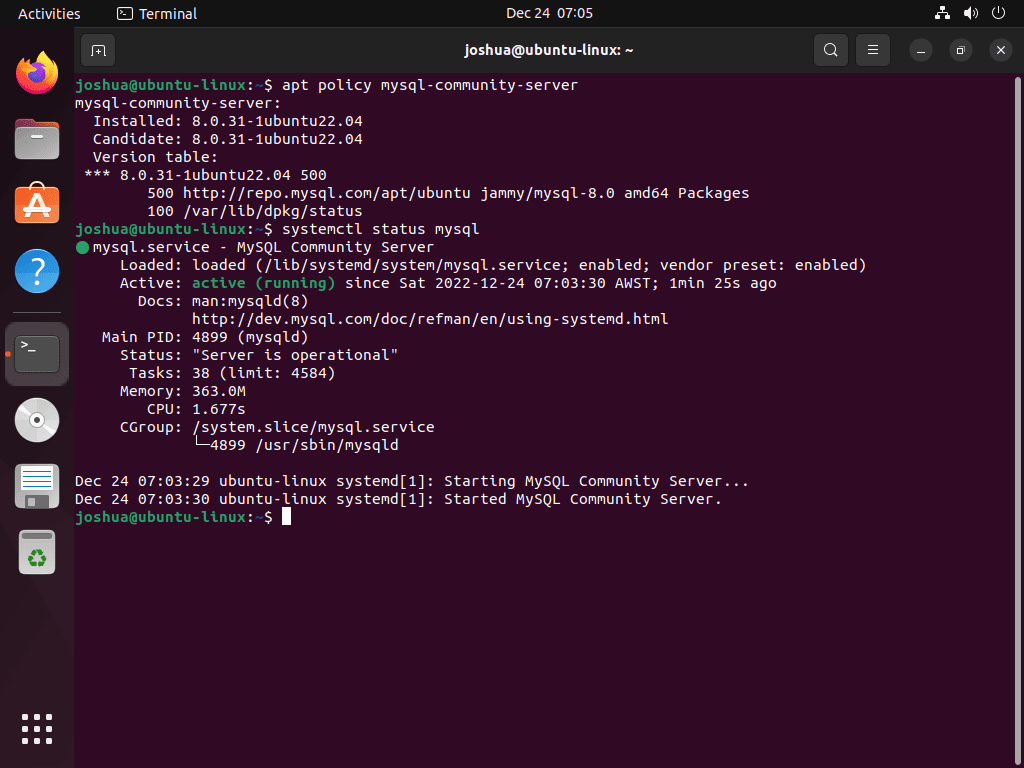
On successful operation, the status message should indicate that the service is active and running without issues.
Understanding how to manage the MySQL service is critical to maintaining your database server. Various systemctl commands enable you to interact with the MySQL service directly. Here’s an overview of some essential commands:
Stopping the MySQL Service
To halt the MySQL service at any given time, use the following command:
sudo systemctl stop mysqldStarting the MySQL Service
If your MySQL service is not running, or after you’ve stopped it, restart it with the following command:
sudo systemctl start mysqldDisabling the MySQL Service at System Startup
There might be situations where you’d prefer the MySQL service not to start automatically when your system boots. To disable auto-start, use the following command:
sudo systemctl disable mysqldEnabling the MySQL Service at System Startup
To revert the above action and set the MySQL service to start automatically upon system boot, use the following command:
sudo systemctl enable mysqldRestarting the MySQL Service
If you need to restart the MySQL service—for instance, after making configuration changes—use the following command:
sudo systemctl restart mysqldSecure MySQL 8.0 on Ubuntu 22.04 or 20.04
Upon installing MySQL, specific default settings may not meet all security standards, potentially opening your database to intrusions or exploitations. A crucial step after installation is to bolster the security of your MySQL instance. MySQL provides a security script mysql_secure_installation that helps to tighten the security around your database.
Running the MySQL Security Script on Ubuntu
The mysql_secure_installation script is a part of the MySQL package that enhances security. Launch the script by issuing the following command:
sudo mysql_secure_installationInteracting with the Security Script on Ubuntu
After running the command, the script prompts you to input your root password, initially set during the MySQL installation.
You will encounter a prompt regarding the VALIDATE PASSWORD COMPONENT, which helps enforce password strength policies. Generally, the default settings suffice.
The script then takes you through a series of steps:
1. Password Settings for Root Accounts
Here, you have the chance to reset the root password. However, if you already set it during the initial installation, you may choose to skip this step. The script requires you to enter the new password twice for validation.
New password: <---- SET NEW PASSWORD
Re-enter new password: <---- RE-ENTER NEW PASSWORD
2. Removal of Anonymous Users
MySQL, by default, includes an anonymous user account. This account allows anyone to log into MySQL without having an authenticated user account, which can be a significant security risk. The script offers you the chance to remove these anonymous user accounts:
Remove anonymous users? (Press y|Y for Yes, any other key for No) : Y <---- Type Y then press the ENTER KEY.3. Disallowing Root Login Remotely
In a standard security protocol, the root user should only be allowed to connect from ‘localhost’. This protocol ensures that remote attempts to guess the root password are mitigated. The script asks you to confirm the deactivation of remote root logins:
Disallow root login remotely? (Press y|Y for Yes, any other key for No) : Y <---- Type Y then press the ENTER KEY.
4. Removal of Test Database
By default, MySQL installation includes a ‘test’ database. This database is accessible to anyone and is only meant for testing purposes. Before moving your setup to a production environment, it’s crucial to remove the test database and access it:
Remove test database and access to it? (Press y|Y for Yes, any other key for No) : Y <---- Type Y then press the ENTER KEY.
5. Reloading Privilege Tables
Reloading the privilege tables allows all changes you’ve made so far to take effect immediately:
Reload privilege tables now? (Press y|Y for Yes, any other key for No) : Y <---- Type Y then press the ENTER KEY.By following these steps and confirming the security changes, you enhance the security of your MySQL server installation, mitigating the risk of potential exploits.
Managing MySQL 8.0 on Ubuntu 22.04 or 20.04
Managing your MySQL server involves several routine tasks such as updates, upgrades, and, when necessary, uninstallation. Ubuntu Linux provides efficient command-line utilities for these tasks, ensuring your MySQL server stays up-to-date and secure.
Update MySQL 8.0 on Ubuntu
Regular updates are essential to maintain the smooth running of your MySQL server. These updates often bring bug fixes, security patches, and new features, helping enhance your server’s overall security and functionality.
Since you’ve added the official MySQL APT repository to your system, updating MySQL is easy. The following command is a combination of two distinct commands, sudo apt update and sudo apt upgrade.
sudo apt update && sudo apt upgradeThe sudo apt update command retrieves information about what packages can be upgraded, including MySQL, if an update is available. On the other hand, sudo apt upgrade upgrades the actual packages.
Remove MySQL 8.0 from Ubuntu
There might be instances when you no longer require the MySQL server on your Ubuntu system. The uninstallation process involves stopping MySQL service and removing the software and associated dependencies.
Stop the MySQL Service on Ubuntu
Before uninstallation, ensure that the MySQL service isn’t running. Use the following command to stop the service immediately:
sudo systemctl stop mysql --nowRemove MySQL and Its Dependencies from Ubuntu
Now, you can remove the MySQL server and any associated packages no longer needed. The sudo apt autoremove command is quite efficient at this:
sudo apt autoremove mysql-community-serverAlternatively, use the following command if you used Ubuntu’s version:
sudo apt autoremove mysql-serverThis command removes the MySQL server and cleans up unused packages or dependencies, freeing up system resources.
Remove MySQL 8.0 Repository
If you no longer intend to use MySQL and had previously imported the MySQL 8.0 Community Repository, removing the repository from your system is a good practice. Use the following command to delete the MySQL list file from the sources.list.d directory:
sudo rm /etc/apt/sources.list.d/mysql.listThis step ensures that your system won’t attempt to check the MySQL repository for updates during a system-wide upgrade, thus keeping your APT sources streamlined.
Conclusion
The journey of installing, configuring, and managing MySQL 8.0 on Ubuntu Linux is an essential skill for any database administrator, developer, or tech enthusiast. We’ve covered a broad range of topics, from setting up and starting the service to ensuring the security of your MySQL installation and updating and uninstalling as needed. Each step is crucial in maintaining an efficient, secure, and up-to-date MySQL server on your Ubuntu system.

