
Monit is a versatile tool designed to manage and monitor Unix systems. This guide will demonstrate how to install Monit on Fedora Linux, providing an efficient way to oversee system processes and resources. Often used by system administrators, Monit excels in its simplicity and power, offering real-time insights and automated problem resolution. It’s an ideal solution for maintaining the health and performance of servers and services.
Key Features of Monit:
- Automated Monitoring: Monit continuously checks the status of specified services and processes, ensuring they are running as expected.
- Alert System: It promptly notifies users of any system irregularities or failures.
- Automatic Maintenance: Monit can restart failed services automatically, reducing downtime.
- Resource Tracking: It keeps an eye on system resources like CPU, memory, and disk usage.
- Customizable Tests: Users can define specific tests for monitoring services and system attributes.
- Web Interface: Provides an easy-to-use web interface for remote monitoring and management.
The process of setting up Monit on Fedora Linux is straightforward, involving a few key steps. By following this guide, users will be able to leverage Monit’s robust monitoring capabilities to ensure their systems are running optimally and efficiently. Let’s dive into the installation process.
Install Monit on Fedora Linux via DNF
Step 1: Refresh Fedora Packages Before Monit Installation
To begin, it’s crucial to update your Fedora system. This step ensures that all existing packages are current, preventing potential conflicts or compatibility issues during the Monit installation.
Execute the command below:
sudo dnf upgrade --refreshThis command refreshes the repository metadata and updates all the installed packages to their latest versions. Keeping your system updated is a best practice for system security and stability.
Step 2: Install Monit via DNF Command
Monit is conveniently accessible in Fedora’s default software repository. This availability simplifies the installation process.
Start by executing the installation command:
sudo dnf install monitAfter successful installation, enabling and starting the Monit service is necessary. This action ensures that Monit runs automatically upon system startup and remains active.
Use this command to enable and start Monit:
sudo systemctl enable monit --nowThe --now flag with systemctl enable command is a useful feature in systemd, as it enables and starts the service in a single command, saving time and simplifying the process.
Step 3: Verify Monit System Service on Fedora
The final step involves verifying that Monit is running correctly on your system. This verification helps confirm that the installation was successful and the service is operational.
Use the command:
systemctl status monit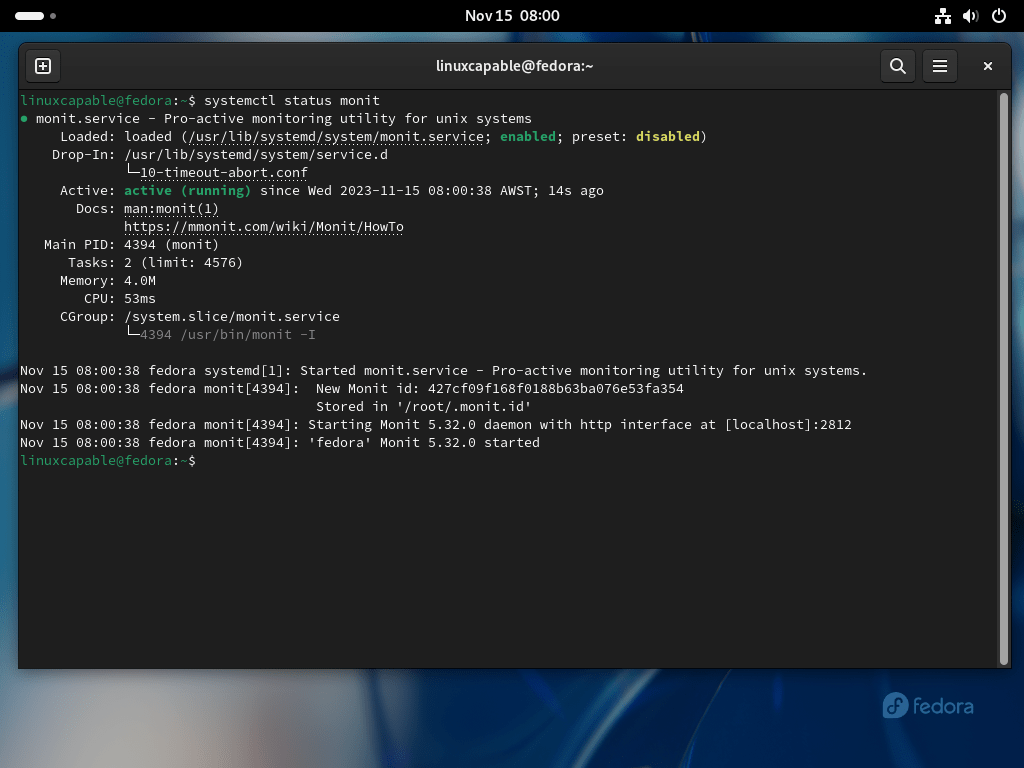
Configure Monit WebUI on Fedora Linux
Editing Monit Configuration File
With Monit operational on your system, the next step is configuring the WebUI. This interface provides a user-friendly platform to monitor your services through a web browser. Start by editing the Monit configuration file located at /etc/monit/monitrc.
Use this command to open the configuration file:
sudo nano /etc/monitrcIn this file, you’ll find several configuration settings. Look for the following lines:
# set httpd port 2812 and
# allow admin:monit
Setting Up WebUI Access
Change the default username and password to enhance security. While ‘admin’ is commonly used, selecting a unique username is advisable. For environments where security is a prime concern, consider changing the default port (2812) to a less commonly used one.
Here’s an example of how to set it up:
set httpd port 2812 and
allow joshmonit:strongpassword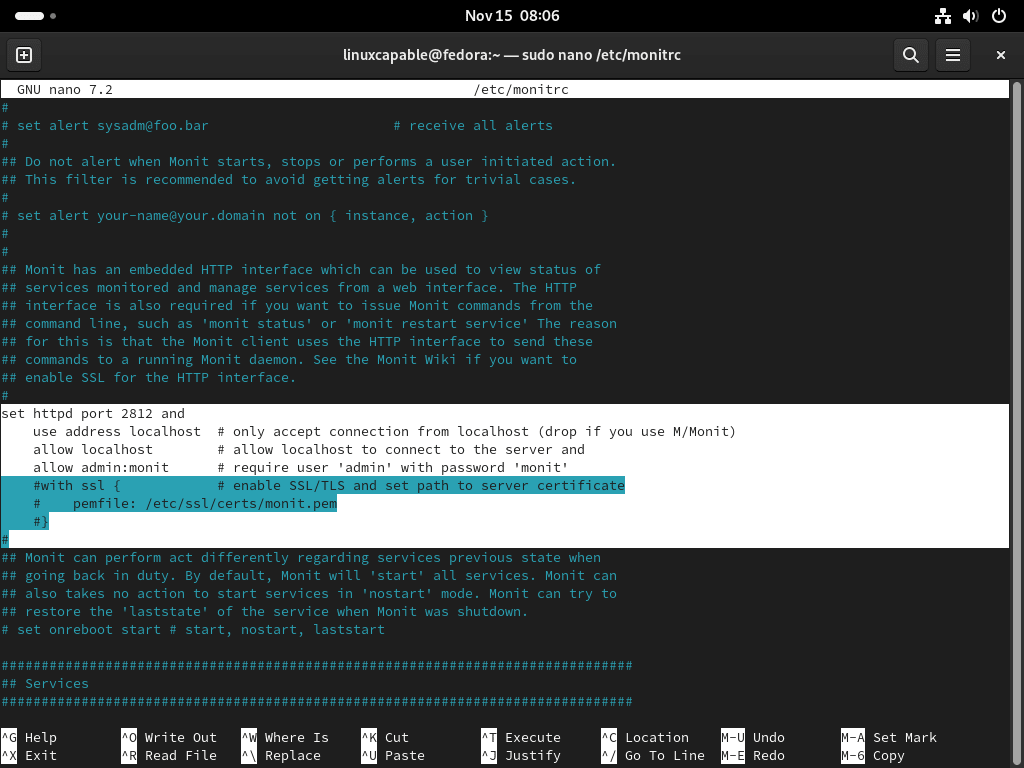
Configuring Localhost Access
For local environments, enabling access only from the localhost enhances security by preventing external connections. To do this, uncomment the following lines:
use address localhost  # only accept connection from localhost (drop if y><p if you use M/Monit)
allow localhost        # allow localhost to connect to the server
Do not uncomment these lines if you need to access Monit from external networks.
After making the changes, save the file with CTRL+O and exit with CTRL+X.
Validating and Restarting Monit Service
It’s essential to verify that your changes haven’t introduced any syntax errors in the configuration. Test the configuration with:
sudo monit -tYou should see an output like this:
Control file syntax OKFinally, apply the changes by restarting the Monit service:
sudo systemctl restart monitThis restart ensures that Monit applies the new configuration settings.
Configure Monit FirewallD Rules on Fedora Linux
Creating a Dedicated Firewall Zone for Monit
To enhance the security of your Monit installation on Fedora Linux, it’s crucial to establish specific FirewallD rules. Monit, by default, doesn’t come with pre-configured firewall settings. Setting up these rules is imperative to protect your system against unauthorized access and potential attacks.
Start by creating a new, dedicated firewall zone for Monit. This approach isolates Monit’s rules from the rest of your system, making management and troubleshooting more straightforward. Use the following command:
sudo firewall-cmd --permanent --new-zone=monitThis command adds a new zone named ‘monit’ to your firewall configuration, ensuring that any rules applied here are specifically for Monit’s traffic.
Adding IP Address Rules to the Monit Zone
Next, specify which IP addresses are allowed to access Monit. This step is critical in defining a clear boundary of who can interact with your Monit service. Use this command:
sudo firewall-cmd --permanent --zone=monit --add-source=1.2.3.4Replace 1.2.3.4 with the actual IP address you wish to allow. It’s a best practice to limit access to trusted IP addresses, significantly reducing the risk of unauthorized access.
Opening Monit’s Port in the Firewall
Monit uses TCP port 2812 by default. If you’ve changed this in your Monit configuration, ensure to reflect the same here. Open the necessary port by executing:
sudo firewall-cmd --permanent --zone=monit --add-port=2812/tcpAdjust 2812 to match your configured Monit port if it differs. This step is crucial for enabling legitimate traffic to reach your Monit service while keeping the rest of your network shielded.
Applying the New Firewall Rules
After setting up the zone and rules, apply these changes by reloading the firewall. This action activates the new configuration without needing a system reboot. Implement the changes with:
sudo firewall-cmd --reloadThe expected output for a successful reload is success. This confirmation ensures that your new firewall settings are active and protecting your Monit installation.
successAccess Monit WebUI on Fedora Linux
Accessing the Monit Web Interface
After successfully installing and configuring Monit on your Fedora Linux system, the next step is to access the Monit service. This is done through a web browser using your server’s IP address. For instance, if your server’s IP address is 192.0.150.220, and Monit is set to use the default port, enter the following URL:
http://192.0.150.220:2812For local connections, i.e., if you are accessing Monit from the same machine where it is installed, use localhost in the URL:
http://localhost:2812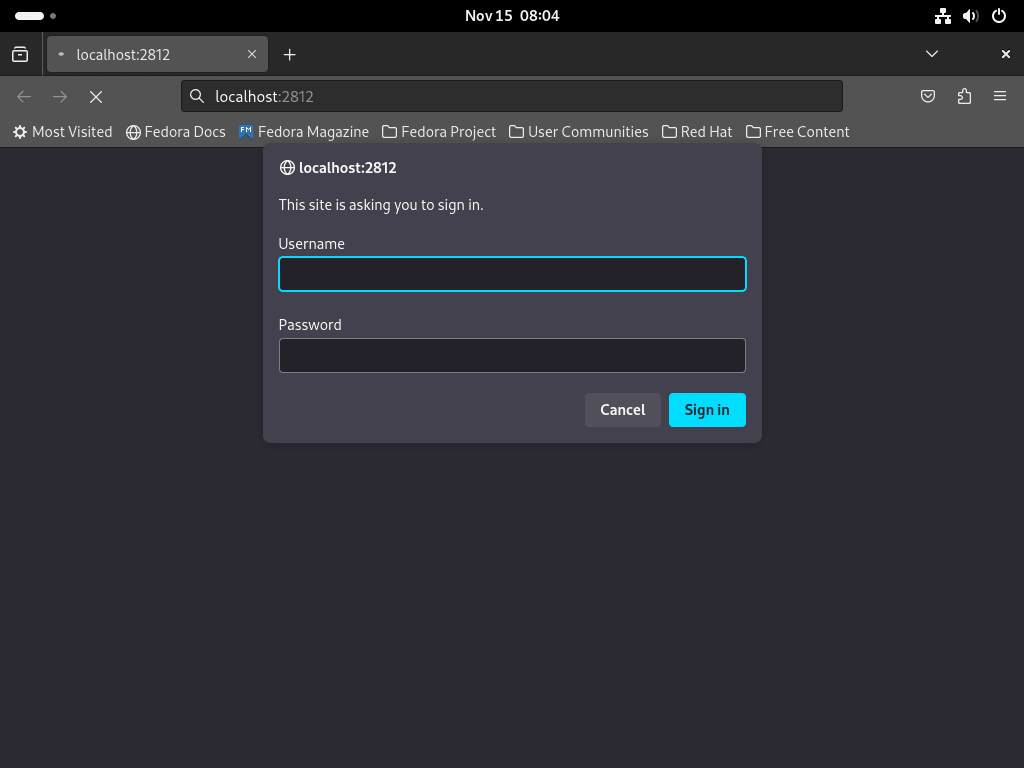
Logging in to Monit WebUI
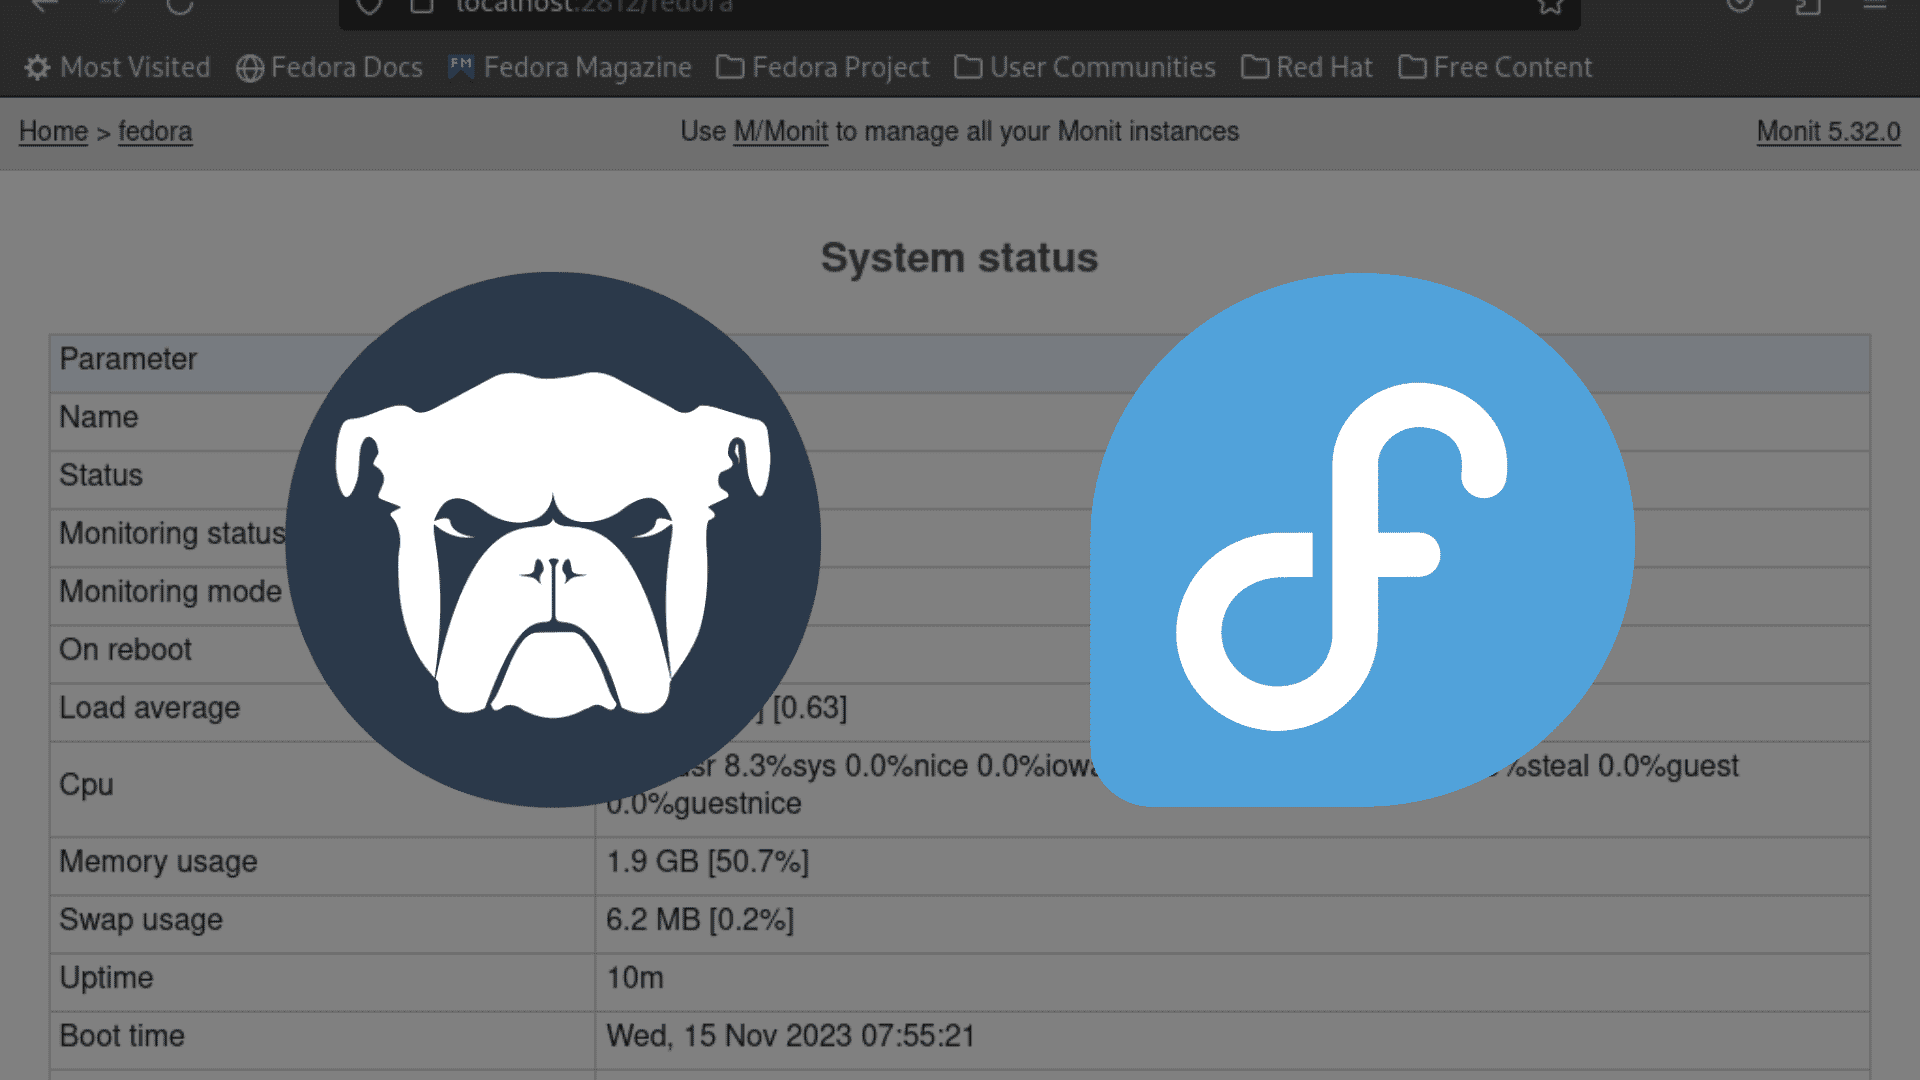
When you access the WebUI, it prompts you to log in. Enter the username and password that you set in the Monit configuration file. After logging in, the system directs you to the main dashboard. This dashboard offers an overview of your system’s status, showcasing monitored services and key health indicators.
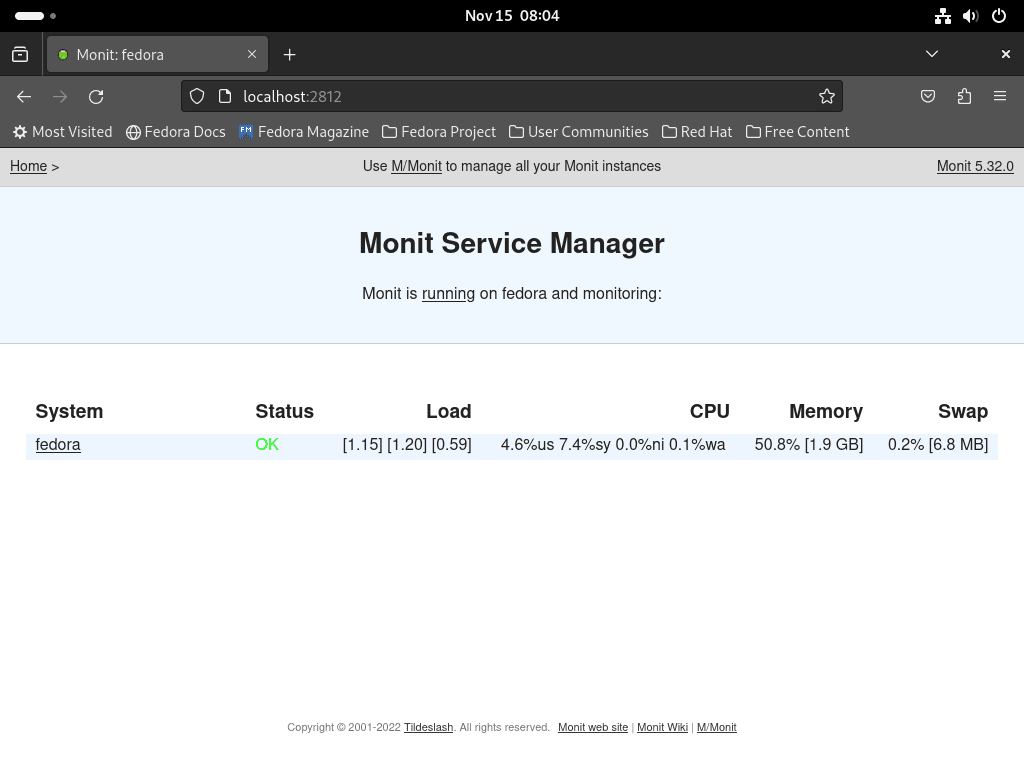
Navigating the Monit Dashboard
On the dashboard, you have the option to delve into more specific details about your system. Click on the system or any service listed to view detailed statistics and information. This feature is particularly useful for closely monitoring the performance and status of individual services.
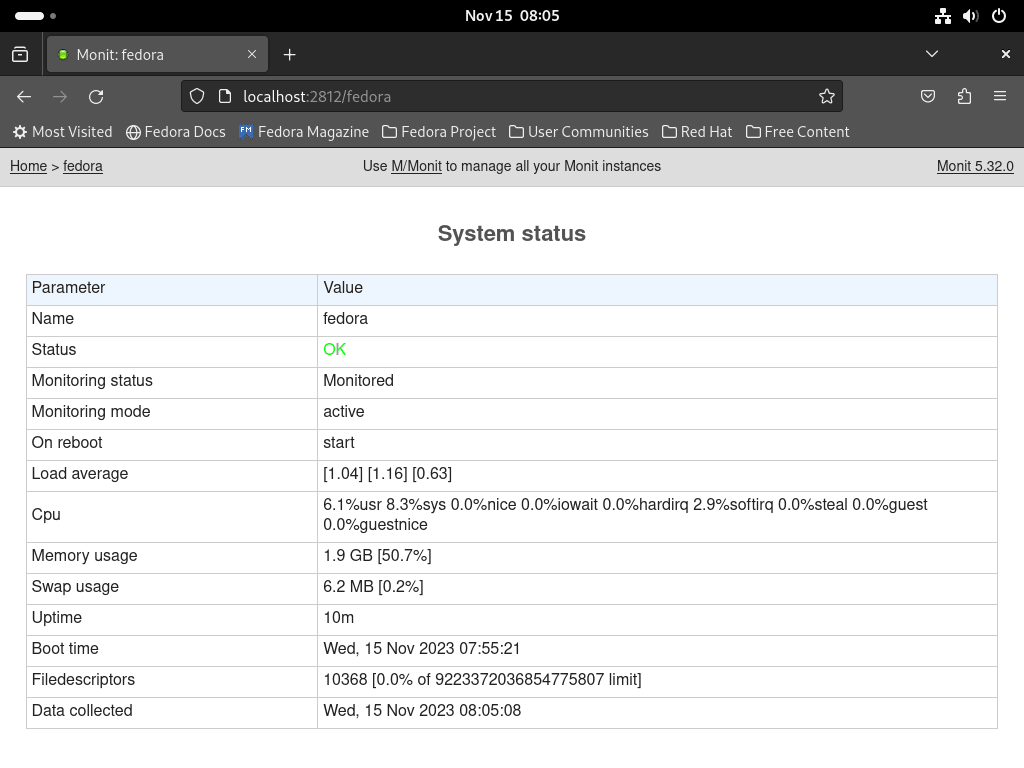
Adjusting Settings via WebUI
For users needing to tweak settings or troubleshoot issues, the Monit WebUI offers a comprehensive overview of all Monit configurations. This interface simplifies the process of adjusting settings, ensuring your Monit setup aligns perfectly with your system management needs.
Managing Monit on Fedora Linux
Update Monit on Fedora
Regularly updating Monit on your Fedora Linux system is crucial for maintaining its performance and security. If you’ve installed Monit using Fedora’s default repository, updating it is straightforward and aligns with Fedora’s standard update process.
Execute the following command in your terminal to update Monit along with other system packages:
sudo dnf update --refreshThis command refreshes your package lists and applies the latest updates available for all installed packages, including Monit. For desktop users who have automatic updates enabled, it’s still recommended to run this command periodically. This ensures all updates are correctly applied, and your system remains secure and up-to-date.
Remove Monit from Fedora
If Monit is no longer required on your Fedora system, removing it is a simple process. To completely uninstall Monit, use the following command:
sudo dnf remove monitThis command will remove Monit from your system. It’s important to note that uninstalling Monit will stop all monitoring services provided by it. Ensure you no longer need Monit’s functionality or have an alternative solution before proceeding with this step.
Conclusion and Final Thoughts
In this comprehensive guide, we’ve navigated through the essentials of installing, configuring, and managing Monit on Fedora Linux. We’ve seen how to set it up from scratch, configure its WebUI for easier monitoring, and secure it with FirewallD rules. The process, while technical, is made accessible with clear, step-by-step instructions. As a final recommendation, remember to regularly update Monit to maintain security and efficiency. Also, don’t forget to tailor its settings to fit your specific system needs. Monit is a powerful tool, and with the right configuration, it can significantly enhance your system’s monitoring capabilities, giving you greater control and insight. Keep exploring its features and fine-tune it to get the most out of your Fedora Linux system.