
Saved sessions, PPK key handling, and PuTTY’s companion tools make PuTTY useful on Debian when a plain terminal SSH command is not the whole workflow. Install PuTTY SSH on Debian with APT when you want the desktop client plus pscp, psftp, and puttygen on your normal shell path. A Flathub build also exists, but treat it as optional and verify the remote before using it, especially on Debian 13.
If you are searching for a PuTTY download for Debian, use Debian’s packages first and only use Flathub when its metadata verifies successfully. The official PuTTY download page publishes Windows installers and a Unix source archive, while Debian provides maintained binary packages through APT.
Install PuTTY SSH on Debian
APT is the best default for Debian 13, 12, and 11 because it installs PuTTY and its companion command-line tools from the distro package set. Flatpak is useful only when Flathub already works on your system and you do not need PuTTY’s host-side tools on $PATH.
| Method | Source or Channel | Status | Best For | Trade-offs |
|---|---|---|---|---|
| APT | Debian package repositories | Default path for Debian 13, 12, and 11 | Most users, local shell integration, and PSCP or PuTTYgen workflows | Version follows the Debian release branch |
| Flatpak | Flathub stable app | Optional; proceed only when the Flathub remote verifies because Debian 13 may report a summary-signature key error | Desktop users who already use Flatpak | Does not replace the APT putty-tools package for host-side terminal examples |
Use the APT method if you plan to follow the PSCP, PSFTP, or PuTTYgen command examples later. Use the Flatpak method only after Flathub metadata loads successfully; do not bypass Flatpak signature checks to force the install.
Refresh Debian Package Metadata
Refresh APT metadata before installing PuTTY so Debian sees the current package indexes from every enabled source.
sudo apt updateThe package-management step uses
sudobecause APT changes system packages. If your account cannot use sudo yet, follow the guide to add a user to sudoers on Debian before continuing.
Install PuTTY with APT on Debian
Install the desktop client and PuTTY’s terminal helper tools from Debian’s default repositories.
sudo apt install putty putty-toolsThe putty package installs the graphical client. The putty-tools package adds pscp, psftp, and puttygen for file transfers and PuTTY key work.
Verify the APT Installation
Check that the PuTTY client and companion tools are available from your shell.
command -v putty pscp psftp puttygen/usr/bin/putty /usr/bin/pscp /usr/bin/psftp /usr/bin/puttygen
Confirm the installed PuTTY branch when you need release-specific details.
pscp --versionExample output from Debian 13 includes:
pscp: Release 0.83
Build platform: 64-bit Unix
Compiler: gcc 14.2.0
Source commit: d2c178c49a0ae6fa9ef75ca84fb3c9d0d675ea85
| Debian Release | Default APT Package Branch | Notes |
|---|---|---|
| Debian 13 (Trixie) | 0.83.x | Closest Debian-packaged branch to current upstream PuTTY |
| Debian 12 (Bookworm) | 0.78.x | Stable oldstable package branch with security updates |
| Debian 11 (Bullseye) | 0.74.x | Older LTS package branch that still supports Ed25519 keys |
The branch depends on the Debian release, but all three supported release paths provide the SSH, PSCP, PSFTP, and PuTTYgen features used in these workflows.
Install PuTTY from Flathub When Verification Works
Use the Flatpak path only when you want PuTTY as a desktop app from Flathub and the remote can verify its signed metadata. Install Debian’s Flatpak package first if your system does not already have it.
sudo apt install flatpakIf you need the full Flatpak setup explained from the beginning, follow the guide to install Flatpak on Debian before installing the PuTTY app.
Add Flathub at system scope so the remote, the app, and later updates use the same installation scope.
sudo flatpak remote-add --if-not-exists flathub https://dl.flathub.org/repo/flathub.flatpakrepoIf this step fails with a signature error, use APT instead and do not add --no-gpg-verify or other trust-bypass options.
Can't check signature: public key not found
Confirm that Flathub can return the PuTTY app record before installing the app.
flatpak remote-info --system flathub uk.org.greenend.chiark.sgtatham.putty | grep -E '^[[:space:]]*(ID|Ref|Arch|Branch|Runtime):'Continue only if the command returns app metadata. Then install PuTTY from the Flathub app ID.
sudo flatpak install flathub uk.org.greenend.chiark.sgtatham.puttyCheck the installed Flatpak metadata after installation. The version may move as Flathub publishes newer stable PuTTY builds.
flatpak info uk.org.greenend.chiark.sgtatham.putty | grep -E '^[[:space:]]*(ID|Ref|Arch|Branch|Version|Origin|Installation):' ID: uk.org.greenend.chiark.sgtatham.putty
Ref: app/uk.org.greenend.chiark.sgtatham.putty/x86_64/stable
Arch: x86_64
Branch: stable
Version: 0.83
Origin: flathub
Installation: system
Flatpak confines the desktop app and can limit file access. If you need straightforward terminal tools for PSCP, PSFTP, or PuTTYgen, use the APT method instead.
Launch PuTTY on Debian
The package installs correctly from a terminal or SSH shell, but the main PuTTY window needs an active graphical desktop session.
Launch the APT-installed desktop client from a local desktop terminal.
puttyLaunch the Flatpak build through Flatpak when that method installed successfully.
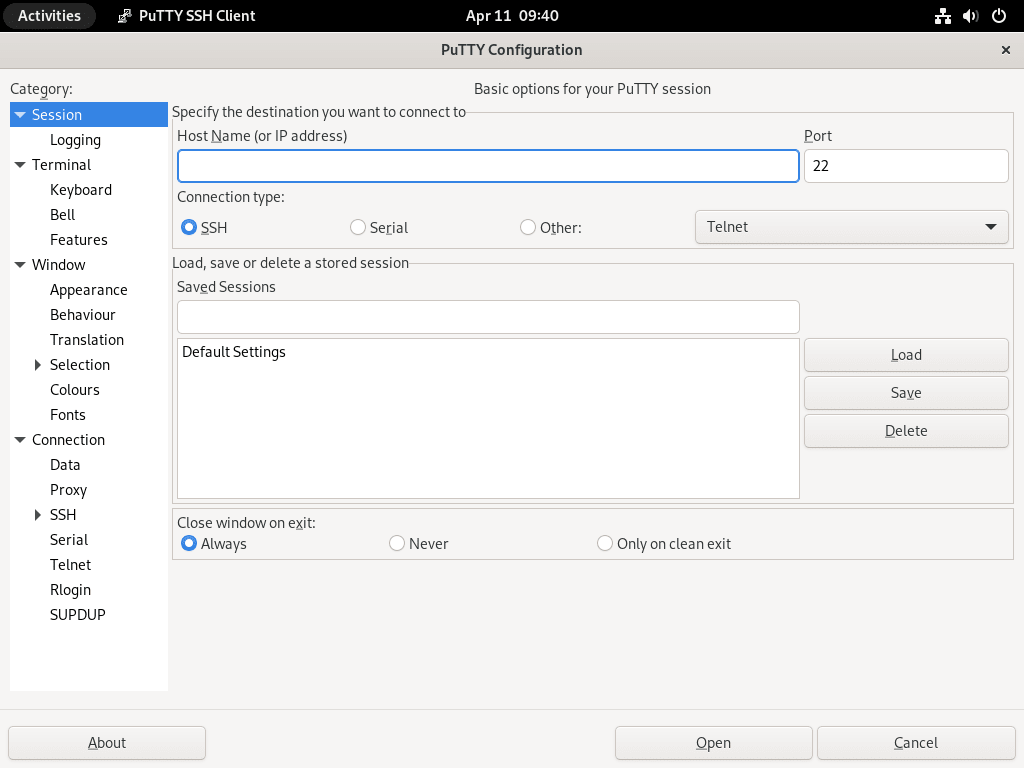
flatpak run uk.org.greenend.chiark.sgtatham.puttyOnce launched, the PuTTY Configuration window opens with session settings for host, port, protocol, saved sessions, terminal behavior, SSH options, and connection-specific tweaks.
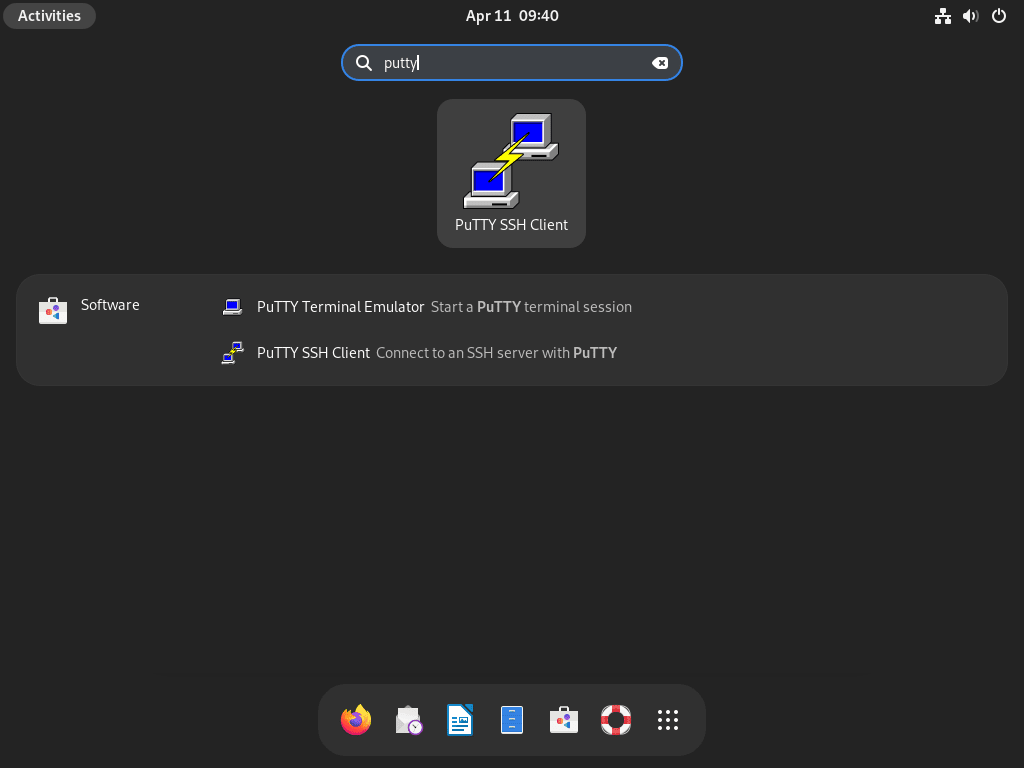
You can also open PuTTY from the desktop applications menu. On GNOME, open Activities, select Show Applications, search for PuTTY, and choose the PuTTY SSH Client icon.
Use PuTTY on Debian
PuTTY is a graphical SSH client, while OpenSSH is Debian’s standard command-line SSH stack. Use PuTTY when saved GUI sessions, PPK keys, or PuTTY’s companion tools fit your workflow; use OpenSSH when you want a terminal-first client or need to configure the remote SSH server. For command-line SSH syntax, see the SSH command reference for Linux.
Configure and Save PuTTY SSH Sessions
Save sessions when you connect to the same remote systems often and do not want to re-enter host, port, and SSH settings each time.
- Launch PuTTY.
- In the Session category, enter the remote server’s hostname or IP address in the Host Name (or IP address) field.
- Set the SSH port, usually
22unless the remote server uses a custom port. - Choose SSH as the connection type.
- Enter a clear name in the Saved Sessions field, then click Save.
Select the saved session later and click Load before opening the connection.
Customize PuTTY Appearance
Adjust terminal appearance from the left-side category tree before saving the session.
- Open Window > Appearance to change the terminal font and size.
- Open Window > Colours to adjust foreground, background, and ANSI color entries.
- Open Terminal and Window sections when you need scrollback, bell, keyboard, or display behavior to differ by session.
Use Key-Based Authentication with PuTTY
Debian 13, 12, and 11 ship PuTTY branches new enough to generate Ed25519 keys. Ed25519 is a strong default for modern OpenSSH servers; use RSA only when an older server cannot accept Ed25519 keys.
Create the local SSH directory with permissions that keep private key material private.
mkdir -p ~/.ssh && chmod 700 ~/.sshGenerate an Ed25519 key pair in PuTTY’s PPK format. Enter a passphrase when prompted so the private key is not usable by itself if copied from your account.
puttygen -t ed25519 -o ~/.ssh/putty-key.ppkExport the public key in OpenSSH format so it can be added to the remote server.
puttygen -L ~/.ssh/putty-key.ppk > ~/.ssh/putty-key.pubThe exported public key should begin with ssh-ed25519. View it before copying it to the remote account.
cat ~/.ssh/putty-key.pubCopy the public key with ssh-copy-id when the OpenSSH client tools are available on your Debian system.
ssh-copy-id -i ~/.ssh/putty-key.pub user@remote-serverIf ssh-copy-id is unavailable, append the public key manually through a normal SSH session.
cat ~/.ssh/putty-key.pub | ssh user@remote-server 'install -m 700 -d ~/.ssh && cat >> ~/.ssh/authorized_keys && chmod 600 ~/.ssh/authorized_keys'Configure PuTTY to use the key after the public key is present on the remote server.
- Launch PuTTY and load or create the SSH session.
- Open Connection > SSH > Auth > Credentials.
- Browse to
~/.ssh/putty-key.ppkin the private-key field. - Return to Session and save the session.
Enable X11 Forwarding with PuTTY
X11 forwarding lets a graphical application on the remote server display through your local desktop session. The remote OpenSSH server must allow forwarding, and the remote account needs the usual X11 authentication helper.
On the remote server, check the effective OpenSSH setting.
sudo /usr/sbin/sshd -T | grep -i '^x11forwarding'x11forwarding yes
If the server reports x11forwarding no, change the remote server’s SSH policy only if you administer that host. Test the server configuration before reloading SSH.
sudo /usr/sbin/sshd -t
sudo systemctl reload ssh
Install xauth on the remote server if the forwarding check succeeds but graphical apps still cannot create the forwarded display cookie.
sudo apt install xauthIn PuTTY, open Connection > SSH > X11, enable X11 forwarding, save the session, and reconnect. After connecting, the remote shell should receive a forwarded display value.
echo "$DISPLAY"localhost:10.0
Test with a small X11 app only when the remote server has one installed.
xeyesIf xeyes is missing on the remote Debian server, install the x11-apps package or test with another known graphical program. On a local Debian desktop, Xwayland usually handles X11 clients under a Wayland session, but a Windows client needs a separate X server such as VcXsrv before forwarded apps can appear.
Transfer Files with PSCP on Debian
PSCP comes from the APT putty-tools package. Use it when you want PuTTY’s SCP/SFTP-style transfer tool from a Debian shell, especially for workflows that already use PuTTY key files.
Basic PSCP Transfers
Upload a file from Debian to the remote server.
pscp local-file.txt user@remote-server:/path/to/destinationDownload a remote file to the current Debian system.
pscp user@remote-server:/path/to/remote-file.txt local-destinationTransfer a directory recursively when the remote path should receive the whole directory tree.
pscp -r local-directory user@remote-server:/path/to/destinationThe -r flag enables recursive mode. Preview the local directory contents first if you are unsure what will be copied.
Use a PuTTY private key file for authentication when the remote account expects the matching public key.
pscp -i ~/.ssh/putty-key.ppk local-file.txt user@remote-server:/path/to/destinationUseful PSCP Options
Use uppercase -P for a custom SSH port. Lowercase -p is not the same option in PuTTY tools.
pscp -P 2222 local-file.txt user@remote-server:/path/to/destinationForce SCP or SFTP only when the remote server or policy requires a specific transfer protocol.
pscp -scp local-file.txt user@remote-server:/path/to/destinationpscp -sftp local-file.txt user@remote-server:/path/to/destinationAdd verbose output when you need to see connection negotiation, authentication, and transfer details while diagnosing a failed copy.
pscp -v local-file.txt user@remote-server:/path/to/destinationTroubleshoot PuTTY Issues on Debian
PuTTY errors usually point to the remote SSH service, firewall access, or a key-format mismatch. Start with the symptom, check the remote layer that can cause it, then retry the same connection.
Handle Flathub Signature Errors
If the Flatpak remote or PuTTY app metadata fails with Can't check signature: public key not found, the Flathub trust path did not verify cleanly on that Debian system. Use the APT package instead of disabling GPG verification.
Check the remote state before retrying later, especially if you already had other Flatpak apps installed.
flatpak remotes --show-disabled --columns=name,optionsFix Connection Refused Errors
A refused connection means the remote host answered the network request, but nothing accepted SSH on the port PuTTY tried to use.
Network error: Connection refused
On the remote Debian server, check whether the SSH service is active.
systemctl is-active sshactive
If the unit is missing or inactive, repair the remote SSH service before changing PuTTY. The Debian SSH setup guide covers the server-side package and service path: install and enable SSH on Debian.
If SSH is active, check whether UFW is active and missing the SSH port rule.
sudo ufw status verboseFor a default SSH listener on port 22, allow the TCP port only when UFW is active and the rule is absent.
sudo ufw allow 22/tcpReview the full UFW setup on Debian if the server uses custom ports, source-restricted rules, or another firewall layer.
Check Host Key Warnings
PuTTY shows a security alert the first time you connect to a server because it has not saved that host key yet. Verify the fingerprint through your server inventory, hosting panel, or administrator before accepting it.
If the warning appears for a server you have used before, stop and confirm why the key changed. Reinstallation, rebuilt cloud instances, reused IP addresses, or a real interception risk can all produce a new host key prompt.
Fix Permission Denied Public Key Errors
PuTTY reports a public-key failure when the remote account rejects the key, cannot read authorized_keys, or receives a key in the wrong format.
Disconnected: No supported authentication methods available (server sent: publickey)
On the remote server, inspect the SSH directory permissions for the target account.
ls -ld ~/.ssh ~/.ssh/authorized_keysdrwx------ 2 user user 4096 Dec 5 10:00 /home/user/.ssh -rw------- 1 user user 738 Dec 5 10:00 /home/user/.ssh/authorized_keys
Fix the permissions if the directory or key file is too open. For a deeper permission walkthrough, use the chmod command guide.
chmod 700 ~/.ssh
chmod 600 ~/.ssh/authorized_keys
Then confirm the PuTTY session points to the correct .ppk file, the matching public key exists in ~/.ssh/authorized_keys on the remote account, and the public key was exported with puttygen -L in OpenSSH format.
Update or Remove PuTTY from Debian
APT owns the default Debian install. Flatpak update and removal commands apply only to systems where the Flathub app installed successfully.
Update APT-Installed PuTTY
Refresh package metadata, then upgrade only the installed PuTTY packages.
sudo apt update
sudo apt install --only-upgrade putty putty-tools
The --only-upgrade option updates packages that are already installed. If APT says the packages are not installed, use the install command from the APT section instead.
Update an Existing Flatpak PuTTY
Update the system-scope Flatpak app through Flatpak only when the Flathub installation exists on that system.
sudo flatpak update uk.org.greenend.chiark.sgtatham.puttyFlatpak reports that there is nothing to do when the installed app is already current.
Remove APT-Installed PuTTY
Remove the Debian packages first.
sudo apt remove putty putty-toolsPreview orphaned dependencies before deleting anything else. Reused systems can already have unrelated packages marked autoremovable.
sudo apt autoremove --dry-runContinue only if the preview lists packages you actually want to remove.
sudo apt autoremoveConfirm that the APT packages no longer have installed ii rows.
dpkg -l putty putty-tools 2>/dev/null | grep '^ii' || echo "NOT_INSTALLED"NOT_INSTALLED
Remove an Existing Flatpak PuTTY
Remove the Flatpak app by its application ID when it exists on the system.
sudo flatpak uninstall uk.org.greenend.chiark.sgtatham.puttyRemove unused Flatpak runtimes only after reviewing the prompt, because another Flatpak app may still need them.
sudo flatpak uninstall --unusedVerify that the PuTTY app ID no longer appears in the installed Flatpak app list.
flatpak list --system --app --columns=application | grep -Fx uk.org.greenend.chiark.sgtatham.putty || echo "NOT_INSTALLED"NOT_INSTALLED
Remove PuTTY User Settings
Package removal does not delete saved sessions, host keys, or per-user preferences. APT-installed PuTTY commonly stores these under ~/.putty/, while Flatpak user data can remain under ~/.var/app/uk.org.greenend.chiark.sgtatham.putty/.
Back up the APT profile directory before deleting it if you may need saved sessions later.
if [ -d ~/.putty ]; then
  cp -a ~/.putty ~/putty-backup
else
  echo "No ~/.putty directory found"
fi
The cleanup commands in this section permanently delete saved PuTTY sessions, remembered host keys, and local preferences for the current user. Keep a backup if you may need those profiles again.
rm -rf ~/.puttyRemove Flatpak user data only when you also want to delete the Flatpak app’s local state for your account.
rm -rf ~/.var/app/uk.org.greenend.chiark.sgtatham.puttyConclusion
PuTTY is ready on Debian for saved desktop SSH sessions, PPK key work, and PSCP transfers when you used the APT method. For the server side of the connection, enable SSH on Debian, then consider installing Fail2ban on Debian to reduce brute-force login noise.

Formatting tips for your comment
You can use basic HTML to format your comment. Useful tags currently allowed in published comments:
<code>command</code>command<strong>bold</strong><em>italic</em><a href="https://example.com">link</a><blockquote>quote</blockquote>