

Discover the seamless integration of Ubuntu’s reliability with the sleek Budgie desktop environment in Ubuntu Budgie. This combination offers a dynamic, efficient, and aesthetically pleasing computing experience. If you’re contemplating a switch or a fresh installation, this guide will detail how to install Ubuntu Budgie on Ubuntu 22.04 Jammy Jellyfish or 20.04 Focal Fossa.
Why Ubuntu Budgie?
- Intuitive Interface: Ubuntu Budgie offers a streamlined desktop layout reminiscent of classic desktop designs, ensuring ease of use and a visually engaging experience.
- Customization Freedom: Budgie stands out with its extensive customization options. From panel adjustments and theme colors to icon sets and fonts, tailor your desktop to your preferences.
- Optimized Performance: Designed to be resource-efficient, Ubuntu Budgie is especially beneficial for systems with limited resources or older hardware.
- Unique Applets: Gain quick access to essential features directly from your desktop, thanks to Ubuntu Budgie’s integrated applets.
- Raven Sidebar: This feature-rich sidebar offers immediate access to the calendar, sound settings, and system notifications and can host various applets for added functionality.
- Budgie Welcome Screen: New to Budgie? This startup application provides valuable tips, software suggestions, and resource links.
- Hot Corners & Tiling: Enhance navigation with customizable corner actions and manage your workspace efficiently with intuitive window tiling features.
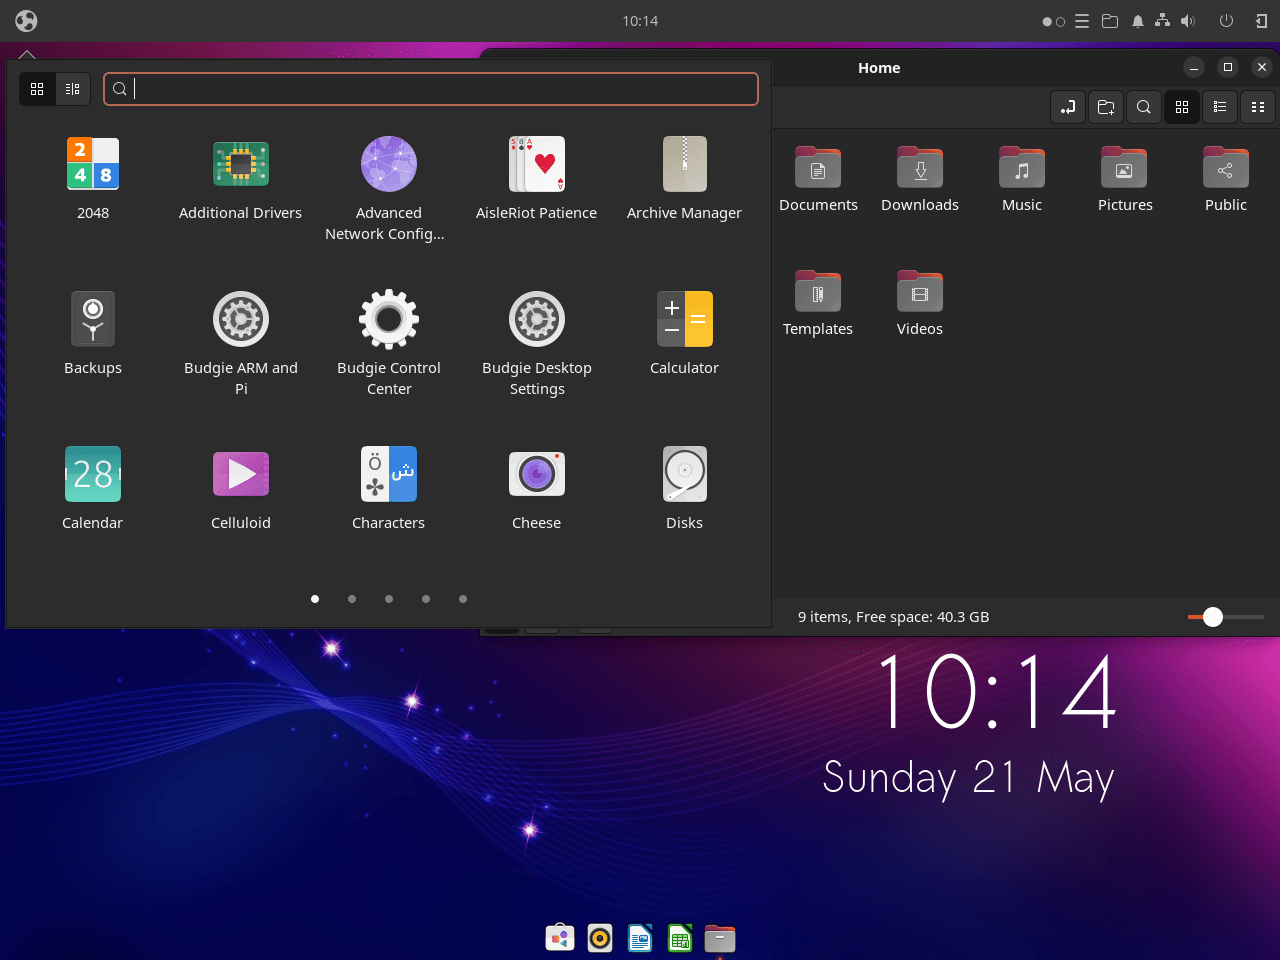
- Budgie Menu: Access all your applications through this efficient, searchable menu.
Considering the highlighted features, Ubuntu Budgie is a compelling choice for those seeking an efficient, customizable, and user-friendly desktop environment. Transitioning to or installing Ubuntu Budgie is straightforward, whether you’re on Ubuntu 22.04 Jammy Jellyfish or 20.04 Focal Fossa. The subsequent guide will explore the installation process using Ubuntu’s default repository. Embrace the innovative world of Ubuntu Budgie and elevate your computing experience.
Install Ubuntu Budgie on Ubuntu 22.04 or 20.04
Step 1: Updating Your Ubuntu System Before Budgie Installation
Before we embark on the installation process, we must ensure all your current software packages are up to date. This is crucial to avoid any potential conflicts during the installation of the Budgie desktop environment. To update your system, you would use the following command in your terminal:
sudo apt update && sudo apt upgradeIn this command, sudo grants administrative privileges for executing the command. The apt update command fetches the package information from all configured sources, while apt upgrade upgrades all currently installed packages to their latest versions.
Step 2: Install Ubuntu Budgie on Ubuntu 22.04 or 20.04 via APT Command
Now, with your system up to date, we can install Ubuntu Budgie on Ubuntu 22.04 or 20.04. The Budgie desktop environment can be installed directly from Ubuntu’s official repositories. The following command will initiate the installation:
sudo apt install ubuntu-budgie-desktopWith this command, sudo again grants administrative privileges, while apt install fetches and installs the package named ubuntu-budgie-desktop, which contains all necessary files for the Budgie desktop environment.
During the installation, you will encounter a prompt window. This window allows you to select your preferred display manager. The display manager is the first screen upon booting your computer, often prompting you for your username and password.
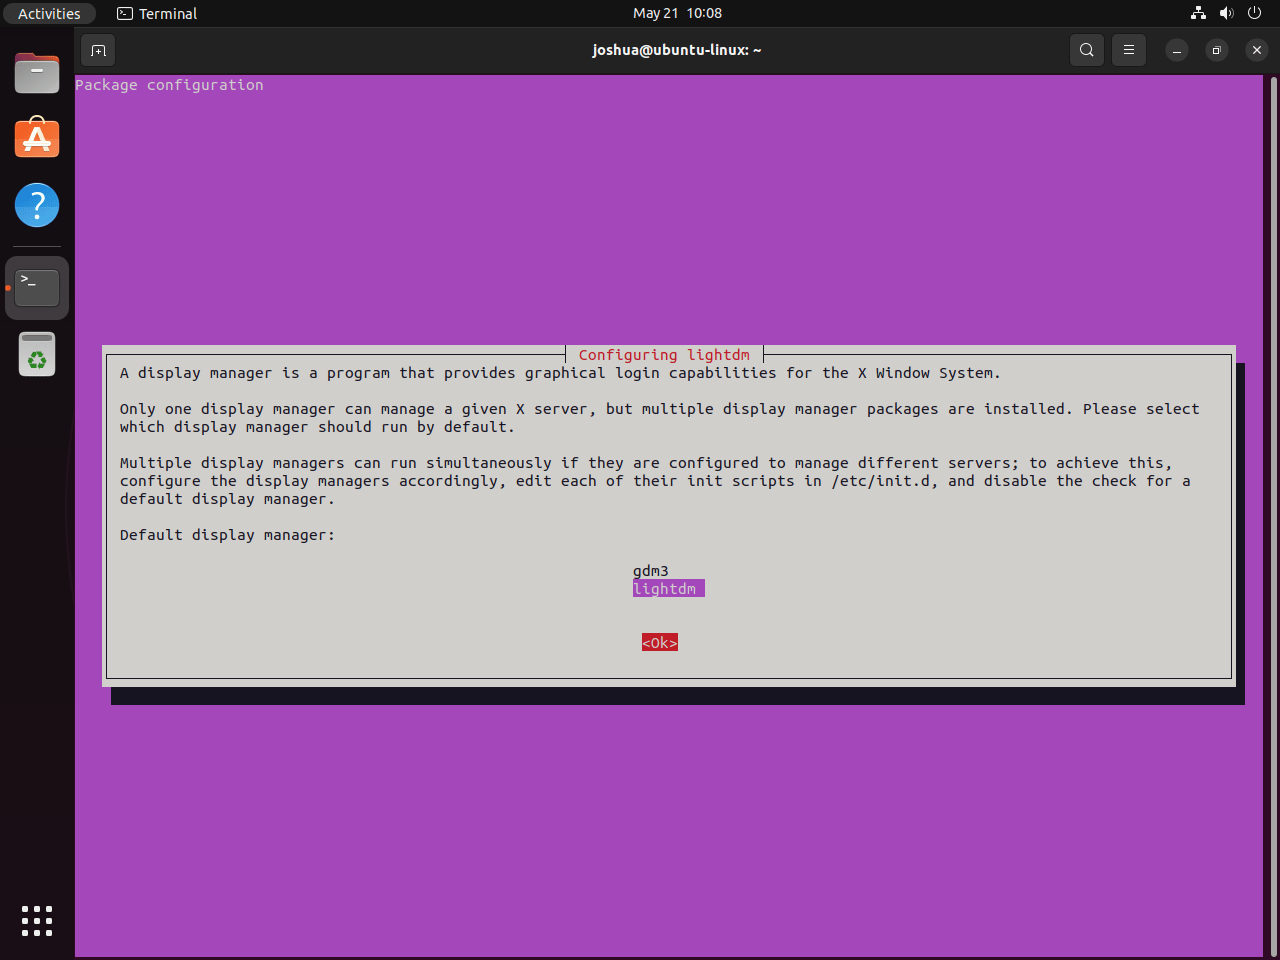
Please choose “lightdm” display manager and proceed with the installation as this is the recommended display manager for Ubuntu Budgie.
Step 3: Restarting Your Computer To Complete the Ubuntu Budgie Installation
Once the installation is complete, it is necessary to restart your computer to activate your new Budgie desktop environment. To initiate the reboot, you would use the following command:
sudo rebootThe sudo command grants administrative privileges, while reboot initiates a system reboot.
Logging in to Ubuntu Budgie on Ubuntu 22.04 or 20.04
Step 1: Observing the Changes of Ubuntu Budgie
After your computer restarts, you’ll find yourself at the login screen. One of the first things you’ll likely notice is a new background. This change in the backdrop is your first sign that the transformation to the Ubuntu Budgie desktop environment has been successful.
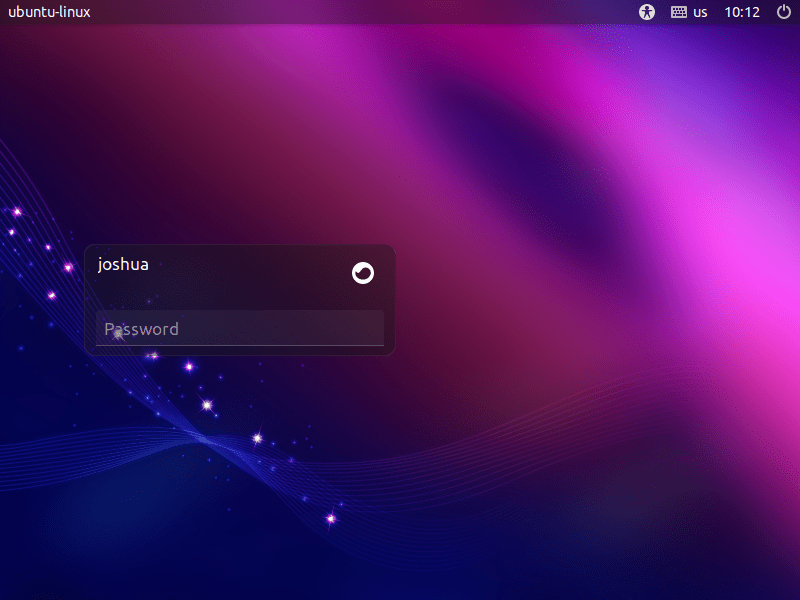
This striking new look is just the welcome mat for the exciting Budgie interface that awaits you.
Step 2: Logging into Ubuntu Budgie
Next, log in as you usually would. Upon successful authentication, you’ll be transported into your new desktop environment.
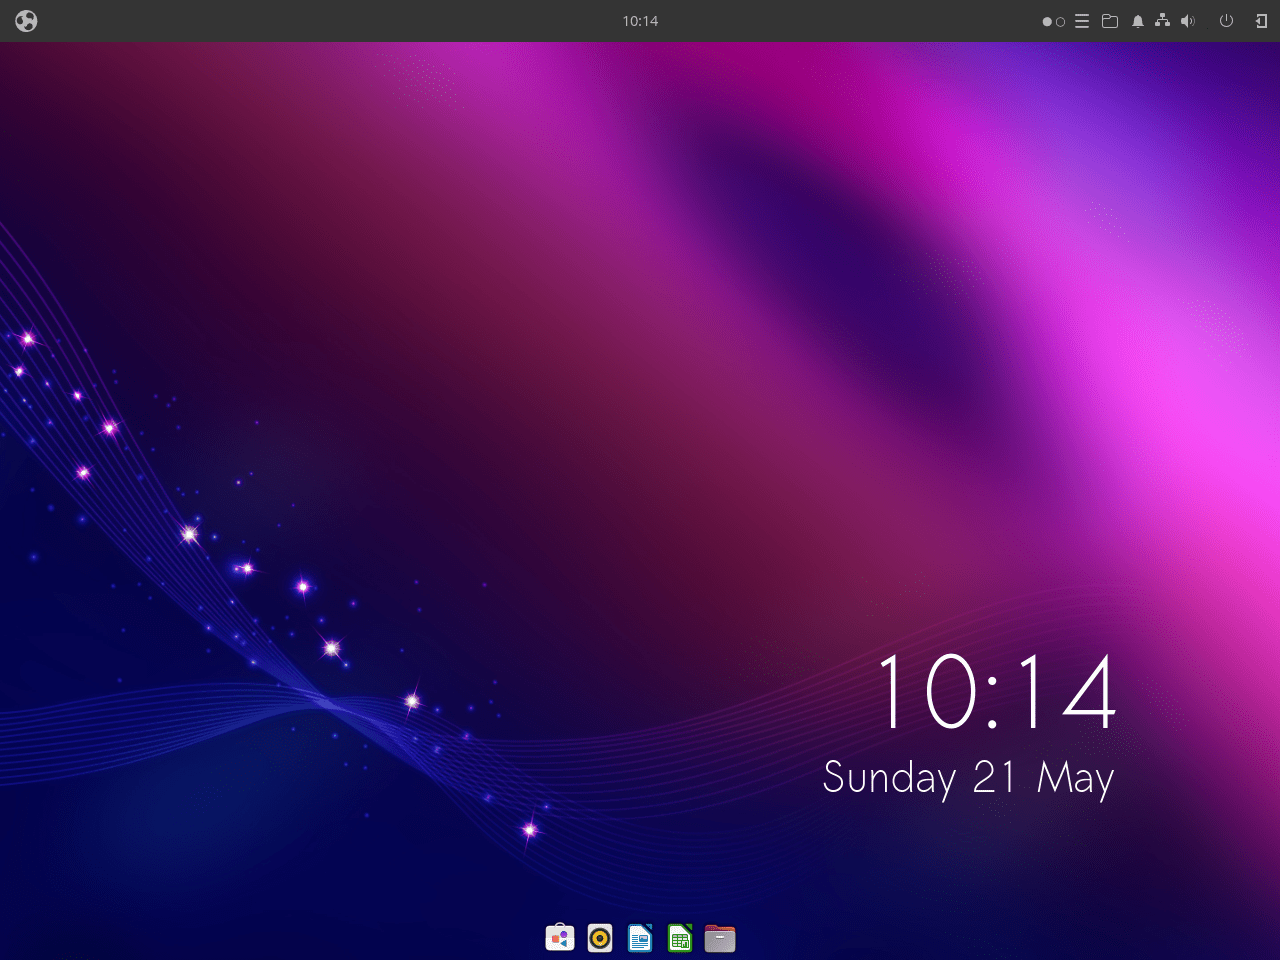
You will notice that the environment is quite different from the Ubuntu GNOME interface you are used to. It’s designed to be intuitive, highly customizable, and aesthetically pleasing while maintaining the familiar feel of classic desktop environments.
Troubleshooting: Ubuntu Budgie Desktop Environment
If your desktop appears unchanged after logging in, don’t fret. The desktop environment selection may have been inadvertently left on the default setting, “GNOME,” instead of being switched to “Budgie.”
To remedy this, go back to the login screen, and before entering your password, look for an option that allows you to change the desktop environment. It’s often symbolized by a gear icon or similar. Click on it and select “Budgie” from the dropdown menu, then log in.

Tips on Getting Started with Ubuntu Budgie with Ubuntu 22.04 or 20.04
As you explore the Ubuntu Budgie desktop environment, several tips and tricks can help you make the most of your experience. Whether you want to personalize your interface or streamline your workflow, these suggestions will enhance your journey with Ubuntu Budgie.
Customize Your Panel on Ubuntu Budgie
The Budgie panel is a powerful tool for customization. It appears at the top of your screen by default, but you can move it to any edge or add new panels.
To customize your panel:
- Right-click on an empty space on the panel.
- Select Budgie settings.
- In the window that opens, select the Panel tab.
In this tab, you can adjust the position and size of the panel, add or remove applets, or even create a new panel.
Explore Budgie Applets on Ubuntu Budgie
Applets are mini-applications that you can add to your Budgie panel for quick access. Ubuntu Budgie has pre-installed applets, but you can also download others from the Budgie Welcome screen.
To add an applet to your panel:
- Follow the steps above to access Budgie settings.
- In the Panel tab, select the panel you want to modify, then click the “+” button to add an applet.
Personalize Your Look with Themes and Icons on Ubuntu Budgie
Ubuntu Budgie allows you to change your desktop’s theme and icons for a personalized look. This can be done from the Budgie settings.
To change your theme and icons:
- Right-click on the desktop and select Change Background.
- In the window that opens, select the Theme tab.
- You can choose your preferred Window, Icon, and Cursor themes from here.
Use Keyboard Shortcuts for Efficiency on Ubuntu Budgie
Keyboard shortcuts can significantly enhance your productivity by reducing the need to switch between the keyboard and mouse. Ubuntu Budgie has several built-in keyboard shortcuts; you can also create your own.
To view or customize keyboard shortcuts:
- Open Settings from the application menu.
- Select the Devices tab and then Keyboard.
Utilize the Raven Sidebar on Ubuntu Budgie
The Raven sidebar in Ubuntu Budgie is a handy feature that provides quick access to the calendar, sound settings, and system notifications. It also hosts several applets for added functionality. To access Raven, click the icon at the far right of your panel.
Remember, the joy of Ubuntu Budgie lies not just in its efficiency and performance but also in its customization potential. So don’t hesitate to tweak, explore, and make it your own. Enjoy your Ubuntu Budgie experience!
Optional: Import Ubuntu Budgie Daily PPA on Ubuntu 22.04 or 20.04
While Ubuntu Budgie provides a stable and reliable desktop environment, some users may be inclined to try the latest and greatest software offerings, even at the risk of occasional instability. For those who live on the cutting edge, Ubuntu Budgie allows the optional import of daily Budgie Extras repositories. This guide will walk you through the process.
Using this repository can disrupt your current setup, especially if you have multiple PPAs added. Only proceed if it’s essential and you’re confident in reverting changes. Always back up before importing this PPA.
Step 1: Adding the Budgie Extras Daily Repository on Ubuntu 22.04 or 20.04
If you’re adventurous and comfortable with potential hiccups that may come with unstable software, you can import the Budgie Extras Daily repository. This repository is the development version where the latest Budgie applications and updates are pushed for testing before making them available in the stable release.
To add the Budgie Extras Daily repository to your system, execute the following command in your terminal:
sudo add-apt-repository ppa:ubuntubudgie-dev/budgie-extras-daily -yThis command adds the Budgie Extras Daily repository to your list of software sources. The -y option automatically confirms that you want to add this repository, bypassing the prompt that would typically appear.
Step 2: Updating Your System After Ubuntu Budgie Daily Import
After adding the repository, it’s essential to refresh your system’s package list to recognize the new software source and check it for updates. Follow this up with an upgrade command to install any new updates available, including those from the newly added Budgie Extras Daily repository.
Execute the following command in your terminal:
sudo apt update && sudo apt upgradeThe update command fetches the list of available updates from all your software sources, and the upgrade command installs those updates. By combining them with &&, you ensure that the upgrade command only runs after the update command has successfully completed.
Managing Ubuntu Budgie on Ubuntu 22.04 or 20.04
There may come a time when you decide that Ubuntu Budgie isn’t quite the right fit for your needs, or perhaps you want to try a different desktop environment. If so, this section will guide you through removing Ubuntu Budgie from your Ubuntu Linux system.
Step 1: Remove Ubuntu Budgie from Ubuntu 22.04 or 20.04
Budgie’s desktop environment removal process is more straightforward than many other desktop environments. All it takes is a single command in the terminal. Here’s the command you need to execute:
sudo apt autoremove ubuntu-budgie-desktop '^budgie' --purgeThe autoremove command removes packages that were automatically installed to satisfy dependencies for other packages and are now no longer needed. The --purge option ensures that configuration files associated with the budgie-desktop package are also deleted.
Step 2: Remove Budgie Extras Daily Repository (If Installed) from Ubuntu 22.04 or 02.04
If you have installed the Budgie Extras Daily Repository, removing this repository from your list of software sources is advisable. You can do so with the following command:
sudo add-apt-repository --remove ppa:ubuntubudgie-dev/budgie-extras-daily -yThis command will remove the ubuntubudgie-dev/budgie-extras-daily repository from your system.
Step 3: Reinstalling Ubuntu GNOME Desktop on Ubuntu 22.04 or 20.04
Upon removing Ubuntu Budgie, it may inadvertently uninstall specific packages that the GNOME desktop environment depends upon. To ensure a smooth transition back to the default Ubuntu desktop environment, you can reinstall the ubuntu-gnome-desktop package. First, update your package list to ensure you’re downloading the most recent version of the package, and then install it using the following command:
sudo apt update && sudo apt install ubuntu-gnome-desktop --reinstallBefore you reboot your system, make sure GDM is enabled. Missing this precaution might lead your computer to boot into a terminal or a server-like login screen. If this happens, you can regain your GNOME Desktop access by running:
sudo systemctl enable gdm --nowStep 4: Reboot Your System After Ubuntu Budgie Removal
Finally, rebooting your system is a good practice to ensure that all the changes are correctly applied, and the Budgie desktop environment is completely removed. You can do so with the simple command:
sudo rebootFinal Thoughts
Throughout this guide, we’ve walked through installing Ubuntu Budgie on an Ubuntu Linux system. We’ve ensured your system is current, installed the Budgie desktop, logged in, and started your journey with Ubuntu Budgie. We’ve even covered importing the Ubuntu Budgie Daily Repositories for those who thirst for the cutting edge. When it’s time to move on, we’ve provided instructions to remove Ubuntu Budgie neatly. This process has hopefully demonstrated the strength and flexibility of the Linux ecosystem. Enjoy your time exploring Ubuntu Budgie!