Apache Maven, a product of the Apache Software Foundation, has revolutionized software project management by simplifying the build process. This powerful tool has become indispensable for developers globally, ensuring consistency, reliability, and enhanced productivity in project development. This guide will detail how to install Apache Maven on Debian using either the APT repository or directly from the source.
Key Features of Apache Maven:
- Project Building: Streamlines the creation of executables and documentation with its standardized structure and build lifecycle.
- Dependency Management: Automatically organizes and manages project dependencies, leveraging a central repository for easy library access.
- Project Documentation: Facilitates the generation of comprehensive documentation through its site plugin.
- Consistency: Ensures a uniform project structure, promoting collaboration and understanding across development teams.
- CI/CD Integration: Seamlessly integrates with Continuous Integration/Continuous Deployment tools like Jenkins, automating various stages of the software development lifecycle.
Maven’s Core Design Principles:
- Convention Over Configuration: Prioritizes standard behavior, minimizing configuration for basic tasks and simplifying project management.
- Reusability: Allows Maven plugins to be reused across multiple projects, enhancing efficiency.
- Transparency: Provides detailed logging and error messages, aiding in swift problem diagnosis and resolution.
- User-Centric Design: Features an intuitive command set, a clear project information model, and interactive user assistance.
With its blend of advanced features and user-focused design, Apache Maven is a vital tool for software developers. A thorough understanding of its installation and usage is essential to harness its full capabilities.
Install Apache Maven on Debian 12, 11, or 10 via APT
Step 1: Update Debian System Before Apache Maven Installation
Firstly, let’s ensure your Debian system packages are up-to-date with the following command:
sudo apt update && sudo apt upgradeThis command serves a dual purpose. sudo apt update refreshes the package lists for upgrades concerning packages in need of updates and new packages recently added to the repositories.
Step 2: Install Apache Maven via APT Command on Debian
With your Debian system now up-to-date, we stand poised to install Apache Maven. As previously stated, Debian incorporates Apache Maven into its default repository, thereby simplifying the installation procedure. To install Apache Maven, execute the following command:
sudo apt install mavenIn this command, APT is directed to install the Maven package. The sudo prefix confirms that the command is run with superuser privileges, a requirement for system-wide installations.
Step 3: Confirming APT Apache Maven Installation
Upon the completion of the installation, it is recommended to validate that Apache Maven was installed appropriately and to verify the installed version:
mvn -versionThis command requests Maven to reveal its version number, which should then display information about the installed version of Maven.
If the installed version of Maven does not meet your requirements, or if your preference aligns with the current version, you might want to proceed to Section 2. Here, we shall guide you through manually installing the most recent version of Apache Maven.
Install Apache Maven on Debian 12, 11 or 10 via source
In this section, we will guide you step-by-step through the manual installation of the most up-to-date version of Apache Maven. This process can be more advantageous for those who need to utilize the cutting-edge features of Maven or for those who prefer having a deeper control over the installation procedure.
Step 1: Installation of the Default Java Development Kit (JDK)
Before Apache Maven can be installed, it is paramount that Java is already installed on your Debian system. Apache Maven necessitates Java for operation, making this a critical preliminary step. To facilitate the installation of the default JDK on Debian, execute the subsequent command:
sudo apt install default-jdkStep 2: Download Apache Maven source Archive
Now, with Java installed, we can download the Apache Maven archive. For this task, we’ll utilize the wget command, a tool designed for non-interactive downloading files from the internet.
To locate the latest version of Apache Maven, you can visit the official Apache Maven download page. However, for this guide, let’s presume that the latest version is 3.9.2. To download this specific version, use the following command:
wget https://dlcdn.apache.org/maven/maven-3/3.9.2/binaries/apache-maven-3.9.2-bin.tar.gzThe wget command above is just an example, please do not use it as it will be outdated. Remember to grab the latest link.
Step 3: Extract Apache Maven Archive on Debian
Having downloaded the Apache Maven archive, it is now time to extract it. The extraction will take place in the /opt/ directory, a standard location for accommodating optional or additional software. To extract the archive, utilize the following command:
sudo tar xzf apache-maven-3.8.4-bin.tar.gz -C /opt/This command utilizes the tar utility to extract the archive. The -xzf flags instruct tar to extract (-x) the gzipped (-z) file, while the -C flag stipulates the target directory for the extraction.
To move into the target directory, execute the following:
cd /opt/Step 4: Create a Symbolic Link to the Apache Maven Directory
Post-extraction, we’ll fashion a symbolic link to the Apache Maven directory. This step, while optional, is recommended as it allows for easier referencing of the directory. To generate a symbolic link, employ the following command:
sudo ln -s apache-maven-3.9.2 mavenThis command generates a symbolic link named maven that points to the apache-maven-3.9.2 directory.
Step 5: Configure Apache Maven Environment on Debian
In this step, we configure the environment for Apache Maven by defining essential environment variables. This will be performed by creating a new script file in the /etc/profile.d/ directory, a common location for scripts that establish environment variables. Utilize the command below to generate the script file:
sudo nano /etc/profile.d/maven.shThis command launches a new file named maven.sh in the nano text editor. In this file, inject the subsequent lines:
export M2_HOME=/opt/maven
export PATH=${M2_HOME}/bin:${PATH}
These lines instantiate two environment variables: M2_HOME, which directs to the Apache Maven directory, and PATH, which includes the path to the Apache Maven binaries. To save the file and exit the editor, press CTRL+O followed by CTRL+X.
Alternatively, you may harness the echo command in concert with the sudo tee command for the same result. The echo command generates the necessary lines, while sudo tee records these lines to the file. Here’s how you can execute this:
echo -e "export M2_HOME=/usr/local/bin/maven\nexport PATH=\${M2_HOME}/bin:\${PATH}" | sudo tee /etc/profile.d/maven.sh
Let’s dissect this command:
- The
echo -ecommand allows interpretation of backslash escapes and generates the lines to be appended to the file. - The
|(pipe) captures the output of the command on its left and utilizes it as the input for the command on its right. - The
sudo tee /etc/profile.d/maven.shcommand logs the input it receives from theechocommand to the file/etc/profile.d/maven.sh. Theteecommand works alongsidesudoto write to files owned by the root user.
This command generates the maven.sh file with the crucial environment variables, thus eliminating the need to open and edit the file manually.
Step 6: Enabling the Apache Maven Environment
Having defined the environment variables, we must activate them. This will be achieved by sourcing the script file we’ve just created. Sourcing a script file signifies executing the file in the current shell, making the environment variables available in your active session. Source the script file using the subsequent command:
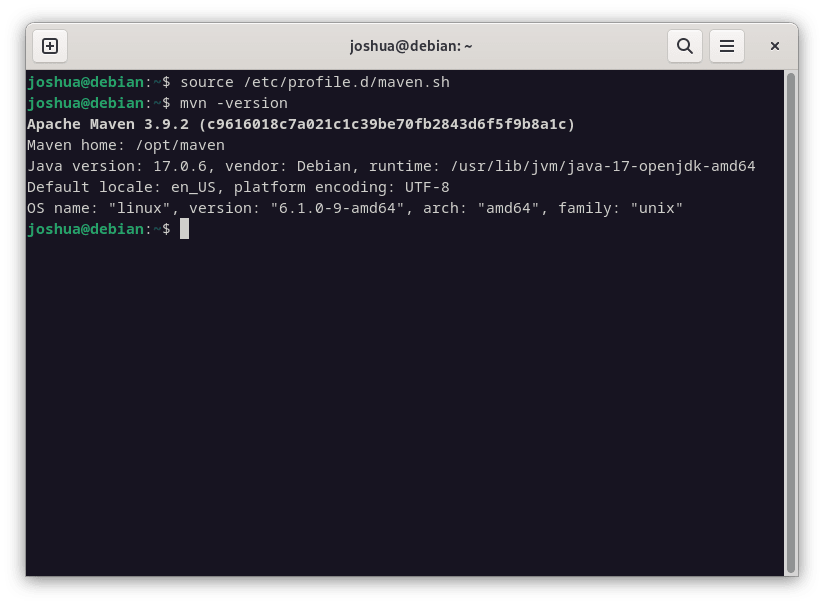
source /etc/profile.d/maven.shStep 7: Verifying Apache Maven source Installation
Finally, having set up the Apache Maven environment, it is good practice to confirm that everything has been correctly configured. As with the prior verification, this will be performed by checking the installed version of Apache Maven. To validate the installation, execute the following command:
mvn -versionThis command will return information about the installed version of Apache Maven. The version number should correspond with your downloaded version if everything has been set up correctly.

Create a Test Apache Maven Project on Debian 12, 11 or 10
In this part of our guide, you will walk through the steps required to build a basic Maven project and conduct an initial test run. These instructions ensure that your Maven setup operates effectively on your Debian system.
Step 1: Initiating a New Maven Project
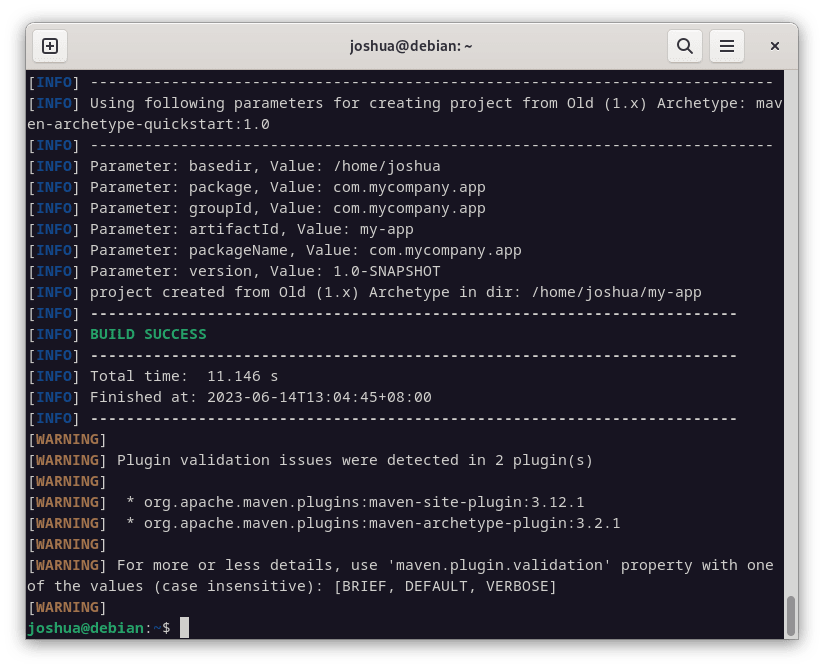
The first action in the life of any Maven project is to establish its structural foundation. Maven simplifies this process by providing a command that spawns a new directory structure complete with a default pom.xml file. In Maven terminology, this pom.xml or Project Object Model file represents the core unit of any project.
Navigate to the directory where you envision creating the project and execute the command below:
mvn archetype:generate -DgroupId=com.mycompany.app -DartifactId=my-app -DarchetypeArtifactId=maven-archetype-quickstart -DinteractiveMode=falseThis command instructs Maven to originate a new project from an archetype, a pre-defined project template. In this case, we employ the maven-archetype-quickstart, a template for a basic Java project. The groupId and artifactId parameters function as unique identifiers for your project within the sea of projects in Maven’s domain.

Step 2: Navigating into the new Apache Maven Project Directory
Upon successfully creating the project, the next step involves steering into the project directory. Accomplish this by employing the command below:
cd my-appThis command alters your current directory to my-app, the root directory of your newly created project.
Step 3: Building the Maven Project on Debian
With your project established and the project directory set, it’s time to construct it. The process of building the project involves compiling the source code and packaging it into a form ready for distribution, such as a JAR file. For building the project, use the following command:
mvn packageThis command directs Maven to execute the packaging phase of the build lifecycle. During this phase, Maven compiles the source code, runs any associated tests, and bundles the compiled code into its distributable format.
Step 4: Executing the Maven Project on Debian
Having constructed the project, you are now ready to execute it. This step verifies that all components are functioning as expected. To launch your project, utilize the command below:
java -cp target/my-app-1.0-SNAPSHOT.jar com.mycompany.app.AppThis command propels the Java application encased in the JAR file, produced by the mvn package command. The -cp flag indicates the classpath, and the argument following the java command is the main class of the application.
If the setup is configured correctly, executing this command will display “Hello World!”. This message certifies that your Maven project has been successfully set up and is operating as anticipated.
Closing Remarks
Our deep-dive into installing and utilizing Apache Maven on a Debian system culminates here. We’ve traversed through the core steps of Maven installation and have gained an understanding of how to manage Java projects by constructing and testing a simple Maven project. Whether you’re an experienced developer or a newcomer stepping into the Java ecosystem, having a tool like Maven in your toolkit could prove invaluable. This experience with Maven ensures you are now better equipped to manage your project’s build lifecycle, dependencies, and documentation in a more streamlined manner.

