Compressed logs, transfer bundles, and database dumps are easier to move when the compression step does not destroy the only readable copy. The gzip command in Linux works on single files and streams, so the important decision is whether to replace the original, keep a side-by-side copy, write compressed data through a pipeline, or switch to tar when the job is a whole directory tree.
GNU gzip is the common implementation on mainstream Linux distributions. Minimal containers, embedded systems, and BusyBox-based images can expose a smaller option set, so check gzip --help before relying on less common flags. The GNU gzip manual documents the full option behavior for metadata, suffixes, streams, and advanced compression choices.
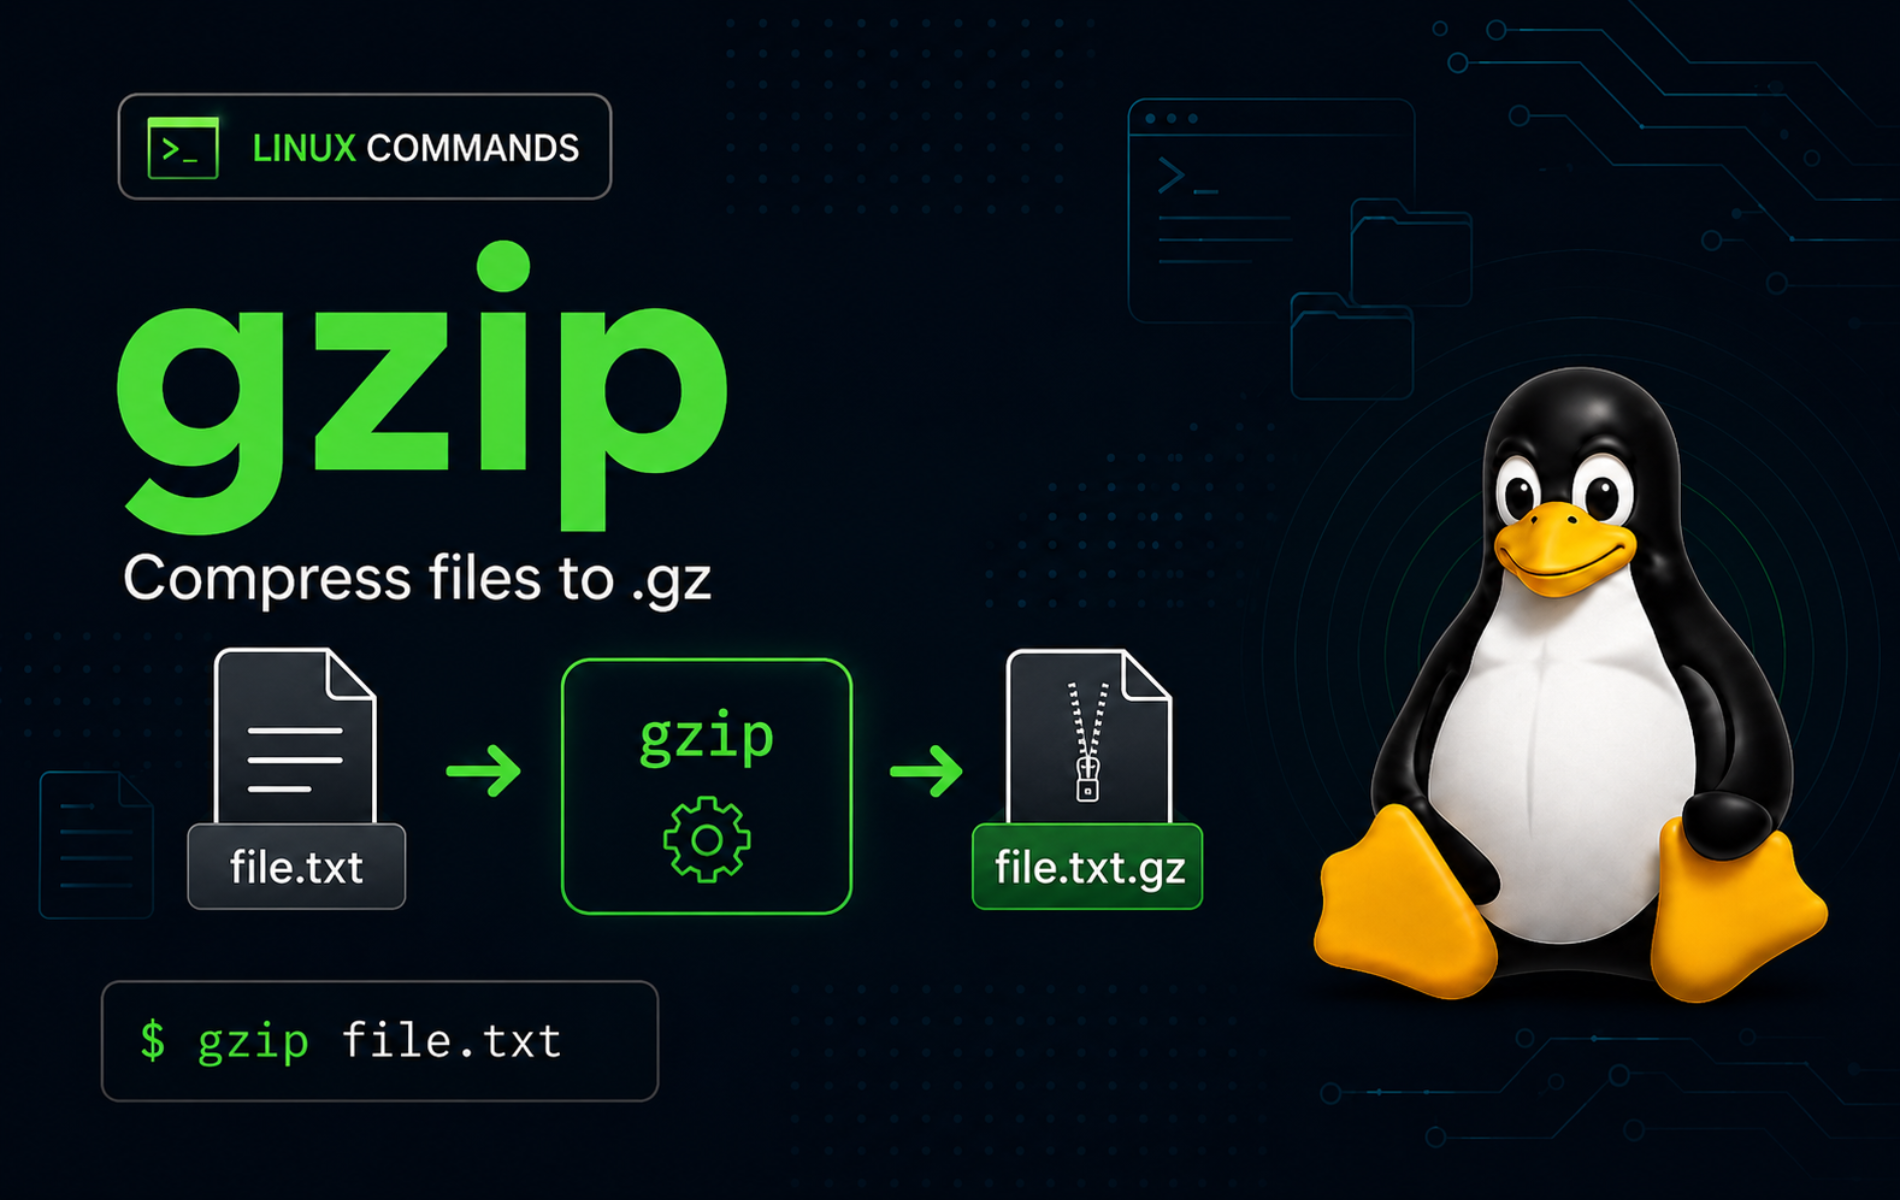
Choose the Right gzip Command Pattern
gzip compresses one regular file or one input stream into gzip format, usually with a .gz suffix. It does not create a multi-file archive by itself. If you point plain gzip at a directory, it ignores the directory unless you use recursive mode, and recursive mode still creates one .gz file per regular file rather than one archive.
The basic syntax follows this pattern:
gzip [OPTION]... [FILE]...[OPTION]...: Compression, decompression, output, testing, metadata, suffix, and safety flags such as-k,-c,-d,-t,-l,-r,-S,-1, or-9.[FILE]...: One or more files to compress or decompress. When no file is named,gzipreads standard input and writes compressed data to standard output.
Start with the pattern that matches the outcome you need:
| Task | Command Pattern | What It Does |
|---|---|---|
| Compress and replace original | gzip file.txt | Creates file.txt.gz and removes file.txt after success. |
| Compress and keep original | gzip -k file.txt | Creates file.txt.gz while leaving file.txt in place. |
| Write compressed output | gzip -c file.txt > file.txt.gz | Sends compressed data to a filename you choose. |
| Decompress in place | gunzip file.txt.gz | Restores file.txt and removes file.txt.gz after success. |
| Decompress and keep archive | gunzip -k file.txt.gz | Restores file.txt while preserving file.txt.gz. |
| Restore to chosen path | gzip -dc file.txt.gz > restored/file.txt | Writes decompressed output without changing the archive. |
| Test gzip integrity | gzip -t file.txt.gz | Checks whether the compressed stream can be read. |
| Inspect gzip metadata | gzip -l file.txt.gz | Shows compressed size, uncompressed size, ratio, and inferred name. |
| Read compressed text | zcat file.txt.gz | Prints decompressed content without creating a temporary file. |
| Search compressed text | zgrep -n 'error' file.txt.gz | Searches compressed text and prints matching line numbers. |
| Compress directory as one archive | tar -czf logs.tar.gz logs | Creates one gzip-compressed tar archive containing the directory tree. |
Verify gzip Availability
Normal Linux desktop and server installations usually include gzip, gunzip, and helper commands for reading compressed text. Check the active commands before troubleshooting a minimal image or stripped-down container:
command -v gzip gunzip zcat zgrep zlessOutput should show each helper on your PATH:
/usr/bin/gzip
/usr/bin/gunzip
/usr/bin/zcat
/usr/bin/zgrep
/usr/bin/zless
Confirm the implementation before using GNU-specific options:
gzip --version | head -n 1Example GNU gzip output:
gzip 1.14
If gzip is missing, install the distro package named gzip. On APT-based systems, use:
sudo apt install gzipOn Fedora, Rocky Linux, and other DNF-based systems, use:
sudo dnf install gzipDo not remove gzip from a normal system only to practice cleanup. Package managers, initramfs tools, log rotation, and installers can depend on it directly or indirectly.
Create a Disposable gzip Practice Directory
A small practice tree keeps compression, decompression, batch, stream, and troubleshooting examples away from real logs or backups. Choose another path if ~/gzip-demo already contains files you care about, because the cleanup section removes that directory.
mkdir -p ~/gzip-demo/logs ~/gzip-demo/restore ~/gzip-demo/batch/sub ~/gzip-demo/glob-demo ~/gzip-demo/tar-source ~/gzip-demo/split-demo
printf 'INFO start\nERROR disk full\nINFO done\n' > ~/gzip-demo/app.log
printf 'alpha\nbeta\n' > ~/gzip-demo/notes.txt
printf 'GET / 200\nGET /admin 403\n' > ~/gzip-demo/logs/access.log
printf 'WARN disk\nERROR app\n' > ~/gzip-demo/logs/error.log
printf 'batch one\n' > ~/gzip-demo/batch/app1.log
printf 'batch two\n' > ~/gzip-demo/batch/sub/app2.log
printf 'api ready\n' > ~/gzip-demo/glob-demo/api.log
printf 'worker ready\n' > ~/gzip-demo/glob-demo/worker.log
printf 'tar-one\n' > ~/gzip-demo/tar-source/one.txt
printf 'tar-two\n' > ~/gzip-demo/tar-source/two.txt
printf 'first member\n' > ~/gzip-demo/split-demo/part1.txt
printf 'second member\n' > ~/gzip-demo/split-demo/part2.txt
cd ~/gzip-demo
find . -type f | sort
The practice tree contains single files, nested logs, batch targets, tar archive inputs, and two files for stream concatenation:
./app.log
./batch/app1.log
./batch/sub/app2.log
./glob-demo/api.log
./glob-demo/worker.log
./logs/access.log
./logs/error.log
./notes.txt
./split-demo/part1.txt
./split-demo/part2.txt
./tar-source/one.txt
./tar-source/two.txt
The mkdir command guide covers nested directory creation and -p behavior in more detail.
Compress Files with gzip
The default gzip behavior replaces the original file with a compressed .gz file. That default is useful for log rotation and storage cleanup, but it is the wrong default when you still need a readable original for comparison, restore testing, or a failed transfer retry.
Compress a File and Replace the Original
Work on a copy first so the replacement behavior is obvious:
cp notes.txt replace-me.txt
gzip replace-me.txt
ls -1 replace-me.txt*
Only the compressed file remains after a successful default compression:
replace-me.txt.gz
Compress a File and Keep the Original
Add -k when you want the compressed copy and the original file to stay side by side:
gzip -k app.log
ls -1 app.log*
The original and compressed copy are both present:
app.log
app.log.gz
Use -k for backups, transfer checks, or any workflow where deleting the original would make rollback harder.
Write Compressed Output to a Chosen File
The -c option writes compressed data to standard output and leaves the input file unchanged. Redirect that stream when you need a specific output filename or when a script should never replace the input:
gzip -c app.log > stream.log.gz
zcat stream.log.gz
zcat prints the decompressed content without creating stream.log on disk:
INFO start
ERROR disk full
INFO done
Show Compression Details with Verbose Output
Add -v when you want gzip to print the file name and compression ratio. With -c, compressed bytes still go to the redirected file while the status message stays on the terminal:
gzip -v -c app.log > app-verbose.log.gzSmall practice files can show little or no size reduction because gzip header overhead is large compared with the input:
app.log: 0.0% -- replaced with stdout
Choose Compression Speed or Size
Compression levels run from -1 for faster compression to -9 for stronger compression. The default level balances speed and size for ordinary text, logs, and transfer files:
gzip -1 -c app.log > app-fast.log.gz
gzip -9 -c app.log > app-small.log.gz
stat -c '%n %s bytes' app-fast.log.gz app-small.log.gz
The demo file is too small to show a useful difference:
app-fast.log.gz 63 bytes
app-small.log.gz 63 bytes
Use level tuning for larger files or automation where the speed-size tradeoff matters. For tiny config snippets, the command’s safety and readability usually matter more than a few bytes.
Compress Several Files at Once
Multiple file operands create multiple compressed files. They do not create one combined archive:
cp notes.txt multi-one.txt
cp app.log multi-two.log
gzip -k multi-one.txt multi-two.log
ls -1 multi-*
Each original gets its own .gz sidecar:
multi-one.txt
multi-one.txt.gz
multi-two.log
multi-two.log.gz
Decompress and Restore gzip Files
Decompression uses gunzip or gzip -d. As with compression, the default behavior removes the input file after success unless -k keeps it or -c writes output to standard output.
Decompress a File and Keep the Compressed Copy
Create a separate compressed file, then restore it while preserving the archive:
cp app.log.gz restore.log.gz
gunzip -k restore.log.gz
ls -1 restore.log*
The restored file and compressed copy remain available:
restore.log
restore.log.gz
gzip -dk restore.log.gz is the same operation written through gzip instead of the gunzip helper.
Restore a gzip File to a Specific Directory
Use -d with -c when the restored file should go to a different directory or filename. This keeps the archive untouched and avoids overwrite prompts in the current directory:
gzip -dc stream.log.gz > restore/stream.log
cmp -s app.log restore/stream.log && printf 'restore/stream.log matches app.log\n'
ls -1 restore
The comparison confirms the restored file matches the original fixture:
restore/stream.log matches app.log
stream.log
Decompress Files Without a .gz Suffix
gzip -d file expects a recognized suffix, but stdout decompression can still read a valid gzip stream with a nonstandard name. Use this pattern when a transfer stripped the suffix and you know the file is gzip-compressed:
cp stream.log.gz packed
gzip -dc packed > restore/packed.log
zcat packed | head -n 2
The compressed data is still readable because the stream has a valid gzip header:
INFO start
ERROR disk full
Read and Search gzip Files
Compressed logs are often useful before you extract them. The zcat, zgrep, and zless helpers read gzip-compressed text directly, which keeps temporary restore files out of log directories and support bundles.
Preview the Start of a Compressed File
Pipe zcat into head when you only need the first few lines:
zcat stream.log.gz | head -n 2The first two lines of the compressed log appear without extracting the file:
INFO start
ERROR disk full
Search Compressed Logs with zgrep
zgrep searches compressed text without a manual decompression step. Use -n for line numbers and -i when case should not matter:
zgrep -n 'ERROR' stream.log.gz
zgrep -ci 'error' stream.log.gz
The first command prints the matching line. The second command prints a case-insensitive match count:
2:ERROR disk full
1
zgrep follows grep-style pattern rules, so the grep command examples help when you need fixed-string searches, extended patterns, inverted matches, or context lines in compressed logs.
Page Through Compressed Text with zless
Use zless for long compressed text files when streaming everything to the terminal would be noisy:
zless stream.log.gzInside the pager, use Space to move forward, b to move back, / to search, and q to quit.
Test and Inspect gzip Files
Integrity and metadata checks should come before deleting originals, moving archives, or assuming a transfer worked. They are read-only and safe to run on unfamiliar .gz files.
Test gzip Integrity
gzip -t verifies that the compressed stream can be read. Add a success message when you want visible output from a passing test:
gzip -t stream.log.gz && printf 'stream.log.gz: OK\n'A clean gzip file produces the success message:
stream.log.gz: OK
List gzip Metadata
The -l option prints compressed size, uncompressed size, ratio, and the inferred uncompressed name:
gzip -l stream.log.gzExample output for the practice file:
         compressed        uncompressed  ratio uncompressed_name
                 63                  37   0.0% stream.log
Use gzip -l for quick metadata, not as a benchmark. Very small files can look inefficient because the gzip header is large compared with the text being compressed.
Create Repeatable gzip Output for Scripts
By default, gzip headers can store the original filename and timestamp. Add -n when a build script or checksum workflow needs more repeatable compressed output:
gzip -n -c app.log > app-repeatable.log.gz
gzip -t app-repeatable.log.gz && printf 'app-repeatable.log.gz: OK\n'
The integrity check confirms the new stream is readable:
app-repeatable.log.gz: OK
The -n option does not make changing input reproducible. It only prevents gzip from saving the original name and timestamp in the gzip header.
Compress Directories and Batch File Sets
gzip handles files, not directory archives. Use recursive gzip when each file should receive its own .gz copy, use find when you need a controlled batch, and use tar when the output should be one archive that preserves a directory tree.
Recursively Compress Files in a Directory
The -r option walks through directories and compresses regular files. Combine it with -k when the original files should remain readable:
gzip -kr logs
find logs -maxdepth 1 -type f | sort
Each file now has its own compressed copy:
logs/access.log
logs/access.log.gz
logs/error.log
logs/error.log.gz
This is not the same as a directory archive. It creates individual compressed files and leaves the directory structure on the filesystem.
Compress Matching Files with find
Use find when a glob is too broad or when matching files live in nested directories. Preview the exact file set before compression:
find batch -type f -name '*.log' -print | sortThe preview finds both log files in the batch fixture:
batch/app1.log
batch/sub/app2.log
After the preview matches your intent, compress the same files and keep the originals:
find batch -type f -name '*.log' -exec gzip -k {} +
find batch -type f -name '*.gz' | sort
The compressed sidecars appear beside their original files:
batch/app1.log.gz
batch/sub/app2.log.gz
The find exec command guide explains -exec ... {} + batching, safer previews, and when -execdir is a better fit.
Preview Globs Before Batch Compression
Shell globs expand before gzip starts. Preview a pattern before compressing many files, especially in directories that contain restored copies or old archives:
printf '%s\n' glob-demo/*.logThe shell expands the pattern to matching pathnames before gzip receives them:
glob-demo/api.log
glob-demo/worker.log
After the preview looks right, compress the matching files and keep originals:
gzip -k glob-demo/*.log
ls -1 glob-demo/*.gz
The compressed files appear beside their originals:
glob-demo/api.log.gz
glob-demo/worker.log.gz
In Bash, an unmatched glob normally stays literal. If glob-demo/*.log prints as glob-demo/*.log, there are no matching files under the current shell settings.
Create a tar.gz Archive for a Directory
Use tar with gzip compression when the output should be one archive containing a directory tree. This example uses the separate tar-source directory so earlier recursive gzip examples do not change the archive contents:
tar -czf tar-source.tar.gz tar-source
tar -tzf tar-source.tar.gz | sort
The list command shows archive members without extracting them:
tar-source/
tar-source/one.txt
tar-source/two.txt
When the reader task is opening or restoring .gz, .tgz, or .tar.gz files, use the GZ and TGZ extraction guide for format-specific extraction examples.
Split Large gzip Files After Compression
gzip does not create multipart archives. Compress the file or tar archive first, then split the resulting .gz or .tar.gz file when a transfer target has size limits. The split command guide covers chunk sizes, safe prefixes, and reassembly checks.
Use gzip in Pipelines and Scripts
gzip works well in scripts because it reads standard input and writes standard output when no file operand is involved. That makes it useful for generated reports, database dump streams, and remote-transfer workflows where an intermediate plain-text file would be wasteful or sensitive.
Compress Standard Input
Pipe generated text into gzip and redirect the compressed stream to a file:
printf 'generated line 1\ngenerated line 2\n' | gzip > generated.txt.gz
gzip -dc generated.txt.gz
The decompression check proves the compressed stream contains the generated text:
generated line 1
generated line 2
The same pattern works with real dump commands, such as a database backup command on the left side of the pipe. Keep database authentication, locking, consistency, and restore testing in the database tool’s own backup workflow; gzip only compresses the stream it receives.
Combine gzip Streams
Concatenating gzip files creates a valid multi-member gzip stream. This can help when independently compressed text chunks should read as one stream, but it is not a substitute for a tar archive when filenames and directory structure matter:
gzip -c split-demo/part1.txt > split-demo/part1.txt.gz
gzip -c split-demo/part2.txt > split-demo/part2.txt.gz
cat split-demo/part1.txt.gz split-demo/part2.txt.gz > split-demo/combined.txt.gz
zcat split-demo/combined.txt.gz
zcat reads both gzip members in order:
first member
second member
Use a Custom gzip Suffix
The -S option changes the suffix that gzip adds or expects. Use it only when another tool or workflow requires a nonstandard suffix, because unusual suffixes are easier to misread later:
gzip -k -S .gzip notes.txt
ls -1 notes.txt*
gzip -dc -S .gzip notes.txt.gzip > notes-restored.txt
cmp -s notes.txt notes-restored.txt && printf 'notes-restored.txt matches notes.txt\n'
The custom-suffix file is created, then restored through stdout to avoid overwriting the existing original:
notes.txt
notes.txt.gzip
notes-restored.txt matches notes.txt
Troubleshoot Common gzip Errors
Most gzip failures come from a wrong file type, an existing output file, an already compressed input, a missing suffix, a directory passed as a file, or a truncated transfer. Match the exact message first, then choose the smallest fix.
Fix not in gzip format
A wrong extension, failed download, HTML error page, or plain text file can produce this error:
gzip: wrong.gz: not in gzip format
Check the real file type before retrying decompression:
file wrong.gzA plain text result means the file is not a gzip stream:
wrong.gz: ASCII text
Download the correct file again, switch to the right extraction tool for the reported format, or remove the misleading .gz suffix from a file that was never compressed.
Fix already has .gz suffix
Compressing a file that already ends in .gz produces this warning:
gzip: app.log.gz already has .gz suffix -- unchanged
Test the archive if you only need to confirm it is readable:
gzip -t app.log.gz && printf 'app.log.gz: OK\n'Restore it through stdout when the original filename may already exist:
gunzip -c app.log.gz > app-restored.logFix Existing Output File Errors
gzip and gunzip refuse to overwrite an existing output file unless you force the operation:
gzip: exists.txt.gz already exists; not overwritten
Inspect matching files before replacing anything:
ls -l exists.txt exists.txt.gzIf the compressed output should be replaced, use -f deliberately and retest the result:
gzip -kf exists.txt
gzip -t exists.txt.gz && printf 'exists.txt.gz: OK\n'
The -f option is convenient in scripts, but it removes the safety check that protects an existing compressed or restored file.
Fix unknown suffix ignored
Decompressing a filename without a recognized suffix can produce this message:
gzip: packed: unknown suffix -- ignored
If the file is truly gzip-compressed, write the decompressed stream to a clear output name instead of relying on suffix removal:
gzip -dc packed > packed-restored.log
gzip -t packed && printf 'packed: OK\n'
If the file is plain text or another format, gzip -dc will fail with a format error. Use file packed when the content type is uncertain.
Fix Directory Ignored Errors
Passing a directory to plain gzip produces this message. Reproduce it with a fresh disposable directory so the fix is not affected by earlier examples:
mkdir -p dir-error-demo
printf 'sample\n' > dir-error-demo/sample.txt
gzip dir-error-demo
The directory itself is ignored:
gzip: dir-error-demo is a directory -- ignored
Use recursive gzip only when each file should become its own .gz file:
gzip -kr dir-error-demo
find dir-error-demo -type f | sort
The recursive command creates a compressed sidecar for each regular file:
dir-error-demo/sample.txt
dir-error-demo/sample.txt.gz
Use tar when you need one archive that contains the directory tree:
mkdir -p dir-archive-demo
printf 'sample\n' > dir-archive-demo/sample.txt
tar -czf dir-archive-demo.tar.gz dir-archive-demo
tar -tzf dir-archive-demo.tar.gz | sort
The tar archive keeps the directory name and member path together:
dir-archive-demo/
dir-archive-demo/sample.txt
Fix Truncated gzip Files
A truncated transfer or incomplete copy can fail integrity testing with this message:
gzip: broken.gz: unexpected end of file
Retest the gzip stream, then check free space and compare the checksum against the publisher’s expected value when one is available:
gzip -t broken.gz
df -h .
sha256sum broken.gz
If the checksum or size does not match the source, download or copy the file again before attempting recovery. Use du disk usage analysis examples when a full filesystem needs cleanup before another transfer attempt.
Clean Up the gzip Demo Directory
Remove only the practice directory created for these examples when you no longer need the demo files.
The cleanup command permanently deletes
~/gzip-demo. Check the path before running it if you changed the directory name or reused an existing folder.
cd ~
rm -rf -- ~/gzip-demo
Conclusion
Safer gzip work comes from matching the command to the job: keep originals with -k, redirect streams with -c, test archives with -t, search compressed logs with zgrep, and send directory trees through tar -czf when one archive is needed. Before using a pattern in backups, log rotation, or transfers, test one compressed file and one restore path so failure handling is clear.

Formatting tips for your comment
You can use basic HTML to format your comment. Useful tags currently allowed in published comments:
<code>command</code>command<strong>bold</strong><em>italic</em><a href="https://example.com">link</a><blockquote>quote</blockquote>