
WordPress is a content management system (CMS) that allows users to create and manage websites with minimal technical knowledge. Installing WordPress on an Ubuntu server using the LEMP stack (Linux, Nginx, MariaDB, and PHP) provides a high-performance environment for your website. This setup combines Nginx’s efficient request handling with MariaDB’s database reliability and PHP’s scripting capabilities.
By the end of this guide, you will have a fully functional WordPress installation with SSL encryption, optimized PHP settings, and proper file permissions. The steps also cover securing your site with Let’s Encrypt and troubleshooting common configuration issues.
This guide supports Ubuntu 22.04 LTS, 24.04 LTS, and 26.04 LTS installations. The default package versions differ between releases (PHP 8.1 on 22.04, PHP 8.3 on 24.04, PHP 8.4 on 26.04), but all commands work identically. Version-specific paths are noted where they apply.
LEMP Stack For WordPress
Update Ubuntu Before WordPress Installation
Begin your WordPress installation on your Ubuntu server smoothly and successfully by running the standard update command. Running this command updates your system, minimizing the risk of conflicts during the WordPress installation process, as WordPress is extensive and intricate.
To execute the standard update command, open your terminal and input the following command:
sudo apt update && sudo apt upgradeThis command will update any outstanding packages and upgrade your system.
Install Initial Packages For WordPress
Ensure you have installed the following packages before proceeding:
sudo apt install curl git wget unzip zip -yInstall Nginx on Ubuntu – LEMP Stack Part 1
To set up a LEMP stack, first install Nginx on Ubuntu by running the command:
sudo apt install nginx -yTypically, the system enables the Nginx service by default upon installation. Nonetheless, run the following command to ensure its correct operation:
systemctl status nginx● nginx.service - A high performance web server and a reverse proxy server
Loaded: loaded (/usr/lib/systemd/system/nginx.service; enabled)
Active: active (running)
Activate the Nginx service, if not already active, by using the following command:
sudo systemctl enable nginx --nowInstall Nginx Mainline (Optional)
To optimize your WordPress performance, use the latest Nginx mainline version instead. Follow the guide on installing Nginx Mainline on Ubuntu. This version offers additional features and improvements to enhance your website’s speed and overall performance.
Configure UFW Firewall for Nginx and WordPress
Securing your Nginx server and allowing access to default web ports requires configuring the UFW (Uncomplicated Firewall). For a comprehensive overview of UFW configuration options, see our guide on installing and configuring UFW firewall on Ubuntu. Nginx provides application profiles for quick UFW setup.
First, ensure UFW is installed on your Ubuntu system:
sudo apt install ufw -yAfter installation, enable UFW on your system. By default, UFW will deny all incoming and allow all outgoing connections. To enable the firewall, use the following command:
sudo ufw enableTo see the available Nginx profiles, run the following command:
sudo ufw app listAvailable applications: Nginx Full Nginx HTTP Nginx Secure OpenSSH
The output shows that Nginx HTTP runs on port 80, Nginx Secure runs on port 443 (HTTPS), and Nginx Full combines both. To enable both HTTP and HTTPS access, use the Nginx Full profile:
sudo ufw allow 'Nginx Full'However, depending on your specific needs, you may want to adjust the profile. For example, if you only require HTTPS access, use the Nginx Secure profile:
sudo ufw allow 'Nginx Secure'Or, if you only require HTTP access, use the Nginx HTTP profile:
sudo ufw allow 'Nginx HTTP'Install MariaDB on Ubuntu – LEMP Stack Part 2
The second stage of the LEMP installation involves installing the database component. MariaDB is the preferred choice in the LEMP stack over MySQL due to its improved performance and other advantages. However, if you wish to install a different version of MariaDB from the official repositories provided by MariaDB.org, In that case, our guide on installing MariaDB 11.x or 10.x on Ubuntu can improve the performance of your WordPress installation.
To install MariaDB, execute the following command in your terminal.
sudo apt install mariadb-server mariadb-client -yVerifying the status of the MariaDB service after installation is crucial, just as you did for Nginx, to ensure its correct functionality without errors:
systemctl status mariadb● mariadb.service - MariaDB 10.x.x database server
Loaded: loaded (/usr/lib/systemd/system/mariadb.service; enabled)
Active: active (running)
If MariaDB is inactive, run this command to activate the service and enable it on the system boot immediately:
sudo systemctl enable mariadb --nowSecure MariaDB with Security Script
Configuring the security of your MariaDB installation is a critical step toward maintaining the integrity and confidentiality of your data. By default, new installations of MariaDB often have weak security settings, making them vulnerable to malicious attacks. Fortunately, running the installation security script can help to secure your database and prevent potential exploitation.
To begin, launch the mysql_secure_installation script by executing the following command:
sudo mysql_secure_installationNow, proceed to configure the MariaDB security script settings. Set the root password, restrict remote access from external sources, remove anonymous user accounts, and eliminate the test database. These actions secure your MariaDB installation and prevent potential security threats.
MariaDB Security Script Prompts
The script presents several security prompts. Answer Y to each prompt to enable all security features:
Enter current password for root (enter for none):
OK, successfully used password, moving on...

Switch to unix_socket authentication [Y/n] Y
Enabled successfully!

Change the root password? [Y/n] Y
New password:
Re-enter new password:
Password updated successfully!

Remove anonymous users? [Y/n] Y
 ... Success!

Disallow root login remotely? [Y/n] Y
 ... Success!

Remove test database and access to it? [Y/n] Y
 ... Success!

Reload privilege tables now? [Y/n] Y
 ... Success!

All done! Your MariaDB installation should now be secure.
Install PHP on Ubuntu – LEMP Stack Part 3
To set up the LEMP stack successfully, you must install the PHP service. The service acts as a mediator between Nginx and MariaDB, using PHP-FPM and additional modules WordPress requires. If you prefer a different version of PHP that meets your requirements, refer to our guide on installing PHP on Ubuntu.
To install PHP and PHP-FPM with the necessary modules on your Ubuntu system, run the following command in your terminal:
sudo apt install php php-fpm php-mbstring php-bcmath php-xml php-mysql php-common php-gd php-cli php-curl php-zip php-imagick php-ldap php-intl -yAfter installation, verify the PHP-FPM service is running. The service name includes your PHP version number, which varies by Ubuntu release:
- Ubuntu 22.04:
php8.1-fpm - Ubuntu 24.04:
php8.3-fpm - Ubuntu 26.04:
php8.4-fpm
Check the installed PHP version first, then verify the service status:
php --versionPHP 8.x.x (cli) (built: ...)
Copyright (c) The PHP Group
Zend Engine v4.x.x, Copyright (c) Zend Technologies
with Zend OPcache v8.x.x, Copyright (c), by Zend Technologies
Next, check the PHP-FPM service status. Replace the version number with your installed version:
systemctl status php8.3-fpm● php8.3-fpm.service - The PHP 8.3 FastCGI Process Manager
Loaded: loaded (/usr/lib/systemd/system/php8.3-fpm.service; enabled; preset: enabled)
Active: active (running) since ...
Main PID: 12345 (php-fpm8.3)
Install WordPress Backend
Create WordPress Directory Structure
To begin the installation of WordPress on your LEMP stack, you can visit the official WordPress.org download page and locate the “latest.zip” download link. An alternative option is to use the following command to download the latest version of WordPress:
wget https://wordpress.org/latest.zipNext, you can unzip the downloaded WordPress archive to the /var/www/html directory:
sudo unzip latest.zip -d /var/www/html/To ensure that WordPress has the correct write permissions, you must set the directory owner permissions to WWW. You can do this by running the following command:
sudo chown -R www-data:www-data /var/www/html/wordpress/After setting the chown permission, it’s essential to set the chmod permission for the WordPress folders and files. This step is crucial to ensure that the WordPress site functions correctly without any issues related to write permissions.
Use the following commands to set the chmod permission for the folders and files:
For folders:
sudo find /var/www/html/wordpress -type d -exec chmod 755 {} \;For files:
sudo find /var/www/html/wordpress -type f -exec chmod 644 {} \;These commands establish the correct permissions for WordPress files and directories. They assign 755 permissions to folders, allowing owners to read, write, and execute while granting others read and execute access only. Similarly, they allocate 644 permissions to files, permitting owners to read and write, with read-only access for others.
Create a Database for WordPress on Ubuntu
First, create a database to run WordPress on your server. Since you previously installed MariaDB during the LEMP stack setup, use it to create a new WordPress database. Open your terminal, enter the following command, and access the MariaDB shell as root to begin the process:
sudo mariadb -u rootOnce you have accessed the MariaDB shell, enter the following command to create a new database with any desired name. In this guide, we will name it “WORDPRESSDB.”
CREATE DATABASE WORDPRESSDB;After creating the database, create a new user account for WordPress with the following command. As a security measure to protect your databases in case of a breach, creating a new user account for each website is essential.
CREATE USER 'WPUSER'@localhost IDENTIFIED BY 'PASSWORD';Note: Replace “WPUSER” and “PASSWORD” with the desired username and password. Do not copy and paste the default user/pass above for security reasons.
Finally, assign the newly created user account access to the WordPress website database only with the following command:
GRANT ALL PRIVILEGES ON WORDPRESSDB.* TO WPUSER@localhost IDENTIFIED BY 'PASSWORD';With all database configuration settings complete, you must flush the privileges to ensure the new changes take effect. Run the following command to flush the privileges:
FLUSH PRIVILEGES;Lastly, exit the MariaDB shell by typing:
EXIT;For a graphical interface to manage your WordPress database, consider installing phpMyAdmin with the LEMP stack on Ubuntu.
Set WordPress Configuration Files
Setting the WordPress configuration files is an essential step in the installation process. It involves renaming the sample wp-config.php file and entering the necessary configuration details.
To start, navigate to the WordPress directory using the following command:
cd /var/www/html/wordpress/Next, copy the wp-config-sample.php to wp-config.php. Keeping the sample in case you need to start over is good. Run the following command to copy the file:
sudo cp wp-config-sample.php wp-config.phpUsing a text editor, bring up the newly copied wp-config.php file:
sudo nano wp-config.phpNext, you will enter the database name, user account with a password, and host IP address if different than localhost.
// ** MySQL settings - You can get this info from your web host ** //
/** The name of the database for WordPress */

define( 'DB_NAME', 'WORDPRESSDB' );                 <--------------- change this

/* MySQL database username */

define( 'DB_USER', 'WPUSER' );                               <--------------- change this

/* MySQL database password */

define( 'DB_PASSWORD', 'PASSWORD' );             <--------------- change this

/* MySQL hostname, change the IP here if external DB set up */

define( 'DB_HOST', 'localhost' );

/* Database Charset to use in creating database tables. */

define( 'DB_CHARSET', 'utf8' );

/* The Database Collate type. Don't change this if in doubt. */

define( 'DB_COLLATE', '' );
Add Optional WordPress Settings
While in this file, adding extra settings will make your WordPress easier to manage. These include direct file saving instead of using FTP and increased memory size limits.
/** ## Save files direct method ## */
define( 'FS_METHOD', 'direct' );

/** ## Increase memory limit, 256MB is recommended ## */
define('WP_MEMORY_LIMIT', '256M');
Note: Adjust your dedicated server or VPS memory limits to increase or decrease the 256 MB memory limit. However, increase it only in small amounts, such as 128 MB, 256 MB, or 512 MB.
Configure WordPress Security Salt Keys on Ubuntu
Setting up WordPress security salt keys is vital for the security of your WordPress installation. These keys fortify your WordPress site by enhancing the security of user authentication and data encryption.
Visit the WordPress secret-key API at https://api.wordpress.org/secret-key/1.1/salt/ to generate security salt keys. Replace the example lines in the wp-config.php file with these new keys immediately after generation.
Note: Avoid using the example lines; they serve as references only. Using pre-generated salt keys exposes your site to attacks, so always generate unique keys for each WordPress installation.
Open your wp-config.php file with a text editor to add the new security salt keys:
sudo nano /var/www/html/wordpress/wp-config.phpThen, find the lines in the file that correspond to the example keys:
define('AUTH_KEY',         '<3yfS7/>%m.Tl^8Wx-Y8-|T77WRK[p>(PtH6V]Dl69^<8|K86[_Z},+THZ25+nJG');
define('SECURE_AUTH_KEY',  'bN#Qy#ChBX#Y`PE/_0N42zxgLD|5XpU[mu.n&:t4q~hg<UP/b8+xFTly_b}f]M;!');
define('LOGGED_IN_KEY',    'owpvIO-+WLG|,1)CQl*%gP1uDp}s(jUbYQ[Wm){O(x@sJ#T}tOTP&UOfk|wYsj5$');
define('NONCE_KEY',        '8=Vh|V{D<>`CLoP0$H!Z3gEqf@])){L+6eGi`GAjV(Mu0YULL@sagx&cgb.QVCbi');
define('AUTH_SALT',        '%TX*X$GE-;|?<-^(+K1Un!_Y<hk-Ne2;&{c[-v!{q4&OiJjQon /SHcc/:MB}y#(');
define('SECURE_AUTH_SALT', '=zkDT_%}J4ivjjN+F}:A+s6e64[^uQ<qNO]TfHS>G0elz2B~7Nk.vRcL00cJoo7*');
define('LOGGED_IN_SALT',   '{$-o_ull4|qQ?f=8vP>Vvq8~v>g(2w12`h65ztPM(xo!Fr()5xrqy^k[E~TwI!xn');
define('NONCE_SALT',       'a1G(Q|X`eX$p%6>K:Cba!]/5MAqX+L<A4yU_&CI)*w+#ZB+*yK*u-|]X_9V;:++6');
Replace each example phrase with your unique salt key generated from the WordPress API. Save and exit the file once you’ve replaced all the example phrases.
Create Nginx Server Block For WordPress
To install WordPress through the web UI, you must first configure your Nginx server block. It is essential to pay attention to the settings listed below, particularly “try_files $uri $uri/ /index.php?$args;”, as omitting the “?$args” may cause issues with the REST API of WordPress.
To create a new server configuration file, use the following command, replacing “example.com” with your domain name:
sudo nano /etc/nginx/sites-available/example.com.confThe Nginx configuration file should include “location ~ .php$” to ensure proper functionality. Below is an example configuration file; make sure to update the root path, as well as “www.example.com” and “example.com” to reflect your domain names:
server {
  listen 80;
  listen [::]:80;
  server_name www.example.com example.com;
  root /var/www/html/wordpress;
  index index.php index.html index.htm index.nginx-debian.html;

  location / {
    try_files $uri $uri/ /index.php?$args;
  }

  location ~* /wp-sitemap.*\.xml {
    try_files $uri $uri/ /index.php$is_args$args;
  }

  client_max_body_size 100M;

  location ~ \.php$ {
    fastcgi_pass unix:/run/php/php8.1-fpm.sock;
    fastcgi_param SCRIPT_FILENAME $document_root$fastcgi_script_name;
    include fastcgi_params;
    include snippets/fastcgi-php.conf;
    fastcgi_buffer_size 128k;
    fastcgi_buffers 4 128k;
    fastcgi_intercept_errors on;
  }

  gzip on;
  gzip_comp_level 6;
  gzip_min_length 1000;
  gzip_proxied any;
  gzip_disable "msie6";
  gzip_types application/atom+xml application/geo+json application/javascript application/x-javascript application/json application/ld+json application/manifest+json application/rdf+xml application/rss+xml application/xhtml+xml application/xml font/eot font/otf font/ttf image/svg+xml text/css text/javascript text/plain text/xml;

  location ~* \.(?:css(\.map)?|js(\.map)?|jpe?g|png|gif|ico|cur|heic|webp|tiff?|mp3|m4a|aac|ogg|midi?|wav|mp4|mov|webm|mpe?g|avi|ogv|flv|wmv)$ {
    expires 90d;
    access_log off;
  }

  location ~* \.(?:svgz?|ttf|ttc|otf|eot|woff2?)$ {
    add_header Access-Control-Allow-Origin "*";
    expires 90d;
    access_log off;
  }

  location ~ /\.ht {
    access_log off;
    log_not_found off;
    deny all;
  }
}
Update the
fastcgi_passline to match your PHP version. The socket path format is/run/php/phpX.X-fpm.sockwhere X.X is your version number:
- Ubuntu 22.04:
fastcgi_pass unix:/run/php/php8.1-fpm.sock;- Ubuntu 24.04:
fastcgi_pass unix:/run/php/php8.3-fpm.sock;- Ubuntu 26.04:
fastcgi_pass unix:/run/php/php8.4-fpm.sock;
Enable and Test Nginx Configuration
To complete the Nginx server block configuration, enable the configuration file from “sites-available” by creating a symlink to “sites-enabled” using the following command:
sudo ln -s /etc/nginx/sites-available/example.com.conf /etc/nginx/sites-enabled/Perform a dry run to check for any errors using the following command:
sudo nginx -tnginx: the configuration file /etc/nginx/nginx.conf syntax is ok nginx: configuration file /etc/nginx/nginx.conf test is successful
If the test passes, restart the Nginx service to apply your changes:
sudo systemctl restart nginxPHP.ini Configuration
Adjusting your PHP configuration is crucial for optimal WordPress use. To accommodate WordPress media files, you should increase the maximum upload size, post size, and memory limit. You can also adjust the maximum execution time and input variables.
To do this, first open your php.ini file using your terminal. The location may differ depending on your PHP version number.
Here are the default php.ini paths for each supported Ubuntu version:
# Ubuntu 22.04
sudo nano /etc/php/8.1/fpm/php.ini

# Ubuntu 24.04
sudo nano /etc/php/8.3/fpm/php.ini

# Ubuntu 26.04
sudo nano /etc/php/8.4/fpm/php.ini
Next, find the following lines and adjust them to your needs:
## Increase this to the maximum file size you want to upload ##
upload_max_filesize = 100M

## Increase this to the maximum post size you want to allow ##
post_max_size = 100M

## Increase this to the maximum execution time (seconds) ##
max_execution_time = 300

## Increase this for complex forms and plugins ##
max_input_vars = 5000

## Increase memory limit - ensure your system has enough RAM ##
memory_limit = 256M
After adjusting your PHP settings, restart your PHP-FPM server using the appropriate command for your version of PHP.
Modifying the Nginx server block would be best to allow large body sizes. Reopen your server block and add the following line:
- client_max_body_size – this should be set to the maximum upload size you set in upload_max_filesize.
If you follow the example server block, your max file size will be set to 100MB. Refer to the example as a guide if unsure.
After changing the PHP configuration file, restart the PHP-FPM service to apply the new settings:
# Ubuntu 22.04
sudo systemctl restart php8.1-fpm

# Ubuntu 24.04
sudo systemctl restart php8.3-fpm

# Ubuntu 26.04
sudo systemctl restart php8.4-fpm
Install WordPress Front-end
Complete the backend setup and configuration, then install WordPress on your domain.
Start by entering the installation domain name, like https://www.yoursite.com. You can also use https://www.yoursite.com/wp-admin/install.php.
Select Language For WordPress
The first page you will arrive at is the front-end installation wizard. Here, select your preferred language, then click Continue.
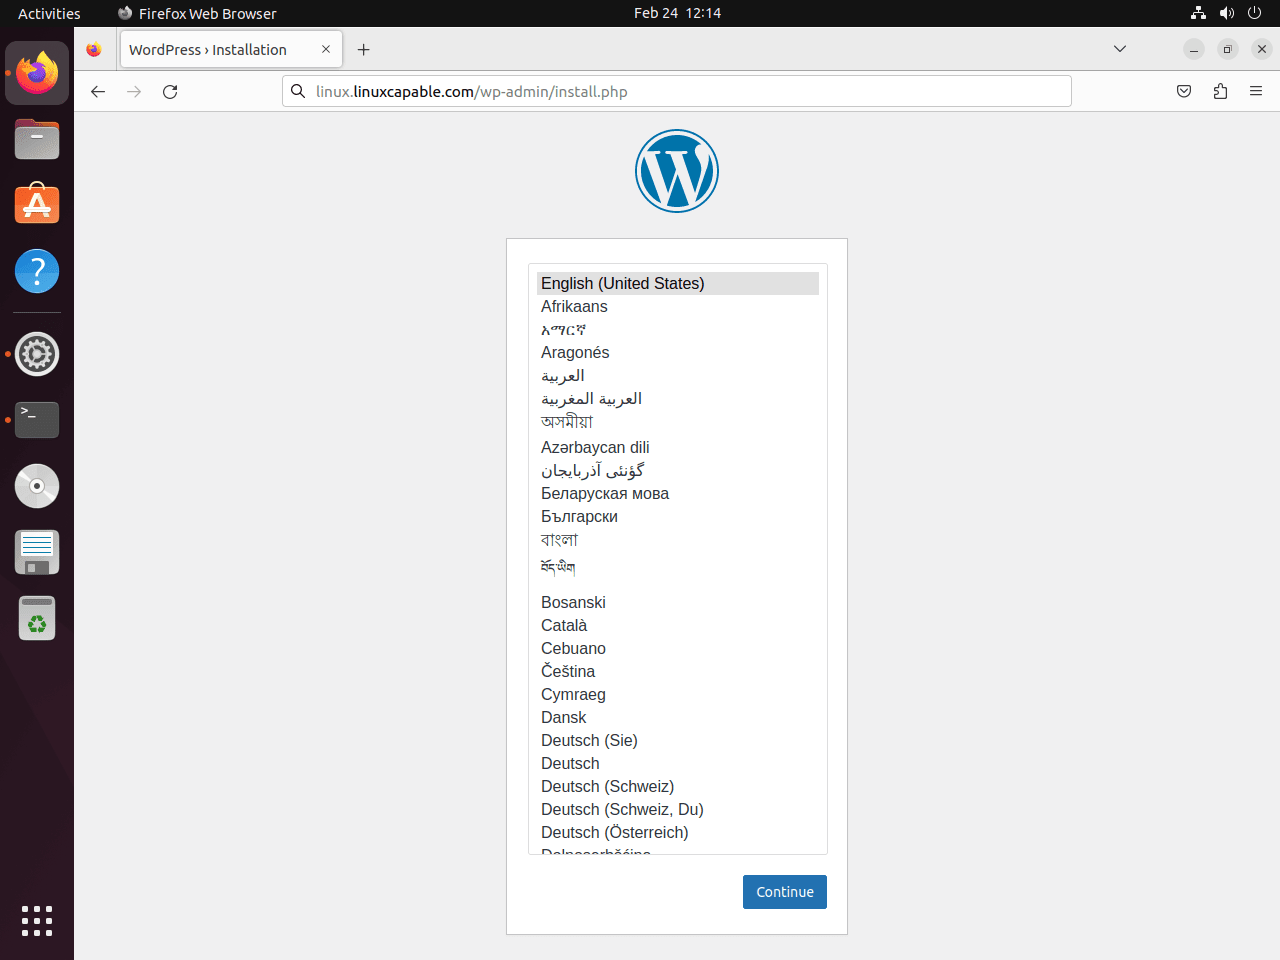
Complete Information Required For WordPress
On the next screen, enter your site title, username, password, and the main admin’s email address associated with the WordPress site. Set a strong password and a working email address; you can adjust all other settings later in the WordPress settings panel.
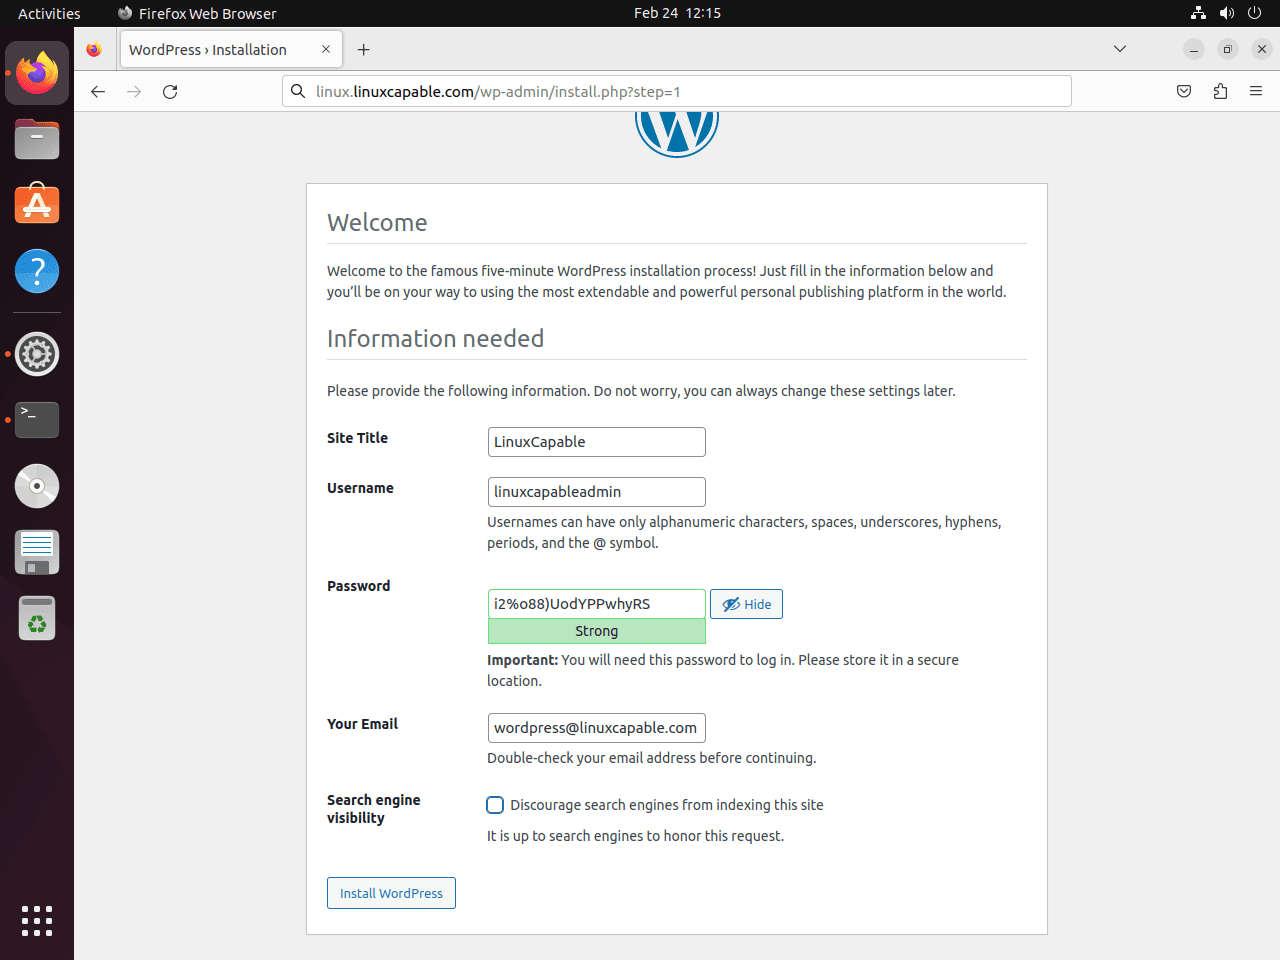
If you are building a website and wish to prevent search engine indexing, enable the “strongly discourage search engines from indexing” option. This option blocks reputable search engine bots like Google or Bing from indexing your under-construction site.
Install WordPress
Once you’ve entered your details and made your selections, click “Install WordPress” at the bottom of the screen. If the installation is successful, you should arrive at a screen prompting you to log in.
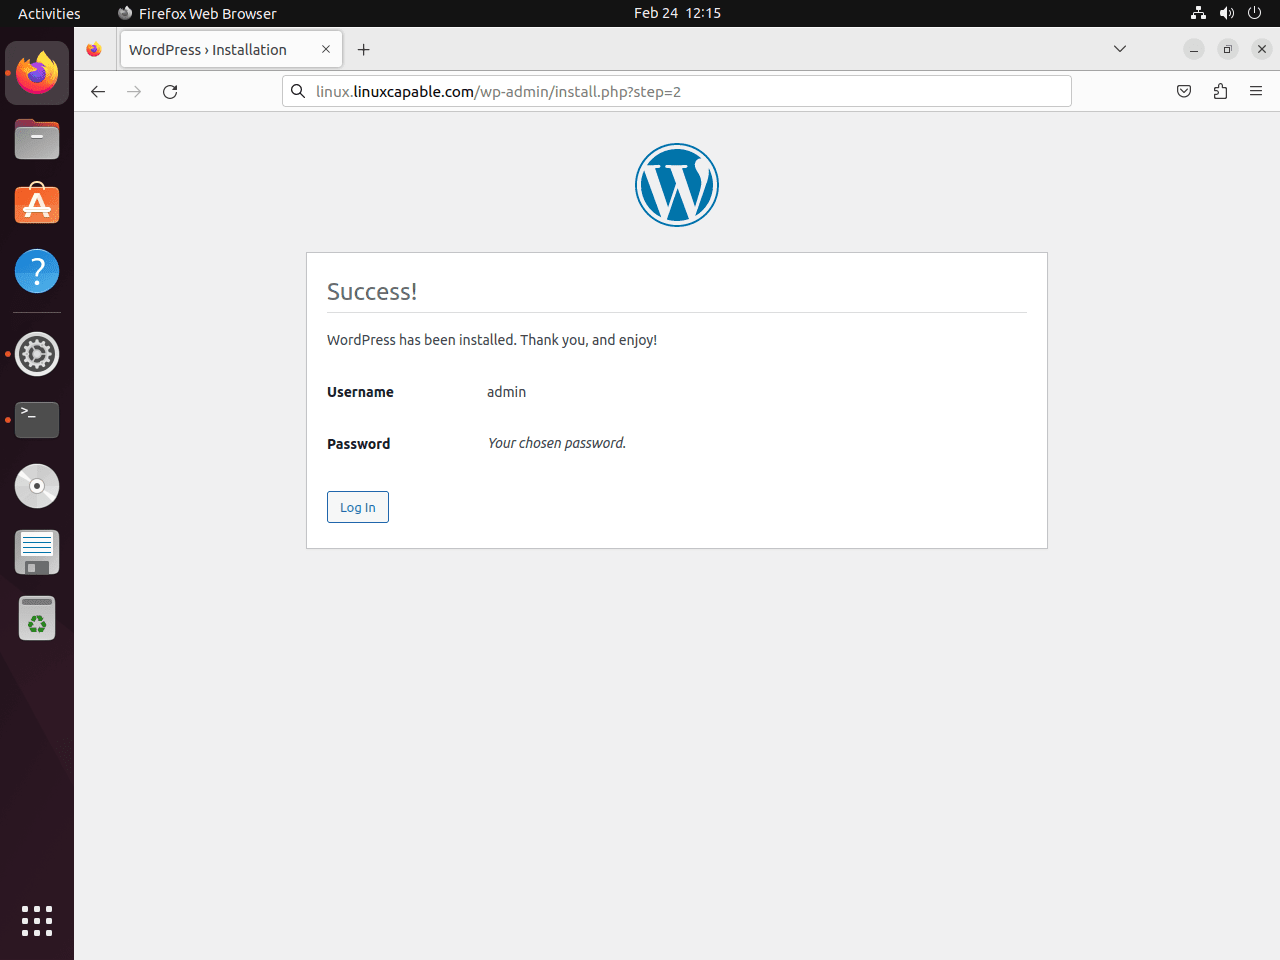
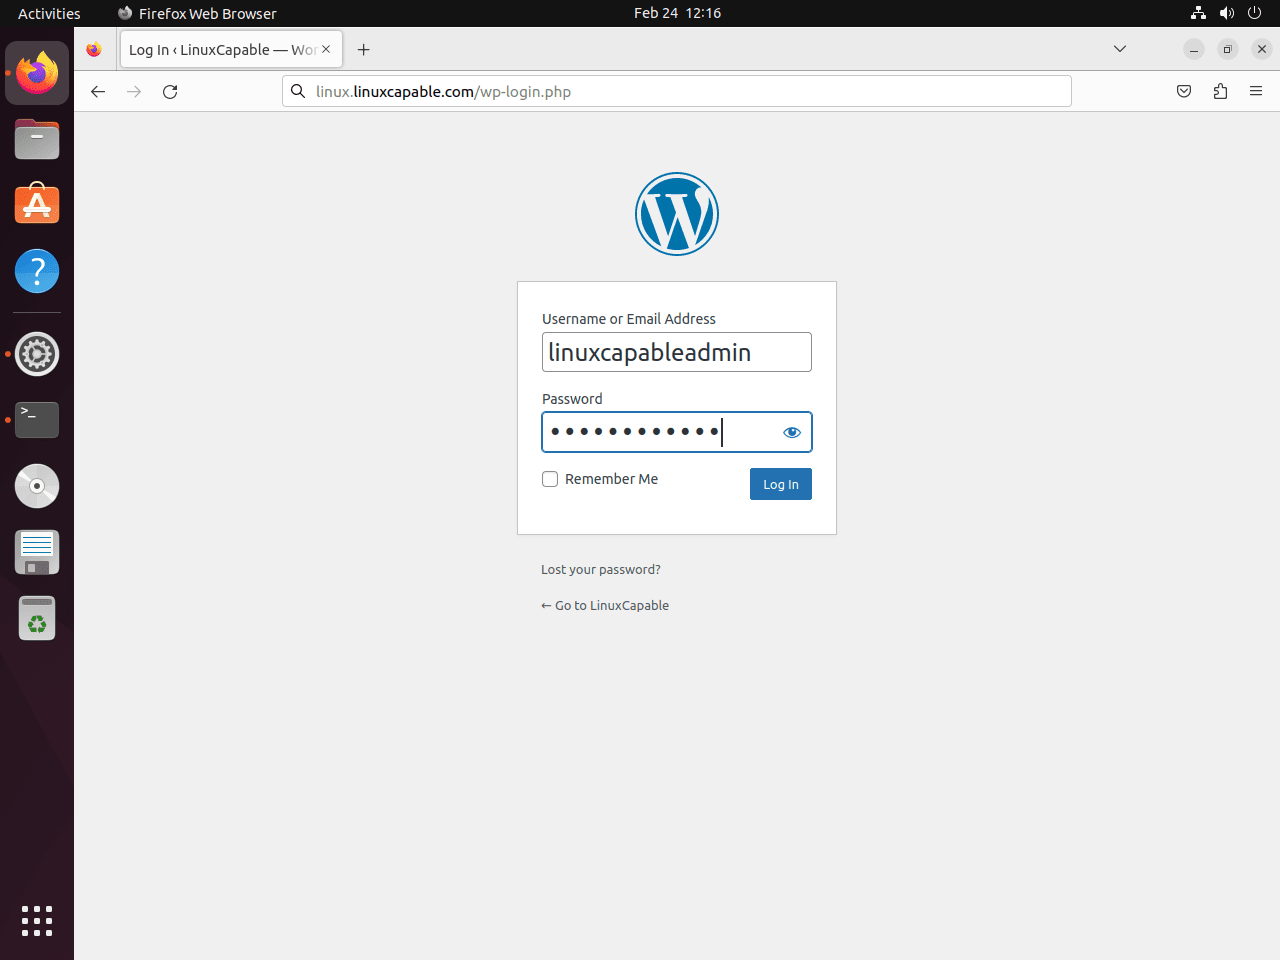
Log in to WordPress
Enter your login credentials and click “Log In.” It would be best to arrive at your WordPress dashboard to build or import your website.
Once you log in, the WordPress dashboard appears, serving as your starting point for website building. This dashboard, your central hub, provides access to all site functionalities. From here, swiftly create new posts and pages, install and manage themes and plugins, and more. The intuitive and user-friendly interface facilitates your website’s speedy customization and launch.
Begin Using WordPress
Through the dashboard, a few clicks allow you to alter your website’s appearance, content, and functionality, enabling the creation of a professional and engaging website swiftly.

Secure WordPress and Troubleshoot Issues
Secure WordPress and Nginx with Let’s Encrypt SSL Free Certificate
Run Nginx on HTTPS with an SSL certificate for optimal web server security. Use Let’s Encrypt, a free, automated, open certificate authority, to set up SSL certificates for your Nginx server.
To begin, install the certbot package with the following command:
sudo apt install python3-certbot-nginx -yAfter installing the certbot package, create your SSL certificate using the following command:
sudo certbot --nginx --agree-tos --redirect --hsts --staple-ocsp --email you@example.com -d www.example.comThe EFF (Electronic Frontier Foundation) prompts you to receive emails during the certificate installation process. Choose “Y” or “N” based on your preference, initiating automatic installation and configuration of the certificate.
The optimal SSL certificate setup enforces HTTPS 301 redirects, applies a Strict-Transport-Security header, and incorporates OCSP Stapling. Adjust your email and domain name to fit your specific needs.
Once you install the certificate, your website’s URL switches from HTTP to HTTPS. Any attempt to access the old HTTP URL automatically redirects to the new HTTPS URL.
Establish a cron job for automatic renewal to keep your SSL certificate current. Certbot offers a script for this automatic process, which you should test with a dry run before setup:
sudo certbot renew --dry-runTo open the crontab window, execute the following terminal command:
sudo crontab -eAdd the following line to check for renewal twice daily, which is the recommended frequency:
0 0,12 * * * /usr/bin/certbot renew --quietUbuntu also installs a systemd timer for automatic renewal by default. You can verify it is active with systemctl status certbot.timer. If the timer is running, the cron job is optional.
How to Fix WordPress PHP Session Errors on Ubuntu
Errors in saving PHP sessions while using specific plugins may stem from improper user permissions in the /var/lib/php/sessions/ directory. Luckily, a simple command can correct this issue.
Run the following command to resolve the issue:
sudo chown -R www-data:www-data /var/lib/php/sessions/This sets the www-data user and group as the session owners, allowing WordPress to write session information to the directory. This is particularly useful for plugins that automate tasks such as social media posting. Fixing these PHP session errors can ensure your WordPress site runs smoothly and efficiently.
Fixing HTTPs WordPress redirect loop in wp-config.php on Ubuntu
After enabling HTTPS on your WordPress site, you might face an HTTPs redirect loop issue. This issue occurs when WordPress continuously attempts to redirect to the secure HTTPS version of your site without completing the redirect.
To resolve this issue, add the following lines of code to your wp-config.php file:
define('FORCE_SSL_ADMIN', true);

if (strpos($_SERVER['HTTP_X_FORWARDED_PROTO'], 'https') !== false) {
    $_SERVER['HTTPS'] = 'on';
}
The code snippet makes the WordPress admin area use HTTPS. The first line sets the constant FORCE_SSL_ADMIN to true, forcing all admin pages to use HTTPS. The second code block examines the HTTP_X_FORWARDED_PROTO header for the “https” string. Finding it, the block sets the HTTPS server variable to “on,” signaling WordPress to treat the connection securely.
To add the code, use any text editor to open the wp-config.php file; the example below uses nano:
sudo nano /var/www/html/wordpress/wp-config.phpAdd the code at the end of the file, just before the line “That’s all, stop editing! Happy blogging.” Save the file and exit the text editor CTRL+X, then Y.
These changes will allow your WordPress site to redirect correctly to HTTPS without causing a redirect loop.
Fix WordPress Domain Name Redirect Loop
If you’re experiencing a redirect loop issue in your WordPress site, it could be due to an error in your domain name configuration in the wp-config.php file. This error can occur if the domain name listed in the configuration file does not match the actual domain name of your website.
To fix this error, open your wp-config.php file and check the following line:
define('WP_HOME','https://example.com');
define('WP_SITEURL','https://example.com');
Ensure that the domain name in both lines matches your website’s domain name if it does not, update it accordingly.
If you have already updated your domain name in the wp-config.php file and are still experiencing a redirect loop, there may be an issue with your server configuration. In this case, you should contact your hosting provider for further assistance.
Remove WordPress LEMP Stack
If you need to remove the WordPress installation and LEMP stack components, follow these steps. This process removes all installed packages and configuration files.
Remove WordPress Files
The following command permanently deletes all WordPress files including themes, plugins, uploads, and configuration. Back up any data you want to keep before proceeding.
sudo rm -rf /var/www/html/wordpress/Remove MariaDB and WordPress Database
First, drop the WordPress database and user before removing MariaDB:
sudo mariadb -u root -e "DROP DATABASE IF EXISTS WORDPRESSDB; DROP USER IF EXISTS 'WPUSER'@localhost;"Then remove MariaDB and its configuration:
sudo apt purge mariadb-server mariadb-client -y
sudo apt autoremove -y
Remove PHP and Modules
Remove PHP-FPM and all installed modules. Replace the version number with your installed version:
sudo apt purge php php-fpm php-mbstring php-bcmath php-xml php-mysql php-common php-gd php-cli php-curl php-zip php-imagick php-ldap php-intl -y
sudo apt autoremove -y
Remove Nginx
Remove Nginx and its configuration files:
sudo apt purge nginx -y
sudo apt autoremove -y
sudo rm -rf /etc/nginx/
Remove Let’s Encrypt Certificates (Optional)
If you also want to remove the SSL certificates:
sudo certbot delete --cert-name www.example.com
sudo apt purge python3-certbot-nginx -y
Conclusion
You now have a complete WordPress installation running on the LEMP stack with Nginx handling web requests, MariaDB managing your database, and PHP-FPM processing dynamic content. The SSL certificate from Let’s Encrypt encrypts all traffic between visitors and your server. For ongoing maintenance, keep WordPress core, themes, and plugins updated, and monitor your server logs in /var/log/nginx/ for potential issues. Consider installing a caching plugin and configuring Nginx FastCGI caching to improve page load times. For production environments, add security headers in Nginx to protect against common web vulnerabilities.

Hi brother, how are you? I followed your tutorial, but strangely it doesn’t work; I get a 404 error.