

This guide will demonstrate how to install WonderCMS with Nginx on Ubuntu 24.04, 22.04 or 20.04 LTS Linux releases utilizing the command-line terminal.
WonderCMS stands out as a remarkably lightweight and straightforward content management system (CMS) designed for those who seek efficiency and simplicity in website management. Its minimalistic approach caters to users preferring a clutter-free, easy-to-navigate interface without sacrificing functionality. Its core features include:
- No configuration is required: It is ready to use immediately after installation.
- Flat-file CMS: Eliminates the need for databases, simplifying backup and transfer processes.
- SEO-friendly URLs: Enhances visibility and ranking on search engines.
- Responsive design: Ensures websites are mobile-friendly and accessible on any device.
- Built-in themes and plugins: Offers customization and extended functionality with minimal effort.
- Markdown support: Simplifies content creation with an easy-to-use markup language.
- One-click updates: Keeps your site secure with quick updates for the core system, themes, and plugins.
- User-friendly admin interface: Streamlines website administration, making it accessible even for non-technical users.
These attributes make WonderCMS an ideal choice for small to medium-sized websites, portfolios, and blogs, offering a seamless blend of performance and ease of use.
Let’s dive into the technical aspects of setting up WonderCMS with Nginx on your Ubuntu server.
Update Ubuntu Before WonderCMS Installation
Before installing WonderCMS, ensuring your system is up-to-date with all existing packages is good. To do this, run the following command in your terminal:
sudo apt update && sudo apt upgradeRemember to reboot if you upgrade any significant parts of your system, such as the Linux Kernel.
Install Nginx on Ubuntu
Install and Verify Nginx
First, begin by installing Nginx. This is accomplished by executing the command below:
sudo apt install nginxOnce Nginx is installed, the service is typically enabled by default. However, it’s a good idea to ensure it functions properly. To do this, execute the following command:
systemctl status nginx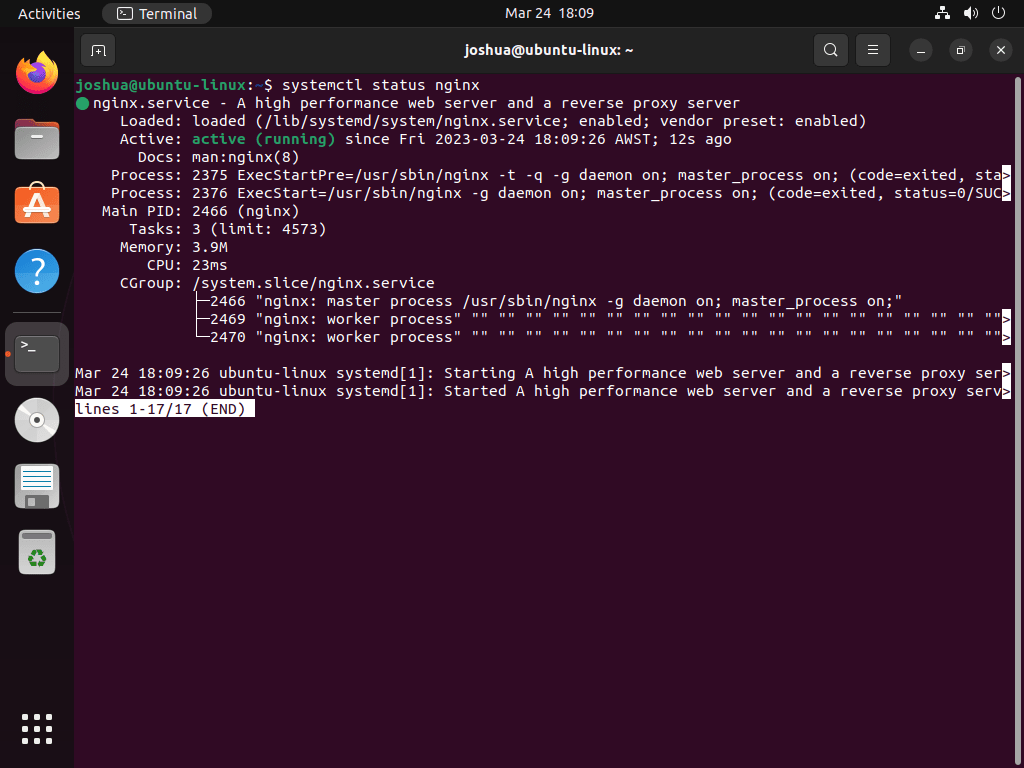
If the Nginx service hasn’t been activated, you can enable it using the command below:
sudo systemctl enable nginx --nowThis command ensures that Nginx starts automatically each time the server is rebooted. Verifying and enabling the Nginx service is essential for setting up a functional LEMP stack.
To optimize your WonderCMS performance, consider using the latest Nginx mainline version which you can find instructions for on our guide installing Nginx Mainline on Ubuntu. This version provides additional features and enhancements that improve your website’s speed and overall performance.
Configure UFW Firewall for Nginx and WonderCMS
Configuring the UFW firewall is crucial for securing your Nginx server and allowing external access to default web ports. Luckily, Nginx offers profiles that allow for quick UFW configuration.
UFW should be installed on Ubuntu, but it’s a good idea to ensure it’s present on your system using the command below:
sudo apt install ufwAfter installation, enable UFW on your system. By default, UFW will deny all incoming connections and allow all outgoing connections. To enable the firewall, execute the following command:
sudo ufw enableTo view the available Nginx profiles, run the command below:
sudo ufw app listThe output indicates that Nginx runs on port 80 (HTTP), Nginx Secure runs on port 443 (HTTPS), and Nginx Full combines both. To enable both HTTP and HTTPS access, use the Nginx Full profile:
sudo ufw allow 'Nginx Full'However, you may need to adjust the profile based on your requirements. For instance, if you only need HTTPS access, use the Nginx Secure profile:
sudo ufw allow 'Nginx Secure'Alternatively, if you only need HTTP access, use the Nginx HTTP profile:
sudo ufw allow 'Nginx HTTP'Install PHP and PHP-FPM for WonderCMS on Ubuntu
Now it’s time to install PHP, an essential service for running WonderCMS. We recommend upgrading your PHP version to the latest stable release or even switching to a newer version entirely. Check out our comprehensive guide on installing the latest PHP version on Ubuntu.
Install PHP
To set up PHP and PHP-FPM along with the required modules on your Ubuntu system, execute the following command in your terminal:
sudo apt install php php-fpm php-mbstring php-bcmath php-common php-cli php-curl php-zipVerify Installation
Once the installation is complete, verifying the PHP service’s status is crucial, as you did for Nginx, to ensure it’s running smoothly without any issues.
In this example, we’ll check the status of PHP 8.1, which is the default on Ubuntu 22.04:
systemctl status php8.1-fpm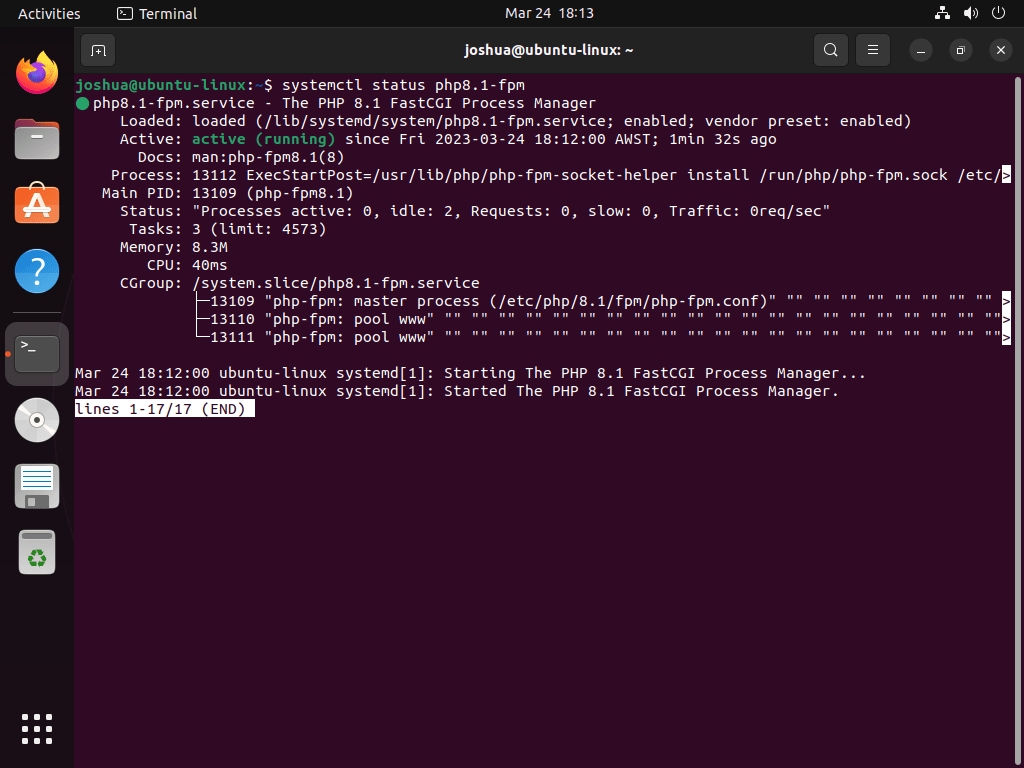
In case you’re uncertain about the installed PHP version, execute the following command to display the version details in your terminal:
php -vInstall WonderCMS with Nginx on Ubuntu
Download and Set Directories for WonderCMS with Nginx
Download WonderCMS
Start by downloading the WonderCMS archive package. Go to the official download page to find the latest link, and use your terminal with either the wget or curl command to download the file.
Example:
wget https://github.com/WonderCMS/wondercms/releases/download/x.x.x/wondercms-341.zipCreate Folder Structure for WonderCMS
Once the archive is downloaded, unzip it and move the contents to your www directory.
First, create the directory for WonderCMS:
sudo mkdir -p /var/www/wondercmsNext, extract the WonderCMS files to the www directory:
sudo unzip wondercms*.zip -d /var/www/If the above command does not work, then install the zip package:
sudo apt install zip unzipSet Proper Permissions for WonderCMS
It’s crucial to set the directory owner permissions to www-data, or you’ll encounter issues with WonderCMS write permissions.
Set the ownership permissions (important):
sudo chown -R www-data:www-data /var/www/wondercms/Set the file and folder permissions (important):
sudo find /var/www/wondercms -type d -exec chmod 755 {} \;
sudo find /var/www/wondercms -type f -exec chmod 644 {} \;
Create Nginx Server Block Configuration for WonderCMS
The next step is to set up the server block for WonderCMS. For those new to Nginx, a server block is the configuration file for the web application on the backend, similar to a virtual host for users migrating from Apache-based web applications.
Create a Server Block
First, create a server block using the command below, making sure to replace example.com with your chosen domain name:
sudo nano /etc/nginx/sites-available/example.com.confHere is an example configuration. Note that the location ~ \.php$ section must be present in the Nginx configuration file. Ensure to replace www.example.com, example.com, and the root path accordingly.
server {
        listen 80;
        # adapt to your server name
        server_name www.wonder-example.com;
        # adapt the path
        root /var/www/wondercms;
        index index.php;
        # prevent directory listing
        autoindex off;

        # rewrite url to make it pretty
        location / {
            try_files $uri $uri/ @rewrite;
        }
            location @rewrite {
            rewrite ^/(.+)$ /index.php?page=$1 last;
        }

        # prevent access to database.js
        location ~ database.js {
            return 403;
        }

        location ~ cache.json {
            return 403;
        }

        # use php-fpm for dealing with php files

location ~ \.php$ {
      fastcgi_pass unix:/run/php/php8.1-fpm.sock;

      fastcgi_param SCRIPT_FILENAME $document_root$fastcgi_script_name;
      include fastcgi_params;
      include snippets/fastcgi-php.conf;
      fastcgi_buffer_size 128k;
      fastcgi_buffers 4 128k;
      fastcgi_intercept_errors on;
        }
    }
If you’re using PHP 8.xx, replace the line fastcgi_pass unix:/run/php/php7.4-fpm.sock; with fastcgi_pass unix:/run/php/php8.0-fpm.sock; for 8.0 or fastcgi_pass unix:/run/php/php8.1-fpm.sock; for 8.1.
Enable the Nginx Configuration File
Next, enable the Nginx configuration file from the sites-available directory by creating a symbolic link to the sites-enabled directory as follows:
sudo ln -s /etc/nginx/sites-available/example.com.conf /etc/nginx/sites-enabled/Make sure to replace example.conf with your configuration file name.
Now, perform a dry run and restart your Nginx server if everything is okay:
sudo nginx -tIf there are no issues with your Nginx dry run test, restart the Nginx service:
sudo systemctl restart nginxPHP.ini Configuration for WonderCMS on Ubuntu
Before proceeding to the web UI installation, optimizing your PHP settings for WonderCMS is a good idea. The following recommendations serve as a guide; you can adjust them based on your requirements.
Edit the PHP.ini File
First, open your php.ini file. The location of this file may vary depending on your PHP version number:
sudo nano /etc/php/{version}/fpm/php.iniYou can enhance your CMS performance by adjusting the settings below. Note that if your system has limited resources (1 vCPU, 1GB), you might not see significant improvements. Use these settings as a starting point and tweak them as needed.
##increase upload max size recommend 50 to 100mb example only##
 upload_max_filesize = 100MB

##increase post max size recommend 50 to 100mb  example only##
 post_max_size = 100MB

## increase max execution time recommend 120 to 300##
 max_execution_time = 120

## increase GET/POST/COOKIE input variables recommend 5000 to 10000##
max_input_vars = 5000

## increase memory limit recommend 256mb or 512mb##
memory_limit = 256M
Now, restart your PHP-FPM server:
sudo systemctl restart php{version}-fpmUpdate Nginx Server Block
The PHP settings you adjusted apply to the PHP backend. You must also modify the Nginx server block to allow larger body sizes. To do this, reopen your server block:
sudo nano /etc/nginx/sites-available/example.comAdd the following line to increase the allowed body size:
client_max_body_size 100M;Ensure that the client_max_body_size value matches the PHP file setting.
Finally, test the changes and restart your Nginx server if everything is okay:
sudo nginx -tIf the Nginx dry run test is successful, restart the Nginx service:
sudo systemctl restart nginxComplete WonderCMS Installation with WebUI
After completing the backend setup and configuration, installing the WonderCMS Web UI is time. Follow the steps below to get started.
Access the Installation Page
Navigate to your domain to begin the installation process:
https://www.yoursite.comLogging In
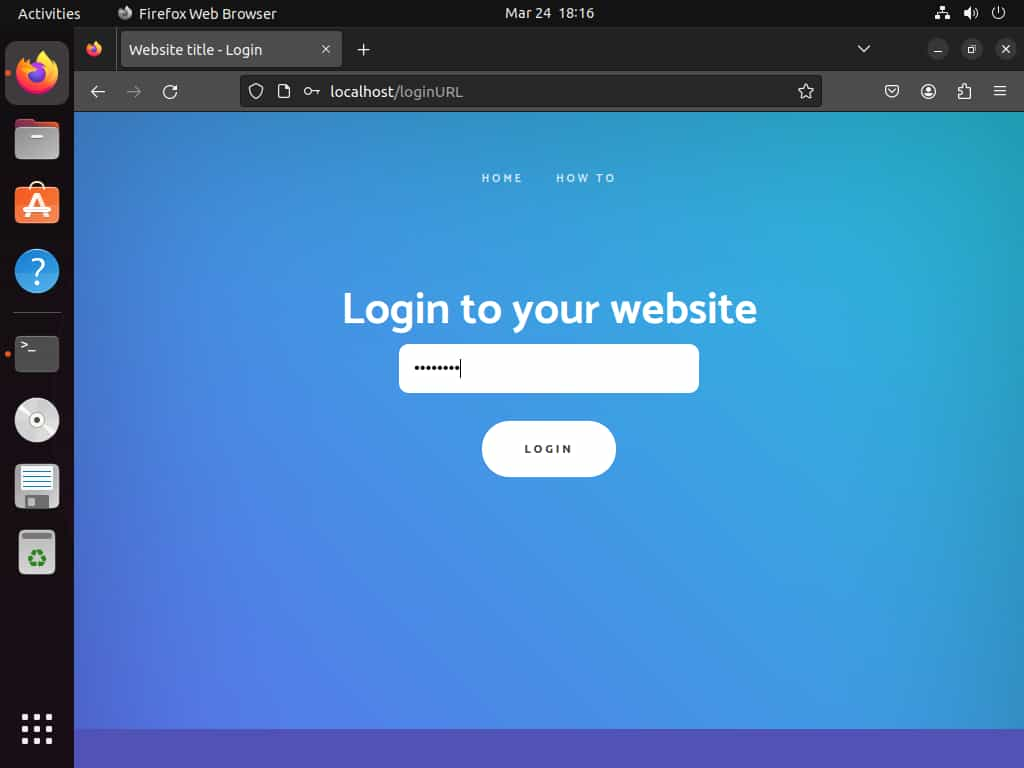
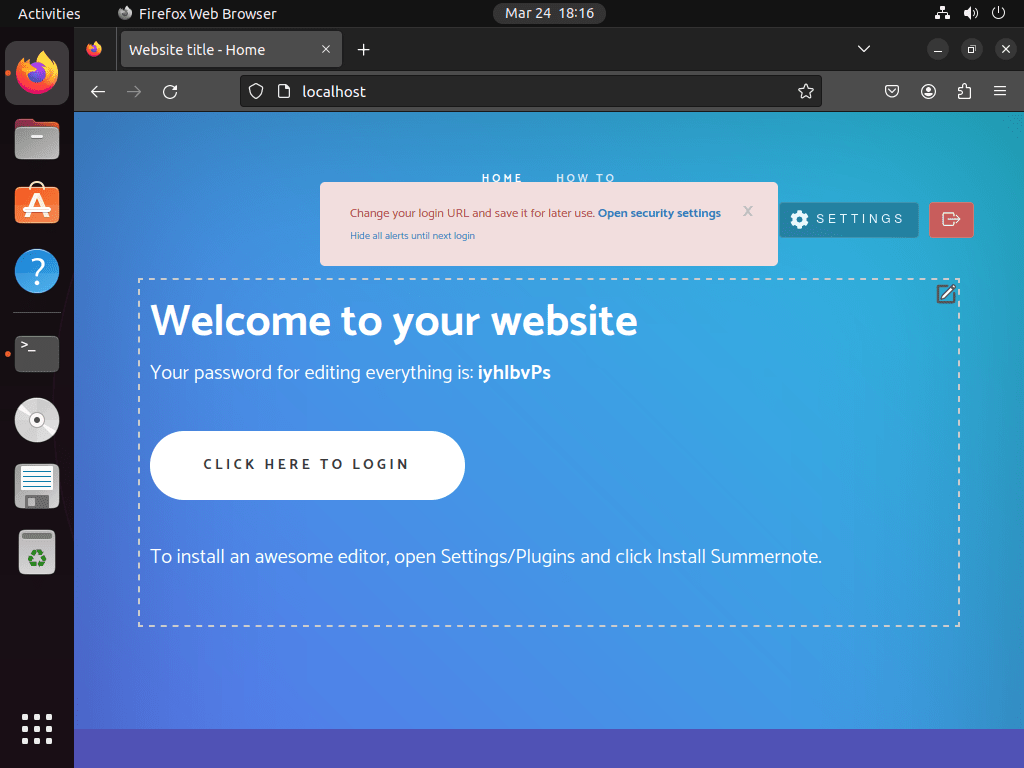
You’ll see a temporary password and a login button on the first page. Click “Login” to proceed.
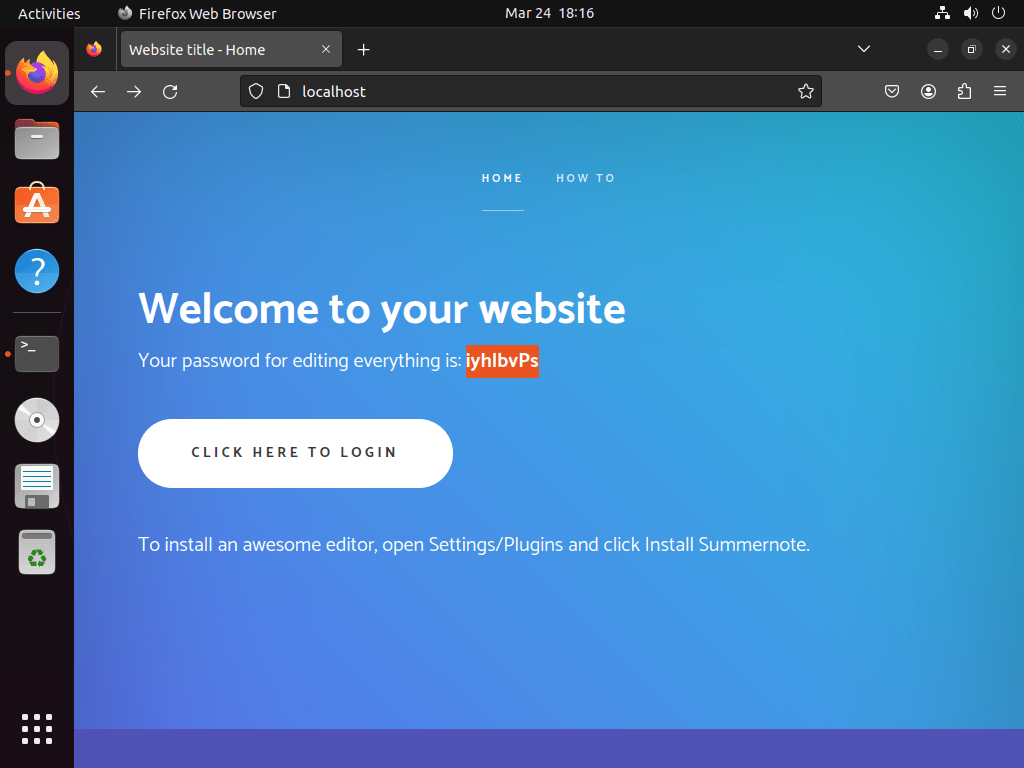
Enter the temporary password on the “Welcome to your website” login page. If you didn’t copy or forgot the password, click the back button, copy the password again, and try logging in again.
Configuring Your Website
After logging in, you’ll be directed to a page similar to the original login page. However, this is an editable CMS page. At the top of the page, you’ll find the “Change settings” option.
Click on “Change settings” to access the configuration panel. Updating your settings immediately is highly recommended to enhance your website’s security.
Customize Your WonderCMS Website
Once you’ve secured your website, feel free to explore the various customization options available in WonderCMS. You can add pages, change themes, and customize the look and feel of your site to match your preferences.
Tips on Getting Started with WonderCMS and Nginx on Ubuntu
Once you’ve installed WonderCMS on your Ubuntu server, it’s time to dive into its features and customization options.
General Tips with WonderCMS Nginx Combination
- Keep your WonderCMS updated: Regularly check for updates to ensure you’re running the latest version of WonderCMS. This will provide better performance, security, and access to new features.
- Enable HTTPS: Secure your website by enabling HTTPS with a free SSL certificate from Let’s Encrypt. This will encrypt data between your server and users’ browsers, providing an extra layer of security.
- Regularly back up your data: Protect your website’s data by creating regular backups. This will help you recover quickly in case of data loss or server issues.
Customization Options with WonderCMS Nginx Combination
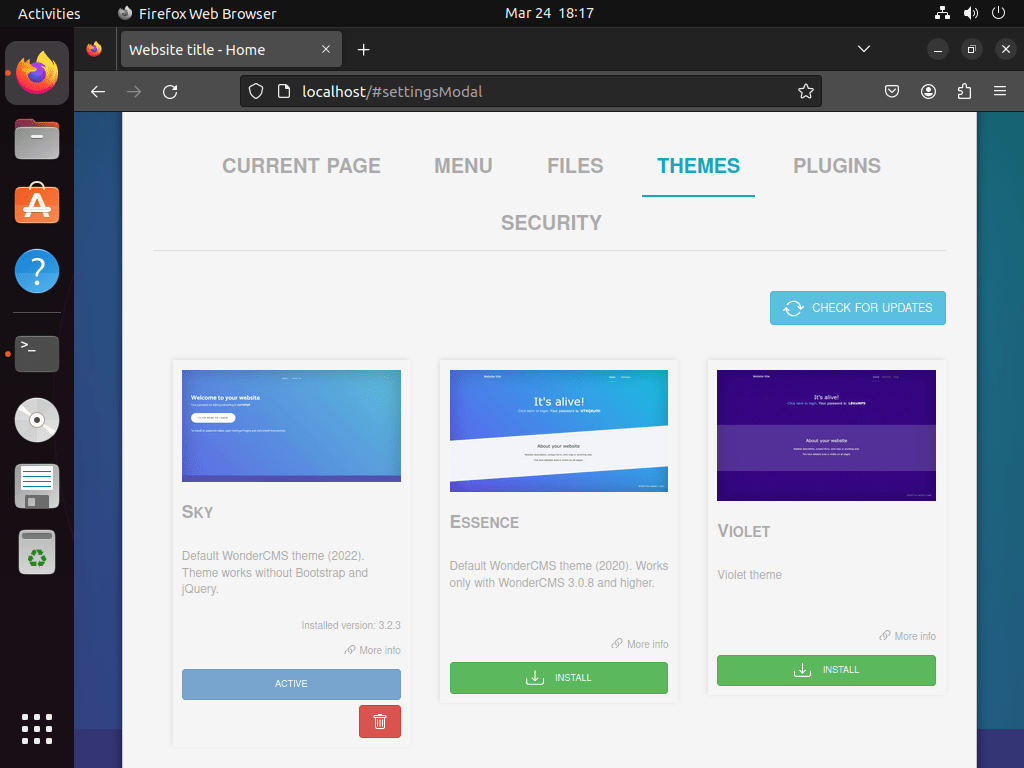
- Change themes: WonderCMS offers a variety of themes to choose from. Customize the appearance of your website by selecting a theme that suits your needs. You can find additional themes in the WonderCMS community or create your own.
- Add plugins: Enhance the functionality of your website by installing plugins. The WonderCMS community offers numerous plugins to extend your website’s capabilities, such as adding contact forms, SEO optimization, and more.
- Customize menus: Organize your website’s navigation by customizing menus. You can create new menus, rearrange menu items, and add custom links to external pages.
Other Useful Tips with WonderCMS Nginx Combination
- Optimize images: Improve your website’s loading speed by optimizing images. Use online tools like TinyPNG or Compressor.io to compress your images without losing quality.
- Enable caching: Speed up your website by enabling caching. This will store copies of your web pages on users’ browsers, reducing server load and improving page load times.
- Monitor website performance: Keep an eye on your website’s performance using tools like Google Analytics and Google Search Console. These tools provide valuable insights into your website’s traffic, user behavior, and potential issues.
Setup NGINX HTTPS with Let’s Encrypt for WonderCMS on Ubuntu
Securing your website with HTTPS is crucial for user privacy and data protection. One way to achieve this is by using Let’s Encrypt, a free, automated, and open certificate authority operated by the nonprofit Internet Security Research Group (ISRG). This section will guide you through setting up HTTPS using Let’s Encrypt for your WonderCMS website running on Nginx.
Install Nginx Certbot Package on Ubuntu for WonderCMS HTTPS
Start by installing the Certbot package with the following command:
sudo apt install python3-certbot-nginxCreate an SSL Certificate for Nginx on Ubuntu for WonderCMS HTTPS
After installing the Certbot package, run the command below to create your SSL certificate. Be sure to replace the e-mail and domain name with your own:
sudo certbot --nginx --agree-tos --redirect --hsts --staple-ocsp --email you@example.com -d www.example.comThis ideal setup includes force HTTPS 301 redirects, a Strict-Transport-Security header, and OCSP Stapling. Just make sure to adjust the e-mail and domain name to your requirements.
This command configures a secure configuration including force HTTPS 301 redirects, a Strict-Transport-Security header, and OCSP Stapling.
Now your website URL will use https://www.example.com instead of http://www.example.com. If you attempt to access the old HTTP URL, it will automatically redirect to the HTTPS version.
Set Up Automatic Certificate Renewal for HTTPS
To ensure your SSL certificates stay up-to-date, you can set up a cron job to renew them automatically. Certbot provides a script to handle this process.
First, test the renewal process with a dry run:
sudo certbot renew --dry-runIf the dry run is successful, open the crontab window:
sudo crontab -eNow, add a new cron job to check for certificate renewals daily. If renewal is needed, the script will handle the update. Use the following line as an example, and customize the schedule as needed:
00 00 */1 * * /usr/sbin/certbot-auto renewIf you need help finding a suitable time for the renewal check, you can use the crontab.guru tool. By following these steps, you’ll secure your WonderCMS website with HTTPS using a free SSL certificate from Let’s Encrypt.
Conclusion
In this guide, we walked through the steps to install WonderCMS with Nginx on Ubuntu 24.04, 22.04, or 20.04 LTS. It’s a straightforward process that brings a lightweight, database-free CMS to your server, ideal for creating efficient, fast-loading websites. Remember, keeping WonderCMS and its components updated is key to maintaining a secure and smoothly running website. Dive into customizing your site with themes and plugins to make it uniquely yours. And hey, don’t hesitate to experiment – that’s the beauty of WonderCMS, after all. Happy building!